Jump to content

Recommended Posts

Posted

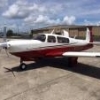
Well, as luck would have it, I have found a T-hangar for at least a little while to keep my bird out of the elements. So yesterday, with another storm barreling down on Atlanta, I moved it in for the first time. Which immediately identified a few new things I have to learn, so any other hangar dwellers, please feel free to provide insight.


1) The biggie. As is probably the correct design, the pavement slopes slightly away from the hangar door, so I quickly learned that pushing a 2300-2500 pound plane uphill, with enough momentum to cross the door rail, is no easy task. The prior occupent did leave me an electric PowerTow but I don't think it has the right attachments for the Mooney. I saw on PowerTow's website that there is a $40 option for "extenders". Does anybody have these? Any advice?


2) I didn't realize how big the Mooney wingspan is compared to many other planes. I probably only have 2' of clearance on either side of the opening. Any tips on how to avoid hangar rash and maintain alignment while backing in? It would be cruel irony to finally get a hangar to avoid hail damage, only to put myself out of commission by clanging the door!


3) The prior occupant left a small refrigerator as well. Favorite beers to stock for post-flight cleaning?!  Cool


Cheers!

Posted

I bought the extenders and use them with the 40EZ. They work but the diameter of the adapter to the nose wheel does not match very well. When turning the extender will twist in the nose wheel, not a problem just a sloppy fit.


I took the time to slowly position the plane into the hangar so the wing was as close to the side wall as I was willing to allow and then marked the floor of the hangar under the right side wheel and use the marks to guide my movements. Just follow the marks knowing that there is xxx space between the wingtip and the wall when the tire is on the mark. A great help for the depth preception.


Let me know when you have the refrigerator stocked......... ;>)


Posted

I am with cruiser.


I painted a red line down the middle of the hanger floor and use that to guide me.


I , like you, only have about 2" of clearance on either side. I have never used the extenders. I welded up a little tow bar myself.


As for the fridge....no explanation required to tell you what to do with that...LOL...load her up and we will all come over to see the new hanger and drink all your beer. Just put lots of pop in there for me as i dont drink.

Posted

Here are my suggestions absent the obvious (tools, workbench, shelves, etc.)...not in any order


1.  Some folding camp chairs


2.  A mechanic's creeper


3.  A small air compressor


4.  The largest fan you can find


5.  Fire extinguisher, the most important thing on this list.

Posted

Jeff,


(with regard to pushing into the hanger) my hanger also has about 2 feet on either side of wing-tip.  On the rear of the hanger there is a "center" vertical rafter/piece of metal.  I keep the top of the tail lined up with this vertical guide and I'm good.  I am having to keep moving (pushing a little up-hill) until in so I can't be looking at each wing-tip to ensure I'm clear.  Maybe installing a vetical streamer at the back of the hanger on center as well as painting a center stripe (mine has a stripe terminating where nose wheel should rest) would help?  Good luck.

Posted

I would add:


1. A short tool chest no taller than the wing tips with wrenches and tools


2. A small desk


3. A storage cabinet for replaceables and parts


4. A battery charger


5. A work bench for the back of the hangar


6. Work lamps


Posted

The easiest way to line up a 36' wingspan to fit through a 40' door is to extend a centerline outside the door roughly the length of your airplane. Paint lasts a long time; 2" yellow tape is good for a short time. My hangar floor has short pieces of tape, 18-24" long, that align approximately on each tire location, because there are two of us sharing a box hangar, parked at angles.


Other than that, put into the hangar whatever you use/need to work on your plane, just nothing very tall. Maybe a tall corner cabinet for in the back.


Don't forget a chair to sit in, and a stool to stand on.

Posted

I have 2 orange balls hanging from the ceiling providing a center line of the hangar above the airplane. This helps in keeping centered when pushing back.


One other thing to make sure of is that your hangar doors are open all the way. YOU need to make sure they are open - DO NOT TRUST SOMEONE ELSE SAYING THEY ARE OPEN. I've come very close to being burned going on someone elses assurance that they're open.

Posted

All good ideas.  I have a long painted centerline strip outside the hangar, and since I carpeted my hangar floor (indoor/outdoor carpeting is easy to lay, and cheap - the concrete was badly craked and broken, and carpet covers the defects very well, and is pleasant when you have to crawl under the plane), I have mailwheel stripes in contarsting color as a sort of runway.  San Carlos, CA is in earthquake country, and so I use, and recommend, at least nose wheel wheel chocks. i've always used wheel chocks in any hangar I have rented and leased, and with little clearence between the spinner and hangar door, it just seems prudent.  Also I suggest as much lighting as you can add.  Overhead is terrific, but I have a potrtable stand with really bright lights to work on the airplane.  My unit folds up, and has a adetachable light bar so it doesn't take up much room when put away. 


Don't forget a decent capacity battery charger.  I assume you have a built-in power inlet on your Mooney.  Sportys sells a neat plug that fits Mooneys, and has round lugs (+ and -) on the outside that can accommodate a standard set of battery cables. 


post-4436-13468139478463_thumb.jpg

Posted

Jeez Bennett, you could just jam that gorgous plane into that humongous hanger full speed with your eyes closed while hugging the cowl and be just fine!


To the OP-


I can give you parking tips. I've been getting by just fine in my funky little shack.


t_7b9ba6e53048721f504af1c9985c3ebb.jpg

post-1249-13468139479445_thumb.jpg

Posted

For lighting you also want an LED or florescent trouble light that you can use in close quarters and not get burned on a hot bulb or wire guard. Also a good vise is a handy thing to have on your bench. You'll want access to a service manual, AMT/FARS, and an AC 43.13 1b/2b if you are going to do preventative maintenence on your aircraft. If the Feds drop in while you are working on your aircraft they may get unpleasant if you don't have these to guide your work.

Posted

Quote: Kris_Adams

Hey Jeff,

Any chance you are at LZU?  I just got a hangar as well so this thread is helping me too!

Kris

Posted

I always seem to have hangars and aircraft that allow minimal space between wingtips and hangar doors.  Sometimes, I have limited distance between trailing edge of wing (flaps or ailerons) and the hangar structure.  Paint centerline stripe to help line up from outside and into the hangar out on the ramp and in the hangar is absolutely necessary in such cases.  For the back wall of the hangar, instead of paint, I locate the center, and get the package of cheap reflectors at WalMart or other hardware store with the self stick backing, and stick a line of them right up the center of the back of the hangar.  Reflectors are high visibility, and they make guiding the aircraft straight in a breeze.  Paint stripe would work as well, but the package of reflectors is fast, easy, and cheap.  Also, if the spacing to the trailing edge of the wing or tail is a factor, I fasten a board(s) as a stop for the main wheels to the floor of the hangar.  No question when the airplane is in far enough, but not too far.  Works great for those nights when you are tired and just want to not screw up.


Just remember, it's not really a hangar, it's a toy box!

Posted

Just a couple more recommendations:  Fire extinguishers have been mentioned, and I totally concur, but I suggest that there be at least two in the hanger, and one close by outside.  The outside and one inside can be dry chemical (with one preferabley CO2), both of good size - 20 lb, and I recommend the third one be a Halon extinguisher, again of good size - 20lb, wall hung, and well marked as Halon, just inside the hangar door area.  Halon leases no residue, and is the preferred type for panel, or aircraft interior fires. Halon is expensive, but not as expensive as your aircraft. There are several formulations marketed as Halon, and I suggest you talk to a local fire extinguisher servicing company for their recommendations. 


I also recommend a well stocked industrial type first aid kit, again wall mounted, and well marked for anyone to see within the hangar.  Some form of eyewash should be included.


This might seem excessive to some, but I am a long time risk management consultant that works with our clientle on catastrophe planning. The unexpected, and unplanned, does happen. We recently had a hangar fire at my home airport, and even with a full time fire truck on the premises, three hangars were damaged, one severely, and there was damage to all three housed aircraft. Without our fire truck, this could have been a huge disaster. Since then, new rules as to what can be done in hangars have been implemented (surprise!), and many more extinguishers were mounted on the outside of hangars. Fires are tough to put out, and the more tools to fight them the better. 

Posted

A small refrigerator for water before you fly, and beer for friends, and when you get back.


At the risk of offending any delicate sensitivities, I'm surprised nobody has mentioned the requisite hanger wench.


eggleston_queen.jpg


Posted

Although my hangar has a nice thick yellow line right down the center all the way to where it meets the taxiway, it still takes me 5 or 6 maneuvers to get her in correctly. Most of the time she's in at an angle and I just know that one day I'm going to hit the elevator where the building narrows towards the back. I have an electric PowerTow and it doesn't make the job any easier, although I don't have to push very hard but the cord is a royal pain.


My partner pushes the plane in perfectly in one shot. I aspire to be just like him someday.


Down here the most useful hangar accessory is a giant fan.


Posted

Politely asking the Feds to leave is a pretty sure guarantee they are going to give you full Federal Services.(Imagine that)  Remember their motto,"We're from the FAA and we're not happy until you're unhappy."

Posted

Hangar wenches? That one Gary posted can handle my jewels any time!


Given the infrequency with which my wife visits the airplane, I could probably get away with some nice artwork tacked to the walls, but she would know it's all a ruse. The monthly Controller listing I get provides plenty of "airplane porn."

Posted

I installed an A/C power wench in my T-hangar so I can pull the plane in (rather than push) and watch the tail at the same time. Works great. My mechanic says that pulling from the tail tie-down loop is no problem. The tie-loop will break before any damage to the plane.

Join the conversation

You can post now and register later. If you have an account, sign in now to post with your account.

Guest
Reply to this topic...

×   Pasted as rich text.   Paste as plain text instead

  Only 75 emoji are allowed.

×   Your link has been automatically embedded.   Display as a link instead

×   Your previous content has been restored.   Clear editor

×   You cannot paste images directly. Upload or insert images from URL.

×
×
  • Create New...

Important Information

We have placed cookies on your device to help make this website better. You can adjust your cookie settings, otherwise we'll assume you're okay to continue.