Leaderboard


Popular Content
Showing content with the highest reputation since 06/27/2024 in all areas
-
18 points
-
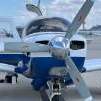
As of today I have owned at least one Mooney continuously for 40 years!

 17 points
 -
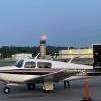
So when I sold my Cherokee 235, I had my sights set on a Turbo Saratoga - the thought of luxuriating in all that space while moving along at a decent clip…. My Wife told me I’m nuts. What do you need all that space for? It’s going to be just you most of the time. You should get a Mooney, she said. She thought they were the best looking birds on the ramp! So I took her advice. I’m now about 50 hours in to my Ovation and I absolutely love it. There’s no other piston engined single I would want. Oh, and here’s my picture from today. She was right, of course. All those empty seats….
 14 points
 -
I write because in some recent threads, the “Chevron deference” doctrine has been the subject of discussion. Under the doctrine, which stemmed from a case 40 years ago, the Courts gave deference to an agency’s own rules and interpretations of its rules. In other words, a Federal agency could not only promulgate a rule, it could then decide what the rule meant and how it was to be applied, and the Court’s were not to interfere with that interpretation. This resulted in what some viewed as abuses of the administrative power. On Thursday and Friday of this week the Supreme Court decided two cases that are likely to dramatically change how Federal agencies (including the FAA) operate. In Loper Bright Enterprises v. Raimondo the Court expressly overruled the original Chevron case. “Chevron deference” is gone. The day before, in SEC v. Jarkesy, the Court determined that there is a right to jury trial in instances where an agency seeks to impose a civil financial penalty for violations of its rules. Previously, an agency could decide whether to proceed against a defendant in Court, where the rules of discovery and rules of evidence apply, or before an administrative judge where they do not. The effect of Loper is that an agency is no longer the sole decider of what its governing statute or its rules mean. This has two effects. First, Federal agencies unfortunately have used their authority under Chevron to pass rules expanding their own authority beyond the scope of the statute under which that authority was granted by Congress. As an example (I am deliberately staying away from aviation-type examples), for many years the EPA asserted the right to regulate farmers’ fields. Their jurisdiction extends to “navigable” waterways, and they interpreted “navigable” to include areas where water ponds in the spring. A long battle was fought over this with Chevron very much at play, in other words, the agency asserted it was the sole decider of the extent of its power to regulate. Second, agencies will be limited in their ability to apply their own rules and regulations simply by reinterpreting a rule. Under Jarkesy, enforcement proceedings in which an agency seeks a monetary penalty will be required to proceed in Court where the defendant will have the ability to defend himself, and have the matter decided by a jury of his peers. In Jarkesy, the SCt distinguished between enforcement proceedings the purpose of which is solely to restore the status quo, from those where a monetary penalty is sought. So it remains to be seen whether Jarkesy will apply, for example, to proceedings for the suspension or revocation of a license as opposed to a monetary penalty of some sort. These cases - and we may see more aimed at limiting the power of the administrative state - will unquestionably have an affect on how any Federal agency, including the FAA, operates. Personally, I have had nothing but good experiences with the FAA, and as Federal agencies go, it has always appeared to me to want to serve and cooperate rather than mandate and restrict. But things will change. In practice, and from long experience in the legal field, I can tell you that it will take some time for these two decisions to have an effect. When major precedents come down there is always some resistance in the lower courts, which find ways around the new precedent. For example, in Loper the SCt said that the Federal courts may, in deciding what a statute means, consider the agencies interpretation in light of the expertise of the agency in the particular field. So in lower courts sympathetic to an agency, the court will simply use that rule to adopt the agency’s interpretation, right or wrong, and it will up to the appellate courts to straighten it out. There will also be quite a few cases in the lower courts trying to sort out what Loper and Jarkesy mean. So don’t anyone think they can now go fly under bridges.11 points
-
I’m happy to report that enabling the alternate gain settings on the latest software version on my G3X has completely eliminated the porpoising I’ve been dealing with. I took the plane to the avionics shop for my altimeter certification and asked them to use the alternate gain settings we’ve heard about. I was told that I already had the correct version on the G3X but the standard gains were enabled. They enabled the alternate gains settings through configuration mode and on the flight home, the pitch oscillations I had going over were gone. YMMV, but this was the ticket for me.10 points
-
Every time I hear how much a paint job costs, my plane looks even more shiny than the last time I saw it10 points
-
Anything that works to restrain bureaucrats even just a little bit encourages me just a little bit.10 points
-
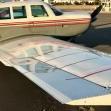
An update….was able to get a coupling nut and make a fix for my issue. These are yet another Mooney part that no longer exists. Fortunately MacFarlane may be able to make a new one. But at least things are working again. Thanks for all advice.
 9 points
 -
I think the FAA got it wrong. Instead or requiring that the gear switch have the shape of a wheel, it should have required it to have the shape of a dollar sign.9 points
-
Everyone has a way of justifying either what they do or what they don't do. If someone wants to take an older airplane and make it as capable as a new airplane and they can justify it, why not? About ten years ago, maybe more, John Breda @M20F-1968 took a nearly 50 year old F model and made it as nice as any Mooney coming off the line in Kerrville. I'm sure it's a source of great enjoyment and he gets a sense of accomplishment every time he looks at his airplane, knowing where it came from and where it is today. @Bob_Belville took an E model and transformed it into a work of art. When people do that, they don't need any one else's permission or validation. Let them enjoy what they did. If someone else decides they want to fly theirs' as it came from the factory years ago, why should anyone else care? We don't all have to agree. If the only reason we come on Mooneyspace is to have our own opinion validated, why bother? If we come on here to learn and to broaden our horizons it's a great forum. I have not only learned a lot here but I've allowed my opinions on subjects to change as I opened up my mind and saw others' point of view.9 points
-
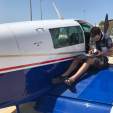
Greetings everyone, Just wanted to say hello and thank you for hosting such a wonderful community. It has been invaluable to me over the past month while researching and finally (today!) purchasing a 1978 M20J. Deal closes next week. I am on my PPL journey and plan to take it nice and slow with a combination of training in the pipers at my school and in my new plane. The eventual mission is family flights for weekend trips with my wife, young son and small dog. I had a very detailed PPI completed and glad I did. Plane will need some work over the years (as they pretty much all do), and needs paint, but I'm looking forward to tackling those things over time and with the PPI I know generally what to expect at the first couple annuals. Interested to hear thoughts on training in a Mooney or anything else that comes to mind for a student pilot planning ahead for a life of fun in the Mooney. James
 8 points
 -
There is no history of rectal cancer on my father’s side (7 aunts/uncles) nor on my mother’s side (11 great aunts/uncles). I have almost 200 living relatives third cousin to great/aunt-uncle. I have a female first cousin who had some pre-cancerous polyps removed, otherwise octogenarians. These days rectal cancer is the cancer flavor, while in years past it was more did you have family history. My intent isn’t to debate it is just to say I had no history and never a health issue. In 2022(52yrs old) I was really tired. I ascribed that to traveling 150+ days a year. Then I had some interesting digestive issues in August. By the time I finally got myself scoped in early November it was stage 4. I sat next to a fair amount of people getting chemo bullshitting and eating Cheezits. A few of them died. You do you, I am not a Doctor but I am a survivor. I have seen people who look better than me at the start melt away in the chair next to me taking chemo and die. If this message saves one person, makes me happy.8 points
-
Thought your neighbor's brand C flies like a truck? Good news, It's not just you, AI thinks so too ...
 8 points
 -
You can grease a Mooney on, or you can land as short as possible. If you can do both at the same time you were lucky. The only criteria for a good landing is that you touch down on the mains, on the centerline, with no sideways drift. Passengers like smooth landings. There is no shame in landing smoothly and a bit longer as long as there is sufficient runway. Just be able to drop it into a short field if you need to. In that case, I don't care so much about smooth. Remember when you first learned: normal landings and short field landings were different procedures. I learned to fly from an instructor that used to win short landing contests. He stressed short field techniques. Years later, I had another CFI friend and we would take my 78 J out once a month and take turns shooting approaches. It irked me that he landed much smoother than I did. Eventually, I caught on that he was not coming in at the absolute minimum airspeed (because the flare then happens very quickly ending in a stall) but instead was doing a very carefully executed flare maneuver that allowed enough time to judge height and make adjustments. He was wasn't going fast enough to cause a lot of float, but he was making a turnoff one past where I would have normally exited. IMHO there is too much concern about the float and the advice from more experienced pilots is always to slow down. That is the best way to land a Mooney, but not necessarily the best way to learn to land a Mooney. Instead, come in a little faster which makes the flare last longer and learn how to use elevators and power to control the flare and touch down smoothly. Do this on a long enough runway that landing distance is not a concern. Once you can consistently land smoothly start slowing down to decrease the float until you find an approach speed that is comfortable (which will vary with weight) to trade off landing distance and touchdown smoothness.8 points
-
Mystery solved. JPI had incorrectly pinned the RPM sensor to the EDM-930 connector. I traced the wires back to the connector and JPI agreed they had mis-wired. Works fine now. Thanks for everyone’s input. And interesting side story. I needed to cut a new panel for the edm930 and mentioned it to my 16 year old grandson, Levi. He said his school recently received a donation of a CNC machine but no one knew how to use it. Levi is not in a shop class but asked the shop teacher if he could learn to use the cnc machine. After a little trial and error, he cut the panel for me and it worked perfectly. In exchange for letting Levi use the cnc machine, I told the teacher I would donate an Alibre CAD program to the school. I called Alibre to see if they had a school discount and they provided the school with a perpetual 10 seat license at no cost to me or the school. My cost for the new panel was only the aluminum stock ($75). Lee


 8 points
 -
I fly commercial a lot but I've developed a seething hatred for it. My wife has always been the one to get the cheapest seats because "why spend extra hundreds of dollars to have a mildly better seat for a few hours??". I get it, but I hate it. The plane was down for a (bad) avionics upgrade, and then an overhaul. Taking commercial flights for that time left me in a bad mood every day. I don't care if flying my plane is 5x the price and 3x the time, I'd prefer it.8 points
-
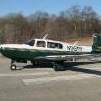
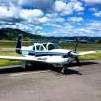
Pretty excited to join the Mooney club. I’ve been looking for a while now and found a ‘71 m20c to call my own. Yay Aerostar!7 points
-
7 points
-
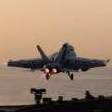
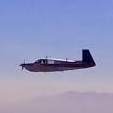
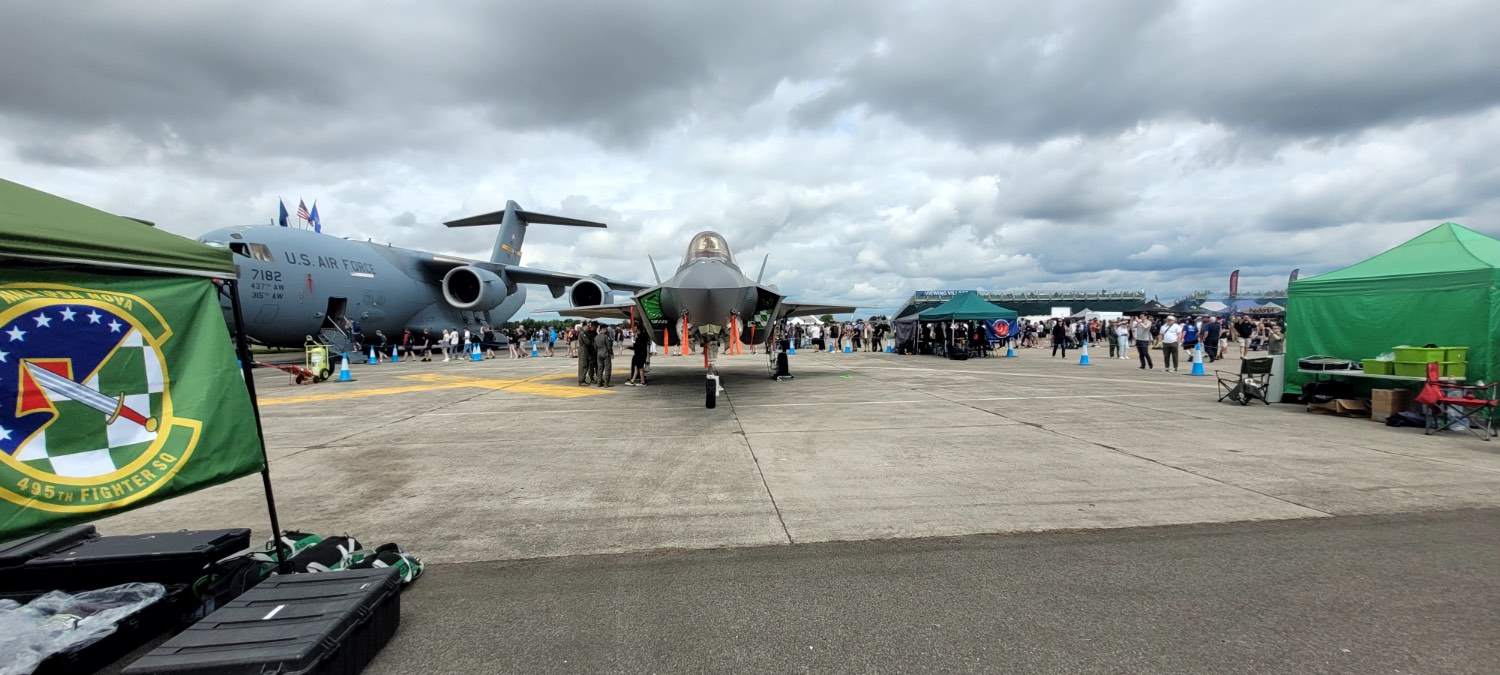
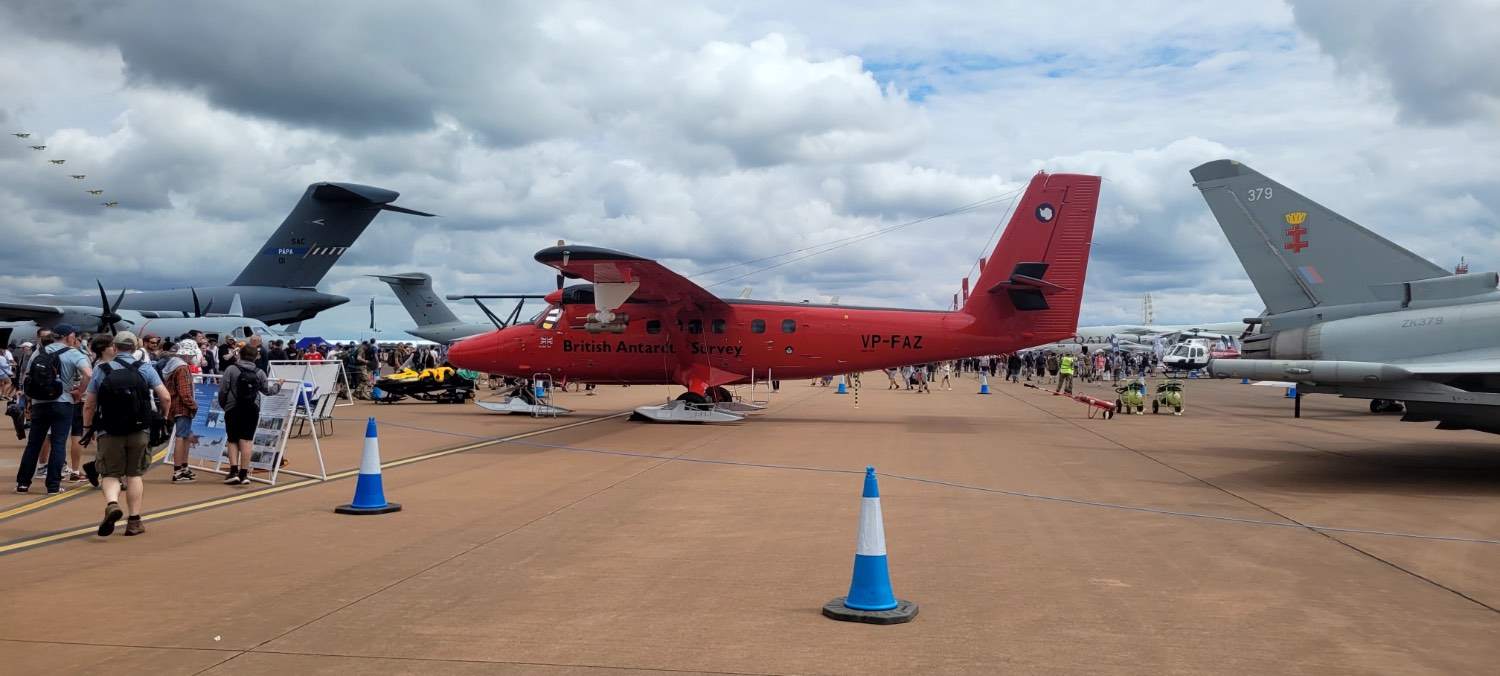
This weekend trip to UK visiting Oxford and then RIAT at RAF Fairford, interesting line up this year with visiting F16s from dozens of allies air forces, the British weather did not cooperate for “proper 3D display”, so they flew “2D figures” Not as exciting as camping between propellers in Oshkosh

 7 points
 -
It's not quite that simple. Level attitude at what speed, weight, flap setting and CG? Even with the flaps fully deployed and the change in effective wing chord (straight line from trailing edge to leading edge), at reasonable approach speeds the level flight (not level pitch) attitude will still be positive enough to touch down mains first (but not by a lot while in ground effect). With the flaps up, nose up attitude will be even greater. Go do some level, slow flight with the gear down at 80kias or less and note the plane's pitch attitude. It will be significantly higher than level pitch attitude. Adding flaps will lower the pitch attitude at a given speed due to both increased lift, shift in center of pressure (aft) and effective chord change which changes the effective angle of incidence. There is a lot more going on in flight compared to simply observing the airplane on jacks. Bottom line - use the appropriate speed for the weight and configuration. It is indeed possible to fly the mains on well above stall in all configurations, but the slower the better. Nevertheless, while it is possible to fly the mains on with adequate energy to lift off again it is not best practice under most situations with the exception of formation landings were it is SOP.7 points
-
I wouldn’t be in a rush to replace that cable. That fix looks stronger than stock.7 points
-
“Yes, dear. The airplane is listed for sale….” -dan7 points
-
Hopefully we don't have any proctologists on Mooneyspace that notice the great deals on Borescopes at Fly Market.7 points
-
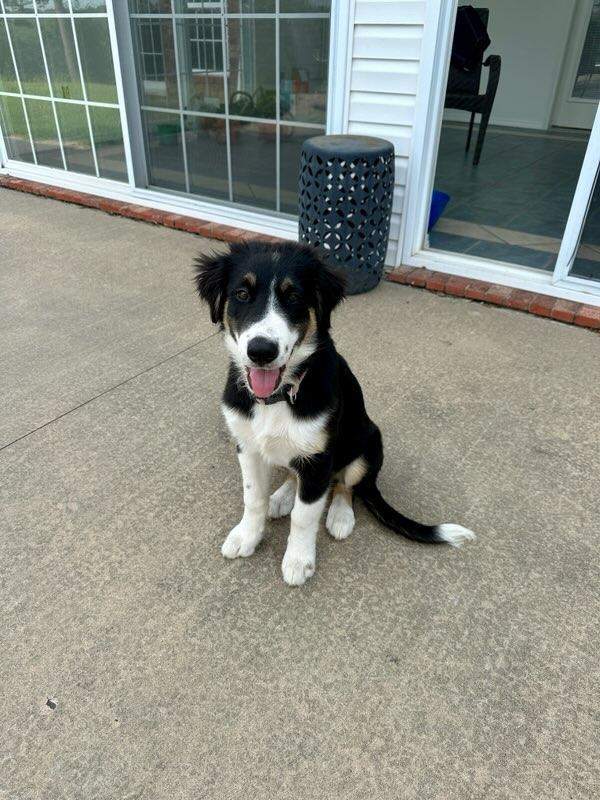
Ok, it isnt a new airplane. Stray dog wandered into the plant and the GF decided "we" needed to keep him. No chip and no postings on the interwebs. My brother has always been clever about his dog names "pending" was his first dog, pending approval, second and current is "caution"...not sure of what. So this one is named Mooney.
 7 points
 -
My experience with ALL students has been that, even though they may want to, they just won't stay in ground effect. In ground effect induced drag is reduced by an amazing 48%. Everyone thinks they are going to hit the ground. Why? The Mooney wing is a little over 36 feet in length. Ground effect is 10% of the wing length or about 3 feet. But the landing gear extends about 3 feet. So just as the wheels leave the ground you need to level the plane a few inches off the ground. People just won't do that. However, if you do, the plane will accelerate much more quickly to Vx, where you can then start your climb.7 points
-
Do you still have one? I think it's just an inventory check box.7 points
-
Oh boy, six pages for sure.7 points
-
As expected, too fast.7 points
-
I flew my 1984 J in there last year... not really 'summer', but it was mid May at least. Takeoff was around 8am... DA was around 11000. We were deliberately at least 250 lbs under gross, or more. (Had like ~30 gal onboard) I didn't feel it was anything all that dramatic. The runway is plenty long and the valley around Leadville is super wide and gradual. If you are taking off to the south, assuming you clear the airport perimeter, if you never gained another foot of altitude, you're flying towards descending terrain all the way down out of the valley. The terrain falls away from you continuously. I was airborne well before halfway down the runway and I managed better than 600fpm on the initial climb. I have had more uncomfortable takeoffs in tired and heavily loaded flight school planes in Florida in the summer. Anyway this is all not to minimize it... maybe another 1000 ft of DA would have made it more uncomfortable, I don't know. I wasn't interested in waiting until later in the day to find out. I certainly didn't want to try it with anything more than the minimum fuel I needed to go somewhere else.7 points
-
Just finished my interior update. Done by UniCraft Interiors at KLRU. They do great work and prices are reasonable. Would recommend without hesitation. Seats were previously done by Powell Interior at KPRC. The rest of the interior was completed by UniCraft.


 7 points
 -
Ominous looking 13k peaks across the valley from kmmh as we got ready to depart this morning. Took off at ~745 am and the DA was already 8800’! Planned a short flight, so we only had 30gallons of fuel and she climbed out real nice even with four of us plus baggage!
 7 points
 -
What a long day. Thanks for all of your input. PlaneExhaust has the part in stock for $295 so I had it overnighted to 5R4. With the holiday, it will arrive Friday. I asked the mechanic about a welder and he reluctantly agreed to call a guy that knows a guy. We checked out of our $260/night Hampton Inn and went to the airport where we played Uno for a few hours while waiting. A little after lunchtime the guy showed up with the welded part for $500.. We installed, checked plugs, cylinder compressions, and ground ran without problems. Took off and dodged thunderstorms all the way to Ft Pierce where I'm in a 4 star Hilton resort for $104/night. Money ran fast and flawlessly. First thing in the morning we'll take off for the Bahamas.. Rented a lifeboat just in case. -David7 points
-
Or, the agency will re-write the regulations so that they say what the agency meant to say, clearly. IMO, IANAL, this is a huge thing in a good way. For too long, agencies have draft ambiguous regulations, then change what they mean via interpretation. To change regulations, they have to publish the changes and go through public comment and weigh the sides. With an interpretation, they just write it and it becomes the new regulation, until the publish an different interpretation, on a whim, and change how the apply the original regulation. Now, they will have to actually amend the regulations, through the proper process. WOW, what a concept.7 points
-
Write in vote: The Mooney you own7 points
-
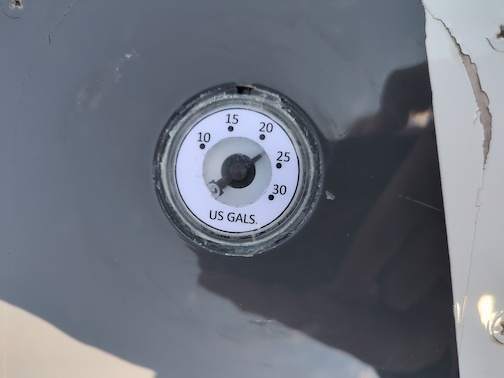
Thanks for all the specific tips. I experimented with cutting into the case and thought it would be more of a thrash to do well and get sealed back properly. So I went with an overlay approach. Compared photos of the original -009 gauge pattern, measured angles in ImageJ and cobbled together a dial image in Powerpoint's vector draw facility, scaled as able and printed some dials out (someone with a real drawing program could do much better!). Used a dime to cut out the center and lined up the capacities at 22.25gal and "1/2" (estimated of course). Used clear repair tape to apply it and then installed in the plane as per prior advice above using RTV 108 silicone. Photos attached. I'm still going to either clean up the excess silicone or fill it carefully in flush, and then follow up with @PT20J's tape approach over the top. Also attached is a PDF of my Powerpoint of the dial faces (it won't let me upload the .PPTX here, can send if anyone needs it). I had to play with print scaling to get the sizing right (I put a sizing rectangle on the image to help with this). Just in case someone else has the same problem. It's not perfect but I think pretty usable and an excellent stopgap measure until the correct gauges become available again. I would imagine the approach would work with other dial ranges as well. Wing fuel gauge overlay.pdf


 6 points
 -
There is a philosophical issue here. Some people like to try to get all their maintenance done once a year during the annual. But this often leads to expensive annuals and the airplane being in the shop for weeks waiting for parts and mechanic availability. Others (and I’m firmly in this camp) like to take care of things as they come up and want the inspection to just be an inspection. Certainly if an airworthiness item comes up, it will have to be addressed. But I’d just like a list of the non-airworthiness items so I can address them (or maybe not address them if I determine that to be the prudent decision) at my leisure.6 points
-
Yes. I have a need for one. I'm about to try fabricating one out of aluminum. I would like it to be collapsible so that it can stand upright and clip into a pipe clamp mounted in the corner of the baggage compartment so that I can reach this even when I have the baggage compartment full. I'm running to all kinds of scenarios where I need to park the plane but we're leaving our luggage in the plane and my tow bar is at the bottom. And it's starting to rain. Can't leave the tow bar on top because my family can't travel without filling the baggage compartment to the ceiling of the plane. If we have any space left, I swear they'll go get something from the house to fill the space. And after we get in the air, one or more persons in the backseat will need to access their bag to get something out. I basically don't eat for 4 or 5 days before a family trip so that we can stay within Max gross take off weight. So I have a need for a very smart, lightweight tow bar for my m20e. -David6 points
-
I am going to admit to something that maybe I shouldn't. The world of Dentistry is much like that of aviation. If the product is for medical or dental uses, the price gets jacked up 10 fold or more. Same thing in aviation. If it is for a certified aircraft then the price sky rockets compared to homebuilt/experimental. One year I was walking around Fly Market and saw they were selling hemostats at about 2-3 bucks a piece. They were the exact same that I use in my office. So I bought a bunch. Why? They get bent, beat up and abused over years of use and sterilizing them. A good pair of hemostats from a dental supply company can run anywhere from $20 on the low end up into the $60 and $70 range. These two dollar hemostats have worked well and lasted longer than their expensive counterparts. They take the abuse of use and sterilization better than the high dollar ones. Not sure if anyone needs to emulate this but does that count?6 points
-
I reread a bunch of this thread. It seems to me that Don is advocating advanced techniques that need to be practiced in order to have them in your bag of tricks should you ever need them. They are not going to work well if you try them out for the first time when it counts. In my experience, pilots are very comfortable anywhere within the envelope of the airplane they have been flying when they take their private or commercial practical test. But over time, they start flying cross countries and don't practice steep turns, slow flight, stalls, maximum performance and cross wind takeoffs and landings. Instead, they fly comfortably near the center of the envelope. And, they become increasingly uncomfortable flying anywhere near the edges. They become apprehensive about flying slowly or stalling and that's why their approach speeds gradually creep up until they don't want to land on any runway shorter than 3000 feet. If that sounds like you, go fly with Don -- or another experienced instructor -- and explore the edges of the envelop until you are comfortable getting all the performance your Mooney is capable of providing.6 points
-
The 24th of July will mark my 40th year of Mooney ownership. I’ve fixed a lot of problems.6 points
-
Making progress, Spoke to the CEO yesterday, Mooney has agreed to make a run of parts, Mr. Pollack is checking on a few last things, then word will go out to the Mooney Service Centers and Lasar abought it as there will be a limited time period to place orders. All order requests will have to go through an MSC or Lasar..DO NOT call them yet. Still looking at pricing and lead times, hopefully I will hear back from Mr. Pollack later this week or the first part of next week. Will keep you all posted6 points
-
Full stall landings are going to be the smoothest --- if you get everything right. The Mooney wing has a pretty abrupt stall break, so if you get near stall and then balloon due to a gust, or pulling a bit too hard or maybe thermals from a hot runway, it can drop in unless you catch it with a bit of power. The best landings occur with coordinated use of ALL controls: elevator, ailerons, rudder, AND power. The worst ones occur when you're not quite "in the groove" and try to horse it around with elevators alone and run out of energy a bit too high.6 points
-
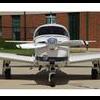
Going to look at an Ovation. This is motivation enough to overlook most any issues.
 6 points
 -
Part of it is some peculiarities of the Mooney landing gear design. The laminar flow airfoil places the thickest section where the wing spar is located farther back than other airfoils. This places the main gear, which is attached aft of the main spar, fairly far aft. Then also the gear design is a trailing link which moves the axels even farther aft. This means that there is more distance between the CG and the main wheels than on some other airplanes. Some call it nose heavy, but that's not really the problem. The problem is that the instant before you touch down there is a certain tail down force and the distance between the tail and the CG combined with this force creates a certain moment that has the airplane in longitudinal balance. But the instant the mains touch, the pivot point changes from the CG to the mains which have a shorter arm to the tail. The tail down force hasn't changed, but the moment arm has shortened so there is effectively a pitch down moment. If you try to catch it and yank back when the nose drops, you will usually be too late and over pull and may lift off again or cause a second nose wheel bounce. Part of the over control tendency is that we are used to airplanes where the controls forces diminish as the airplane slows. But the Mooney's trim bungees add force as the deflection increases and so the elevators get heavy in the flare. The best way to softly land a Mooney that I've found is to get it slow before you get in ground effect (because the drag is higher out of ground effect) certainly by 50' AGL and carry a slight amount of power into the flare and then aim to reduce power to idle in the flare with the yoke still coming back as the wheels touch.6 points
-
I'll bet it was tender though . .6 points
-
Unless you have lots of money burning a hole in your pocket I’d strongly suggest you don’t buy anything for awhile beyond nickel and dime stuff. Two things, it’s not uncommon at all for the first annual to be way more expensive than expected no matter how clean the pre-buy was. Secondly it’s not at all uncommon for the first six months or so for a lot of things to break as it’s most probable that your use rate will be higher than it’s last couple of years6 points
-
Our Mooney has landed!
 6 points
 -
6 points
-
Chevron caused the entire Trent problem and for it to rise to where it is. If the founders knew what would happen to the bureaucratic side, there would have been an additional section of The Constitution to stamp out. In the last 100 years most of congressional authority has been given to the executive and in turn to the alphabet agencies and their state clones. I for one see only good things coming from it and getting back to the intent of The Constitution6 points
-
OT: I always find it strange when Mooney owners aren’t on MooneySpace. Some of my favorite threads on here are the ones where the incident pilot is talking to the community about decisions made in the moment, and collecting advice/feedback on how to proceed. It’s often cathartic to commiserate with others who have made their own mistakes and have hard-earned wisdom on the matter. When an incident pilot isn’t here, we end up with rampant speculation, which is fine as far as it goes - but nowhere near as productive as having a candid conversation with someone who was there. Type club membership is generally associated with safer pilots, and it’s not just about proficiency programs - it’s also about having a sounding board for ideas and a place to sanity-check decisions.6 points