Leaderboard
Popular Content
Showing content with the highest reputation on 12/12/2023 in all areas
-
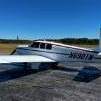
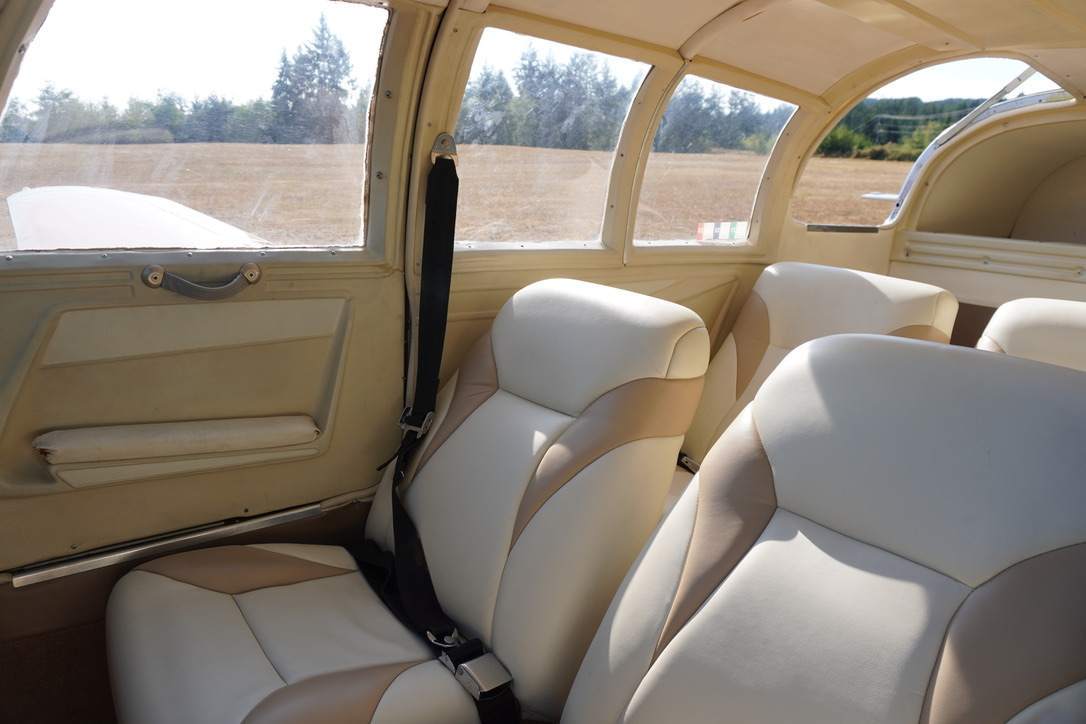
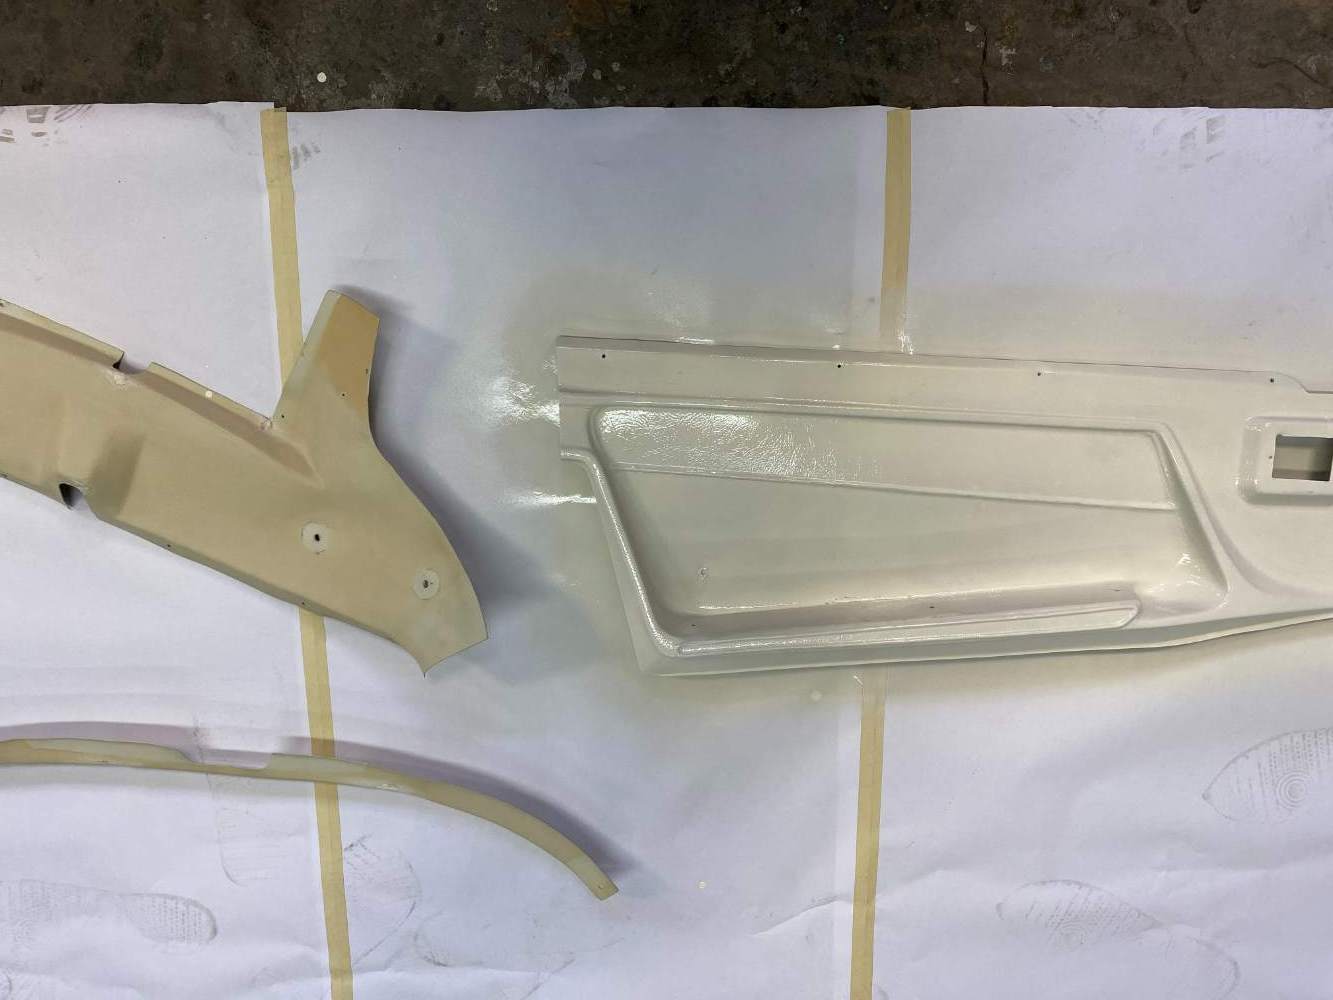
I purchased my '67F N9611M a few years ago and have flown the pants off of it, going from my home base of Mexico City to Airventure (2x), Victoria BC (6x), the Caribbean, lots of places all around the western US and all the way up to Yellowknife NWT via Saskatchewan. I've flown N9611M over 650 hours and that means I've spent a bit more than that inside of her. As cozy as she is, she was in need of a little help. While the seats, carpet, and lower upholstered panels were re-done by the previous owner, they left the plastics as-is, cracked in some places, ruptured screw holes in many places, and a general yellowing effect which didn't look great with the brighter upholstery. Below is a photo of the original interior: As you can see, the previous owner decided to leave the original upholstery on the arm-rests and the "vintage" plastic panels look a little dated. Frankly, had the panels been structurally sound I probably wouldn't have touched them but hours of long x-country flying had taken their toll on the arm rest seams and from time to time my elbows would get pinched from the open seams. I also had a theory, still to be tested, that the panels in their condition were letting a bit more noise into the cockpit than originally intended. With all this in mind, a couple of months ago I began the process of disassembling the interior of the aircraft in order to move all of the pieces to my workshop and begin the restoration process. This was the second time I had removed some of the interior, the first being during my pre-buy, but this interior removal was certainly more thorough and involved more electrical connections and visits to Mooneyspace to figure out how to get those darn circular vents off. The de-install went well and I found an airframe still with zero corrosion and only mildly decaying foam fiberglass insulation and foam, generally in pretty good shape for an old bird! Once at my workshop, I surveyed the damage and found that there were three intact panels in total, all window frames, and the rest had some form of cracks, punctures, or other deformations with the worst offenders being the footwell side plastics, the ceiling panel, the door, and the pilots side lower panel. In my research, I had found that there were two main schools of thought when repairing and re-beautifying the panels. One, was to follow the Aero-Comfort system of reinforcing the panels and then covering with a fabric or leather. I had spoken to Hector a couple of times and was impressed with their product and found him to be knowledgeable and helpful, however I really enjoy my 1000lb+ useful load and wanted to add as little weight to the aircraft as possible. While super-lightweight coverings do exist, and would have solved another problem with the window joins (which I'll get to later), the weight consideration, getting FAA approved products into Mexico, and cost all played a factor in deciding to restore the panels via option two. Option two, which I went with, was to fix the panels from behind, and then paint. The trick would be to figure out how to fix them so that they wouldn't break again, at least not for a long time, and then how to paint them in both a color and sheen which fit with the existing upholstery scheme. First thing to figure out was what material we were working with. According to the manufacturer, Spartech, it's ABS plastic. Yes, there are some special mixes and flame retardant elements in there but it's ABS. The next thing to figure out was the best way to repair ABS plastic. After exhausting the interior plastics threads here on Mooneyspace which all offered different options for plastics reinforcement including glue, fiberglass, and tape(!) solutions, I turned elsewhere for inspiration and found it in a lovely video from an Australian gentleman. It seems that the best way to reinforce ABS plastic is with ABS plastic! Being in Mexico City, it can be difficult to acquire the right, certified materials for any job and while they do exist, proper caution is wise. Case in point, after visiting a construction market to purchase ABS welding rods, I tested the rods and found that they were smoking considerably on a piece of test material. When I returned to the market to ask the vendor about the product he'd sold me, he confessed it wasn't pure ABS and instead had a PVC mix at somewhere around 15% which was causing the smoking and would have resulted in an inferior repair. I had read somewhere that Lego blocks are manufactured out of 100% pure ABS plastic, and so went off on a hunt to dig up some white Legos. Luckily, Mexico City has a lot of Lego and just around the corner from my house was a Lego seller with several 40 gallon drums filled with used Legos, sorted by color. Scoop! After bringing back the legos and verifying with a test piece, I started to weld the panels back together. Some photos below showing the extent of the welding pre-sanding. Below you'll see a before and after sanding of a hole repair. And a couple of shots of the footwell panels which were quite damaged from years and years of use. Special note: these panels were especially de-formed and I was able to straighten them using a heat-gun on the low setting before then welding them. I'm not sure how to post my own videos here but I have some nice ones of shaking the panels and flexing them to try to break them again and they're flexible and strong as can be expected. The only time I managed to re-break one was when I flexed it on a non-sanded weld. Maybe it was the thicker plastic section hitting the thinner section at an angle? With all of the panels welded and sanded, it was now time for paint. I chose an oyster white to soften the appearance of the interior and went to work. In the first picture, you can see the difference in color between the yellowed original panel, the original color seen where the strap covers had blocked UV exposure, and one coat of the new color. And below is all of the panels laid out for painting, with the floor panels in the bottom left playing around with colors. After rattle-can coats of paint on each panel, they were ready for install, and yesterday I went out to the plane to begin assembly. I'm re-doing the headliner but have been itching to fly so thought I'd put together the plane to see how things look before final assembly. And once again, the before picture for reference. Installed, the panels look very good. There are a couple of paint imperfections, mostly in deep corners, and I think a better paint product (or maybe more skill on the part of me, the painter) would have solved this issue. That's where I've gotten for now, next up is: headliner and ceiling panel install de-install of the panels to upholster the arm rests with the same material as the seats install of freshly painted passenger headphone jack covers (more on that next time) sourcing and install of those thin window joining strips I'm looking for help with adhesives recommendations for both foam to aluminum and foam to vinyl, as well as if anyone knows where to find those little strips which go between the windows?7 points
-
That is an ancient 1979 Lycoming manual that was written 17 years before the TIO-540-AF1B engine (Bravo) ever existed and 10 years before the TIO-540-AF1A engine existed (TLS). That booklet was made for the much heavier duty 350hp TIO-540 engines years before this that were put into Piper Navajos, as an example, that share no parts with your engine. The lighter weight engine used in the Bravo is pushed to the max at 270hp and is used in no other airframe. The closest engine related to it is rated at only 250hp and was used in the Socata TB21. Lycoming came up with a booklet toward the late 90's that is a little closer to reality, where they used more conservative numbers, but just keep in mind that the people who wrote this and other "official" material are not owners who have the "privilege" of buying cylinders ($3000 each for the Bravo) and overhauling engines ($100,000). I would dispose of that version properly, along with the charts on the visors that came with early M20Ms. In GA, long term owners and owners groups cut through all the marketing nonsense that promoted unrealistic and unattainable numbers and come up with the way that it makes the most long term economic sense to fly the airplane in real world operations. One other thing: you keep quoting what the MAX numbers are in this and the POH. Hopefully you would never operate a $40,000 car pegged to the redline on the numbers, with the tach, the temperatures, etc, for good reason. Your Bravo engine is worth twice what the average car is today.5 points
-
My steam gauge DG died. I thought maybe I should upgrade to a new electronic DG. The Garmin G5 cost for just the instrument is $2625 for just the screen and then there's the magnetometer on top and a GAD. Oh and the Avionics shop said my old beacon and nav lights might cause interference with the magnetometer so changing all of them out would be about $3500. Then there is the cost of installation, another $2500. I just got a quote to install a AV-30-C and a JPM EDM 900. The quote was $26k. I sent off my DG to be serviced Thursday and Fed ex is delivering it back to me tomorrow. Total cost $465 No thanks. It will be cheaper by many orders of magnitude to not do the upgrades. I'll just keep a repaired yellow tagged spare for each steam gauge for tens and tens of thousands less. I wonder how far I can fly on $26k in gas.4 points
-
I’ve flown all three of my Mooney planes coast to coast and over the Rockies. Suggestions don't fly over the Rockies in IMC use oxygen and keep your O2 sat > 95% follow the major highways as a guide for lower terrain and more airports mornings tend to be smoother if the wind at ridge levels is > 30 knots, reconsider enjoy the spectacular views4 points
-
An electrical engineer buddy once told me that electrical systems are like oil burners: You adjust them for minimum smoke.3 points
-
That's the because the smoke is what makes it work. If you let the smoke out, it stops working.2 points
-
Hmmm . . . . I get 6-7 years from my Concordes. And yes, it's capacity checked every annual. Methinks you speak without experience.2 points
-
After changing the bulbs, it’s a good idea to check the alignment. The procedure is in the manual. Basically, you measure the aim points at the specified distance and mark with tape on the inside of the hangar door. Mine were off quite a bit.2 points
-
Even if you don’t carry coverage for your airframe, I would think you’d want liability coverage. It’s going to be a lot more than $65k if you taxi into a Gulfstream or whatever2 points
-
2 points
-
If you can, find an M20J cowl and baffles and do that conversion at the same time, and ditch the ram air door. I know, easier said than done. McFarlane will also make them off of a drawing, and they have drawing templates on their website. Basically, you sort out the dimensions, fill them in on the drawing, and they make it. It's essentially an OPP. If you can find someone who has done similar you can use their dimensions. I did two of my cables for my J quadrant this way, but I don't know if those match exactly for an E with a quadrant. Cool project in any case. That'll be slick when you get done.1 point
-
1 point
-
Anyway lights of whatever source really have nothing to do with EV’s Some just won’t believe, regardless of facts, they are convinced of all kinds of silly things that are easily disproven. ‘Same thing happened when Hybrids first came out1 point
-
I like to cross through Salt Lake City, Rock Springs, KRKS, and Casper WY, KCPR. Terrain is relatively flat.1 point
-
Good one. I have heard that once all the smoke comes out, you are done.1 point
-
We have one and fly at 9,500-11,500 with it and similar experiences. On a level 3 if I am solo it keeps my sats at 98-99%. Just to test it out I was at 9,500' with a pulse ox on and the O2 flowing and I was at 99%. I removed the cannula and kept the pulse ox on, within about 2-3 minutes I was in the low 90's, replaced the cannula and in less than a minute was back up to 98%. When my wife and I are using the splitter I keep it at level 6 and plugged into a 12V that I had installed in the baggage area. After a 4 hour flight the battery was still full.1 point
-
Start with field voltage check w/ master “on”. At alt. And breaker, if good move to output1 point
-
Depending on the state of the armature wear specifically the commutator I might be able to fix it. If the commutator has excessive wear down to the insulator, the motor will need to be removed and sent to Globe for overhaul. I have new brushes and bearings but no new armatures.1 point
-
Bevan Aviation might... I know they work on King servos and have great bench repair capabilities.1 point
-
It is definitely less expensive to keep the old stuff running. There is so much used equipment out there from panel upgrades that it’s not hard to find replacements, and most old stuff can still be repaired. The problem is that you never know which old thing is going to fail next, or where. If you fly mostly locally for $100 hamburgers the reliability may not be as important. But if you travel a lot, reliability can be a big issue. And for me, playing whack-a-mole with the panel became tiresome.1 point
-
Hmm, if I fly XC 100 hours in a year, that is 17,500 miles. At 10.1 GPH that is 1010 gallons or about $6060 in just fuel cost. C-182 would be more like 135 knots on 16 GPH, so 130 hours, or 2080 gallons, so $12,480 in fuel cost. That should cover the insurance difference. And there are less oil changes due to faster cruise, and other variable costs, like ADs that are hour based.1 point
-
I fly a G model out of Utah and it works fine as long as you stay within the limitations of the aircraft. For cross countries it’s common to fly at 10.5k and 12.5k in altitude because the terrain requires it. Overall I try to limit flight over large mountainous areas with little population and instead try to stay over flatter more populated areas. I’m fine flying over higher isolated ridgelines because you have good terrain right before and after it. Below is my flight plan for a trip Friday for a funeral from KTVY (Tooele, Ut) to KPUW (Pullman Wa) You’ll notice I am choosing not to fly over 200 continuous miles of Mountains and instead circling to the west. I chose the gps waypoints because they route me between the higher peaks and away from some restricted airspace. I should be able to complete this flight at 8500 feet. So pretty low for western flying. My flight planning process starts with planning a direct flight and then I zoom in and start modifying the route to miss tall rocks and airspace I shouldn’t be flying through. Once I find the lowest/flattest route I start working on what is the optimal altitude based on winds etc. Having a modern GPS navigator is very handy. Having to navigate with VOR and /or pilotage only through the mountains would really limit you. There has already been a lot of good advice that I agree with. I’ll just add don’t fly at night either. Sure, you could, and I do occasionally, but it does increase risk so why not just fly during the day? Also, without a bright moon the mountains and desert are IFR when the sun goes down. A guy killed himself and his family taking off out Moab Utah recently because he took off after dark with no moon. It’s no joke. So dark!1 point
-
Lower pilot experience? Rate should go down substantially with more pilot experience.1 point
-
1 point
-
It sounds like your route is sound. Heading for Cheyenne is about the best place to cross the Rockies. I used to do it almost daily in a NA M20 F. Just remember the weather through there can be bad in the winter. Planning your trip in advance, is a crap shoot this time of year. It can also be beautiful…1 point
-
1 point
-
Looks great. I buy ABS plastic filament in rolls on Amazon for 3D printing. Might be a good alternative to sourcing used Leggos and comes in lots of colors. Would be a lot like TIG welding I'd think. Never tried it myself.1 point
-
Put some more information in your profile, helps to know what year and model your airplane is. Get yourself a the wiring diagram for your airplane, print it out as large as you can. In my 252, Mooney uses a shielded twisted pair for all the lights and strobes. The ground runs all the way back to the cockpit. Great for no RF noise, especially when installing a magnetometer int he tail or wing. But they also have numerous CPC and knife splice connectors, any one could become a high resistance or broken joint. The wiring in the rudder itself is likely to be in poor condition. Fuselage much better. I needed to get rid of my wingtip aft nav lights and install a new strobe / aft nav LED. So I installed new wires (nav, strobe, ground) all the way to behind the avionics tray behind the wing. There is a good grounding block at the avionics tray, so I used that. And spliced the Nav and Strobe wires to the black and white wires. White is Nav power, found the black wire at the panel and connected to Strobe power. Good for the next 40 years. Aerodon1 point
-
It's not pilots that steal them. It's Canadian moose that are bored that like to play practical jokes on pilots and then watch them duct tape two tennis balls to their wing. They later have their friend Rocky sell the caps on Ebay.1 point
-
1 point
-
1 point
-
Yes, you probably won’t notice it much unless you do a mag check at cruise altitude above ~7,000’. If you’re running peak or leaner it might get your attention as the SF is basically doing all the work and switching to the mag it will get rough and you’ll see your speed dropping off(depending on how lean or high you were). You can tell the advance is doing something.1 point
-
1 point
-
From the sound of it, you’re already delegating or putting all your faith in the mechanic for the scope of the pre-buy which is a mistake. Start with a review of the logs and draw up a pre-buy inspection list with the help of the mechanic that will cover Mooney specific issues and your mechanic can give you an estimate of the hours to do it. There are some pre-buy checklist in the file section to help you. Sent from my iPhone using Tapatalk1 point
-
I am surprised that YouTube does not block posts by content creators who used YouTube to monetize activities that resulted in criminal behavior. Like @ArtVandelay, I certainly will not give him any clicks.1 point
-
1 point
-
I've flown an E (and a K, and a 182) over the Rockies multiple times in the Northern United States. Yes, it is practical. As practical as any light GA flight can be, anyway! My advice: Take Oxygen. Plan a route that doesn't leave you without any good landing spots for very long, particularly IFR or night flights. Be prepared to shift your schedule by a day or two for weather.1 point
-
P.S.--"flexibility." Take your electric SUV out into the woods to go hunting, fishing, camping or just hiking. But driving those bumpy, hilly dirt roads, your range will go way down, so don't stray too far from the nearest charger. It's hard to strap an extra battery to the back, but 5 gallon gas cans are no trouble at all . . . . . isn't this why many people buy SUVs anyway? Or at least it used to be, until everyone had to have an SUV. My former neighbors "had to have" a 4WD Bronco; when they turned it in at the end of the lease [3 mistakes at once!], they had to pay ~$4K because there were problems in the 4WD system, which they had never used . . . .1 point
-
I can’t address your go see Mom use case as well you can’t address every case, but I’ll try to address your others. I don’t know what capability and flexibility is as those are undefined terms but suspect they address you presumption of reduced long range travel capability. But as of today the price including the tax credit of a standard range Tesla model 3 is $28K plus change, see attached pic. According to Consumer Reports two months ago the AVERAGE price of a new car is over $48,000. So that blows the “more expensive” part out of the window, a Tesla is $20,000 cheaper, not more. Even if the tax credit is ignored the Tesla is still over $12,000 LESS than the average. https://www.consumerreports.org/cars/buying-a-car/people-spending-more-on-new-cars-but-prices-not-necessarily-rising-a3134608893/#:~:text=The average cost of new,many other factors at play. Based on our 30,000 miles of driving that’s only the beginning, the cheaper to operate is massive, the Tesla returns 260 miles on 50 KWH, so a full tank on the Tesla costs only $8.50. To fill up our Miata for the same range costs over $30, and that’s at Sam’s Club the cheapest gas there is at least here. So “fuel” wise it’s less than 1/3 to power a Tesla than a Miata, you’ll have to run the numbers for your car of course but I suspect the Tesla is cheaper than even a Prius So at least a Tesla to operate is orders of magnitude less expensive to buy and operate and own than a comparable gas car. Then add in performance wise it will blow the doors off of any other than gas performance vehicle, but don’t forget that crash test wise a Model 3 is the safest vehicle on the market. So we have come to several conclusions that are easily proved. It’s much cheaper to buy. It’s much cheaper to drive. It’s the safest vehicle you can buy, I think still, but the test was about the time we bought ours which was almost three years ago. https://www.tesla.com/blog/model-3-lowest-probability-injury-any-vehicle-ever-tested-nhtsa Oh, and it’s the most American made vehicle you can buy. That’s a little tougher to prove as 90% or better of the auto mags etc simply ignore Tesla’s existence as Tesla gives them no money, doesn’t even give them vehicles to test, whereas everybody else spends large sums on advertising and free cars to test and keep as long as they want. Small wonder the Auto press isn’t Tesla fans. But Tesla builds pretty much everything in their vehicles, in the US, even the seats and no other large manufacturer build seats and most even if assembled in the US the major components are shipped in from overseas. Oh, and charge time is 15 min for 147 miles of range, so my 20 min guess was off a little, but in truth I charge a little more than the computer suggests as I like to have a little extra, if you follow the computers directions you will minimize charge time and you will make it to the next charge point, but I don’t like getting there nearly empty so I’ll charge for a few minutes extra. In all honesty I can’t come up with a logical reason for most not to buy one. There are some requirements though, the perfect car doesn’t exist anymore than the perfect airplane. A Tesla is close to a Mooney though, fast, safe and efficient. To be most useful you need a garage that you can park in every night or at least a private parking spot close enough to run a 30 amp cord to. No EV is best in super cold weather as waste heat is normally used to heat a gas car where an EV has to use power to either creat or move heat, the Tesla’s heat pump is very efficient, but you can’t beat “free” heat you get from a gas car. But for the average driver they are ideal. Best if you don’t live in the wide open spaces, example I’m sure in places like lots of Montana that you would pretty much be confined to within 100 miles of home, because I’m sure in sparsely populated areas there just aren’t any chargers, a Tesla can use anyone’s chargers, can even plug into pretty much any power outlet, a 110V plug will power it, but it’s ridiculously slow, my back up plan is an RV park, most have at least 30 amp plugs. Of course I’ve never charged at an RC park, but could if I had to. In your case for your Mothers house all you would need is a 30 amp or larger plug in her garage and plug in your travel charger into it. A standard range Tesla charger can only pull 22 amps so while it certainly can use a 5o amp plug a 30 amp is more than enough. A drier or stove plug is fine, so if your Mothers drier is near the garage you could simply plug into it’s outlet. You know I watch Fox News myself, but get tired of their honestly ignorant tirade against EV’s.1 point
-
But @A64Pilot, what counts is not "time remaining" of 8 minutes; you could wait 6 more minutes and show Time Remaining = 2 minutes. What counts is the total time spent charging. From home to Mom's place in the mountains, not always flyable, is 350 miles across Atlanta. I live 40 miles from a charging station. Even gassing up there and driving home first, I can then drive to Mom's and a couple of hours back before spending almost ten minutes putting 17-18 gallons into my Altima, then I can drive home and commute to work several days. With an electric vehicle, charged overnight at home to 100%, stopping to recharge before reaching 20%, not charging above 80%, would add two stops each way, call it an hour, making the drive 7-1/2 hours plus Atlanta traffic delays plus stops for food, etc. No thank you! That's my problem with electric cars--I'm supposed to happily pay more for less capability, less flexibility in where & when I go, and accept less durability, all so the politicians can look good to each other??? Not with my money and time!1 point
-
I’ve known Monroe McDonald since the 1980’s as a ham operator I used to talk to every day on the way to and from work. I recognized his distinctive voice on the LiveATC recording. I flew in the BD-4 he built way back then and kept at a hangar in Addison in the days when you could afford one there . He was very familiar with the entire area around Addison. Most people may not know he’s the guy who proved with tufting that the airflow in an M20C is OUT of the oil cooler and had built a plexiglass duct to mount on front of the oil cooler intake hole to force the air to flow IN. The last ADS-B datapoint I saw showed a 1000fpm climb rate and a very slow ground speed. The accident occurred near the end of civil twilight IIRC. I’ll let the investigation play out. Rest in peace Monroe, K5DUS SK1 point
-
Seems like a Lycoming IO 360 would be a good choice to power the electric motor. They are reliable, efficient and well proven!1 point
-
I (through my LLC) am the sole owner of my Mooney, however I let another guy (frequent GA pilot/instructor, active airline pilot) that I trust use my plane. We both have non-exclusive dry leases with the LLC, and we pay a monthly fee to access the plane (for hangar, ins, etc) and a dry hourly rate for the usage of the plane. There may be other/better ways of setting this up, but that is how I do it. It is not a money making operation, it is more like a lose-less-money operation. I paid (too much) for an aviation attorney to setup this arrangement, however I probably could have done it myself, if I knew then what I know now.1 point
-
Kind of a glorified private rental. I was in one for a few years. It can take various forms, typically an LLC, but the essence is that you have one or a limited number of people who have access while you retain most if not all of the control. People tend to think in terms of equal partners with an equal say but it doesn't have to be that way. In fact you can have partners with no control interest at all. BTW, "fractional ownership" has a very specific meaning in FAA parlance. They are regulated under Part 91, Subpart K. Chances are that's not what you are looking for.1 point
-
1 point
-
I'm still new here so sorry if I put it in the wrong spot. It turns out the tach cable was vibrating and was next to the MP hose. The tach vibrations also vibrated that hose so both gauges were going nuts. Going to order a new cable and that should fix everything.1 point
-
Good point... I could see a daytime soap opera version of an insurance adjuster say "Well, your husband was not IFR rated, and the accident was caused by inadvertent IMC, so at the time of the crash, they had failed to comply with the cloud clearance requirements of part 91, therefore the claim is denied, because he was in violation of the regulations."1 point
-
I’m pretty sure an insurance company can drop you or adjust your rates based on violations but I don’t think they can deny claims because the claim occurred while a violation was taking place (regardless of whether it was causal). If that were the case insurance would be fairly useless. Certainly that is how insurance works in other areas. It’s why collision insurance is so expensive for new drivers, especially young males. They don’t deny claims based on stupid and illegal behavior, but they will price the coverage based off the increased risk of loss from the higher rate of stupid and illegal behavior in that demo. If you have a prop strike and it turns out the plane is 3 months out of annual and and you have an expired medical, I’m 99% sure that claim gets paid. I am also 99% sure your rate increases substantially or you get dropped shortly thereafter.1 point
-
If anyone has any interest, I took a video of rebuilding the pump that I would be happy to post if it would be useful...1 point
-
1 point


