Leaderboard


Popular Content
Showing content with the highest reputation since 10/25/2025 in all areas
-
Had you posted your interest in N562BG on here before spending the money on the pre-buy we could have told you much of what the pre-buy told you . . . for nothing. I have pictures and logbooks and info in a file on dropbox that I would have gladly shared. Brian is the best at what he does, but spending the money to have Brian Kendrick travel out to look at that airplane is a little like hiring Picasso to paint your tool shed. Every once in awhile someone comes on here mentioning that they are looking at an airplane, asking all kinds of questions, but they are afraid to give too many details since they're afraid that someone will swoop in and buy it before they do. In nearly 15 years on here I've never seen that happen. It usually takes us about 10 minutes to figure out which airplane it is anyway. The Mooney community is small and tight-knit. People on here share lessons that they've learned. We don't charge each other for that. I might share one thing today but it's likely I'll need two things tomorrow. That's the community that we are. It's a net win for everyone that contributes.14 points
-
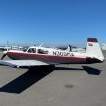
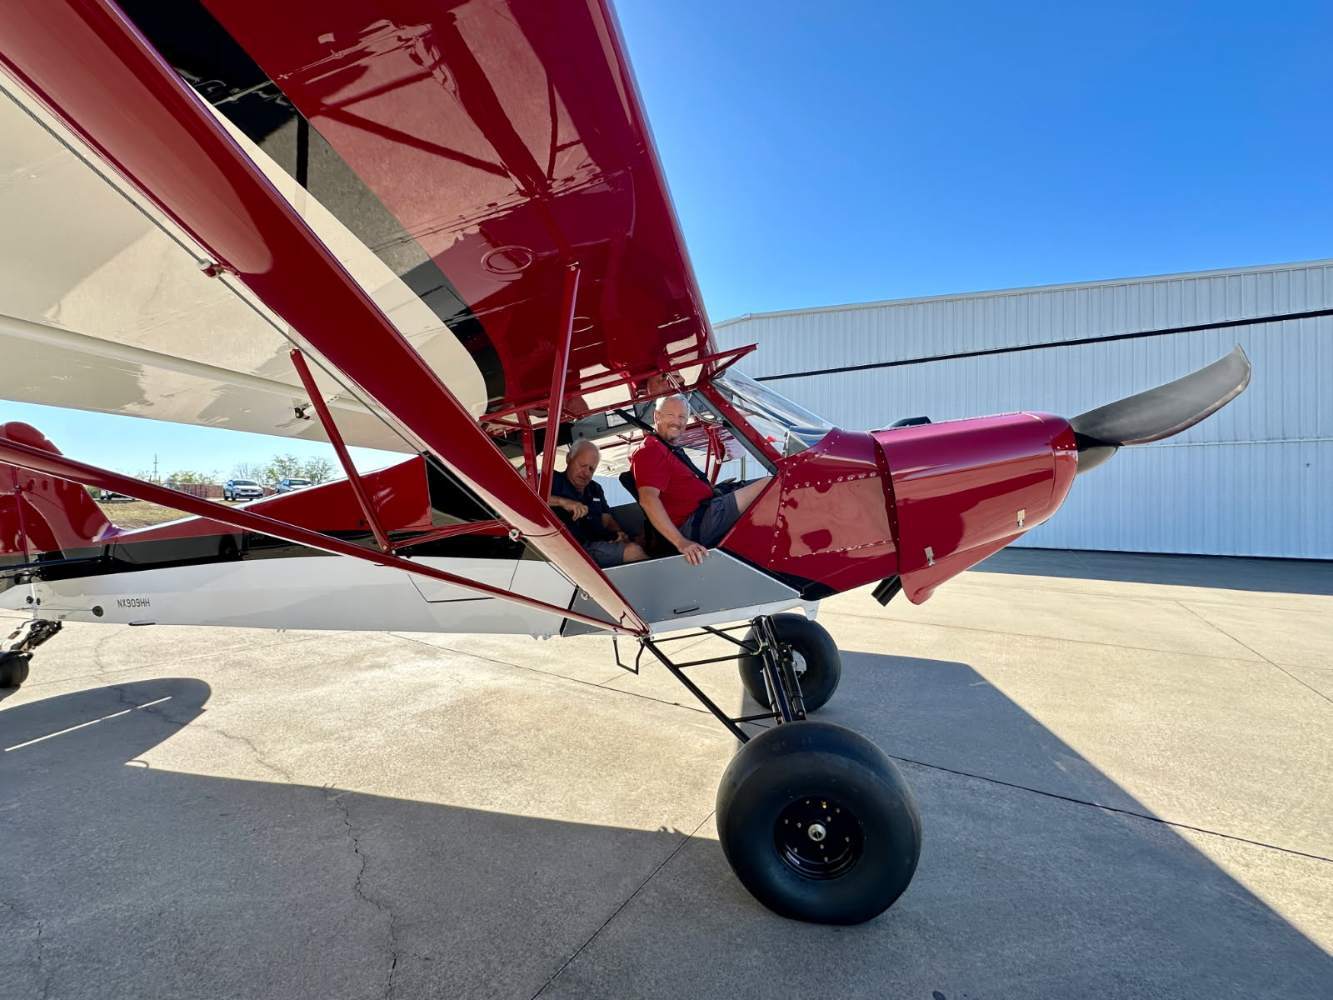
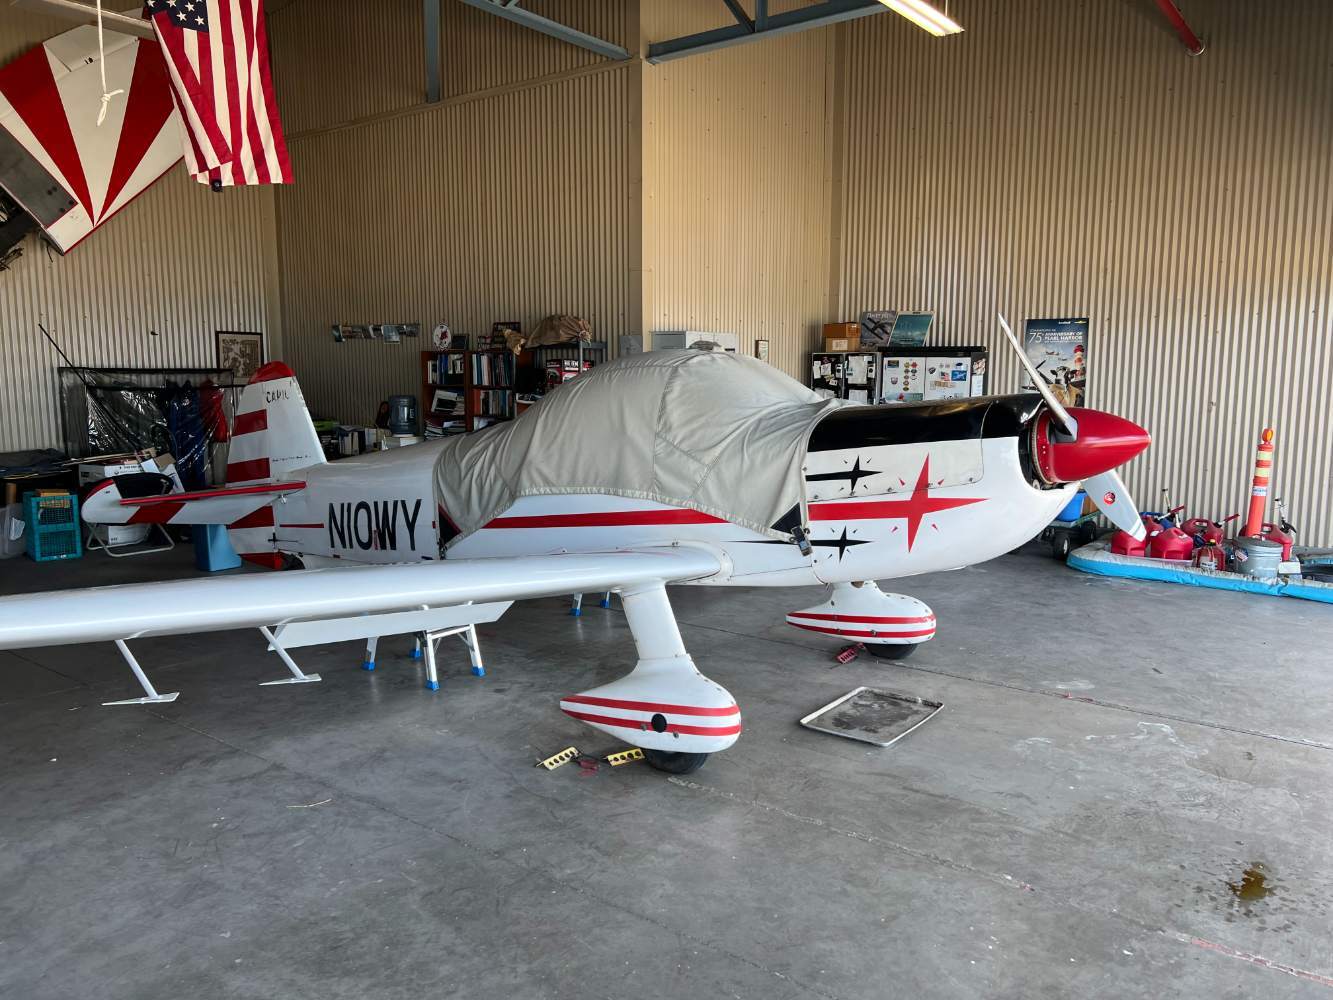
I am the fat guy up front. still keeping the ovation, just want to get back to stick and rudder real flying
 9 points
 -
What would we do without you Skip? I walked out to the hangar and in 5 minutes it's fixed. Thanks!!!!8 points
-
Sorry failed the test.
 8 points
 -
Not to bash the OP, but asking to pay for the results of a prebuy that caused you to back out of the sale seems to be a bit silly. It’s obviously bad enough to avoid it, I don’t believe anyone is going to pay you for information that will deter them from buying, they just aren’t going to go there. An airplane with that much damage history is going to appeal to very few people anyway, and those will likely be offering less than salvage value. Traditionally we share these things on the forum as a community service, and we all hope someone can learn from our experiences. not demanding you to do the same, just saying you’re not likely to find a buyer for your info here. who knows, I could be completely wrong… In any event, thanks for sharing what you have. For me it would have been more than enough.8 points
-
The OP paid a not insignificant amount for an inspection. Accordingly, the results of that inspection are his property and have tangible value to anyone interest in purchasing the airplane. It is not unreasonable to offer that information to interested parties for a fee. It shouldn’t concern any of us uninterested in purchasing the airplane.7 points
-
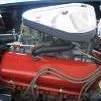
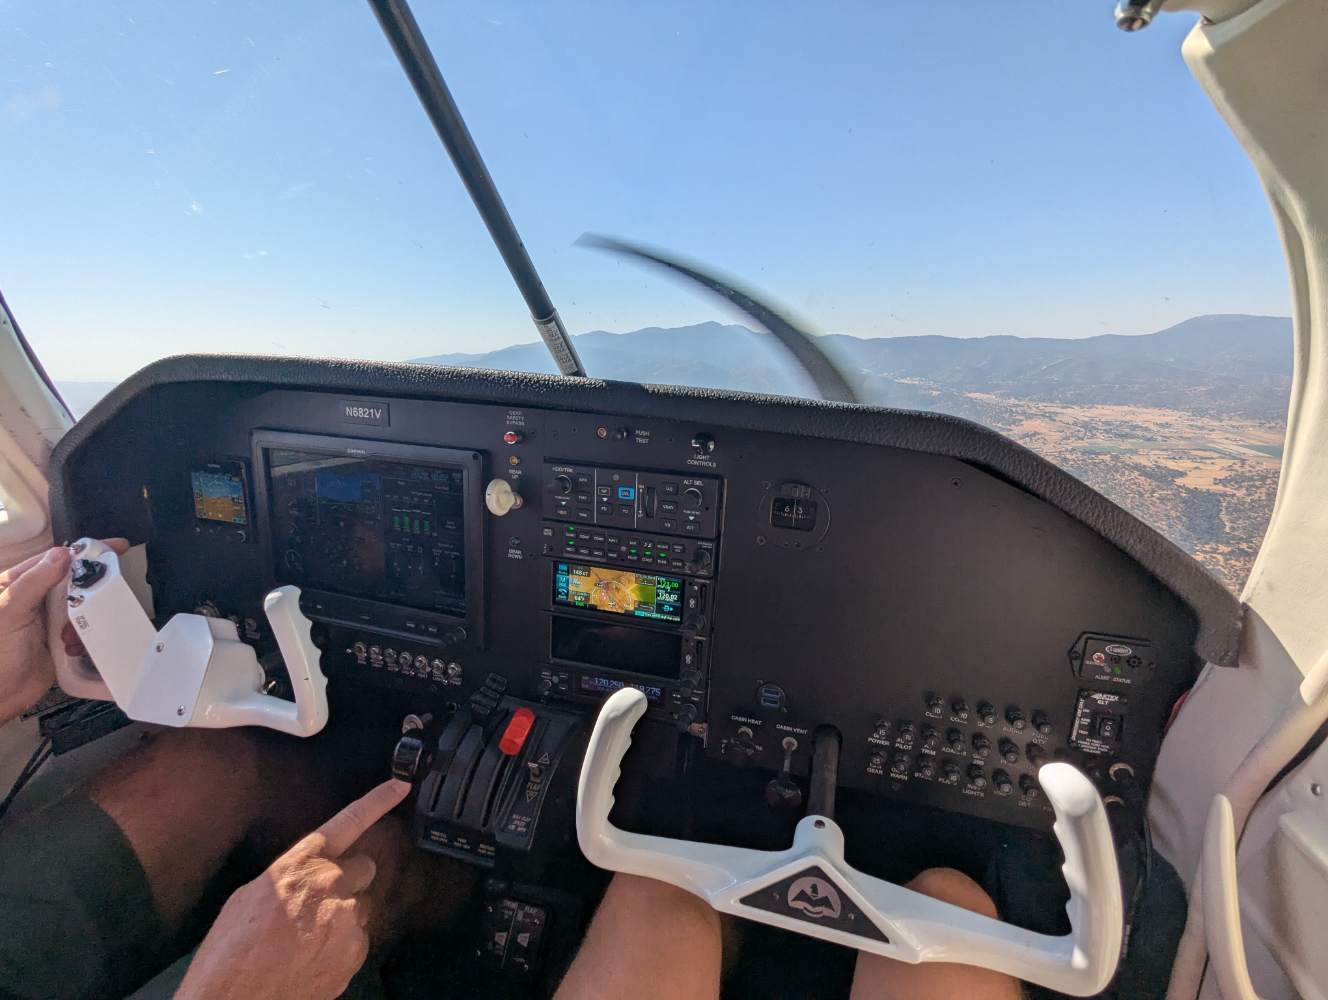
Thanks all for the work and advice. I think we've solved this for now! After determining that it wasn't just the #3 that was high, but that the whole engine was running hot and the #3 was just the hottest, we took a whole engine look approach. We checked the timing, found the Surefly to be timed at 0 TDC exactly. But then we check the right mag we found it to be advanced to almost 35 degrees! The bolts were finger tight and it had obviously slowly been moving and had rotated to be extremely(!) advanced. After fixing that right mag, and cleaning up the baffles for good luck, I just did a long test flight and was able to keep all CHTs, including the new cylinder, all easily under 380 even with the cowl flaps completely closed and power at 75% or greater. That has never happened as long as I've owned the plane. Thanks for the discussion, it definitely helped us hone in on the right answer.7 points
-
I actually feel extorted. "Give us money or your plane will potentially be grounded because we wont sell you a part because others will be in line before you but trust us, without showing you any company information, it's all just a problem of money, so if you do make a donation, you'll be sure to get that part!" I don't react well to stuff like this.7 points
-
It may come as a surprise to some of you that not everyone flying and owning a Mooney has massive amounts of disposable income that can just provide a significant investment into something so ambiguous as this. Don’t want to see LASAR or Mooney fail but it’s really not our responsibility to insure their success. People are free to do whatever they like with their money but I take offense from anyone trying to guilt folks into this.6 points
-
I replaced mine at about that age. They were minimally compressed. They were also still quite flexible. Where they showed their age was in cold temperatures. I jacked the plane up in February and they took nearly a half hour to fully expand. I haven’t jacked up the plane in cold temperatures with the new ones for fear of being disappointed that the difference in performance is minimal. The reason mine were not replaced earlier is because they continued to pass inspection per the maintenance manual. I finally replaced them on general principal because it was embarrassing to have shock discs in service that dated to the Johnson administration. If I’m honest, there’s zero difference in feel from the cockpit. 45yrs old vs never installed/new:
 5 points
 -
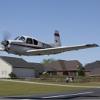
After a long time flying, I finally got my tail wheel endorsement! I highly recommend it to any pilot as a skill improving experience. I recently read an article that said pilots who learn to fly in a tail dragger have an accident rate 60% lower. I wonder if there is an accident reduction for pilots with tail wheel endorsements? The article did not say... I got the endorsement in a J-3 Cub and a Stearman from here: https://ww2flighttraining.com/. Kevin is a great instructor and takes you to several grass strips in the local area so you can get more diversified training. He made it fun and interesting. I don't think you can find anyone better.4 points
-
I am willing to bet new ones one will not last as long!4 points
-
Try adjusting the height about halfway between high and low and sitting on it and shifting your weight to see if you can get it to slide forward and off the rails so you can start over.4 points
-
From your manual: CAUTION 3: DO NOT ATTEMPT TO PUMP MORE THAN 1 FL. OZ. (30 ML) OF GREASE INTO THE LUBRICATION FITTING. USING MORE THAN 1 FL. OZ. (30 ML) OF GREASE COULD RESULT IN OVER SERVICING OF THE PROPELLER. VERIFY THE OUTPUT OF THE GREASE GUN BEFORE SERVICING THE PROPELLER. CAUTION 4: OVER LUBRICATING AN ALUMINUM HUB PROPELLER MAY CAUSE THE GREASE TO ENTER THE HUB CAVITY, LEADING TO EXCESSIVE VIBRATION AND/OR SLUGGISH OPERATION. THE PROPELLER MUST THEN BE DISASSEMBLED TO REMOVE THIS GREASE. (8) Pump a maximum of 1 fl. oz. (30 ml) grease into the lubrication fitting, or until grease emerges from the hole where the lubrication fitting or hole plug was removed - whichever occurs first. What you've posted and what the manual says are not quite the same. Based on your comments, I don't think that you understand that there is no seal on the hub side of the blade bearing race. I have seen multiple prop issues on multiple airplanes from overservicing. Hopefully, you did not really "fill it up" as that will cause the blade seals to herniate when the piston is actuated. If you think that you can "even out" the grease by pumping both sides until it pushes out the other zerk hole, you are mistaken. Grease pushed into the prop bearing race can migrate out of the race on the hub side before getting to the rear zerk fitting hole. This is why they limit servicing to 1 fl. oz. I hope it works out for you! The Georgia weather may have helped you dodge a bullet as the grease is less viscous at higher temps, so it may have pushed out the back before overfilling...4 points
-
Just as an aside. Vibrations in the cockpit are not always directly related to propeller balance. I was recently dealing with a minor vibration in cruise and a pronounced vibration any time the prop was driving the engine. This was due to some movement in the position of my exhaust pipe and it's hanger. The pipe had migrated ever so slightly in the ball joint causing the hanger to just kiss the firewall. This caused an almost undetectable harmonic in cruise, but at low power with the prop driving the engine, the mounts compressed just enough to increase the contact between the hanger and firewall. It was very noticeable and I had to fully inspect everything ahead of the firewall to catch it. Such a small thing but it had a huge effect on N, V, & H. Make sure that everything firewall forward is tidy and secure with no rubbing or interference.4 points
-
Chasing storms yesterday from Austin to Florida. Wound up stopping in New Orleans and Tallahassee cause the Mooney was moving faster than the front! Alaska and a couple other commercial aircraft were landing at TLH to go to Million Air as they were having a sale on fuel…plus wx to Tampa and Orlando was blocked. Florida Flow Control I’ll bet was lit yesterday. ”If you have time to spare go by air” indeed. 10a arrival turned to a 7p arrival, but my ride was smooth and the Mooney stayed dry. Modern weather tools are really pretty incredible. PS. KNEW is a fav…first rate FBO (Flightline First), good fuel prices and fun airport to fly into right on Lake Pontchartrain. Put it on your list if you’re in the area and give yourself an excuse to check out NOLA

 4 points
 -
Scotch brite and primer.4 points
-
Holy crap I have a bag of those I cut from some Derlin rod. I am sitting on a gold mine.4 points
-
I can understand the need/desire to recoup some of your costs on bad decisions, hell I have lots of them. Still waiting for something/anything to come back. However, this situation is different. You just spent $5K on a decision that didn't work out, that is enough red flags as it is. I would give the results away to anybody in the aviation community to keep them from making a bad decision. We as a community would all be better off if we worked to call out bad players and decisions without getting too judgmental.4 points
-
It seems to me, a relatively new owner (since last year), that no one here really knows what's been going on at the factory. And while this is fun: No one can fix a problem that they don't understand. This is why I don't appreciate being asked for money. Because I don't understand the problem and I doubt it's money.4 points
-
@DC_Brasil I just plugged your home airport (Jundiaí) into Foreflight and tried to get a sense of the geography. There're a couple of SIGMETs sitting right over it right now, I have no idea what your usual hazards are. I'm a big fan of turbos now, weather options and other benefits. Would you need FIKI at all? I've never been to Brasil so I have no idea whether you're going to want that. Even at lower altitudes near the coast in the US West, it's helpful, but all depends on your mission. Brasil conjures up visions of beaches, good food and drinks to us Americans... Do you fly into colder areas and mountains elsewhere also? If you don't need FIKI you'll probably have more choices, esp. IIRC some lower-cost Cirruses. I looked hard at the SR22T when shopping a couple years ago (mission/task-driven) and the Acclaim made a lot more sense for me, in part because a FIKI Acclaim Type S was a better cost deal (initial and TCO) than a comparably-capable Cirrus from what I could tell (and I needed to fly high and in the winter, with good climb, for my plans). Also finding K's will be easier. An advantage there would be some of them have higher useful loads from what I've read (the main issue IMHO with a Mooney and the only downside of an Acclaim). Cirrus has a roomier cabin (more "car-like") and higher useful load I think with newer models (you mention the opposite so maybe older ones), also CAPS. Your mention of your wife is not to be taken lightly; you will almost certainly fly more, more often, and with more moral support if your family like the airplane and feel comfortable in it. "Sure honey, go ahead and get the Stormscope..." You mention a desire for glass and express openness to the G1000. Getting a G1000 plane restricts you in upgrades *but* solves many problems up-front; it's a very useable system and provides many features all-in-one. I spent a lot of time looking at this and have no regrets going the G1000 route. All Acclaims have G1000, newer Ovations, newer Bravos (?I think?), and all Ultras have the NXi (outside your price range). If you have to add or signifcantly change glass, budget money, time, and management energy. Cirrus will be slower than a big-engine Mooney but may not be too much of a decrement from a smaller-engine Mooney (it will burn more fuel to do this though!). I'll defer to those who have flow Cirrus, but all the feedback I got jives with my sense the Mooney will be the sportiest of anything you mention. I looked at Bonanzas but it all seemed more expensive, harder to get real FIKI, likely higher TCO. I really, really like my Acclaim. It's done everything I've asked it to, is surprising easy to operate systems-wise, and is very versatile. Drawbacks are useful load and probably short/soft field (I haven't even tried, most of the real backcountry fields near me are more 182/206/taildragger territory). Can't beat it for regional travel, high teens to low FL's (start at FL180 here), can easily beat airlines door-to-door over hundreds of miles while being great fun. HTH D4 points
-
I share all of the same suspicions, and have had nearly all the same reactions to lasar’s rollout. i also sent an email with some of my impressions and perceptions. Another member here had done the same and set up a conference call with Brett and John to get a better explanation. In that conversation the idea was floated for a town hall of sorts. They seem to have genuine good intentions, and while this is in no way a solely altruistic venture for these guys, their success would mean a more stable future for the fleet. They are listening to our comments and grappling with how to package this in a way that accurately describes their needs and what they intend to provide. I would suggest anyone who genuinely wants to provide constructive input, to email them directly, and participate in the meeting if it comes about. Also, we aren’t talking the kinds of figures that brings in a marketing team and some huge structure. Even if the parts division was running like a Swiss clock, we aren’t talking about millions of dollars a year in profit. there is room in this deal for the owners to make money and for the fleet to get serviced fairly. Finding that sweet spot isn’t going to be free, and to think it would be cheaper to go bankrupt, and restart from scratch is fantasy. I don’t know if what they are attempting will work, but I heard enough to believe if they can fix this packaging problem and better define how contributors can benefit, it may actually work. They are still finding out the mess that Mooney was, and know what needs to be done, and are sorting it out. Mooney did not even have a database that they could query for inventory management. This was shocking to me, something so basic and critical for any manufacturing supplier, was left in the 70’s tech. They appear to be very close to converting that, which is a huge step. I am stopping short of advocating for this assurance plan, but there is potential to make it work, and am much more supportive than I was since talking to them.4 points
-
Has anyone asked the question, has LASAR or Mooney, for that matter, gone to venture capitalist, banks ect for cash infusion. If not why not. If so what was the result and why. I can guarantee that most loans or requests of money from investors is rejected because of a lack of management ability to turn the company around, lack of business plans. So if a bank or other investors won't poney up, the next last gasp of air is to make an emotional plea to those with an emotional attachment and little business sense. Others are correct, the money is most likely like the alimony to an ex...gone as will be both companies. Money is rarely the root problem, management is almost always the problem. This is why buyouts get rid of management.4 points
-
Other than the TX-1 platform to drones, I don't think building airplanes should be the focus. I would take the existing fleet and make it better in quick turn items. Clearly we know that shops can make money on Annuals. I would have the Annual Plus program. Spec out your fabrics before you come for your annual and get an annual and a new interior in a couple of weeks. OR annual and overhauled brake system. Or annual and overhauled trim system. or annual and new panel. Or annual and new engine or annual and replacement Moritz gauges. This would fund the parts inventory process, because you would be selling parts with the annual. The factory has the patterns and capabilities to swap out seats by just building a few more. Most seat frames need some sort of repair anyways. New tail jack screws could just be swapped in and the others sent to rebuild. Other than color of fabric everything needs to be standardized and comoditized. Yes you can have a new panel but it is going to be a Garmin Txi and Auto pilot. No you cannot suggest how it is going to be laid out. Since the software configuration is standard it would save lots of programming hours. Just load it and test. If you look at Cirrus they have a upgrade panel program. Kerrville is a pretty good vacation spot. So set up some package deals with local vendors. Where people could stay the week then fly their annual and upgraded Mooney home. Then as cash is coming in, the standardized items panels, interiors, and such could be pushed out through the MSC network for local install. This is a proven approach that has served me many time in the IT world. If your IT world is struggling, it is because it is not standardized. I would reach out to JOBY and Archer aviation and see if they want to rent factory space to build their air taxis4 points
-
As I recall, there are further adjustments in the maintenance menus. As others suggested, be sure it is not only specific frequencies. Also, check basic things like turning off other systems. USBs can be problematic and only show up on certain frequencies. Add in local noise and it can open the squelch.3 points
-
Someone must have slept through Econ 101. This comment is simply not true. Core CPI which is what you are referring to was created in the 70's. Headline CPI or Headline Inflation includes food and fuel and is also measured monthly like Core. I see why people are confused this past week as both rates were the same, but that's just a rare coincidence. If you're focused on parts prices I would look at Core CPI and just goods, not services. Services late last summer was almost double goods. So, a little bit of parsing of data is helpful. I'm more of a PPI guy myself, but that's just me, Jerome Powell, and the rest of the Fed board. PPI cuts out a little bit of the noise. For work, I'm less focused on retail consumers and more focused sellers/producers/service providers which aligns better with PPI. In my personal life, I focus more on Core CPI as I am not sensitive to volatile food or fuel prices. Side note: Hangar supply is very often a permitting issue on the very broad whole (as someone who lends to FBOs). At some airports the environmental studies are eyewateringly long and expensive (having read a few, I think any dufus could write one). There's a reason why the large FBOs don't do a lot of greenfield development. One thing is for sure, this hobby or whatever you call it won't get cheaper.3 points
-
Try powering down the radios individually and see if the other radio behaves properly. It could be interference coming from your radios.3 points
-
Or replace the shock discs more often (like every 20 years, not every 45 years).3 points
-
This is a template for an adaptor plate I made on my CNC router for a Cygnet trim switch. The final was in 0.090 aluminum. It would be real easy to make the switchboard out of aluminum, I can't quite see - are all the inside faces vertical or tapered? And thickness? (I'm not a fan of 3D printing, always seems too fragile for the real world) Aerodon
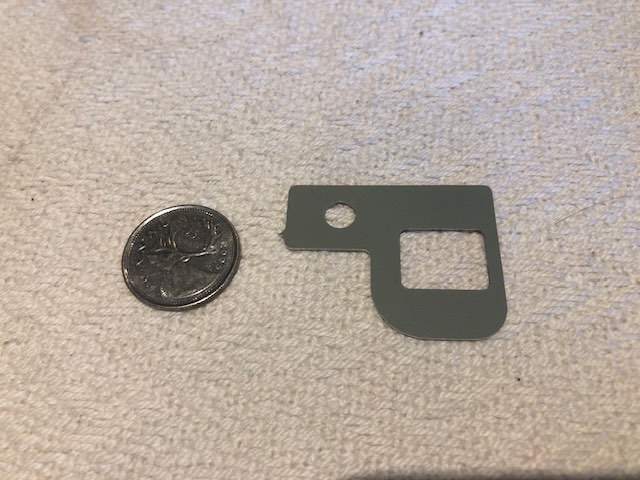 3 points
 -
The spar splice plate is steel, it is against the aluminum. If the corrosion is in the steel not too big of a deal. Drill rivets, remove steel plate. Clean plate, reinstall. If corrosion is in the aluminum it's a bit trickier. Get in touch with a mooney structure guy. Call Don maxwell shop. Get pictures. I just finished a 6 yr project. Left spar cap and aft stub spar replacement. Did it all myself with consultation with the structure guy at maxwell.3 points
-
What level of compliment would it take for you to print me a new engine?3 points
-
And, OPP. That’s the path I’ll likely take. Along with boneyards.3 points
-
Someone here mentioned that LASAR had the seat rollers out of stock. Evidently they listened and have now updated their stock. I purchased new rollers for my plane last year. In the screenshot, you can see today's price and also my invoice from 1/2024 to the right. Quite the price increase. I would like to think this is nothing more than a human decimal error, but I suspect it is not. This coincides with other updated pricing I've seen with LASAR. The sad truth is, I think we are far better off if Mooney shutters for good. Other orphaned airplane owners referenced earlier in this thread have fared far better than we will with LASAR in place. Some folks think that investing in LASAR's success will help protect the value of their Mooney. I think that increasing part costs by 1000% will quickly devalue the fleet. I think what LASAR is not telling us is that this deal is happening regardless of contributions to the Mooney Assurance program. I just don't know if their plan for profitability is well thought-out considering it's on the backs of the cheapest bastards in aviation.
 3 points
 -
I believe we can safely say what you're experiencing is an over-lean engine misfire. My plane has the exact same engine (IO-360-A3B6D) and at around 75 LOP it will start behaving badly a will lose a lot of power. The Lycoming operation manual says best economy for these engines is exactly at peak EGT. My G3X EIS says it is slightly below (around 25LOP gets more miles.per galon). Overly lean mixtures require a stronger spark to ignite. You'd need to have 100% sure your magneto, ignition harnesses and spark plugs are all in pristine shape to operate confidently at 50 LOP. Tiny variations in induction airflow or fuel injected at these settings will likely cause the hiccups you've seen. Different engines (even the same model) will have slightly different behaviors: my engine will run well at peak EGT up to around 50 LOP. The equates (depending on altitude and temperature) to 8.6 all the way to 7.4 Gal/h fuel flow. At peak I will see between 139 and 144 kts TAS. At 50 LOP I get around 122 to 127 kts TAS. I use these settings if ATC instructs me to hold or I know I'll have a lot of traffic in front of me.3 points
-
75 deg F LOP is pretty lean. Keep in mind that we are dealing with last century mechanical technology here. I sometimes notice a lag in FF with mixture changes. I have a spot around 9.9 gph where it seems to hang with no change in FF even though I can see the EGTs rising as I lean the mixture. Try running the leanest cylinder no leaner than 50 deg F LOP and see if that solves it.3 points
-
But please don't forget that you can still get it for just $104.91 with $2400 annual membership!!3 points
-
So I first have to apologize for hi-jacking this thread, but thought I would share my response from Dan @ Lasar. I first checked their website to get their phone number and their site now states that it has been updated, which is great. I checked the seat roller just last week and I know for a fact that it stated a cost of less than $12 a piece, and now it no longer shows “out of stock” but the price is $116.57. In talking to Dan he said that they only have 2 and these are the expensive ones. I stated, “Well if you say these are the expensive ones, where are the ones I saw listed last week?” He responded that they no longer have those. I know we were told that their pricing was going to increase, but that is ridiculous.
 3 points
 -
My Dad told the story of him doing an NDB approach in an SNB (Navy Beech 18). The procedure was to fly over the NDB, configure, go outbound on a course, turn to the inbound course, all while descended. So he comes out of the null over the NDB and drops the gear and flaps, and gets the null. So he cleans up to go missed, and he comes out of the null. He did this a couple of times to figure out that with the gear and flaps down, his TAS was lower than the windspeed and he was going backwards.3 points
-
You mention "finding the sweet spot". If the intent is to support an existing fleet by solely manufacturing parts then there is no "sweet spot" in buying the equity of an airplane manufacturing company. Buying equity means buying the assets and assuming the liabilities of a company structured to make and sell complete airplanes. It didn't work for FletchAir(Grumman/Tiger), Belanca, Commander, Aerostar, and I am sure there are others. They all bought only the assets (the "intellectual property" and sometimes a few assets like jigs/fixtures) in a bankruptcy sale. It was literally an "auction on the courthouse steps". They have all been successful in supporting their legacy fleets. It only worked if they swept the Liability ledger clean, free and clear, so that they could start fresh rightsized for just parts manufacturing.3 points
-
I think a Picasso painted tool shed would look awesome3 points
-
Can’t really top what @dkkim73 just put down for you. If you’re looking at K models, I might recommend the 252 or Encore since that gets you the MB or SB engine which came with the intercooler and a variable waste gate. In your price range you should find very nice examples of these, some probably are fiki too. The k has the same fuselage as your j, but a turbo 210 or 220hp engine that climbs straight up to 20k or higher. Good useful load and fast in the teens and higher - easy 170-190kts depending on altitude. Also on 10.5-11.5gph. Acclaim is probably faster on more fuel. No Ks came with g1000 though, but some have been fixed up nice!
 3 points
 -
I had a dream last night I got brought into KROA all goofy-angled by ATC and had to go around, and @donkaye, MCFI, you'll be happy to hear I retracted my gear before raising my flaps during that go-around. :)~ --Up.3 points
-
I don't know about anyone else but I don't need things "packaged" for me. I abhor PR. Lasar, guys, if you're really listening, and you want to win people over, tell the truth, the whole truth, nothing but the truth. Give it to us straight, shows the numbers, show the plan and then lets see what you got.3 points
-
If I recall, the factory prefers to do ‘modern’ Mooneys and let Vintage go to the MSCs like Maxwell’s- due to the overall knowledge MSCs have on Vintage aircraft. I believe a lot of the vintage tooling is no longer at the factory also. I guess a call to the factory would be a good idea to see what support it has for Vintage Mooneys… I’ve gone to Maxwell’s and SWTA for my Vintage Mooneys and my experience has been excellent. Edge Aviation near me also has experience with Mooneys and I go there a lot for most other work. I wish David ( @Sabremech ) was closer :o) I’d go to him for sure… -Don3 points
-
It's probably a lot less expensive to buy a Stairmaster than to add electric trim , and could improve useful load. . . lol. However, suggesting that may cost you much more than electric trim.3 points
-
It’s hard to describe how to fix them except to suggest looking at pictures of others here on the forum. It could be as simple as slotting them so they sit flush with the cowl. They may actually be too wide as well. Not sure you need new seals, so much as they need adjustment. As for where to buy, there are various levels. Aircraft Spruce has raw materials. @Gee Bee Aeroproducts often shows pictures of the very nice seals he sells. McFarlane also has a unique seal they sell. This may not be a 100% solution, but certainly a starting point.3 points
-
Those baffle seals look janky as hell. I’d start there for sure.3 points
-
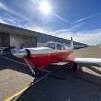
Exactly, turn key. Modern avionics. Low time engine. Speed mods. When you really look at comps, I think it supports the price nicely. An M20E in similar condition should support this price too. I'm really curiuous what the new MOSAIC rules will do the value of the whole GA fleet. More people competing for the same limited fleet of aircraft will likely inflate prices up the whole chain.
 3 points
 -
Taildraggers rule
 2 points
 -
Whoever did the engine install is responsible for those baffle seals unless somebody messed with it afterwards. That's awful. Also, when reinstalling the cowl the seals must be checked or proper positioning - every time. The (metal) baffles also wrap around the bottom of the cylinder and are held tight to the fins with springs. Check that those are intact and doing their job.2 points