Bob_Belville Posted March 8, 2014 Report Posted March 8, 2014 What are you using for insulation behind the panels. Also what do you recommend for inside the firewall in front of the pedals. Speaking of pedals, the boots are a bear to get at, I see they are held down with a plate that's held down with tiny screws to the floor and bulkhead. Any tricks to replace this and who supplies them. Thanks for the help on my M20D ©. Great source of Mooney Love here! Ron I have no tricks. I did spend more than a few uncomfortable hours with my head and shoulders stuffed into the leg wells removing and replacing those rudder pedal boots. (I'm 5'8" & 220#, 70+ year old) I found a small electric screw driver and a flex drive, short screw drivers, an awl, and patience Useful. A skinny friend would have been really nice. I used the hot water heater blanket material from Lowes and contact adhesive to cover/insulate the wall forward of the rudder pedals I may get around to adding a layer of fabric or vinyl to cover the metallic look though it is not really visible until you stand on your head. 3 Quote
isaacpr7 Posted May 5, 2014 Author Report Posted May 5, 2014 Latest updates on my interior remodel: I had to take a few weeks of leave so that I could get the project going but the cold wx cut into my fiberglass drying times. I am done with the panels and began installation but I ran into a small problem you guys might be able to help with. My wind lacing was torn to pieces so I purchased some new one and I cannot install it because the piece that holds it in place (looks like a "J" channel of some sort) is also broken to pieces. Does anyone know where I can purchase this piece at an affordable price? By the way, I decided to repair the pannels with fiberglass in the back and using flexible putty on the cracks shown in the front. I first used ABS plastic chips but it took too long to dry for me and it did not like prolonged sanding. After wasting my time with the ABS chips I found that the flexible putty worked best and allowed the touch up intervals to be shorter. Quote
carusoam Posted May 6, 2014 Report Posted May 6, 2014 The windlace guy... Who also does carpet... http://www.airtexinteriors.com/catalogue/carpets.php The low cost material is great, looks similar to leather, relatively easy to install if you have some talent... It is miraculously better than the broken crusty stuff that was delivered in 1965.... Best regards, -a- 1 Quote
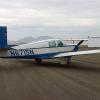
isaacpr7 Posted May 7, 2014 Author Report Posted May 7, 2014 So I was supposed to be done with the installation today but had a minor setback. As I was drying the last coat of paint on the overhead panes, the wind picked it up and when it hit the ground it broke a corner. This means that I have to re-fiber the panel and start over again before I can install it. It will set me back several days but I am glad to be almost done with the project. Here are some pics for those of you that have been helping with suggestions throughout the process: 1 Quote
isaacpr7 Posted May 7, 2014 Author Report Posted May 7, 2014 The windlace guy... Who also does carpet... http://www.airtexinteriors.com/catalogue/carpets.php The low cost material is great, looks similar to leather, relatively easy to install if you have some talent... It is miraculously better than the broken crusty stuff that was delivered in 1965.... Best regards, -a- I called the company you referred me to and they don't sell the part I was talking about. It is the J channel that holds the windlace in place. Quote
mike_elliott Posted May 7, 2014 Report Posted May 7, 2014 I called the company you referred me to and they don't sell the part I was talking about. It is the J channel that holds the windlace in place. You might want to get with Bruce Jaeger bruce@jageraviation.com. He has a black silicone windlace that the panels can tuck into and really provide a nice, auto like finish. It doesn't need the "j" channel you are referring to. 1 Quote
scottfromiowa Posted May 7, 2014 Report Posted May 7, 2014 Your photos are bring back memories...nightmares really. Sorry about the damage to the part...I had similar trials and tribulations with interior re-do. We put one of the window brackets on backwards and need to remove/re-install screws...We have not "got to it" for over a year...I try not to look from outside at top of pilot window...nothing to see here...Oh, well., looks WAY better than before. Perfection is tough with the re-do on the plastic. I found the putty shows up as the grain or lack of it shows if you really look close...so I don't. Hope rest goes smooth. Enjoy your "new budget interior" Quote
isaacpr7 Posted May 7, 2014 Author Report Posted May 7, 2014 Your photos are bring back memories...nightmares really. Sorry about the damage to the part...I had similar trials and tribulations with interior re-do. We put one of the window brackets on backwards and need to remove/re-install screws...We have not "got to it" for over a year...I try not to look from outside at top of pilot window...nothing to see here...Oh, well., looks WAY better than before. Perfection is tough with the re-do on the plastic. I found the putty shows up as the grain or lack of it shows if you really look close...so I don't. Hope rest goes smooth. Enjoy your "new budget interior" Scott, You are right about the nightmare. I now know why shops charge so much money to do this kind of work. If I could have afford it, I probably would have had someone else do it. The biggest frustration putting it all together was figuring out where all the bags of screws belonged and making some hairline cracks as I was forcing the one of the panels back in place. As far as the putty goes, mine did not show up through the texture. I used SEM flexible texture paint (only comes in black) for all the repair areas and SEM white plastic paint to go over it. Because the textured paint was black it took multiple coats to cover it up. 1 Quote
carusoam Posted May 8, 2014 Report Posted May 8, 2014 I'm not familiar with the channel. The windlace was screwed in place behind the plastic panels. I took out the old and swapped the old screws for SS ones. '65C. The windlace was original as were the plastic panels... Best regards, -a- 1 Quote
Bob_Belville Posted May 12, 2014 Report Posted May 12, 2014 So I finished installation of all my interior panels after a long remodeling process and now my avionics master switch will not power my avionics. The only thing I can think that would have anything to do with it is when I disconnected the speaker and lighting wires on the overhead panel. I have always had an additional switch in the circuit breaker panel that also powers my avionics as an alternate source but now it is the only way I can get power to the avionics. I also noticed that when I cranked the aircraft to run it up, the aircraft wants to shut down if I select the right magneto. When I select the left magneto I don't even get a drop on RPM. Does anyone have an idea as to what might be causing these issues? Sent from my SAMSUNG-SGH-I337 using Tapatalk Isaac, you might want to start a new thread on the Avionics Master and mag issues. I don't know if they could be related but the mag check symptoms indicates the right mag is grounded. The wiring and the switch should be checked. Be careful around that prop! Quote
isaacpr7 Posted May 13, 2014 Author Report Posted May 13, 2014 Isaac, you might want to start a new thread on the Avionics Master and mag issues. I don't know if they could be related but the mag check symptoms indicates the right mag is grounded. The wiring and the switch should be checked. Be careful around that prop! Bob, Thanks for the info. I will look into that. I will also move this thread. I posted this issue using Tapatalk and it ended up on the wrong side. Quote
Yetti Posted March 5, 2015 Report Posted March 5, 2015 Question on the reclining rear seat handles on the side panels. How do you remove them? Screw removed, forgot to check for the 70s style clip behind the lever, is that what I am missing or are they just supposed to pull off? Quote
Yetti Posted March 6, 2015 Report Posted March 6, 2015 Part number 33 Roll Pin is the answer. Not sure how to get to it. Does the panel just slide over the lever? Quote
ryoder Posted March 6, 2015 Report Posted March 6, 2015 I failed miserably in painting my passenger side plastic instrument panel overlay with krylon fusion. Had to remove the paint as it spat out incoherently leaving a terrible spotty coverage. Took the wind out of my sails and I might end up paying a shop to do the work for me because I like my interior to be nice. I repainted panels in a Camaro and installed leather seat covers twice but this experience was deflating. Quote
Wakeup Posted March 8, 2015 Report Posted March 8, 2015 I repainted everything several times. An insect would always land on my last coat. I removed and reinstalled the metal around the front window next to the door prob 4 times trying to get my door to shut completely. Finally I realized it was the trim around the door that needed trimmed. Everything about a plane takes more time then you think, but I love to save money. CB Troy 1 Quote
rob47v Posted March 8, 2015 Report Posted March 8, 2015 I repainted everything several times. An insect would always land on my last coat. I removed and reinstalled the metal around the front window next to the door prob 4 times trying to get my door to shut completely. Finally I realized it was the trim around the door that needed trimmed. Everything about a plane takes more time then you think, but I love to save money. CB Troy Paint in the early morning hrs. This is what I was tough many years ago the early morning dew keeps the bugs down. It's always worked for me!!! 1 Quote
aviatoreb Posted March 8, 2015 Report Posted March 8, 2015 I failed miserably in painting my passenger side plastic instrument panel overlay with krylon fusion. Had to remove the paint as it spat out incoherently leaving a terrible spotty coverage. Took the wind out of my sails and I might end up paying a shop to do the work for me because I like my interior to be nice. I repainted panels in a Camaro and installed leather seat covers twice but this experience was deflating. A professional spray guy will spray much smoother and with more control than a rattle bottle sprayer. Quote
Chimpanzee Posted March 8, 2015 Report Posted March 8, 2015 just wanted to add another chimp photo... Quote
Recommended Posts
Join the conversation
You can post now and register later. If you have an account, sign in now to post with your account.