Leaderboard


Popular Content
Showing content with the highest reputation since 08/26/2025 in all areas
-
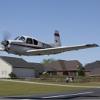
Due to the significant pitch up when flaps are retracted in Mooneys, especially the long body Mooneys, I have taught to retract the gear 1st, trim down, then retract the flaps when going around. I always taught the student that the drag of both were comparable. While most POHs say retract the flaps 1st, in this case I think safety is more important in my opinion than an incorrectly written POH. Finally, in the Acclaim Type S the POH does have the gear being retracted before the flaps in a go around. I recently saw a YouTube video of a recent test conducted in a Bonanza on the given topic. For the Bonanza the conclusion was that the flaps should be retracted first. I decided to run the test on my airplane, a Bravo M20M. At 4,500 feet I slowed the plane to a steady 105 knots ( 5 knots below maximum flap extension speed), engaged the autopilot in altitude hold mode and extended the gear. The plane stabilized at 87 knots for a drag reduction of 18 knots. I retracted the gear and returned to a stabilized 105 knots. I then extended full flaps and waited see where the airspeed would stabilize. It stabilized at---87 knots, the same as with the gear extended. Demonstrated conclusion: Confirming my earlier statement, for safety reasons, the gear should be retracted while trimming down before the flaps are retracted in a Mooney go around.8 points
-
I’ve done this in my M20J. Making it from 600’ depends on the wind. It’s dicey if the wind is calm. I can always make it from 800’ and if there was much wind on takeoff you have to be careful if the runway is short because you’ll be landing with a tailwind. I brief 800 as my minimum turn back altitude under normal circumstances. You might consider that in some cases the best option might be to keep the gear up to stretch the glide and land somewhere flat on the airport gear up if you can’t make the runway. When Don Maxwell had to do this he told me he almost forgot the gear and put it down in the flare. He heard thump, chirp in short succession. He wouldn’t have made it if he had put the gear down earlier. He also had multiple long runways and taxiways available - things to consider when you brief.7 points
-
I don't know where you heard about that reputation and I certainly have not seen it other in isolated situations. It's these situations that need to stop the fighting and bickering. This is the single BEST place to talk Mooneys and it's important for all of us to make it a welcoming and productive place for Mooniacs to hang out and share experiences (good and bad) that others may glean valuable information. I'm sorry if someone made comments about your weight. That's not right in any fashion. Also, if you went back to all of my posts, you will see that I have not attacked or said negative things about anyone personally. Including you. We want everyone here, let's help this forum have a really good vibe.7 points
-
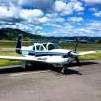
These things rock! Got us above the thin smoke layer across Oregon and northern Nevada. Yes it took 17,500’! But she’s real fast up there. Got to see Burning Man too. 6 in the pattern on adsb as we went by - no thanks!

 6 points
 -
Pilots are the best obviously! Sent from my iPhone using Tapatalk6 points
-
I missed this when it was unveiled at Airventure last month. It sounds like Piper is planning to sell brand new Seminoles with DeltaHawk engines, using an STC that Piper owns. https://generalaviationnews.com/2025/07/24/piper-unveils-seminole-powered-by-diesel-deltahawk-engine/ This is the more mature 180hp variant, not the more interesting 200 or 200+ variants. But still, getting more of these in the wild in certified aircraft will tell us a lot more about the long term viability of the powerplant. https://www.deltahawk.com/engines/ Given all of the painful recent decisions on UL avgas, I’m happier thinking about diesel again …5 points
-
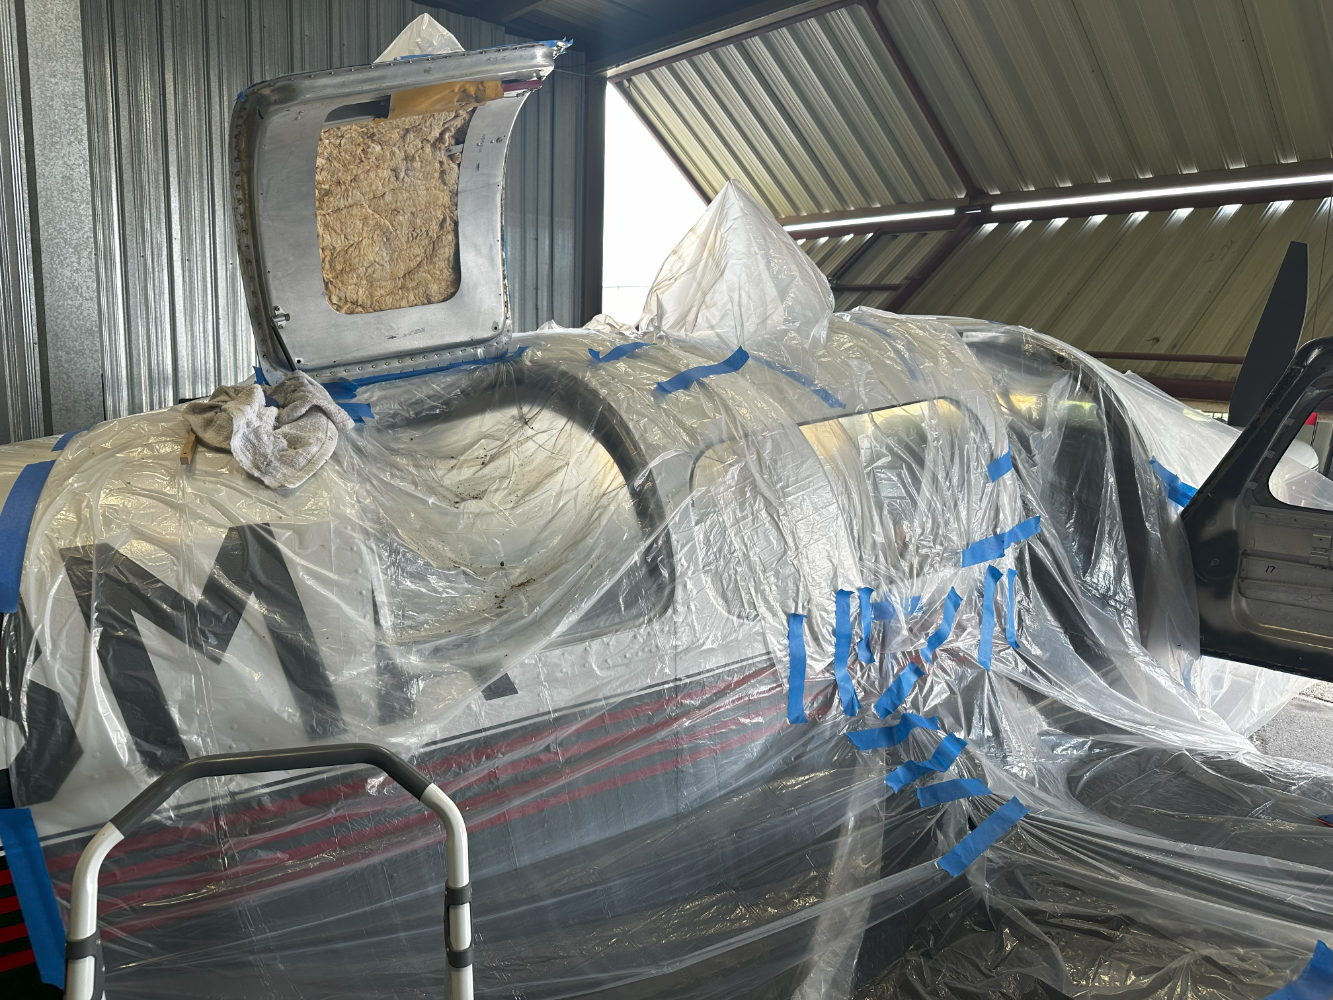
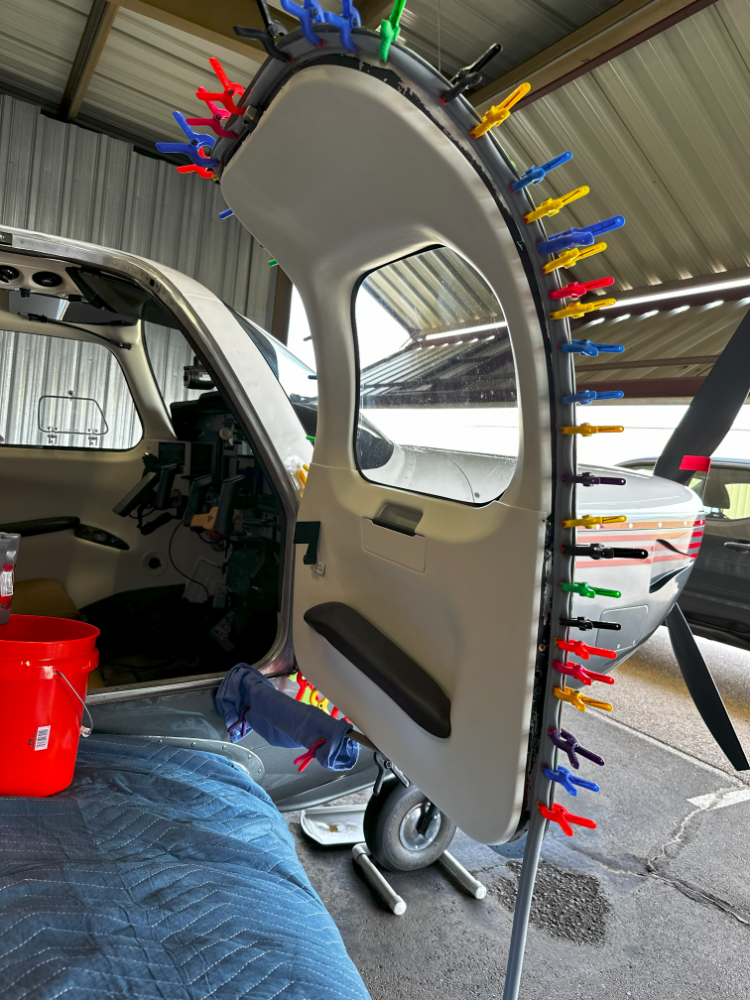
Finished installing the GeeBee seals. First off, after reading all the previous descriptions of issues with seals I was apprehensive...but in hind sight I think this was unfounded. I installed the new profile (larger bulb, less durometer) on both baggage and main. New GeeBee (left), Old GeeBee (middle), Mooney seal (right) Cleaning off the old seals: Baggage door seal looked different than the cabin door. Baggage door was the foam core rubber seal, but the main door was dense crunchy foam seal. Baggage door came off cleanly and way too easily, but the cabin door came off in chunks. The money was to use plastic razor blade scrapers to scrape off the foam between the rivet heads and get down to adhesive. This worked surprisingly well but was a little tedious in places. Main Baggage I used cheap thin plastic drop cloths from Home Depot with some painters tape to mask things and keep any remover or parts off the paint and out of the aircraft. It was an easy step that made clean up super easy! I took off the interior panels for both the doors. I initially removed the hold open arm on the main door, but it really didn't open that much more and I think you could easily just leave it on and be fine. But it makes it a little easier. If you do take it off, be mindful of the washers and the cotter pin when removing. Hold open arm parts: Door Cotter pin AN380-2-2 (MS24665-132); Washer AN960-10; Washer AN960-10L I then used white shop terry cloths (and a brass brush as needed) with a small spray bottle filled with Adhesive remover. Given the fumes I'd recommend good ventilation and a respirator/glasses/gloves. Depending on how thick and crusty your old adhesive is, dictates how much you need to use a brass brush. Some have described using drill mounted brass brush, and I found that I could control the use of a brush easier without worrying about damage to the underlying frame by hand. Being able to spray the adhesive and keep it wet as it softened the adhesive made it MUCH easier. With softened adhesive sometimes using the corner of a terry cloth rag dipped in some adhesive remover pulled off the top layer of the glue and that coupled with a brush turned it into about an hour+ per door. I think the 3M General Purpose Adhesive is less damaging to painted surfaces than other types of removers. I think overall it worked well and I had no damage to paint or any surfaces inside or outside the aircraft...although I did mask with drop cloths very well. Ounce of prevention is worth a pound of cure. 6-pack of cheap plastic drop cloths from HD Plastic Razor Blade Scraper 3M 08984 Adhesive Remover Small 2 oz spray bottle Wood handled brass brush After cleaning off the old adhesive, I used isopropyl alcohol to clean off the metal, cleaned up the drop cloths/area, and reassembled the hold open arm and reinstalled the door panels. To prepare for door seal install the next day, I remasked using painters tape along the back edges of the doors to protect the paint from glue/from clamping. I threw a clean moving blanket over the wing walk and wing around the main door to keep things off the paint and prevent paint drips on the wing. QUICK ASIDE: I debated using the 2-part silicone cement that GeeBee includes based on comments here on MooneySpace about something like 3M 08001 yellow "gorilla snot" that has "more working time"...THIS WAS COMPLETELY UNFOUNDED. First off, you can't use rubber cement on a silicone seal...so don't even try to use 8001 on a GeeBee seal. But I've used gorilla snot and it's stringy, messy, and goes on way thicker than you need. I think the cement GeeBee includes is Momentive SilGrip PSA529 & SRC18 Silicone Contact Adhesive. And a huge shout out to Guy as he has this packaged with mixing stick, measured bottles, a pipette for mixing small amounts, and even paint brushes to apply...its clear, just the right consistency to lightly apply just where you want it without running or dripping, and is SO much easier to use than 8001. If you're apprehensive about using GeeBee's cement...don't be. That's just silly. BAGGAGE TIPS: For the baggage door you want to install so that the "tail" of the "P" seal goes on the raised part of the door ~right around the edge of the door panel. You want to make sure you have enough exposed metal at the edge as there is a slight profile at the edge that will bind if you put the seal too close to the edge of the door. Also, by putting the tail on the raised section, it allows you to easily and smoothly turn the corners. The part closest to the hinge (top of the baggage door when closed) should be close to the raised section away from the hinge. So basically on the baggage door it's easily to follow the tail along the raised part lined up with the edge of the interior panel. Make sure you put your seam at the BOTTOM OF THE DOOR which is the higher part when you have the door open. MAIN TIPS: Get inside your aircraft and use a thin pencil stuck into the gap in front of the hold open arm. You can use a pencil to make a mark along the bottom frame of the aircraft to see where the seal should go. You can't quite get the entire bottom marked with a pencil, but you should be able to get enough to see the idea of where the radius of the door frame goes. Along the sides and top you want to center the "P" bulb roughly on the rivet heads, however you want to make sure that when compressed that the seal doesn't flatten past the edge of the door frame. Take a look at your door frame and it should be obvious where you want the bulb to hit the frame. Really the only tricky point is really at the front lower corner due to the gap from the hold open arm. If you followed the interior panel the seal would be in the gap and not sealing anything. With a pencil mark you can aim to have the edge of the tail at the pencil line to make sure the bulb is contacting the frame. Then once you turn the corner you can again align the bulb with the rivet line. I mixed up the epoxy into a small "baby food" size container that I got a 4-pack from Target. Take a small piece of seal to see where you need to apply the seal. So use the paint brush and apply a THIN layer of adhesive on the frame where you're going to put your seal. If you're doing both seals, then I'd suggest starting with the baggage door, then main. So apply thin layer of adhesive to the frame of the baggage door, then apply to the main door. You can use a hair dryer to "speed up" the drying. What I'd suggest is apply glue to both, then only use hair dryer on the baggage door and the main will dry while you're applying the baggage seal. Use isopropyl alcohol to clean the seal. Then start at the BOTTOM of the door (high point when door open) and apply a thin layer of adhesive on the seal tail up to the bulb (just the part that will lay flat). Use a hair dryer to dry until tacky. Then place the seal TAIL inside / BULB to the outside. Extra points to apply the seal end between rivet heads so that each end will glue to flat metal instead of right over a rivet. If you're at a point where you can apply glue to the hanging seal you can apply to 10" of seal and dry. But slowly apply the seal when the glue is tacky and press firmly to adhere. I used small clips from Harbor freight (I bought 2 x 22 piece packs and it worked perfectly) to hold the seal as I moved along, but with the adhesive properly tacky the seal will hold itself. When I ran out of clips, I'd harvest from the initial clips placed and move the clip train along the seal. The adhesive is pressure sensitive so press the seal firmly and it will hold. When you get back to seam, cut the end of the seal LONG. Then slowly cut a little at a time until it requires very slight compression to fit. This will allow you to join the ends together with cement. Then move to the main door and make sure the adhesive is tacky...if not, you can use the hair dryer, but I'll bet you'll take at least 20 min standard dry time to apply the baggage door seal. Clean the seal with IPA. I started on the bottom of the main door and worked towards the hinge. That allowed me to follow the pencil line and turn the corner. Then it was smooth sailing to follow just inside the rivet line. HINT: you don't want the center of the bulb closer to the edge of the door than the center of the rivet line. Basically when the bulb is compressed, you don't want it extending past the edge of the door. I think mine were actually centered on the inside edge of the rivet line. On the main door with a moving blanket on the wing, its easy to keep the seal laying on the bulb and apply adhesive in a longer length of seal. But still apply to the door in 3-5" increments and press firmly to adhere and then use the clips. Once the seals are in place, go back though and make sure the seal is firmly pressed to the door after you've removed the clamps. Then let cure with doors open for 12-18 hours. The next day is the moment of truth. If you closed the door prematurely, you could possibly glue more of the bulb seal down to the frame than you need. I applied a thin layer of silicone lube/paste to the seal, wiped off the excess and then closed the door. Firm, but not cumbersome. Seals well all around. If you need a new seal, I wouldn't hesitate to use the seal and kit from @Gee Bee Aeroproducts. I was way more apprehensive about this than I should have been. But give yourself a good 3 day stretch to make sure you have plenty of time to finish and take your time. Day 1 clean off old seals, clean up and reassemble interior panels. Day 2 to apply new seals. Day 3 lube seal and close, then leave in the sun to fully dry and cure.


 5 points
 -
We have a 1987 M20J here with 2700 hours on it. It's never had a cylinder off. It still looks good on the borescope and the compression test and it doesn't use too much oil so I don't know where the end is, but it's not there yet.5 points
-
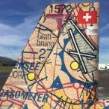
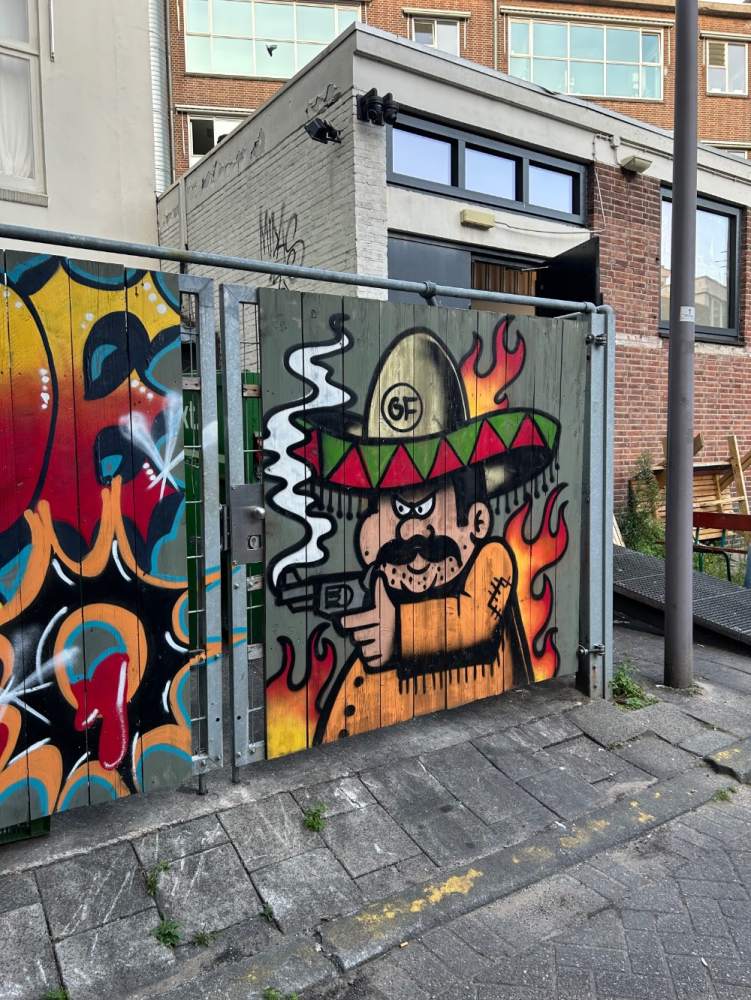
I flew up to Rotterdam where the street art is off the charts. The biggest challenge of Rotterdam is pop-up thunderstorm cells. I studied the weather, and studied and studied. Everything said stable weather the whole time. Then the morning of departure, boom! Pop-up thunderstorms at both ends of the runway. Luckily they disappeared as quickly as they came, so it's wasn't a big deal. I don't have too many pictures of the flying, but here is one, plus examples of the super cool street art with one work in progress


 5 points
 -
@Aaviationist I don't have a dog in this fight at all, but I have seen too many good and productive participants on this forum leave because of personal attacks. Yes, tons of people have differing opinions and that can be healthy and hopefully sharing these differing opinions, we learn. Personal attacks are different that just having differing opinions and are not welcome here. Please change the tone before more people leave.5 points
-
Follow the money....4 points
-
Ahhh...yes. The universal "it is for the children" argument that we are all supposed to buy without questions. By the same respect, it is morally or ethically acceptable for any airport governing body to allow or mandate sale of a product that has been misrepresented as "safe" while causing damage to aircraft? I guess it is, so long as it is "for the children".4 points
-
The passenger seatbelt is a regular as well…4 points
-
Flew to our place in CO for Labor Day weekend. Mt Humphrey's by Flagstaff High Desert Ship Rock KPSO landing in light rain


 4 points
 -
Well fortunately a few engine shops responded quickly and the prices weren’t as bad as feared. Western Skyways is going to handle the IRAN this time.4 points
-
We're always keeping an up-to-date strategy for different makes & models.4 points
-
A lot of problems can be avoided by making the decision to go around early when there is still sufficient airspeed and altitude that technique isn't critical. If you have to go around during the flare it gets much more dicey. For those interested, here are the aerodynamic coefficient curves for a M20K clean and full flaps that I got from a Mooney engineer many years ago. I don't have one for takeoff flaps. M20K Aerodynamic Coef - Flaps 0.pdf M20K Aerodynamic Coef - Flaps 33.pdf4 points
-
More important IMO to make sure you are with an underwriter that won’t drop you at a certain age since the ones that don’t generally don’t take new risks on after a certain age like 70. Cheapest price shouldn’t be the primary factor for older pilots but continued insurability and limits IMO. Sent from my iPhone using Tapatalk4 points
-
I never go full flaps until committed to land and often I never go full flaps. Half flaps is take off configuration for a F. In a go around I am configured for maximum performance and than it is positive rate, gear, than flaps.4 points
-
I repeated Don's experiment in my M20J MSE at 2500' and an initial speed of 100KIAS. Gear down reduced airspeed to 77 KIAS, flaps full down 78 KIAS, gear and flaps both 70 KIAS. So gear and flaps were approximately the same with a 23 KIAS reduction. One of the issues with Mooneys is that the control forces can be higher than many other airplanes of similar size and weight. Sometimes you have to push or pull pretty hard to make the airplane go where you want it to go until you get it back in trim. There is nothing wrong with using two hands on the yoke if that's what it takes. If you check the stall speed table in the POH, you'll notice that Mooney flaps reduce stall speed more than most other comparable airplanes. But, most of the stall speed reduction comes from extending full flaps. The takeoff flap setting mainly changes the deck angle and adds a little drag.4 points
-
All of them. But, the M20S probably has the best rates for non instrument rated pilots. The more expensive, the lower premium per dollar insured, too! So, please, let's start production of $800,000 Mooneys. It's for my children.4 points
-
Insurance cost comparisons are meaningless unless you state the insured hull value and the liability limit including whether it is “smooth” or has a sublimit.4 points
-
My experence is retracting the flaps will reduce lift and the airplane will dip a bit. This isn’t something I want during a go around. Especially close to the ground. I don’t touch the gear or flaps until I have a positive rate of climb and have climbed at least 100 feet. That usually isn’t a problem, by the time I’m done messing with the power and trim, the plane is already climbing and I can do the flaps and gear at my leisure. Another reason to do the flaps first, is that is where your hand is, right by the flap switch. Move your hand from the throttle to the flap switch and then up to the gear.4 points
-
I’m all for Darwinism.4 points
-
As an update on this post, I had planned to get a second cylinder at some point to either cascade or just dual-stage fill the O2 in the plane. However, with the Mountain High 02D2 system I added about the same time, I go through the oxygen so slowly, I've found it unnecessary. I just refilled the supply cylinder for the first time. It still had 700 PSI left in it, but I wanted the plane topped up more for a long cross-country with 2 on board. So, if you're considering doing this, maybe start with one cylinder and see how long it lasts you before you invest in a second one. I have found having the setup in the hangar has greatly increased the percent of the time I fly on oxygen, and has also increased the average altitude I fly at. I'm in clear smooth air more often and feeling better and less fatigued when I land. All around worth it.4 points
-
Hello all, After a rough couple months of spam-bot invasions I have decided to make some critical changes to the way new users to the community are validated and how Supporter level memberships work. Here are the key changes: When a new account is created here it will be placed in a group called Unverified Members. This group can browse the site but cannot create any new content. To upgrade this account to a Verified Member you have two options: a) pay a $2 fee for instant validation which is good for the life of the account or b) contact me @mooniac58 with a picture/scan of your valid ID to prove you are who you say you are. The old manual $10 minimum donation for upgrade to Supporter level has been replaced with a $25/year automatic subscription system that will renew every year on its own unless you cancel it. No more waiting for me manually upgrade your account, etc. Those that purchase the $2 instant validation will get a $2 credit towards their first year of Supporter level access...so $23 for the first year and $25 thereafter. Generic Donations: Separate from the membership plans, users can still donate arbitrary amounts to support the site using the new donations page. Those that donated prior to today with the old system will continue to have Supporter access until 12 months from your last donation as long as that was $10 or more. These are the current membership levels for members: Unverified Members - New accounts, can browse site, cannot create content or message others. Verified Members - Either paid the $2 fee or proved in another way that they are a real person. Can post new content but not in classified forums. Limited to 200MB total storage for attachments, photos and other files. Supporter Members - Signed up for $25/year subscription. Do not see advertisements on site. Able to post non-commercial topics on the classified forums. Storage limit of 1GB. Sponsor Members - These accounts have paid a fee to have a limited number of commercial posts on the forums (usually 1 per month limit). Some final notes: While I am confident new spam-bots are not being registered on the site, I am quite sure that they have dormant accounts that were created in the past that still exist undetected. For this reason we have and will see brief uprisings where they rise up and make a bunch of spam posts. We will ban each of these as they occur and wipe the content. I don't expect much of this and the past few days have been clear skies here. If you created an account prior to August 5, 2025 and did the normal email based activation then you are in the Verified Member group. No one was downgraded during this process and you don't need to do anything to validate your account. Please do not do the $2 validation process (I am still working on hiding this option for everyone except unvalidated accounts in the site). I will be making small changes here and there to try and make it more clear how new users validate their accounts. For now I hope newly registered members find their way to this topic to get the instructions. Eventually I hope to figure out how to customize the site more to guide new members through the process better. And lastly a big thanks to everyone who has supported this community over the past 17 years! Craig4 points
-
Since the Mooney Summit is approaching, I want to give everyone a heads-up about recent changes affecting all Hillsborough County Aviation Authority (HCAA) run airports: KTPA, KTPF, KVDF, and KPCM. The county has implemented a new rule requiring any outside mechanic or service provider to submit an application to Hillsborough County for approval before being granted access to airport facilities. This will and already has negatively impacted the tenants of Tampa Exec. At Tampa Exec in particular, there is only one on-field mechanic. I’ve relied on a trusted mobile mechanic—formerly the manager of one of the local flight school shops—for most of my maintenance. However, under the new policy, any mechanic must now carry a $1 million dollar liability insurance policy as well as specific hangar liability coverage to even be considered for access. This restriction can cause significant problems. For example, tonight I noticed a Baron that had returned this Friday to the field. Unfortunately, it looks to have suffered a nose gear collapse on landing, damaging both engines and props. In that situation, the owner has no real options: he’s limited to the one on-field shop, which is already overwhelmed, and bringing in outside help has become so tedious who the hell would want to work with the FBO. This policy applies across all four HCAA airports. Two of them (KTPF and KPCM) are managed by Atlas Aviation, which although I don’t love, seems to be a bit more pro GA than Skyport, the FBO that currently runs Tampa Exec. Many tenants were hoping Atlas would take over Tampa Exec, but Skyport somehow won the contract for a second time. The impact on tenants has been overwhelmingly negative. The one existing mechanic on the field opened his shop only a few years ago and is very capable, but his space is shared with the largest flight school on the airport. With limited capacity, the workload ratio is easily one mechanic to 200 tenants. The county has restricted all maintenance activity to that single hangar, preventing new shops from opening. They have built one new bulk hangar and are planning to build another. Space is not an issue, it’s them not caring or willing to put the effort forth to keep GA going. They have yet to build any new shade or enclosed hangars in over a decade. They’ve sure as hell have been doing construction non stop for the last 4 years, mainly to benefit the high dollar jets coming in. That leaves mobile mechanics, like the one I’ve used, as the only practical alternative. He currently works for a large avionics and maintenance company but started his own mobile business with hopes of eventually opening a dedicated GA shop. He’d like to open a shop for airframe and avionics work, but despite months of requests, the FBO has refused to provide him even a small space. The opportunity for growth at KVDF is obvious to everyone except the FBO and county, who continue to push policies that work against GA. I’d hate for someone visiting Tampa to find themselves stranded over a minor maintenance issue, unable to get timely help. Aviation is supposed to be enjoyable, but dealing with an airport system that feels anti-GA and anti-business takes much of that enjoyment away. Finally, a word of advice: avoid the $7/gal avgas at the HCAA airports. Instead, stop at KZPH, just 15 minutes from KTPF, where fuel is closer to $5/gal and the atmosphere is much more welcoming.3 points
-
If we don’t use full flaps for landing, what are they for? I have landed a Mooney in every flap position imaginable. The plane can be landed with any flap position. I think it lands better with full flaps in all circumstances. Some will offer a different opinion. The less flaps, the more nose up pitch is required.3 points
-
I teach the impossible turn maneuver to all kinds of Mooney pilots; even a past student pilot. With our good glide ratio and some practice this is not a hard maneuver. But i don’t think anyone can learn to do this from a video, but hopefully the video inspires folks to seek out training on how to do this since few will pull it off without practice. This is why we first start off with simulating the departure climb to a safe altitude, pulling throttle, waiting 3 sec for startle effect and commencing a 360 degree turn to measure your altitude loss. Every single person has improved significantly with some coaching and practice with each successive try. We’ll add 50% buffer to their altitude loss to derive their personal minimum turn back altitude. Usually by the third try they’ll be ready to make a successful try. I’ve successfully done this with student in calm winds to winds over 30 kts always returning to the departure end of the runway. With strong winds you have a whole different problem than making it to the runway but slipping down steeply enough before you’re out of runway. There are important considerations i am not going into here but my intent isn’t to instruct in this post but to encourage everyone not practiced in this maneuver to seek out expert training and practice in it to be proficient. As pilots we can’t have too many tools in our tool bag not to mention knowledge and proficiency adds to our safety immensely. Sent from my iPhone using Tapatalk3 points
-
People die all the time in this maneuver. The problem isn’t that it never works. The problem is that sometimes it does. Sometimes the total sum of the circumstances is such that it will work out. Just the right runway, surrounded by just the right terrain and obstacles, just the right wind, your plane losing the engine at just the right moment, being of just the right weight, you executing the maneuver at just the edge of the envelope available… and it works out. But then there are those other times where people crash badly and die. Mainly because they burned all other options in the available time dead set to make the runway. When the time comes there are only two choices. You try your luck or you take whatever is 180° ahead of you. Unless there really really are no options I will not test my luck turning back. Instead I will take the available seconds to setup as best I can for a good landing in a field that I prepared for on the ground and keep a lookout for better options. Remember, even a short field is good enough to stop short if you keep your gear up and will leave you with less injuries as long as you keep the plane flying all the way to a complete stop and don’t stall and crash badly. That’s my take.3 points
-
I recently interacted with Scott, also privately and I will never again nor will I watch his content. I did watch this video just to see what he had to say and it's more of the same from him. He is not a truth seeking individual, is arrogant and presumptuous and unwilling to hear, really listen to, the other side. That's my opinion of him. And this video confirms it for me. He will not admit that yeah sure G100UL is way worse on certain materials than 100LL. No, he seems to think that it's either us dealing with whatever the fallout to switching to G100UL will be or not flying at all. Well ok, sir, have that position. But at least be honest about it and don't pretend getting a new paint job, o rings, gaskets and sealants is just easy peasy and super cheap to do and everyone will be able to continue to fly. Be honest and say that all GAMI did was test on a single 172. Be honest and say that your tiny leak became a major leak very quickly. Say it how it is. G100UL eats most of the materials used until now and most of the planes will need extensive investment to make them compatible with G100UL, if at all. And no, 100LL doesn't have the same effect. It's present but way way less. Bah it's all just so stupid. Someone in the comments of his video says it well: "This problem would have been solved 30 years ago if the EPA and FAA had simply told the industry back when lead was removed from auto fuels that leaded avgas would be sunset in 20 years and they thus had that long to find a solution. This would have forced the airframe, engine and fuel makers to work together aggressively to find a solution and I am 100% confident a solution would have been found." This is the real problem. We were let down by regulations. But more on the side of certification. Hopefully stuff like this will be a solution (although I'm not holding my breath):3 points
-
Scott Perdue wrote: “I have to add a mea culpa- I got the AOPA Baron Fuel Leak at Oshkosh wrong. There was a 100LL leak, but there was also a G100UL leak and the culprit was an overfill and the cork gasket failed. Just wanted to correct the record. Once a video is up I can't really edit it without taking it down completely. I also made a note in the video description.” It was highly public with the G100UL leak on the Baron with the black goo under the wing as Osh24. I’m not sure where Perdue obtained his background research for this video. I suspect GAMI? Certainly makes it appear that Flywire is GAMI’s new advertising spokesperson. https://flyeagle.org/wp-content/uploads/2024/11/AOPA-Baron-Fuel-Cells-Report.pdf "Given the areas of stain and stickiness observed during the receiving inspection, we expected the left hand auxiliary cell to leak as well. However, the stickiness could have been caused by seepage into that cavity. The stickiness of the leaking main cells was in keeping with the number of leaks found. There is no doubt the patch may have been partially loose given its location however, the extent of the detachment in situ is in question. The removal and subsequent handling would have further separated the repair. The important question is why the repair began to detach. It may be possible that the missing internal rubber may have allowed the solvents in the fuel to penetrate the fabric and the exterior rubber coating and then getting beneath the external repair. This is most likely the reason given how the repairs are bonded." There’s more to the story than “move along folks nothing to see here” that Mr Braly likes to suggest. It’s striking that Mr. Perdue would suggest in a video that “surprise, it was only 100LL that leaked.” This suggests that his video isn’t researched and educated but just parroting support.3 points
-
Summary of Scott's video posted above - G100UL is completely safe, provided that all gaskets, hoses, diaphragms, etc., made from anyting else than Vitol are replaced, planes are rapainted or get magic"ceramic" coatings installed Yet another attempt to gloss over the known compatibility issues of this fuel.3 points
-
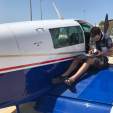
Had one of those moments only a Johnson bar owner can appreciate….ALWAYS check the floor before raising the gear! I relearn this about once a year. Today could have been ugly, gear wouldn’t go up…..WTF?? Look down and realized I had smashed an errant port-a-john. LUCKILY it was empty!!!! Quick gear cycle verified bar was fine and time for a new urinal. Johnson Bars and Port-a-John’s are not compatible, despite their names.3 points
-
That looks great! This was the Great Southern Haze Layer last weekend, coming from NC back to Sweet Home
 3 points
 -
Before you start tearing into things, try getting a large Gats jar and push up all the way to fully open the valve and get lots of fuel out. Do it several times. There may be some gunk under the seal which will clear out with a substantial draw. I've found most people don't pull enough fuel out to fully flush the valve on a regular basis. Do it several times to see if you can clear any gunk under the valve seat.3 points
-
Reproduction in any manor (sic) without the written express permission of the author is prohibited.3 points
-
Flight schools do it routinely, and since those airplanes fly a lot they don't have the usual issues associated with engines that sit for a long time. It doesn't seem unusual for flight schools to get 3000 hours out of engines. Mine is currently sneaking up on 2400 hours, but it had an IRAN about a 1000 hours ago that included rehoning the cylinders, replacing a guide, etc. I have one cylinder that is getting a little quirky on compression (comes and goes) and oil consumption is creeping up. None of that means an overhaul is imminent, just that it needs to be monitored. Borescopes and oil analysis are still great, so I'm not too worried.3 points
-
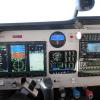
Good advice from both Ross and Skip. I should have followed their advice and verified the timing much earlier. As it turned out, the A&P who originally installed the SureFly off field in 8/2024, installed it with the DIP switches positioned correctly to advance to 20 degrees BTDC. But he installed the unit as one would a mag, at the 20-degree BTDC mark on the front sprocket, not at 0-degree TDC. I was actually starting the engine at 20 BTDC and then at 400 RPM, the SureFly unit was than advancing the timing to another 20 BTDC! I was flying the plane at 40 degrees BTDC! The vacuum advance was never hooked up. I was well aware of the high CHT issue and kept them under 400 by leaning. But no wonder I was only able to get about 65% power without the CHTs going through the roof. I finally took the plane to a SureFly dealer last Monday, 8/25 and they quickly found the problem. We borescoped the top of the pistons and saw no indication of detonation. I called SureFly and told them of my experience. They said that they used to hear of this happening when the units were first out on the market. But they haven't heard of it happening in a while. So, the moral of the story? If you have a SureFly installed and you're seeing usually high CHTs, the first thing to do is verify the timing by making sure the unit was installed correctly. John3 points
-
The part that is not intuitive is that retracting flaps at very slow speed does increase drag, something we can explain by plotting polar curves in clean and dirty configs. For illustration, retracting flaps fully at VS(clean) = stall = lot of drag and while in flap config at VS(clean) = flying = less drag. In the other hand, retracting gear always reduce drag. So there is a some speed cutoff at play: * If I am at 90kts, I would retract flaps first * If I am between VS(dirty) and VS(clean), I would retract gear first If my aim is to climb quick, I accelerate from VS0 to VY in ground effect, I tend to retract gear first between VS0 and VS1, then flaps once well above VS1. I rarely climb at VX with takeoff flap but if I do, I tend to retract gear after liftoff and I do no touch flaps until 1) cleared of obstacle and 2) I accelerated sufficiently toward 90kts-100kts I think correlating “flaps” to “drag” is unhealthy, especially when one flies slow speeds near “drag curve” or “near stall”, at slow speeds flaps add lift and they reduce “induced drag” between VS0 and VS1. To be honest, M20J flaps are not “that draggy”, if the aircraft fails to accelerate, it’s likely because pilot is using the whole wing as airbreak (pulling up at slow speeds between VS0 and VS1) rather than flaps? or flying in some high density altitude or some engine power problem? the gap between VS0 and VS1 is very wide in Mooney, one should not raise any flaps in middle of that large gap, they should concentrate on flying runway heading and accelerating in ground effect, this require gear up to reduce drag, accelerating above VS1, once well above VS1, retracting flaps tend to reduce drag…3 points
-
Not throwing rocks at all on the Mooney Summit process of how selecting the location(s) works every time. I know there are hundreds of considerations that go in to planning and putting something like that on--we're all grateful for all of that. That said, it would be great to see those decisions focus more toward more GA-friendly airports and locales. At the risk of sounding completely cynical, most airports in larger metro areas have zero interest in supporting anything involving piston and/or GA operations. I know holding the Summit in Tampa is far more glamorous and attractive than say, Ogala, Nebraska, but why do it at an antagonistic place? Thanks for posting your PSA--when policies don't match up to reality, we should move on.3 points
-
I am in the camp of, choose a gear operating SOP and stick with it. Always.3 points
-
I have J model that had a 3 blade Mac on it. It always had a lot of vibration despite being balanced by the previous owner. It started leaking a lot of grease and was going to need an overhaul. I had Stallings put on a 2 blade hartzell top prop and sold the 3 blade. It was expensive but it is smooth as silk and I gained 6-8 knots in cruise depending on altitude. Also had an A plus experience with Stallings.3 points
-
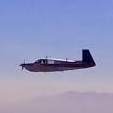
Nicely done, though sometimes hard to make out the aircraft configuration - not many technical details in the narration2 points
-
There is a requirement in Canada for a diversity antenna, typically on the roof, for the 1090ES transponder/ADS-B signal. That may be what that was, and if the aircraft was in Canada, but is no longer, that may explain why it hasn't been addressed. If the transponder does have diversity capability, the diversity output channel should be turned off to prevent damaging the power ampifier in that part of the transponder. This is just me guessing what that was, but it shouldn't be too tough to check the transponder and make sure any available diversity outputs are turned off.2 points
-
Here are some insights of go arounds with larger airplanes: If you fly an Airbus 320 or a Boeing 737, during a go around, always the flaps are retracted first by one step or to a certain position. Then the gear is retracted after the positive climb is confirmed. With the Airbus A320, the call of the pilot flying would be "go around, flaps". Then the pilot monitoring checks the speed and retracts the flaps by one step and confirms the action. Then the pilot monitoring checks the attitude and the climb rate + rising radar altimeter and calls for "positive climb". Then the pilot flying calls for "gear up". For example, if we land an Airbus with full extended flaps, it is a flap setting which is never be used for a takeoff. Retracting the flaps by one step brings the plane in the same configuration which may be used for a normal takeoff. So, retracting the flaps first brings the Airbus into a known takeoff configuration. My Mooney M20F manual does not say anything about go arounds. It looks like that 1967 no go arounds were flown.2 points
-
Add Power, gear up, trim, flaps up, trim for climb. Same as every takeoff, just starting with some extra speed and altitude.2 points
-
Digging up old threads. I've helped put together a 10. They are great flying machines and they do perform better than our J but will but slightly more fuel. The reason I own a J over a 10 is cost. An RV10 is significantly more than a J... and I mentally struggled to buy the J. If it wasn't for my wife telling me to spend some money, I wouldn't have bought a J. Even with her support, I wouldn't buy a 10 at this point in life.2 points
-
I did that once, bought a 0 SMOH engine that had been sitting for 11 years. I took it to the local engine shop and had them tear it down and put it back together. They only charged me $700. That was in 95, so it will be more now. The only thing he found was some rust in the cylinders. He rehoned them. It turned out to be a good engine.2 points
-
I'm also in the gear first camp. I treat it just like a takeoff--power up, verify positive rate, gear up; when I'm looking down at the obstacles, flaps up.2 points

.thumb.JPG.3f268b2d012c9aee0a0bf2a4f41e7faa.JPG)