Leaderboard


Popular Content
Showing content with the highest reputation since 08/19/2025 in all areas
-
I don't know where you heard about that reputation and I certainly have not seen it other in isolated situations. It's these situations that need to stop the fighting and bickering. This is the single BEST place to talk Mooneys and it's important for all of us to make it a welcoming and productive place for Mooniacs to hang out and share experiences (good and bad) that others may glean valuable information. I'm sorry if someone made comments about your weight. That's not right in any fashion. Also, if you went back to all of my posts, you will see that I have not attacked or said negative things about anyone personally. Including you. We want everyone here, let's help this forum have a really good vibe.14 points
-
@Aaviationist I don't have a dog in this fight at all, but I have seen too many good and productive participants on this forum leave because of personal attacks. Yes, tons of people have differing opinions and that can be healthy and hopefully sharing these differing opinions, we learn. Personal attacks are different that just having differing opinions and are not welcome here. Please change the tone before more people leave.12 points
-
Brett the owner of Lasar spoke yesterday, 9/12/25 at the summit and said they are taking over parts manufacturing at Kerrville and they have taken over the factory lease there. They’re implementing updated manufacturing processes and will be manufacturing parts in earnest going forward. I know there has been some negative comments about this deal but they are the only ones that stepped forward and put the money in the game. While some may interpret an increase in parts costs negatively, consider no parts availability. He also mentioned Lasar, as a Mooney parts dealer purchased close to 80% of all the parts Mooney sold into distribution. He also mentioned they would have direct and distributor sales channels. After listening to his presentation and engaging him afterwards my thoughts are a lot more positive. They also presented a concept called Mooney Phoenix they are working on where they’ll be taking trades and purchasing airframes and totally refurbishing them with all the latest technologies, interiors, paint and engines and offering them as an option for a “like new” aircraft purchase. It’s an interesting concept it will be interesting to see how it catches on. They are definitely investing in the continued life of our aircraft in a way nobody else is and the fleet will hopefully live on much longer with their investment.11 points
-
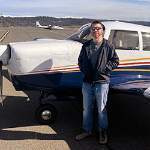
Hello , Thanks for the answers and help. I had an A&P look at the plane yesterday and we discovered that bolt was indeed from my plane. It was part of the alternator mounting bracket or a supporting bracket. Nothing serious but important to get right, nevertheless. Thanks, everyone!
 10 points
 -
I don’t want to talk about it any more….10 points
-
I flew up to Rotterdam where the street art is off the charts. The biggest challenge of Rotterdam is pop-up thunderstorm cells. I studied the weather, and studied and studied. Everything said stable weather the whole time. Then the morning of departure, boom! Pop-up thunderstorms at both ends of the runway. Luckily they disappeared as quickly as they came, so it's wasn't a big deal. I don't have too many pictures of the flying, but here is one, plus examples of the super cool street art with one work in progress


 10 points
 -
Follow the brick
 9 points
 -
Due to the significant pitch up when flaps are retracted in Mooneys, especially the long body Mooneys, I have taught to retract the gear 1st, trim down, then retract the flaps when going around. I always taught the student that the drag of both were comparable. While most POHs say retract the flaps 1st, in this case I think safety is more important in my opinion than an incorrectly written POH. Finally, in the Acclaim Type S the POH does have the gear being retracted before the flaps in a go around. I recently saw a YouTube video of a recent test conducted in a Bonanza on the given topic. For the Bonanza the conclusion was that the flaps should be retracted first. I decided to run the test on my airplane, a Bravo M20M. At 4,500 feet I slowed the plane to a steady 105 knots ( 5 knots below maximum flap extension speed), engaged the autopilot in altitude hold mode and extended the gear. The plane stabilized at 87 knots for a drag reduction of 18 knots. I retracted the gear and returned to a stabilized 105 knots. I then extended full flaps and waited see where the airspeed would stabilize. It stabilized at---87 knots, the same as with the gear extended. Demonstrated conclusion: Confirming my earlier statement, for safety reasons, the gear should be retracted while trimming down before the flaps are retracted in a Mooney go around.9 points
-
I would rethink flying without a backup fuel pump.9 points
-
I’ve done this in my M20J. Making it from 600’ depends on the wind. It’s dicey if the wind is calm. I can always make it from 800’ and if there was much wind on takeoff you have to be careful if the runway is short because you’ll be landing with a tailwind. I brief 800 as my minimum turn back altitude under normal circumstances. You might consider that in some cases the best option might be to keep the gear up to stretch the glide and land somewhere flat on the airport gear up if you can’t make the runway. When Don Maxwell had to do this he told me he almost forgot the gear and put it down in the flare. He heard thump, chirp in short succession. He wouldn’t have made it if he had put the gear down earlier. He also had multiple long runways and taxiways available - things to consider when you brief.9 points
-
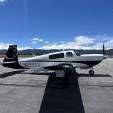
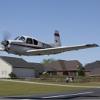
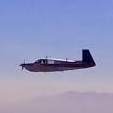
These things rock! Got us above the thin smoke layer across Oregon and northern Nevada. Yes it took 17,500’! But she’s real fast up there. Got to see Burning Man too. 6 in the pattern on adsb as we went by - no thanks!

 9 points
 -
Here it is! I had to try a couple scanners because of the holes for the spiral bound pages and I cleaned up the final scan a bit. Let me know if you find any issues. I already uploaded it to the files section as well, just waiting for approval. The Backwards Tales Rev 8 - Coy G Jacob.pdf9 points
-
Swift Fuels granted me the opportunity to acquire some 100R to perform the same materials compatibility tests that I applied to G100UL. As part of this, I did expand some testing on fabric systems and compared that test with 4 different fuels. As I note in the video, I want to dispel any rumors and conspiracy theories that I am connected to any fuel companies or was put up to any of my past or future testing. The video is quite long (~30 min) and covers a lot of material.8 points
-
When talking about no-back springs, it is important to distinguish between the two actuator manufacturers that Mooney used. There have been a number of documented failures of springs in GEC/Plessey actuators and I do not believe that no-back springs are available for these. The Eaton actuators (which confusingly were manufactured under several names) seem more robust. There was at least one (maybe two) documented failures many years ago causing Eaton to recall certain serial numbers which I believe is the source of the idea that there was a bad batch of springs. Probably some of these were never pulled and sent back to Eaton, but if they were going to fail, they'd certainly have done so by now. The spring is a wrap spring brake/clutch and it will wear in service. The chattering that Don Maxwell speaks of as a symptom of needing replacement is undoubtably caused by slippage of a worn spring. Outright failure is caused when the tangs on either end of the spring break jamming up the mechanism. I think this is a very, very unlikely event and I'm in no hurry to replace mine given the possibility of a maintenance-induced failure especially since there are now very few mechanics that have any significant experience working on these things. But, each owner will need to assess the risk and chose a course of action that they believe appropriate.8 points
-
Service Bulletins are not mandatory for private use under Part 91. The no-back springs are very expensive to replace and do not have a significant history of failure over the history of their use in Mooneys, so most people don't bother with changing them. If your A&P insists on performing every Service Bulletin as though it's mandatory your ownership experience is going to be very expensive.8 points
-
If we don’t use full flaps for landing, what are they for? I have landed a Mooney in every flap position imaginable. The plane can be landed with any flap position. I think it lands better with full flaps in all circumstances. Some will offer a different opinion. The less flaps, the more nose up pitch is required.8 points
-
It’s still going to happen! I’ve just been extremely busy with the full time job which I’ll be retiring from in January. After 40 years, I’m going to be done with being on call 24/7 /365 and worrying when I’ll get the call that one of my airplanes is broken somewhere. I’ve moved to the UP, Michigan, last April and have been commuting for work to Waukegan IL Fridays and Mondays. Lots of driving. I did have a conversation with the composite shop and we’re still good there as they have people who can make molds! I’m to far into it with the research and money spent to walk away. What I need is time which will be happening soon. Thanks, David8 points
-
Finally made it up to Half Moon Bay. Shot the approach and broke out at 1,500'. Had a great lunch and took off in VFR conditions to fly the San Francisco Bay.


 7 points
 -
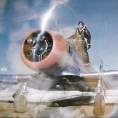
My dad was an engineer for Mooney from 1964 - 1969. He was the lead designer of the retractable step, an associate engineer on the design on the Mustang, ( he was against the roll cage concept and drew up a conventional pressurized tube design but was rejected) and lead AI/AP of the three assembly lines, back when they needed all three lines. We were cleaning out storage and came upon these items. I also found his Embry Riddle tie tack.
 7 points
 -
Here is an opportunity to exercise your superior aeronautical decision making rather than rely on superior airmanship if your engine driven fuel pump also develops an issue and ground your bird till you can get your boost pump replaced or repaired. Sent from my iPhone using Tapatalk7 points
-
Why use flaps at all? What do flaps do? Flaps do three things: First, flaps add drag allowing for a steeper approach with power, and using power during an approach aids controllability by providing the ability to control airspeed and descent angle/rate independently. Second, flaps reduce the deck angle allowing better visibility over the nose. And, third (and most importantly) flaps reduce the stall speed allowing for slower and thus shorter landings. So, if flaps do all these good things, why not use all you can get? Are Mooneys easlier to land with partial flap settings? And, are Mooneys so difficult to land that we need to resort to lesser flap settings to make it easier? Judging by the fact that landing Mooneys seems to be a perennial topic of discussion, it appears that many have issues with landing these airplanes. Let's define a good landing as on centerline, with no sideways drift, on the main wheels first. We might further add touching down within say 100 feet of your aim point. Most every competent pilot can do that. But what I think everyone is really after is a soft touchdown which can be more difficult in a Mooney than lesser aircraft. Why? I think there are a number of reasons: 1. When you get a Mooney slowed down to 1.3Vso you are deeper in the region of reverse command (aka backside of the power curve) than many light aircraft and the airspeed is thus unstable in the sense that if it starts to get slow, it wants to get even slower. So, you have use the throttle and elevators more to keep it on profile. 2. Mooneys have a lot of gadgets in the elevator controls. M20Js and earlier have trim assist bungees and later models have a down spring interconnected with the trim and a bob weight. These gadgets add an unnatural control force at low speeds because the spring tension is constant where the elevator forces without the springs would decrease as the airplane slowed. 3. The laminar flow wing has the spar pretty far aft and so the landing gear, which is attached to the spar, is located farther aft of the CG than most other similar aircraft. This is why people sometimes call the airplane nose heavy. But this main gear position has an undesirable effect upon touchdown. At the instant the main wheels touch down, the pivot point shifts from the CG to the main wheels which shortens the moment arm to the tail. This produces a pitch down moment and the tendency to "bang" the nosewheel down harder than intended. 4. The rubber puck suspension system is pretty stiff and not very forgiving if you drop it in on landing even a little bit. Some of these negative aspects can be improved by landing with less flaps. The landing speed is higher so you will be less deep into the region of reverse command. The pitch angle is higher so the flare maneuver does not take as much rotation and is more tolerant of mistiming. But, wouldn't it be better to learn how to land the airplane correctly than to use the "crutch" of using less flaps just to make it easier? It's not that hard. The biggest mistakes I see (and make myself) are not looking far enough down the runway to properly judge height, flaring too high (risks running out of energy and dropping it in) or too low (scoots along in ground effect until it stalls and drops in) and not using a touch of power when it seems it is going to drop in. My best landings are with the power coming to idle just before touchdown and the elevators still coming back as it touches down.7 points
-
For those of you that are waiting for your slot with Paul at Weep No More, it's well worth the wait...Just picked up my aircraft from Paul this morning couple of things to consider if you make the trip and decide to fly back on a commercial airline. Wilmar is about a 2hr drive from Minn/St Paul airport, Paul introduced me to Geri (320) 979-8818 and she took me to the airport and picked me up 2 weeks later, very nice individual and cheaper than Lyft or Uber, IF you can get anyone and there are NO one-way car rentals. She also has rooms for rent that are very reasonable, and if you chose to stay at a hotel, the Super 8 is reasonable and actually really nice rooms, just DON'T take the rooms next to the stairs..made that mistake. I know Paul has a long wait list, but he does have cancellations, he booked me 18 months out but had a last minute cancellation and texted me to see if I could make the short suspense to get there so overall, I waited 6 months. He gave me a quote, stuck to it completed the job when he said it would be done for LESS than the others charge..now I can look at getting it painted. Also, Paul is co-owner of the MSC there on the airfield so if there is other work you need taken care of, just ask him about it.7 points
-
I’ve been in aviation for over 40 years. I’ve been hearing the same thing you just said the entire time. There have been quite a few attempts to do what you said. Porsche and Mercedes both tried and failed. There are actually quite a few certified diesel engines, but few are sold. We look at our current engines differently. I see engines that have been optimized for 85 years. And you see a stale design. There are few modern engines out there that will do what our aircraft engines will do. Just look at the horsepower most modern high performance auto engines make at 2500 RPM. Few if any will exceed what modern aircraft engines will do. And they will probably use more fuel doing it. All of our aircraft engines could easily be made to run on any unleaded fuel, but their performance will be a bit less. You can’t take an engine that was designed and tuned to run on 100 octane fuel and wave a magic wand and make it run the same on a lower octane fuel. If you asked Continental to design a clean sheet 200HP engine that will run on UL94, I would bet it would look just like our current engines except it would be about 400 cu in and weigh about 20 Lbs. More.6 points
-
I don't recommend saying that out loud with passengers. Just sayin'6 points
-
I’ve used all 3 settings just to be comfortable with them (my electric flaps died in the up position a couple weeks back so I got a “real” nf landing). Personally, I like full flaps as that’s the configuration for the slowest possible touchdown and the shortest landing roll. I agree that the to position feels a little better sometimes, I expect from a combination of the extra few knots and the different view, but you can land just as well with full flaps if you practice. Caveat… i use to flaps on instrument approaches until landing is assured.6 points
-
We have a 1987 M20J here with 2700 hours on it. It's never had a cylinder off. It still looks good on the borescope and the compression test and it doesn't use too much oil so I don't know where the end is, but it's not there yet.6 points
-
Pilots are the best obviously! Sent from my iPhone using Tapatalk6 points
-
After I got my ppl (about 35 years ago, damn im old!) I thought the same way. Why not top it off? If landing with 1 hour is good, 2 is better for sure? And sheesh, I need to stop anyway. I think that’s a normal (and probably reasonable) way to start out. When I went to USAF pilot training we always started with tanks full, but I quickly learned that to land with an hour of fuel, I’d have to fly a max of about 2 patterns and land. Then, in the Eagle we would commonly land with about 2000lbs of fuel which sounds great, but then you realize that fuel burn on takeoff is in excess of 50,000 pph. At normal settings, it’s 30 minutes or so. Sometimes not comfortable, but if you followed the rules about having an alternate and spoke up when you needed to divert or were minimum (or emergency) fuel, it works. Why did we do it? Because otherwise you can’t get the utility out of the airplane. And Im not suggesting doing this in a Mooney either, but you trade utility (range and load) for fuel. Now, as a corporate pilot, I do this every day. It’s easy with foreflight because the planning profiles are accurate, the winds are accurate, and you can recalculate your plan as often as you like. I commonly depart with half fuel in the Meridian so I can carry 3 or 4 pax instead of 2. I am also happy to tell my boss that I need more fuel if the winds or weather change and I drop a person off the trip to add gas. I don’t get into regulatory minimum requirements with him, but I tell him I want a minimum of 1 hour fuel at landing (or alternate) and I stick to that. Now how about you and your wife in the Mooney? By all means, top it off every flight, but when the kids come, start looking at options. I would fly my M20F 525nm to my folks with my wife, 2 kids and bags. We generally landed with ~15gallons, but I couldn’t start full. I would leave ~2 gallons in one tank and 13 in the other for landing. Once I flew 600nm with them and I did run a tank dry to ensure I had everything in one tank. Landed with ~12 gallons. It’s a non event if you’re ready it barely stumbles. My family was ready and were interested but not scared. Ive also run a tank dry in my K to empty it and check fuel gage accuracy. Now that I know how accurate the CIES gages are, I wont plan on it going completely dry in cruise but I can maximize remaining fuel in one tank and the utility of the airplane by getting within a couple minutes of dry on the low one. And since Ive tested it in cruise, if I do it accidentally (I screw up), I know how it will restart. To do this, you have to be willing and confident in checking your plan as you fly, ensuring that it works, and WILLING to divert if it’s not going to meet your personal mins. Just last winter at Boeing Field in Seattle, I followed a citation down the ILS in a PA46T. It was pretty foggy, but I thought we would see the lights. He went missed, and I was on the approach but much slower than him so I thought I still had a chance. I also went missed, but I did see the lights right as I started to add power. On the missed approach the citation asked to go back around and try it again since he had also seen the lights. I thought there was a reasonable chance that the fog was moving and he would land. Approach asked me what I wanted to do? I said I want to divert to the other side of the mountains and land in Wenatchee, which was VFR. He said do you want to try the approach again? I said no I want to divert immediately. And we went and landed comfortably with an hour of fuel still. You have to be willing to make that call.6 points
-
Paid $400 for a product that wasn't as promised.6 points
-
Made it back to Canada today from Iceland. Vancouver tomorrow.6 points
-
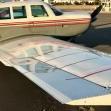
Just for everyone to see my final result - here's how my yokes now look.
 5 points
 -
I wouldn’t do that. Graphite can cause galvanic corrosion of steel and especially aluminum. I believe the Air Force prohibits its use on aircraft.5 points
-
Ok, this was a ridiculous post and I apologize. It’s obvious I misread the plug wires or it would not have run on one mag (3 cylinders). Even with my newly cataract free eyes, I can make mistakes. Good news is we had 2 successful hot starts. I’m reminded of a captain I flew with once who made a lengthy p/a to the passengers but mistakenly picked up the wrong mic and broadcast it on comm one. Before he finished he realized what he was doing and continued by saying to his audience of airline pilots “ I’m just going to hang up now and take off my headset, so make all the comments you want, I’m not listening “ Ya’all have a great day!5 points
-
That would work too. It was a long time ago. My memory isn’t as sharp as it once was. I think what happened I asked for the tool and the guy came up, opened the door and handed it to me. And they let me fly planes……5 points
-
Yesterday I flew to Augsburg, outside of Munich. There were many firsts for me. The first first was the NOTAM for Augsburg (EDMA) stating that overflight is prohibited due to bomb disposal (exhibit A). The second first was getting the call, "free of storks" on climb out. At my home airport, we have an offset approach due to a stork sanctuary. Yesterday there were at least three of these flocks circling next to the runway and possibly directly over and around the grass runway. The photo is the best I could do from the taxiway. I counted about 70 in that flock, so there were at least 250-300 storks total flying in our airspace (exhibit B). The third first was this factory I saw in Germany in the middle of the forest. Maybe @MatthiasArnold knows what it is. Strange location; hundreds of employees (exhibit C). I had a fourth first, but I can't remember what it was. Anyway... interesting day!


 5 points
 -
The main point of the article is "The variation of flutter speed with true airspeed is more complex.". Forces from air molecules hitting our planes are well understood per the Ideal Gas Law - as altitude increases, pressure decreases, and air molecules decrease proportionately. And the forces from those air molecules hitting our planes decrease proportionally. That is why KIAS makes sense. But flutter is a function of the dynamic damping and harmonics of both the plane structure and the air. At higher altitude the dampening of the air is less and has a less predictable effect because of the harmonics of the air interacting with the structure. So determining the critical flutter speed is not easily predicable without actual flight testing with all these dynamic forces in action. Yes - exactly! It means that the Vans RV-10 has a much, much weaker wing and tail structure than the proven Mooney. Remember that Vans only started saying this when they woke up to the fact as more and more reports of RV break-ups. With N174BK everyone initially tried to dismiss it as a bird strike that caused it to break-up. NTSB found no evidence of a strike. The Mooney has stronger "chops" that are demonstrated every day. When leaving the teen's in my Missile modified J, I routinely hit over 200 KTAS. If you are interested in safety and are flying your family, then buy a Mooney. If not, then buy a homebuilt or experimental. Let's face it, they are generally lighter and may have better performance because something is left out (structure or safety margin) vs a certified. Aviation is a compromise. You can't get something for nothing.5 points
-
Received an email from LASAR this morning, they are working with a few vendors trying to get the lead-times down and have created a "Waitlist." Once they get a firm (reasonable) lead-time they will start reaching out to those on their waitlist for orders/deposits. As of this morning, they still do not have an approximate price for the gearsets, won't know until they lock-in a vendor. (LASAR did not give a timeline as to when they might be reaching out to those on the waitlist.) IF you would like to be placed on their waitlist, email Sales@lasar.com with the qty you are requesting. Looks like there will be a secondary vendor option at some point as an individual, already making gearsets for other aircraft, is looking to make the 40:1 gearsets as well, he already has a few items PMA'd and working to do the same with the 40:1 gearsets, the good thing is, he's the vendor and a Mooney Owner, more info as it becomes available, but it will be good to have a little competition for LASAR to hopefully keep pricing relatively reasonable. But for now, if you are interested, reach out to LASAR and get your name on the list. V/r matt5 points
-
I hope they can get it to market for the same price as 100LL. I hope it has less issues than G100UL5 points
-
it's progress from a company that actual makes fuel for living. I think we have supplies of paint stripper for the next decade. Hopefully GAMI cuts a deal with Home Depot so it's more readily accessible.5 points
-
I could see if it was bud light…..5 points
-
I was advised that I am nearing the sb to replace the spring. I am not going to do so. I believe there was a bad batch at some point in the past and that the SB was an over reaction. no guarantee that the “new” spring will not have issues. the life cycles of these springs is pretty light in our airplanes and I see no reason to spend $3k for a $10 part that is unlikely to fail. At least that is my opinion.5 points
-
I teach the impossible turn maneuver to all kinds of Mooney pilots; even a past student pilot. With our good glide ratio and some practice this is not a hard maneuver. But i don’t think anyone can learn to do this from a video, but hopefully the video inspires folks to seek out training on how to do this since few will pull it off without practice. This is why we first start off with simulating the departure climb to a safe altitude, pulling throttle, waiting 3 sec for startle effect and commencing a 360 degree turn to measure your altitude loss. Every single person has improved significantly with some coaching and practice with each successive try. We’ll add 50% buffer to their altitude loss to derive their personal minimum turn back altitude. Usually by the third try they’ll be ready to make a successful try. I’ve successfully done this with student in calm winds to winds over 30 kts always returning to the departure end of the runway. With strong winds you have a whole different problem than making it to the runway but slipping down steeply enough before you’re out of runway. There are important considerations i am not going into here but my intent isn’t to instruct in this post but to encourage everyone not practiced in this maneuver to seek out expert training and practice in it to be proficient. As pilots we can’t have too many tools in our tool bag not to mention knowledge and proficiency adds to our safety immensely. Sent from my iPhone using Tapatalk5 points
-
The passenger seatbelt is a regular as well…5 points
-
Flew to our place in CO for Labor Day weekend. Mt Humphrey's by Flagstaff High Desert Ship Rock KPSO landing in light rain


 5 points
 -
Before you start tearing into things, try getting a large Gats jar and push up all the way to fully open the valve and get lots of fuel out. Do it several times. There may be some gunk under the seal which will clear out with a substantial draw. I've found most people don't pull enough fuel out to fully flush the valve on a regular basis. Do it several times to see if you can clear any gunk under the valve seat.5 points
-
I never go full flaps until committed to land and often I never go full flaps. Half flaps is take off configuration for a F. In a go around I am configured for maximum performance and than it is positive rate, gear, than flaps.5 points
-
My experence is retracting the flaps will reduce lift and the airplane will dip a bit. This isn’t something I want during a go around. Especially close to the ground. I don’t touch the gear or flaps until I have a positive rate of climb and have climbed at least 100 feet. That usually isn’t a problem, by the time I’m done messing with the power and trim, the plane is already climbing and I can do the flaps and gear at my leisure. Another reason to do the flaps first, is that is where your hand is, right by the flap switch. Move your hand from the throttle to the flap switch and then up to the gear.5 points
-
I am in the camp of, choose a gear operating SOP and stick with it. Always.5 points
-
The only products Lucas made which didn't suck were their vacuum cleaners.5 points
-
The latest IPN has articles on both SmartCharts and Dynamic Procedures. Interesting to note that Sporty's is normally a stronger advocate for ForeFlight but the two articles have very different tones with the excitement going to Garmin Pilot. Both articles are some of the better ones I've read detailing the features from an operational perspective. Dynamic Procedures article: https://ipadpilotnews.com/2025/08/foreflight-launches-dynamic-procedures/?utm_source=BlogEmail&utm_medium=email&utm_campaign=I25083A&utm_id=01K31B4FY38M7XVS8GR7HBGXF7&utm_term=READ MORE&utm_content=Should Pilots Buy an iPad with a Built-In GPS%3F %2B ForeFlight Introduces Dynamic Procedures&_kx=yegQcfXR2q3SPS36YNW7F3fQ9ATJJF-OKKIxkYzRyQY.XnPJzL SmartCharts article: https://ipadpilotnews.com/2025/06/garmin-smartcharts-a-pilots-guide-to-interactive-instrument-charts/?utm_source=BlogEmail&utm_medium=email&utm_campaign=I25083A&utm_id=01K31B4FY38M7XVS8GR7HBGXF7&utm_term=READ MORE&utm_content=Should Pilots Buy an iPad with a Built-In GPS%3F %2B ForeFlight Introduces Dynamic Procedures&_kx=yegQcfXR2q3SPS36YNW7F3fQ9ATJJF-OKKIxkYzRyQY.XnPJzL5 points
.thumb.JPG.3f268b2d012c9aee0a0bf2a4f41e7faa.JPG)