-
Posts
1,547 -
Joined
-
Last visited
-
Days Won
6
Content Type
Profiles
Forums
Blogs
Gallery
Downloads
Events
Store
Everything posted by Vance Harral
-
I think there is a small but important misconception in the well-intentioned posts above: some of them appear to imply that a descending aircraft is always "unloaded". If that was the intent, it's not correct. An aircraft in a constant rate, level descent will experience a 1G load on the wings, same as in level flight. An aircraft in a 30/45/60 degree turn executed in a constant rate descent will experience a 1.15/1.41/2.00G load on the wings, same as in level turns. You don't "buy" anything in terms of reduced load factor just by being in a descent. If you change your rate of descent by pushing or pulling on the yoke, you do change AOA and load factor. So the instinct to "push and unload" if you're worried about a stall is a good one. Letting the nose drop in a turn so as to increase the rate of descent as the turn is executed is similarly effective. But it's the vertical acceleration that helps you, not the vertical velocity. Put another way, if you make a bad decision and snatch back on the yoke because you were startled, your odds of instantly exceeding the critical AOA and stalling are the same regardless of whether the aircraft was level, descending, or climbing when you did so. The idea that an aircraft in a constant rate descent has a lower G-loading than an aircraft in level flight, or in a climb, is a common misconception. But an aircraft with a constant bank angle and constant rate of climb or descent (including zero) experiences the same G load, regardless of its vertical velocity. The mathematical explanation is just Newtonian physics: F=MA. If the vertical acceleration (A) is zero, the net up/down force (F) is zero. Vertical velocity is not a factor in the equation. Therefore, load factor only changes when a climb or descent is initiated, not once it's established.
-
Thanks to everyone for the continued comments, and thanks especially to John for posting pics of his spare. John's spare appears to be made of anodized aluminum, as Anthony mentioned upthread. Since John says his appears to be a copy of the H&E, my thinking is that the factory switched from the cast magnesium design of the Dukes selector to the anodized aluminum design of the H&E/others at some point, perhaps for exactly the reasons being discussed in this thread. It's hard to say if John's spare could be a drop-in replacement in our aircraft without laying hands on it, but it appears to be at least roughly the correct configuration and dimensions. If no one else chimes in with specific info, I'll try to get a hold of the factory after the holiday, and see if I can get some information on the exact selector in the retrofit kit. The only reliable information I have about the retrofit kit at this point is a one-line e-mail from Stacy at the factory, who says it is p/n 940073-503, and that you order it through an MSC. Internet searches on that p/n mostly turn up bogus autogenerated "catalogs" from dubious aviation parts suppliers. But SWTA's web site does have a specific reference at http://www.swta.net/images/Retrofit_Kits.pdf, and my assumption is that's the $5K kit. Can't find any images or sub-part breakdowns, though, so no telling what the actual selector in the retrofit kit is. It also remains unclear to me what if any sheet metal work, re-routing of fuel lines, etc. might be required to use a retrofit selector. Again, the pics of John's spare look like a drop-in replacement, but I wouldn't be surprised to learn some minor tweaking is required to switch from the Dukes to the H&E style.
-
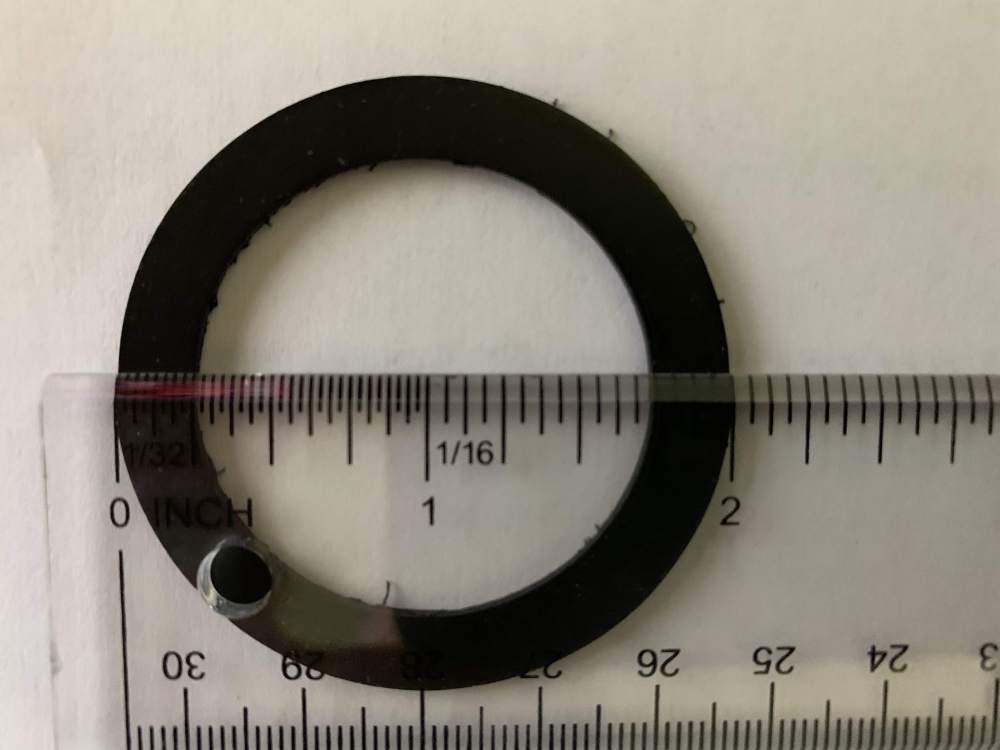
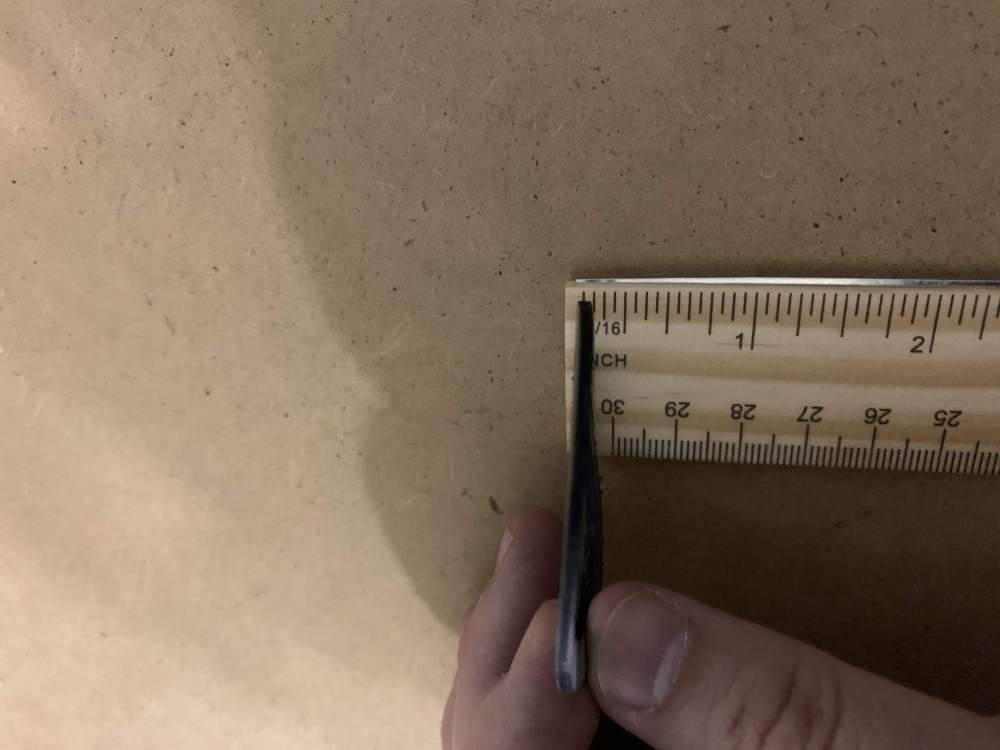
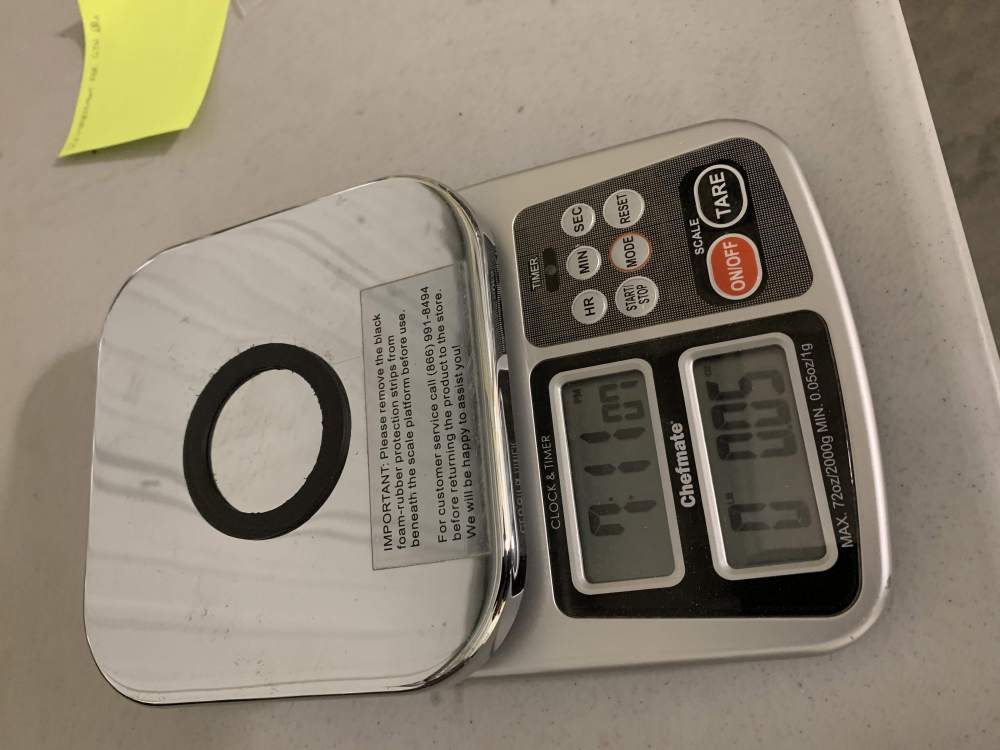
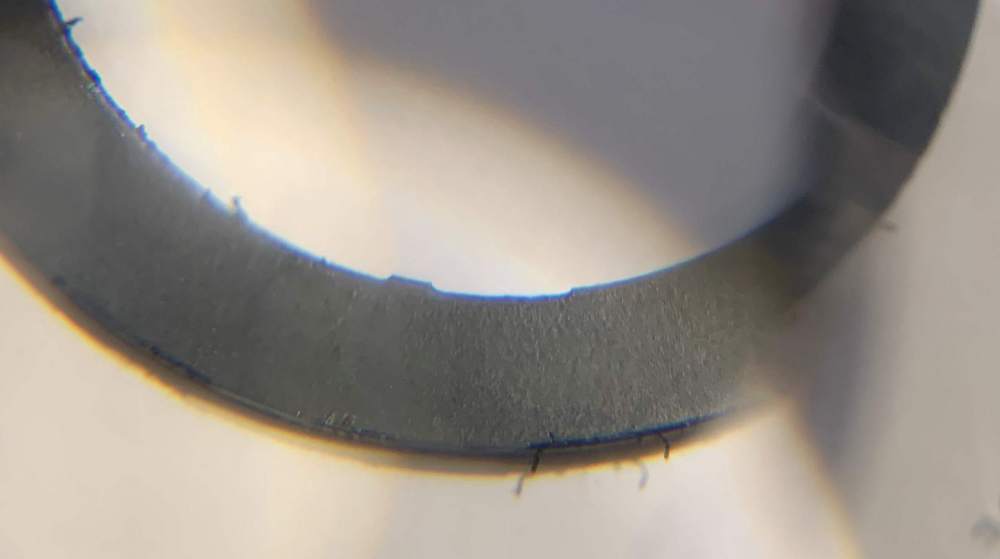
For those following the saga... Our "overnight" gasket actually took two days to arrive due to UPS delays in Louisville, but I did receive it yesterday. Out of the bag, it measures 2" O.D. by 1.5" I.D. by about 1/16" thickness. Weight is 0.05oz on my kitchen scale, but that's the limit of the scale's resolution so that's not a very reliable number. I gently tugged on the inner and outer edges all the way around and found no cuts or defects. Looking through a magnifier, you can see the material isn't what I'd call "pristine": it has some light fraying along the cut lines, and the surface is not perfectly smooth; but this is not different from anything I remember with previous good gaskets. I dropped it in a clean mason jar with about a cup of 100LL drained from our left tank (the one that didn't get emptied by the leak). Will report back here on what it looks like in a few days.
-

Garmin 430 right knob stopped working?
Vance Harral replied to AlexLev's topic in Avionics/Panel Discussion
Because the alternative is physical contacts that must scrape together as the switch slides from one position to another. The mechanical wear that results is a major long-term reliability issue. There are ways to make a physical contact knob last a long time, e.g. the knobs on a KX-155 are pretty good. But overall, the contactless solution is more reliable. A really relevant example of this is the optical encoder knob on the 430/530 series, vs. the physical contact buttons on that same unit for flip-flopping the NAV/COM frequencies. Both the knob and the flip-flop buttons are used heavily, but as these units get long in the tooth, you hear vastly more problems reported with the flip-flop buttons than the knob. If I may editorialize a bit, there's nothing "complex" about an optical encoder. It's just a little light bulb that can or can't be "seen", based on whether something is between the bulb and the detector. They are considerably simpler to design, manufacture, maintain, and service, than a physical switch or knob. The on/off signal they generate is no different than the signal associated with a mechanical switch. About the only difference between physical vs. optical switches from an interface standpoint is that in the simplest cases, the latter require 3 wires and the former only 2. But that's hardly a big jump in complexity. They do have failure modes, however - nothing is perfect. -

Garmin 430 right knob stopped working?
Vance Harral replied to AlexLev's topic in Avionics/Panel Discussion
As mentioned previously in the thread, the knobs on a Garmin 430 are optical devices, contact cleaner cannot do anything for them. The usual failure mode is the light source that shines through the windows of the rotary dial. It either burns out (total failure), has reduced output (intermittent failure), or develops a weak/intermittent connection with its power source (also intermittent failure). The fact that a previous poster "cured" their problem with contact cleaner is completely coincidental. It's likely the act of removing the outer knob flexed the rotary dial and/or circuit board enough to make a marginal light source good enough again, for a while longer. By all mean, try taking the knobs off and reinstalling them a few times, you might be similarly lucky. But R&R'ing the knobs is the salient action. Spraying contact cleaner on anything while you're doing it is no more or less effective than humming Gregorian chants. -
That's a very interesting question. I'd say it's "unlikely", but I didn't record the serial number, and probably can never say for certain - one Duke's fuel selector looks pretty much like another. I'll take a close look the next time I have it in my hands and try to recall any identifying features. But my guess is that if there was even a remote possibility our selector had been accidentally swapped for another, Dan would have already thought of it. I haven't measured, and not sure it'd be a meaningful measurement given the odd state of the gasket that was removed. But the thickness of the deteriorated gasket looks "normal" to me, about on the order of 1/16". It's comparable to the thickness of the brand new one I installed a couple of months ago, just before I broke the selector, as well as others I've R&R'd in the past.
-
Another hypothesis... the local shop drained our tanks into a portable fuel storage unit before pulling the selector to ship it to LASAR. After reinstalling the overhauled selector, they simply put the fuel from the storage unit right back in our tanks. This is a purpose built storage tank with a pump that's clearly labeled for 100LL, not some rusty bucket in the back corner. Still, if there was Jet fuel or some other contaminant in the storage unit, it may have introduced contaminants into our fuel that ate the rubber seal. This sucks.
-
I try not to be an alarmist. But I think you better call LASAR first thing tomorrow, and ask if the gasket you received was from the same batch as the one Dan used to assemble our fuel selector. If it was... or maybe even if it wasn't... I would not fly the airplane without pulling the selector bowl and inspecting the gasket. Go look at the video in my OP again, and think about what happens if your gasket lets go in the air.
-
OK folks, here are some pictures of the gasket under a magnifying glass. This is definitely not right. The material is pitted, and has an "orange peel" or "chocolate cake" appearance. My airplane partner says it looks and feels like foam rubber. Either the material was crap to start with, or it was attacked by fuel, and/or the fuel lube used to assemble it. When I get the new gasket tomorrow, the first thing I'm going to do with it is simply drop it in a jar of 100LL for a few days and see what it looks like after that.
-
So I called Dan at LASAR and (politely) asked WTF. His response was that he definitely replaced that gasket when he worked on the selector two weeks ago, but... this is not the first report he's had of this sort of problem, recently. These gaskets are not generic parts. They are Mooney-specific parts that come from the factory. Yeah, I'm sure the factory just cuts them out of a sheet of butyl rubber or whatever, but the only legal source is the factory. So one possibility is the factory has produced a set of crap gaskets that deteriorate in the presence of 100LL. Maybe that caused cferr59's problem? Dan claimed he'd be on the phone to Mooney immediately after hanging up with me. The other possibility is that Dan is fibbing to me, to cover up shoddy work. I can't discount that 100%, but I honestly have no reason to believe it could be true. We've worked with LASAR in general, and Dan in particular, for over a decade with no issues. Dan is overnighting us a new gasket, supposedly from a different lot of parts. He's also still digging around for salvage fuel selectors. Assuming we install the new gasket and everything holds... how many days/weeks/months do I stare at it on the ground before working up the gumption to fly with it?
-
My airplane partner dropped the selector bowl a few minutes ago and sent the attached pic. How does the saying go... a picture is worth a thousand words? That seal cannot possibly have been brand new just a few days ago. I don't even know what to say at this point. Too early to be pointing fingers at any particular mechanic or vendor, especially since the part has been in multiple hands. But something about this definitely smells.
-
Thanks John, I'm very interested.
-
The main body of the Duke's gascolator has three parts: a top section that contains the springs and balls and tracks that establish the detents, a middle section that routes the ports from each of the two tanks down to the bowl, and a bottom section that is the bowl itself. It's possible these are made of anodized aluminum - I'm not a materials expert - but it doesn't look like it. Dan says they are made of cast magnesium and I'm inclined to take his word for it. The bolt in question has a "washer" with embedded rubber. It's called a Stat-o-Seal. That's not where the leak is coming from. As you said, the leak is from the seal between the bowl and the middle portion of the body. The bowl and the middle portion of the body do *not* have a pristine interface. As mentioned above, the salvage selector from Alan had some light pitting. All this was cleaned up with scotch brite. But because we're forced to use the middle body from the salvage selector (that's the part I broke on the original selector), the interface cannot be pristine, there is going to be some pitting there. The opinion of multiple mechanics is that the pitting is not bad enough to prevent a reliable seal. Either that opinion is incorrect, or the seal between these two components is bad/installed improperly. Both the original screen and the screen from Alan are long since in the garbage. I bought a new screen from LASAR for the annual this year (I install a new one every few years). I installed this year's new screen right before I broke the original selector. That screen was included in the parts we sent to LASAR. I don't know if Dan used that screen when he reassembled the selector, or yet another new screen. But whatever the case, we're not dealing with a 50-year-old screen. It's interesting to wonder if this is part of the problem. As we all know, sometimes prophylactically replacing a part introduces new problems that weren't present with the old part. Won't know until I work up the heart to go back out to the hangar and start disassembling the selector for the Nth time in this saga. I'll keep everyone posted.
-
We installed the selector as received from LASAR, we did not disassemble it on receipt to check the work. We're all human, and it's possible Dan installed the wrong seal or assembled the unit improperly. But that would be unusual for a shop/person with that much experience. I'm still decompressing and waiting on a follow-up call from Dan so I haven't been out to the hangar to remove the bowl and look inside. That's the obvious next step, and I'll report back here on what I find.
-
Thanks John, please keep me posted. I don't know what the various different selectors look like, I'm only familiar with the Dukes in our aircraft. Perhaps someone else can assist us with photos.
-
Dan says he'd like to try to make the Duke's selector work, but is presently researching other alternatives so he can give me options. I appreciate Dan's interest in making the old selector viable, and I haven't 100% ruled out giving him another crack at it. But LASAR is in California, we're in Colorado, and the airplane is AOG. So every try-again cycle involves 4 days and about $100 worth of round-trip shipping. I'm not a penny pincher, but I've already put two months and 1 AMU of effort into making the old one work, spanning both LASAR and my local shop, waiting on shipping of seals and parts, etc. It just feels like I'm at the point of throwing good money after bad on the existing selector (I've always felt that good/bad money idiom was backwards, but I digress...) Maybe the answer is to bring Dan out here so he can actually work on the problem in situ. I'm sure he has no interest in flying the airlines right now, maybe a fellow Mooney owner in California needs a visit to Colorado and can just bring Dan along for the ride?
-
No, I'm not sure it's leaking because of the pitting, that's just a hypothesis. When I get over being demoralized, I'll go back out to the hangar, drop the bowl, and see what the gasket looks like. I agree the failure mode seems very odd. Whatever is causing it, I remain tremendously disconcerted the selector could be completely leak free for days on end, then lose it all at once. If it had been dripping slowly at first and getting worse with each passing day, we would have noticed. The selector was installed 9 days ago, and we made multiple trips to the hangar to check on it, switching back and forth between tanks on each trip. Completely dry. Last check was last Thursday, 6 days after installation, no issues. The seal let go some time between then and this morning.
-
I appreciate the practical suggestion, I'd certainly try something like this if it was an old car. Unfortunately, I don't think there is any manual from Dukes, or method in AC43-13, that covers this kind of work on a certified aircraft. I live in the real world and I understand that sometimes good mechanics and conscientious owners go out on a limb regarding minor and/or low-risk repairs. But machining the mating surface of a fuel system component doesn't strike me as either of those things.
-
Thanks for the response, Mike. The "whole thing" has already been to Dan at LASAR once, this is the reinstall after receiving it back from him. No aspersions cast on Dan either. What more could one ask for? He actually disassembled the unit while on the phone with me, and described what he found and how he'd reassemble it. He's very experienced, I'm certain he was careful in the reassembly, and everything seemed fine for several days before it sprung a leak. My working hypothesis is that the pitting on the main body of the salvage selector we got from Alan prevents a good seal at the bowl with proper torque, no matter how fresh the gasket is, or how much fuel lube is applied. Perhaps it's OK for a little while with enough fuel lube, but eventually that gets washed out. One could try overtorquing the bolt that holds the bowl on to get more clamping force, but... that's what got us here in the first place. I could send it to Dmax, but I can't imagine what he would do differently than Dan. What gives me the heebie jeebies is the likelihood someone will get the seal to once again be OK for "a while", then it will suddenly let go again. Possibly in flight. Based on the rate at which fuel is spewing out in the video above, my guess is it took way less than an hour to completely empty a full tank. I don't want to lose another $100 worth of fuel on the ground in the hangar, and I really don't want to be worrying about this in flight.
-
I'm working with Dan at LASAR on this problem, but figured I'd seek advice here on the forums too. About two months ago, I broke the Dukes fuel selector in our '76 M20F by overtorquing the bolt that holds the bowl on. The story of exactly what happened and why is a cautionary tale for another time, but for now let's just say I take full responsibility, even though I was working "under supervision" by a certified A&P who was only a few steps away. I was able to obtain a salvage fuel selector from our local Grim Reaper, @Alan Fox. Unfortunately the selector was not in pristine condition and had some pitting, particularly at the interface between the lower body and the bowl. No aspersions to cast on Alan here, he sold me the part "as is", and I accepted that as the deal. The local shop installed new seals in the selector, but it leaked fuel at the bowl. The selector was disassembled and a "Frankenstein" selector was assembled using most of our old selector, but the main body from the salvage selector. When installed in the aircraft, the selector leaked fuel through the selector shaft. The shop removed the selector and replaced the seals again, but same problem. We pulled the selector again and sent all the parts - original and salvage - to LASAR. Dan at LASAR found the local shop had been nicking the shaft O-ring on reassembly due to the sharp edge where a flat is cut into the shaft to receive the set screw on the selector lever. He filed a small radius on the cut, reassembled the selector, shipped it back to us, we installed it, and it held fuel with no leaks for several days, with the selector in both the left and right positions. Went out this morning to finally fly the airplane after two months of down time and found the right tank completely empty, and the belly and drip pan covered in blue stains. Pulled the panel beneath the fuel selector, switched to the other tank, and observed the massive, gushing leak at the bowl shown in the attached video. At some point in the last couple of days, the seal at the bowl simply "let go", and poured about $100 worth of avgas on the floor. The failure mode is scary: one of the most qualified people in the industry almost certainly did everything right in IRANing the selector, it looked good for several days on the ground, then it just started gushing fuel. Thank goodness it happened on the ground! Needless to say, we've lost faith in this particular collection of parts. The Duke's selectors aren't made any longer, nor are the H&Es, so Mooney sells a retrofit kit P/N 940073-503 for some other type of selector. When our own @Jim Peace went through this drill in 2016, the cost for the retrofit was $2400. I learned this morning it has since doubled, to just below $5000. Furthermore, it's my understanding from Dan at LASAR that the retrofit kit may require moving the position of the selector, rerouting fuel lines, etc. such that it involves nontrivial labor costs in addition to the parts. The conventional wisdom is, "Don't buy a new selector, just get yours overhauled and it'll be right as rain". But again, we've already been through multiple iterations of this, including work by one of the most respected folks in the business, and I'm at wits end about how to proceed. First choice would be a known good used selector from some M20F just recently condemned due to something awful like spar corrosion, etc.; but of course I wouldn't wish that on another Mooney owner. Next choice is the retrofit kit, I guess. Next choice is yet another salvage unit of unknown provenance. Absolute last choice is trying another round of seals in the existing salvage selector. It's been nothing but trouble, and has exhibited a scary failure mode. We've lost faith in it. Any advice, denizens of MooneySpace? IMG_9513.MOV
-

mats for protecting wing finish during fueling.
Vance Harral replied to Vance Harral's topic in General Mooney Talk
You're awesome, Paul! I'm giving a Flight Review at KBJC this Saturday, any chance you'll be around the airport that day? -

mats for protecting wing finish during fueling.
Vance Harral replied to Vance Harral's topic in General Mooney Talk
My caps are not tethered. However, if you place them somewhere other than right next to the hole while fueling, you are more likely to forget to put them back on. Ask me how I know. -

mats for protecting wing finish during fueling.
Vance Harral replied to Vance Harral's topic in General Mooney Talk
That's a kind offer, Paul, and a good excuse to get together. How 'bout you evaluate them and post a PIREP here? I'll buy the spare from you - and lunch - if it goes well. If it doesn't, I'll fund a follow-on experiment and give you one of whatever we try next. -

mats for protecting wing finish during fueling.
Vance Harral replied to Vance Harral's topic in General Mooney Talk
This is an interesting question. The fueling mats for sale at Spruce are made of polyurethane. My understanding is the electrical properties of silicone and polyurethane are similar. I think the silicone baking mats we're discussing here are probably "fine" vs. purpose-designed choices in terms of risk. But now that I think about it... regardless of the material used, I'm thinking you probably want to ground the airplane before laying down the mat, and (perhaps more importantly) remove the mats before you disconnect the ground. That would seem to be the lowest-risk procedure. -

mats for protecting wing finish during fueling.
Vance Harral replied to Vance Harral's topic in General Mooney Talk
Silicone baking mats sound like a great idea. Thinking something like this would fit the bill with a DIY hole cut out: https://www.amazon.com/gasare-Silicone-Countertop-Protection-Resistant/dp/B07K6YZY21


