Jump to content

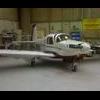
M20C modifications + paint and interior


Recommended Posts

I have started a major modification to my 1962 M20C.  I will be installing a 201 window, wing fairings, tail root and dorsal fin fairings, aileron and flap gap seals, brake caliper reversal and new side vents.  I already have a cowl closure and a IFR panel.  We will also be installing new glass, new paint and interior upgrades.  I have enclosed some pictures to document the project. I will try to post updates as the project continues.   

post-331-13468137402196_thumb.jpg

post-331-13468137403863_thumb.jpg

post-331-13468137405164_thumb.jpg

post-331-13468137405552_thumb.jpg

post-331-13468137407302_thumb.jpg

post-331-13468137408569_thumb.jpg

post-331-1346813741071_thumb.jpg

post-331-13468137411914_thumb.jpg

Link to comment
Share on other sites

Wow, you're going to almost double your initial investment with all those mods...  I'd like to get the 201 windscreen on mine as well, but the plane has fresh paint (courtesy of previous owner) and I don't want to mess it up.


Do you have 2 sets of nav lights?

Link to comment
Share on other sites

Here are some pictures of the brake caliper reversal and tail and dorsal fin fairings.  Also someone asked who was doing the work.  His name is Raul Bueno from Kansas City.  He has done an excellent job. 


We still need to complete the 201 window install and the flap gap seals and side window installation. I will continue to keep you posted.

post-331-13468137460203_thumb.jpg

post-331-13468137462134_thumb.jpg

post-331-13468137463932_thumb.jpg

post-331-13468137465132_thumb.jpg

post-331-13468137465798_thumb.jpg

post-331-13468137582815_thumb.jpg

Link to comment
Share on other sites

Used the Lasar Window.  The window install took about 40 hours.  The mechanic Raul Bueno did a great job and did the 201 window, 1 piece belly, flap and aileron gap seals, hinge gap seals, the dorsal fin and verticle fairing and the wing root fairings, we installed the new style ELT, and side air vents for the pilot and co-pilot and reversed the brake calipers.  When we did the 201 window install we moved some components so they would be easier to reach including the brake fluid intake and the regulator for the vacuum pump. We pulled out all the interior except for the seats ready for a full redo inside. Also replaced the cowl sheet metal screws with recessed 100 degree machine screws for a far tighter fit.


Here is a picture of the plane with all mods installed and ready for the paint and interior shop.

post-331-13468137581256_thumb.jpg

post-331-13468137582132_thumb.jpg

Link to comment
Share on other sites

  • 3 weeks later...
  • 2 weeks later...
  • 1 month later...

The paint is 97% done.  So I decided to post the recent progress. The Mozley Paint shop in Overland Park Kansas located at OJC did a great job.  White, with red and 2 shades of silver.  All panels were removed, including the 40 or so access panels, the gear doors, all the bottom panels, and all of the control surfaces were removed and separately sanded and painted with primer and paint.  New screws and a new N number.  Now for the interior shop next door and maybe by 2/1/2001 the plane will be ready. 

post-331-1346813777345_thumb.jpg

post-331-13468137774665_thumb.jpg

post-331-13468137775563_thumb.jpg

post-331-13468137778253_thumb.jpg

post-331-13468137779717_thumb.jpg

post-331-13468137780889_thumb.jpg

Link to comment
Share on other sites

  • 2 weeks later...
  • 1 month later...

Thanks for the positive comments.  I am very pleased with the progress of this full modification.  It is costly but I have a very updated airplane.  I was very happy to find no rust or corrosion during this process - we performed the Mooney 208 service update and inspection.  Still waiting for the final interior installation.  Once it is completed I will post final pictures. 

Link to comment
Share on other sites

  • 3 months later...

Join the conversation

You can post now and register later. If you have an account, sign in now to post with your account.

Guest
Reply to this topic...

×   Pasted as rich text.   Paste as plain text instead

  Only 75 emoji are allowed.

×   Your link has been automatically embedded.   Display as a link instead

×   Your previous content has been restored.   Clear editor

×   You cannot paste images directly. Upload or insert images from URL.

×
×
  • Create New...

Important Information

We have placed cookies on your device to help make this website better. You can adjust your cookie settings, otherwise we'll assume you're okay to continue.