Search the Community
Showing results for 'Spinner'.
-
In 1500 hours I have experienced the following, approx hours of ownership listed in parentheses: -VR failure 3 hours from home, turned into a great 4 day weekend adventure at OBX (100) -uneventful vacuum pump failure in VMC (150) -cracked spinner noted on landing at home (300) -D3000 mag failure in flight, diagnosed in flight by 100deg EGT rise on all cylinders (350) -lost alternator in flight, broken field discovered after landing at home (500) -coms and transponder failure, resolved with replacing wiring harness (800) -skytec starter failure 4 hours from home (1000) -broken spinner bulkhead (1500)
-
In about 1000 Mooney hours.... one alternator (field wire), zero vacuum, two power plant (one loss of power; one extremely rough running engine), one propeller (spinner backplate shredded metal) plus several on the ground post maintenance (fuel system, vacuum system).
-
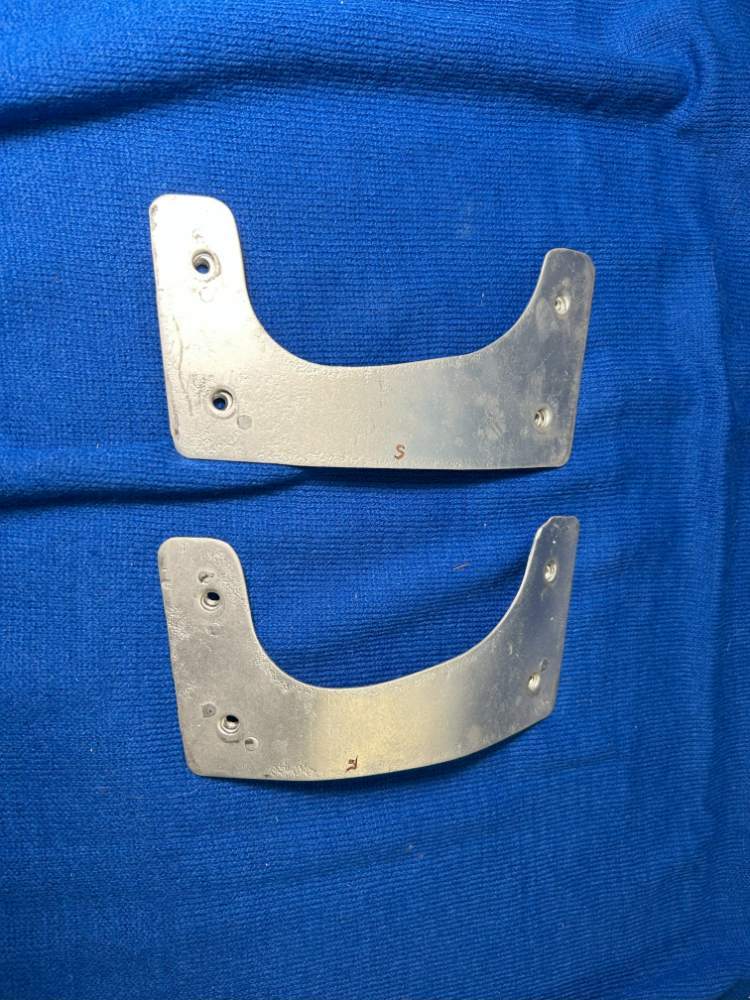
 This is a spinner for two blade Hartzell prop off '67 M20F. It was removed some 10 years ago for having 3 small cracks. My understanding is two were OK to have, if sopped drilled. There wee some discussions here on MS about welding them and repair. Spinner comes with two fillets and the bulkhead so that has $$ value as well. It will be shipped in it's box. $250 plus shipping. Please contact me for details. Paypal F&F, please.

-

Reiff Turbo XP Hot Band and Sump Heater
mhrivnak replied to JBlueSkys's topic in General Mooney Talk
I have the Reiff Turbo XP also, and it is very effective. The chart above looks about right from my experience in relatively mild winters. I bought a used comforter at a thrift store for about $3 and put that over the cowling. I use a spring clamp to clip the two sides together just under the spinner, which covers the cowling inlets and keeps the blanket tight around the front. If you have an engine monitor (and hopefully you do!), keep an eye on the CHTs there for an idea of how the heater is doing. -
Performing an annual and found the forward bulkhead of the prop spinner shattered. Looking for a replacement. P/n C-3532-22P. Any help would be much appreciated. South Louisiana


-
I've only bled brakes on my M20J once when I overhauled the master cylinders and replace all the flexible brake lines. I followed my A&P's suggestion and opened the bleeders and let them drip while occasionally exercising the brake pedals slowly and keeping the reservoir full. I let about a pint of fluid drip through and then we bled them bottom up and it didn't take long to get all remaining air out. I do owner assisted annuals. I usually spend a day forward of the firewall: removing the plugs, borescoping cylinders, removing the fuel servo inlet screen and oil suction screen, removing and opening the oil filter for inspection, removing spinner, removing muffler shroud and tailpipe for inspection, cleaning the engine. The second day is spent opening the airframe, putting it on jacks and lubricating everything. The third day the IA does the inspection and usually I start putting it back together when he's done. On the forth day, I finish putting it all back together, double check everything, run it up and leak check it and adjust idle speed and mixture if necessary. So far, we have never found an airworthiness item that needs repair before return to service because I keep after everything. Any minor issues found are usually fixed at a later date when convenient. Next year will take longer because the mags will be due for 500 hour IRAN.
-
I'm new to this, I assume spinner can be repaired. Whats the situation with this bulkhead? Prop came off because there was leaking oil down the blades.

-
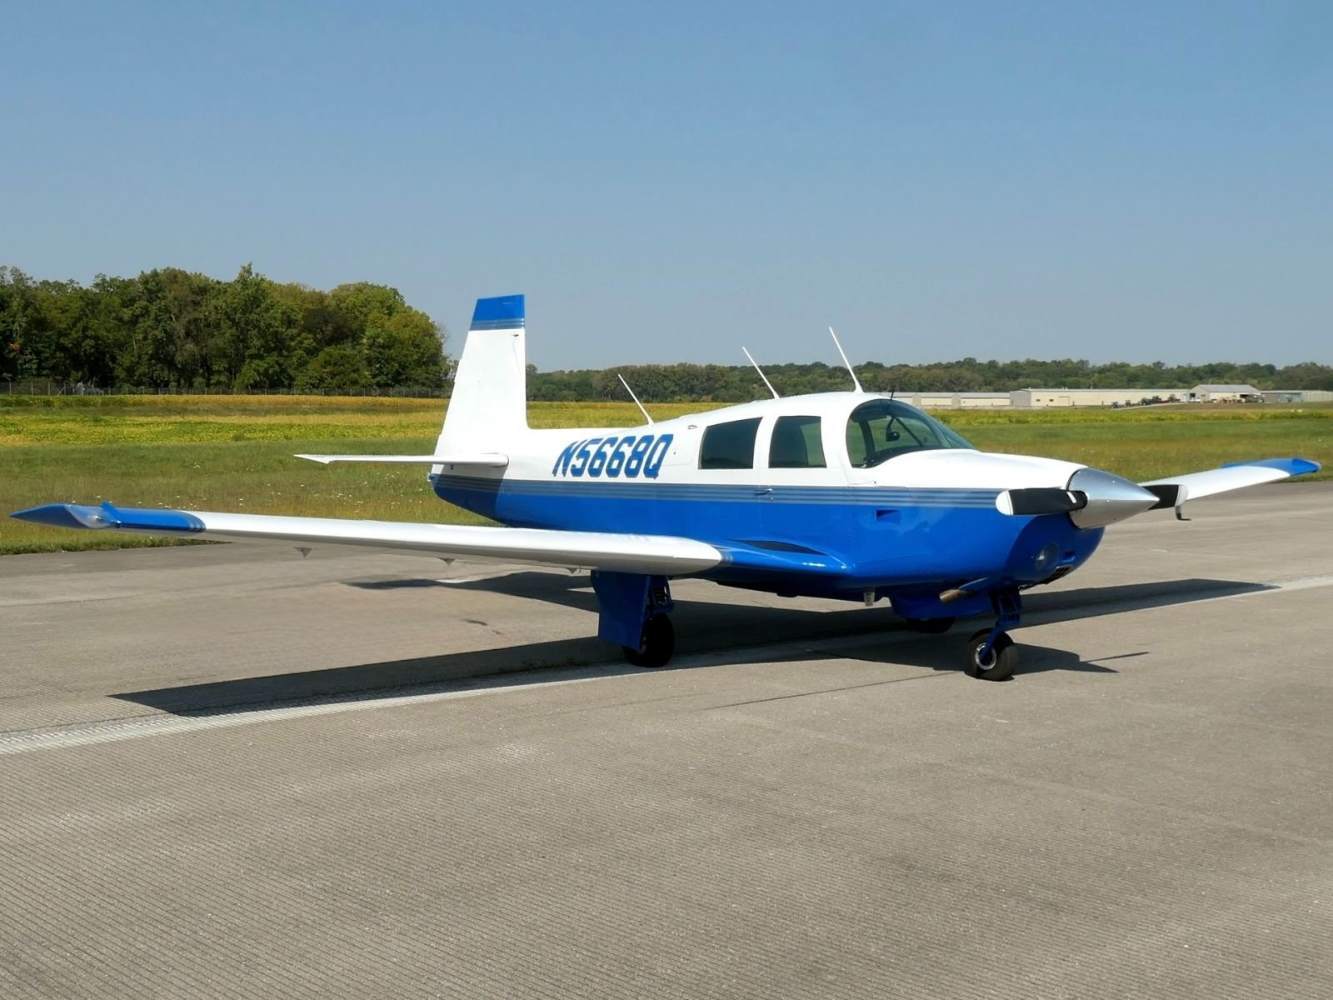
Hey all! My name is Philip, and I fly Dassault Falcon jets and run a mobile A&P business based out of the upper Midwest. I picked up a unique little E model Mooney as another service rig for the business, so figured I'd join and get involved with this awesome community! This E model is unique because one of the past owners put a lot into making it just like a mini-J model. It has every offered speed mod, a beautifully done original 201 paint scheme, electric gear, one piece belly, wingtips, speed brakes, and much more. The most interesting part is that it received a single aircraft approval STC for a Lycoming IO-360-C1D6 engine, which uses a 6.3 and 8th order counterweight on the crankshaft, just like the J model engines (A1B6D & A3B6D). Finishing it off, the engine is mated with a round-tip J model propeller and spinner. I've been a long-time viewer of this group, and the content here has helped tremendously when working on client's aircraft. I'm glad to now be a part of this group and hopefully I'll be able to contribute even just a fraction of the value and knowledge that is held within this community!
- 4 replies
-
- 12
-

-

Ly-Con options on IO-360-A1A Overhaul
MooneyMitch replied to Vance Harral's topic in Vintage Mooneys (pre-J models)
I see some dust on your spinner....................you might want to take care of that!! -
 Our 1961 B model has a crack on the propeller spinner that has me a little worried. It has been drilled 3 times and shows no evidence of cracking past the last drill hole. My partner is not worried about it, and says he has spoken to 2 mechanics who said to just keep an eye and make sure the crack doesn't continue. The crack is on the 'trailing edge' of the flange and so is not exposed to the relative wind the prop when rotating. Am I needlessly worrying for nothing?
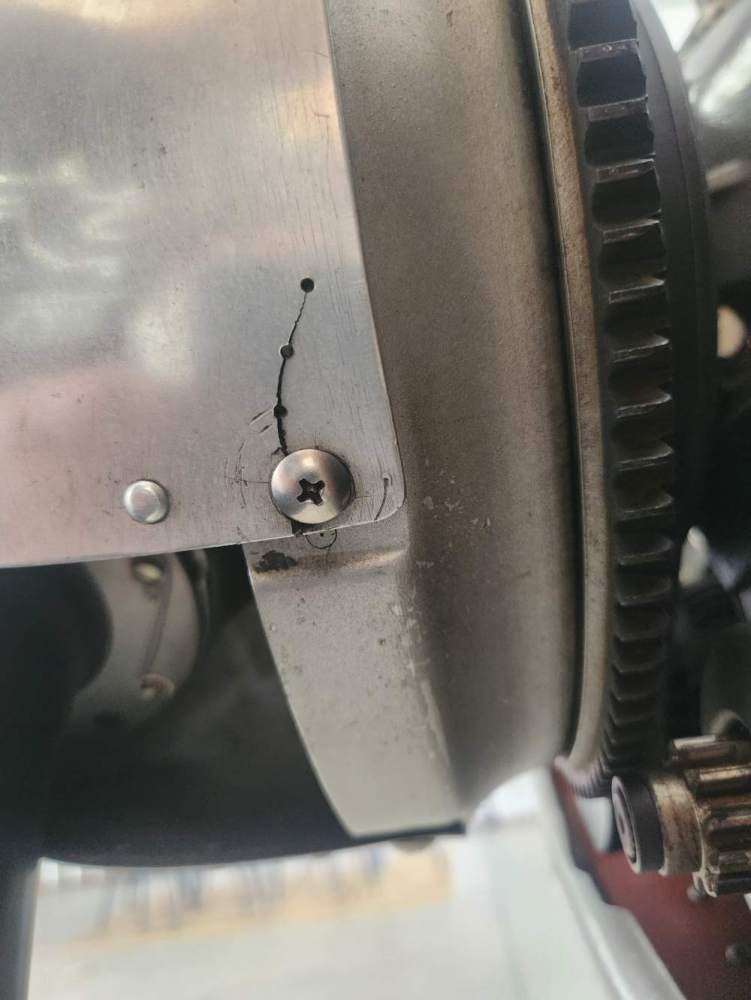
-
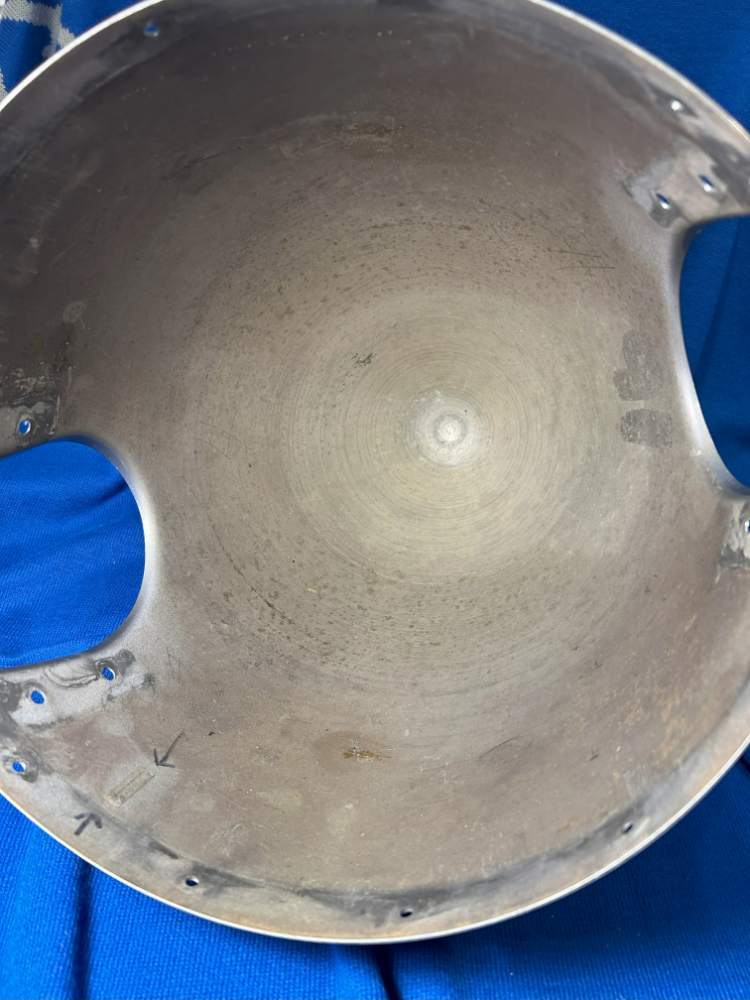
Reaching out to the community for some friendly advice on the level of concern and follow-on action. Background: 1981 M20J (IO-360) went in for annual service with some avionics upgrades early this year. Every item found on the report was approved for repair/fix. A/C flew from MX to home station, about a 4+30 flight with one stop for fuel. One item was a crankshaft seal leaking, removed and replaced the crankshaft seal and prop o-ring—common fix from what I can research, done. After arriving home, I noticed a few streaks on the passenger side windshield, which appeared lubricant-based. Noted and cleaned the windshield as the prop was dry. Fast forward two short flights later, followed by another 4+00 flight, the streaks appeared on the windshield again, prop still dry. Findings: The spinner was removed yesterday to check for any apparent issues. On removal, there was a random installation of long and short bolts on the spinner and the inner spinner assembly. The aft spinner bulkhead appears to be installed 180° out from the markings of a #1 and #2 on the assembly—minor streaks from the prop and engine crankshaft attachment point. Spinner had a small lubricant (grease) transfer relative to prop #2. Action: I cleaned streaks and the spinner transfer, reinstalled the proper bolt pattern, and will perform a ground run and flight, then recheck for streaks or lubricant transfers. Concern: The aft spinner bulkhead is the balancing attachment point for added weight. Can it be rotated 180° without removing the prop? Or does it even matter?
-
I'm trying to justify in my mind purchasing a sweet, fully loaded M20E. I know there's a point of diminishing returns when upgrading the avionics on an older airplane like this, but I was curious what others thought the upper end of the price range a knowledgable buyer would stretch to. I can post a picture of the panel if it would help. And the airframe has pretty much all of the mods available (201 cowling, windshield, spinner, etc.).
-
McCauley spinner D5992 with bulkhead for sale. $1000 plus shipping.


-
Coy Jacob's used to advocate chrome hubcap, for additional visibility while banking. Same with chrome stall strips and spinner. But LED stripes, etc,, have made that unnecessary. When I first got my Mooney, mynA&P talked me out of any hubcaps, saying they heated up wheel bearings and made it difficult to inspect them.
-

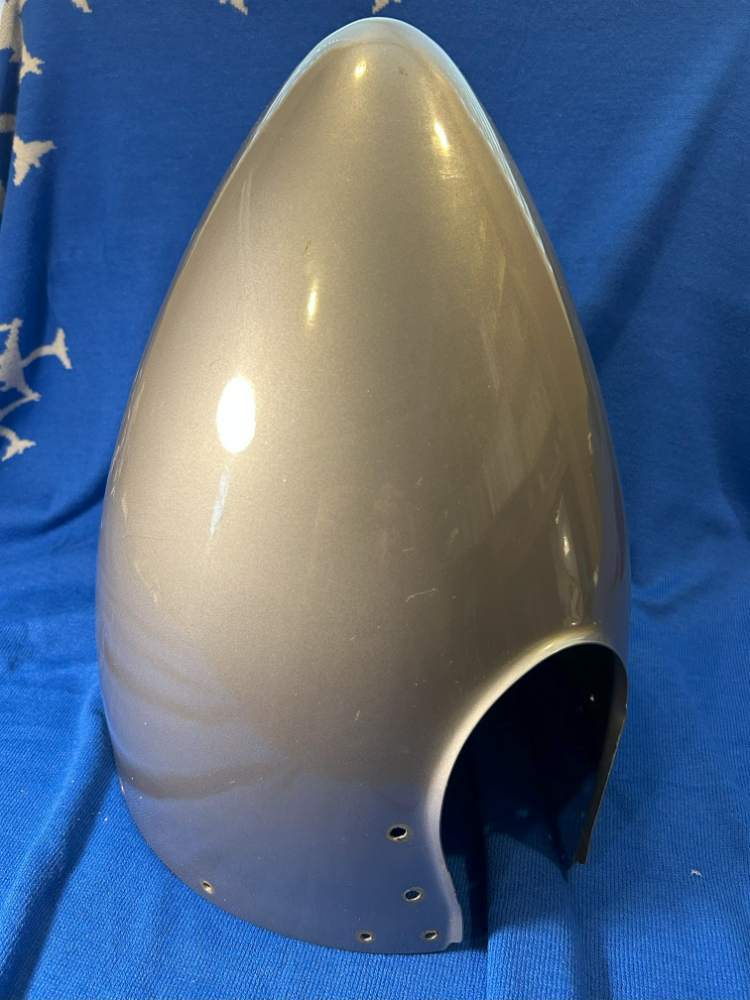
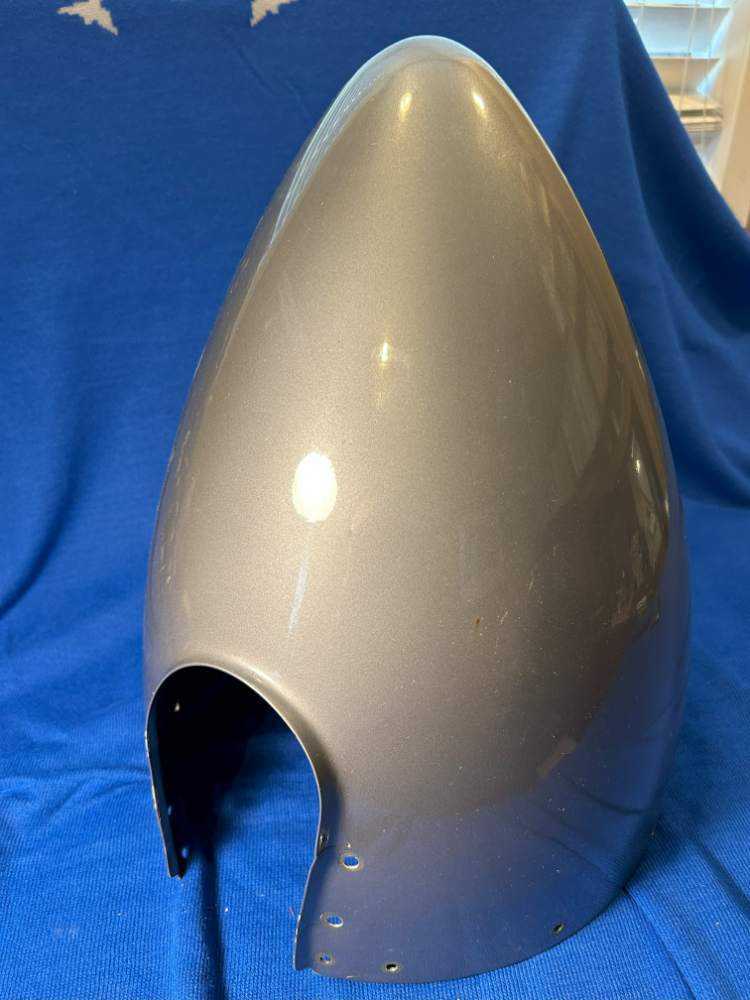
Cracked spinner and deformed bulkhead
Bartman replied to SilentT's topic in Modern Mooney Discussion
Wow ! It is likely that the bulkhead deformed because the tape on the hub was not sung enough. If it’s not tight enough at the bulkhead-hub interface, the spinner was wobbling around at 2700 rpm and results in cracks in the spinner. You better take a really good look at the backing plate. I would not be surprised if it is cracked too. -

Cracked spinner and deformed bulkhead
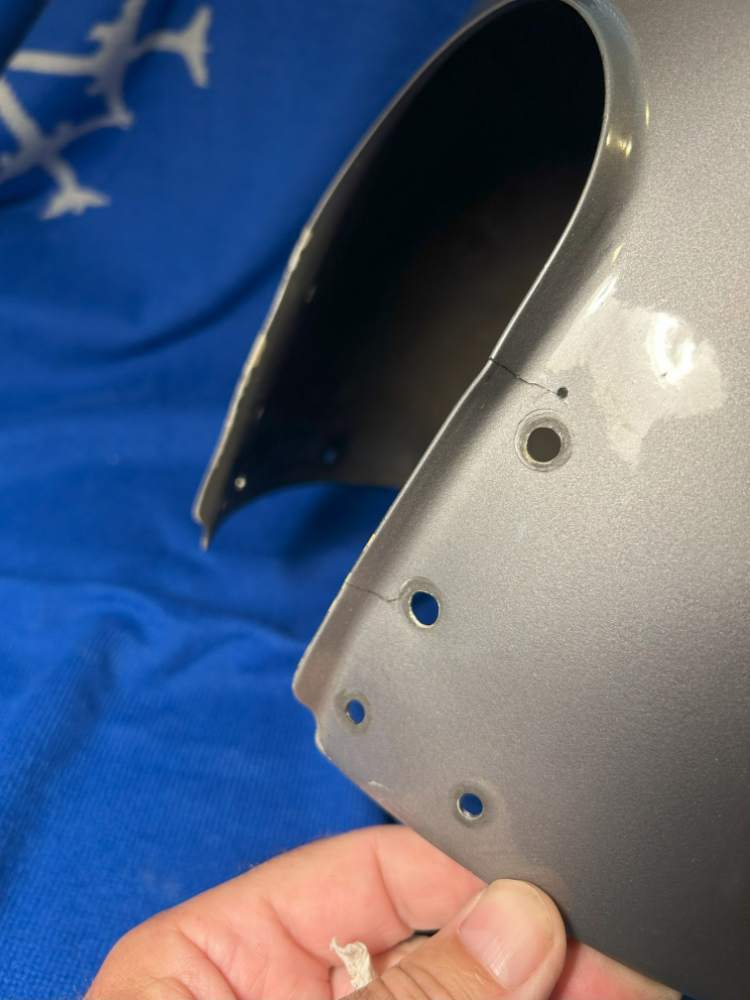
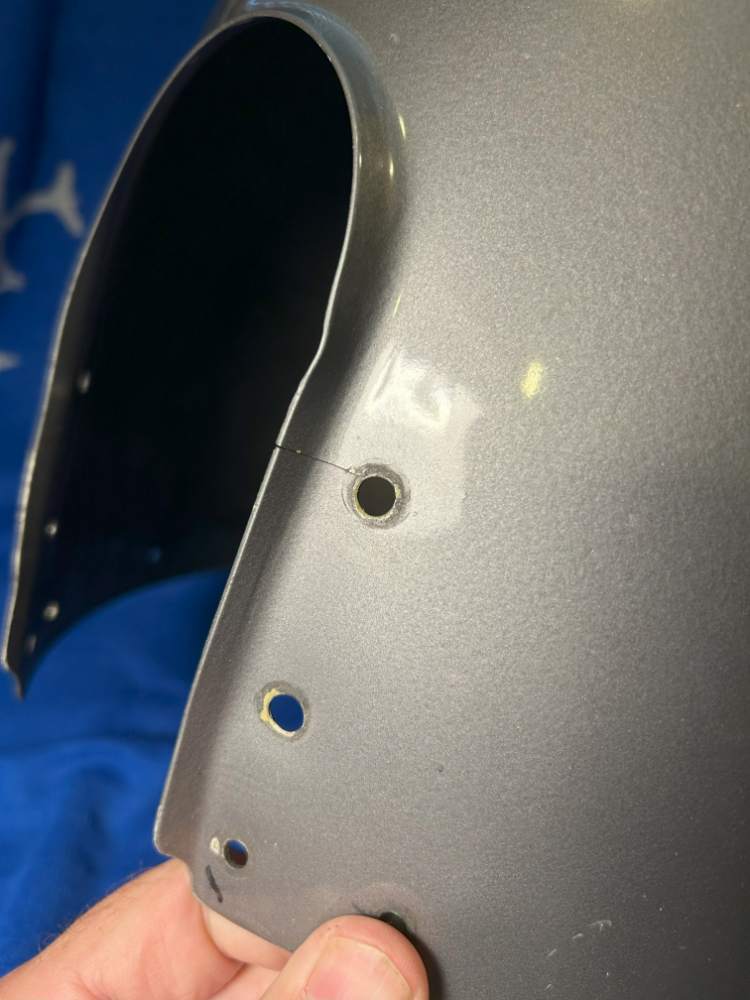
1980Mooney replied to SilentT's topic in Modern Mooney Discussion
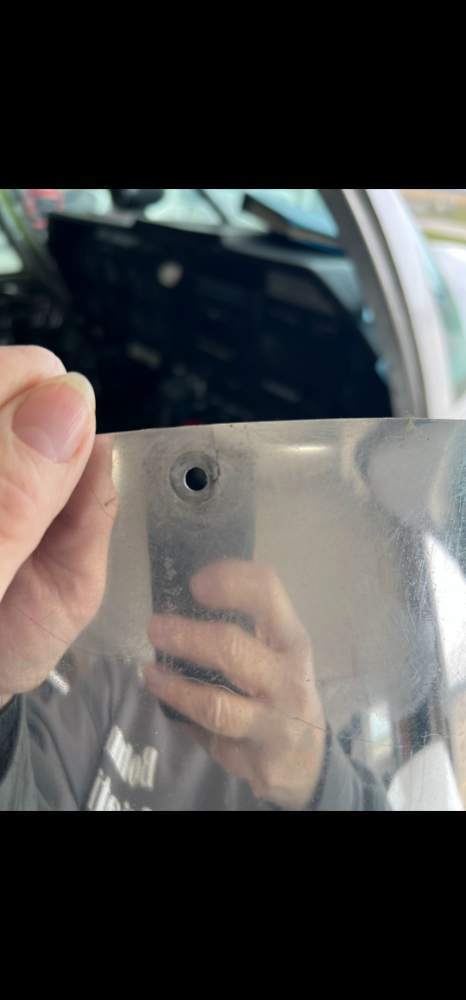
Wow - you are really having more than your share of issues shaking down your "new to you" plane. Is that a crack from the hole on the spinner going up to the edge? And is that another crack near your thumb also going up to the edge? And what is that line that goes at a diagonal from your hand holding it past your hand holding the iphone? - Is that a crack also?? -
Hi all, I'm having trouble finding a replacement spinner doubler part no. 940003-501. This is for a 1978 J. It looks like this part was installed after this airplane left production as a result of SB M20-201 2-14-78. If this part is unobtainium... what are my options? Can a doubler be riveted on, or is my only option to use the old part as a template to fabricate a replacement?

-
When you check the baffle seals, make sure that after flight they are curved inward. If not installed correctly, they can look fine when the cowling is installed but then blow back from air pressure causing a leak. Afterwards, they can appear to seal the cowling when the engine isn’t running. Another trick to check for air leaks is to put the airplane in a dark hangar and insert a light through the oil filler door and peer through the inlets by the spinner. A significant induction leak should cause a rough idle. For comparison, my IO-360-A3B6 in a 1994 J generally runs about 360 deg F CHT or less with cowl flaps open during a sea level climb at 105 KIAS with full rich mixture and about 18 gph fuel flow. It will get hotter on a warm day at lower IAS but never over 400. In cruise I usually see about 340 with the mixture leaned peak or LOP and the cowl flaps closed. If your left cowl flap is flat rather than curved like the right one, you might try rigging it to be open about half an inch when the cowl flaps are closed.
-
Thank you and that's where we are headed. Just wondering if there is a better way to time a Mooney than with an antiquated sundial attached to the spinner? Surely technology has caught up to that too.
-
Cowl and Spinner


-
been flying a '75 F for 8 years now with no washers of any kind on the spinner screws, using several different mechanics. new mechanic just put plastic crush washers on them. that seems......odd to me. what say you all? tcds doesn't say anything specific about it. checking parts manual as we speak.....
-
Diagnose my first oil leak after recent overhaul...
47U replied to DXB's topic in General Mooney Talk
Without an obvious leak after visual inspection, the crankshaft seal is the first place I would investigate. It’s hard to see, but run a clean paper towel underneath the crankshaft on the backside of the starter ring gear. If that’s clean, maybe pull the spinner and see if there’s any evidence of the prop leaking. The prop governor oil line fitting might be leaking a little, but I don’t think it’s the source of your spritz. Years ago, I had the same spritz on my C model (narrow deck) under the same flight conditions. It was the crankshaft seal. (The safety wire on the alternator support arm looks to be neutral… could be parallax in the view… ummm, I apologize for mentioning it.) -
So last weekend, we began to tackle the ratty old, worn out, 34 year-old M20J cowling. This is prep for a repaint this fall. The paint was cracking next to the hump and all the cowl fastener holes were worn out. Additionally, both cowl halves were split right behind the spinner and there were some shoddy repairs made before we owned it. In other words, time for a total rebuild of the cowling. My first post will be about the carbon fiber stiffener mod and spinner ring. The fastener holes, cowl edges, ram air hole delete, and lower spinner ring will follow as we do those. The upper cowling is made of epoxy impregnated fiberglass, with aluminum strips embedded along the edges where the fasteners go. The factory also used 3 strips of 1/4" honeycomb about 1" wide under the final layer of fiberglass to act as a stiffener. Where the honeycomb makes the transition at the edge of the hump it is crushed, and fails there first. The fiberglass over it cracks and it begins to flex. Then the cowl begins to flex, and the paint cracks at that transition next to the hump molding. It's easy to tell, just set the cowling upside down on your lap and push down on the sides, the gaps open up. cracks form here As mentioned earlier, the previous owners attempted to fix this, but the execution was terrible. They used common boat store fiberglass and either contact cement or polyester boat resin to place a large 16" square patch over the entire area. It peeled off in one sheet, and about half the fiberglass cloth was not even wet, it was white, dry, and flexible. The honeycomb under the hump area was completely crushed down and broken, the only thing holding it together was the very thin skin of 3 layers of fiberglass from the factory. Terrible. This is the before picture of the inside of the cowling, after removing the scab patch and during prep for the carbon stiffener. Our solution was the use of 19.7oz/sqyd carbon fiber bidirectional 8HS weave fabric cut to strips and laid up to replace the stiffener. More on fabric selection later, but this is what we had. For epoxy only one thing will do, and that is MGS. It is a certified epoxy from Germany they build gliders over there with, and Cirrus and Diamond uses it in their airplanes as well. It is a very strong product and has a high TG, or, the temperature at which the epoxy gets soft and loses strength. We chose MGS L285 resin with a 50:50 mixture of fast and slow hardener. Also, per the M20J SMM, Structures section, 5% Antimony Trioxide by weight of resin must be mixed for flame retardant properties. The SMM also lists several epoxys to use for repairs, but none are suitable for laminates. They are more of a PRC-type paste. I went the modern solution and contacted a few Cirrus repair centers, they all use MGS L285 for cowling repairs. The stiffener was cut down flush 2" from either side of the hump mold line and scarfed back at a 30 degree angle. You can see this in previous pics. For the rear two stiffeners, 5 plies of carbon in width from 1.75" to 1.25" were used, to give it a trapezoidal shape, and 2 capstrip plies were used that extends past the scarf line over the top of the factory honeycomb, 2" either side to transfer the load. The front stiffener consists of 6 plies of carbon fabric from 1.75" to 1.25" in width, and three capstrips, one extending 2" either side, the next 2.5" either side, and the final top strip extends 3" either side. Then the front two stiffeners were covered in three layers of the 19.7 oz fabric, the middle layer cut on a 45 degree bias. All of this was vacuum bagged with 20" of vacuum. Due to time constraints, the rear two stiffeners were laid up along with the first 3 layers of the front stiffener and bagged. The next day we finished the layup of the front stiffener and the large patch layers, and vacuum bagged that all together to finish the job. Midway through the job, the rear stiffeners are laid up and 3 plies on the front. Cutting the carbon proved to be a real issue. The 8HS weave is very loose and excellent for draping over complex curves, but it falls apart with scissors. The solution was a 45mm OLFA razor cutting wheel against a metal straightedge as a guide, cutting epoxy-wet cloth on glass. After a few cuts to refine technique, it comes out very smooth and can be laid up immediately. For vacuum bagging we used a 5CFM a/c vacuum pump and a set of R-12 gauges. That along with a 7$ fitting to connect the vacuum bag fitting worked great. It is massively stiff and really was overkill for the work needed. If I were to do it over again, I would use 1.5" wide 19 oz carbon fiber unidirectional tape on the same layup schedule. It would be far easier to cut and layup. We basically made our own strips. Only 2 plies of the large area patch to tie the front two stiffeners is needed. After stripping of the old shoddy repair, total weight gain was approximately 1.5 pounds. Final product:


- 64 replies
-
- 7
-
-

-
- carbon fiber
- fiberglass
- (and 2 more)
-
Are you still looking for a damaged/bent 201 spinner?
Mark
-

Upper cowl machine screw issue on '83 J
jetdriven replied to 0TreeLemur's topic in Modern Mooney Discussion
Stainless screws tend to gall and seize up in the nut plate and then break off and then you have one heck of a problem. We just started using more and more cad plates steel fasteners, which don’t do this nearly as often. Spinner screws in M20Js are another notable example.