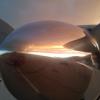
fatter36 Posted November 14, 2012 Report Posted November 14, 2012 relatively new owner and first time posting here. i tried searching as i am sure some others have the same issue. the tab on the shaw aero 431-9 fuel caps sit up proud from the surface of the wing - i think the years of use have rounded off the tab, so the downwards tension does pulls it slightly up. can't seem to find a ready supply of new - or newer caps. does anyone have a remedy? (or some nice new caps they wish to part with?) i read filing the corner of the tab back square may address the issue, but wanted some feedback before attempting. thanks Quote
jetdriven Posted November 15, 2012 Report Posted November 15, 2012 That sounds like a good fix to me. Disassemble the cap and file the bottom side square with a good corner. before filing, try adjusting the tension on the tab. Quote
Hank Posted November 15, 2012 Report Posted November 15, 2012 How 'not flat' is it? I'd ignore less than twice the thickness of the metal. Quote
DrBill Posted November 15, 2012 Report Posted November 15, 2012 I had 2 Shaw caps (sold to another Mooney owner recently) after I had the O&N Bladders installed. One cap tab was always flush, the other not so. I first increased the tension of the "bad" one with no improvement. After bladder install I compared the two. The flat one had a nice square corner (perhaps 1/32 radius) so that it snapped over and the two surfaces were 90 degrees. The "worn" tab had a rounded corner, 3/32 or more radius. The new owner was planning to document through precise measurements and perhaps machine new tabs. If it were mine, I'd probably just file the surfaces flat using a good milll bastard file and make them perpendicular again. Bill Quote
1964-M20E Posted November 15, 2012 Report Posted November 15, 2012 I had 2 Shaw caps (sold to another Mooney owner recently) after I had the O&N Bladders installed. One cap tab was always flush, the other not so. I first increased the tension of the "bad" one with no improvement. After bladder install I compared the two. The flat one had a nice square corner (perhaps 1/32 radius) so that it snapped over and the two surfaces were 90 degrees. The "worn" tab had a rounded corner, 3/32 or more radius. The new owner was planning to document through precise measurements and perhaps machine new tabs. If it were mine, I'd probably just file the surfaces flat using a good milll bastard file and make them perpendicular again. Bill Or you could use a milling machine if you have access to one. Quote
fatter36 Posted November 15, 2012 Author Report Posted November 15, 2012 thanks for the feedback, i had adjusted the tension and it just makes it pop up more (and at a certain point, they can open easily). I might try the squaring off the corner by filing. logically it seems like this should work. i'll post the results. Quote
Steve65E-NC Posted November 17, 2012 Report Posted November 17, 2012 A very good welder can carefully build up the corner or: if previously filed down, the entire parallel surface. Try heliarc and 5356 rod. Stay clear of the pivot hole. After the weld build up it is probably better to use a mill, vise and parallels to get the primary parallel surface flat (file sides back to flat first). I am not sure a square corner is needed or best. This would create a lot of over center action and may not be good for the fuel tank flange or the large O-Ring. However, any corner radius must leave some flat distance forward of the perpendicular tangent point to the pivot rod center so that there is toggle action to hold tab flat. If you need new pivot hardened dowels, you might consider the ground off clean end of a 1/8" drill bit, these are cheap and readily available. If the dowel is loose a little punch work on the narrow flat of the aluminum latch tab should work to recreate the light press fit on the pivot rod. Of course this welded/ build-up fix will require prep/repaint of the latch tab after the fitting is complete. And also sign off by an A&P. Quote
fatter36 Posted November 21, 2012 Author Report Posted November 21, 2012 i ended up disassembling the caps, and sanding bottom edge of the tab flat using sandpaper. snaps over nice and tight now. pairing this with some built-up weld repair would probably be a superior solution - but the simple version ended up working well for me and was very easy to execute. new o-rings, fuel cap leak test, sign off by A&P - job done. 1 Quote
Recommended Posts
Join the conversation
You can post now and register later. If you have an account, sign in now to post with your account.