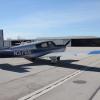
ncdmtb Posted February 1, 2014 Report Posted February 1, 2014 My "wing walk" is not looking best anymore. What is the best way to repair? Does the old stuff need to be removed? Do you just "paint" over the old to fill the holes? What kind of a compound is neeed? How to proceed? Since this is totally new for me, any advice is much appreciated. Here are some pictures of what the "wing walk" looks like: Sent from my iPad using Tapatalk Quote
kerry Posted February 1, 2014 Report Posted February 1, 2014 Your picture looks like wing compound to me. It looks to be in pretty good shape. I would clean it and patch the localized areas with new wing walk compound. 2 Quote
Bob_Belville Posted February 1, 2014 Report Posted February 1, 2014 Search for a thread from a year or so ago. Several of us have done this job, simple and cheap. I recall providing step by step advice using a small can of material from Aircraft Spruce and a narrow napped paint roller. Clean thoroughly, dry, mask, and roll right over the old. (The grit settles quickly, keep it stirred.) 2 Quote
laytonl Posted February 1, 2014 Report Posted February 1, 2014 Randolph wing walk compound is the material. I prefer to brush it on. Lee 1 Quote
Marauder Posted February 1, 2014 Report Posted February 1, 2014 On 2/1/2014 at 10:04 PM, laytonl said: Randolph wing walk compound is the material. I prefer to brush it on. Lee That's the stuff... Quote
Guest Posted February 1, 2014 Report Posted February 1, 2014 I would use caution in applying too much wing walk compound. Rolled on too wide and too think destroys the beautiful clean airfoil and adds un wanted drag. Paint stripped is required to removed it. Clarence Quote
Bob_Belville Posted February 2, 2014 Report Posted February 2, 2014 On 2/1/2014 at 10:04 PM, laytonl said: Randolph wing walk compound is the material. I prefer to brush it on. Lee Lee, Lynn uses a roller. In fact he loaned me his and stirred my can on his drill press. But I did the work. We're lucky to have him. Quote
rbridges Posted February 2, 2014 Report Posted February 2, 2014 On 2/1/2014 at 10:35 PM, Marauder said: That's the stuff... that's what I used, too. Cleaned the wingwalk to remove oil/residue and marked the edges with blue painters tape. I bought a cheap roller (it's going to be toast afterwards) to apply it. Looked great. make sure to stir it well. The grit is probably settled to the bottom of the can. 1 Quote
ncdmtb Posted February 2, 2014 Author Report Posted February 2, 2014 I looked at the thread from last year. Thanks for the tip! A number of comments refer to "cleaning" the existing wing walk before reapplying. How do I clean? What solvents/material are best used? Is it best to wait for a certain outside air temp before I do this project? Should I wait for spring or is this something I can tackle now? ( Sent from my iPad using Tapatalk Quote
rbridges Posted February 2, 2014 Report Posted February 2, 2014 On 2/2/2014 at 9:39 AM, ncdmtb said: I looked at the thread from last year. Thanks for the tip! A number of comments refer to "cleaning" the existing wing walk before reapplying. How do I clean? What solvents/material are best used? Is it best to wait for a certain outside air temp before I do this project? Should I wait for spring or is this something I can tackle now? ( Sent from my iPad using Tapatalk I just used a spray degreaser like Purple Power from walmart. I think mine cured pretty quick b/c I did it when it was fairly warm. There was one spot where I had to fill in a void and it took a few days to harden. I would just stay off it for a while, especially if it's cold and humid where you are. Worst case, you put a shoe mark in it and have to repaint an isolated area. 1 Quote
OR75 Posted February 2, 2014 Report Posted February 2, 2014 paint remover to remove the old wing walk fine sand paper to remove any corrosion patches spray Zinc chromate apply wing walk compound. 1 layer should suffice. Really the most difficult part will be to protect the non walk area with paint tape. and as mentioned somewhere above, make sure you stir the pot really well as the grit tend to settle. use a long screwdriver or steel rod to scrape the bottom of the pot and make sure the grit is in suspension. do yourself a favor and do not patch the current wing walk. very easy and fun job. tools and products needed: wing walk randolph paint remover ( home depot) zinc chromate spray plastic and/or metal spatula to scrape old paint plastic sheet to protect plane from spray fine sand paper paint tape Quote
ncdmtb Posted February 2, 2014 Author Report Posted February 2, 2014 OR75 mentions to "not patch the current wing walk". Since mine still looks pretty good (see pics above) would it not be OK to paint over the old? Sent from my iPad using Tapatalk Quote
RobertE Posted February 2, 2014 Report Posted February 2, 2014 Let me be a contrarian here. If what bothers you most about your wing walk is its appearance (after all, 95 % of the compound is still there, doing it's thing) then I'd suggest buying some flat black paint, taping the edges for a nice, neat appearance, and rolling it on. I did this 5 years ago with my wing walk and it has held up well. If and when it starts showing its age, I'll redo it. Quote
rbridges Posted February 3, 2014 Report Posted February 3, 2014 On 2/2/2014 at 9:29 PM, ncdmtb said: OR75 mentions to "not patch the current wing walk". Since mine still looks pretty good (see pics above) would it not be OK to paint over the old? Sent from my iPad using Tapatalk Mine was fine, too. Just faded and a few stains. Stripping would probably be more ideal, but mine has held up well for 2 years since repainting it. Quote
AmigOne Posted February 3, 2014 Report Posted February 3, 2014 On 2/1/2014 at 10:04 PM, laytonl said: Randolph wing walk compound is the material. I prefer to brush it on. Lee Years ago in an Arrow I had I repainted the whole area with Randolph wing walking compound using a paint brush and could not get rid of the brush marks. The stuff is very thick and does not smooth out by itself. I would recommend using a short nap roller. 1 Quote
Buster1 Posted February 6, 2014 Report Posted February 6, 2014 How do you use paint stripper and not destroy all the surrounding painted areas? Very carefully I guess? Seems like the stripper would 'bleed under' the painter's tape and ruin paint. Quote
N201MKTurbo Posted February 6, 2014 Report Posted February 6, 2014 I use aluminum tape to mask for stripping. Quote
Recommended Posts
Join the conversation
You can post now and register later. If you have an account, sign in now to post with your account.