
47U
-
Posts
1,107 -
Joined
-
Last visited
-
Days Won
5
Content Type
Profiles
Forums
Blogs
Gallery
Downloads
Media Demo
Events
Everything posted by 47U
-
@Pinecone
-
 What king of damage is to the lower wing skin/bottom of the wing?
 -
Would .dxf files be a candidate for uploading?
-
I wouldn’t be afraid to schedule with Maxwell, who now does the Monroy STC, but I had scheduled with Paul Beck over a year ago. I didn’t have any unairworthy leaks, but the topcoat was showing up in my sump samples. I went to Weep No More because I have transportation support to MSP from relatives in the area. Paul had me scheduled for 27 Jan, but I delivered the airplane to him early on 8 Jan due to other travel commitments. And the airplane is done already! I am happy, and will be very happy as soon as I can get the airplane back home. Hopefully, mid Feb.
-
Heavy & Difficult Manual Gear Operation on M-20C
47U replied to mslisaj's topic in General Mooney Talk
Did someone say “springs?” So close, and yet, so far away.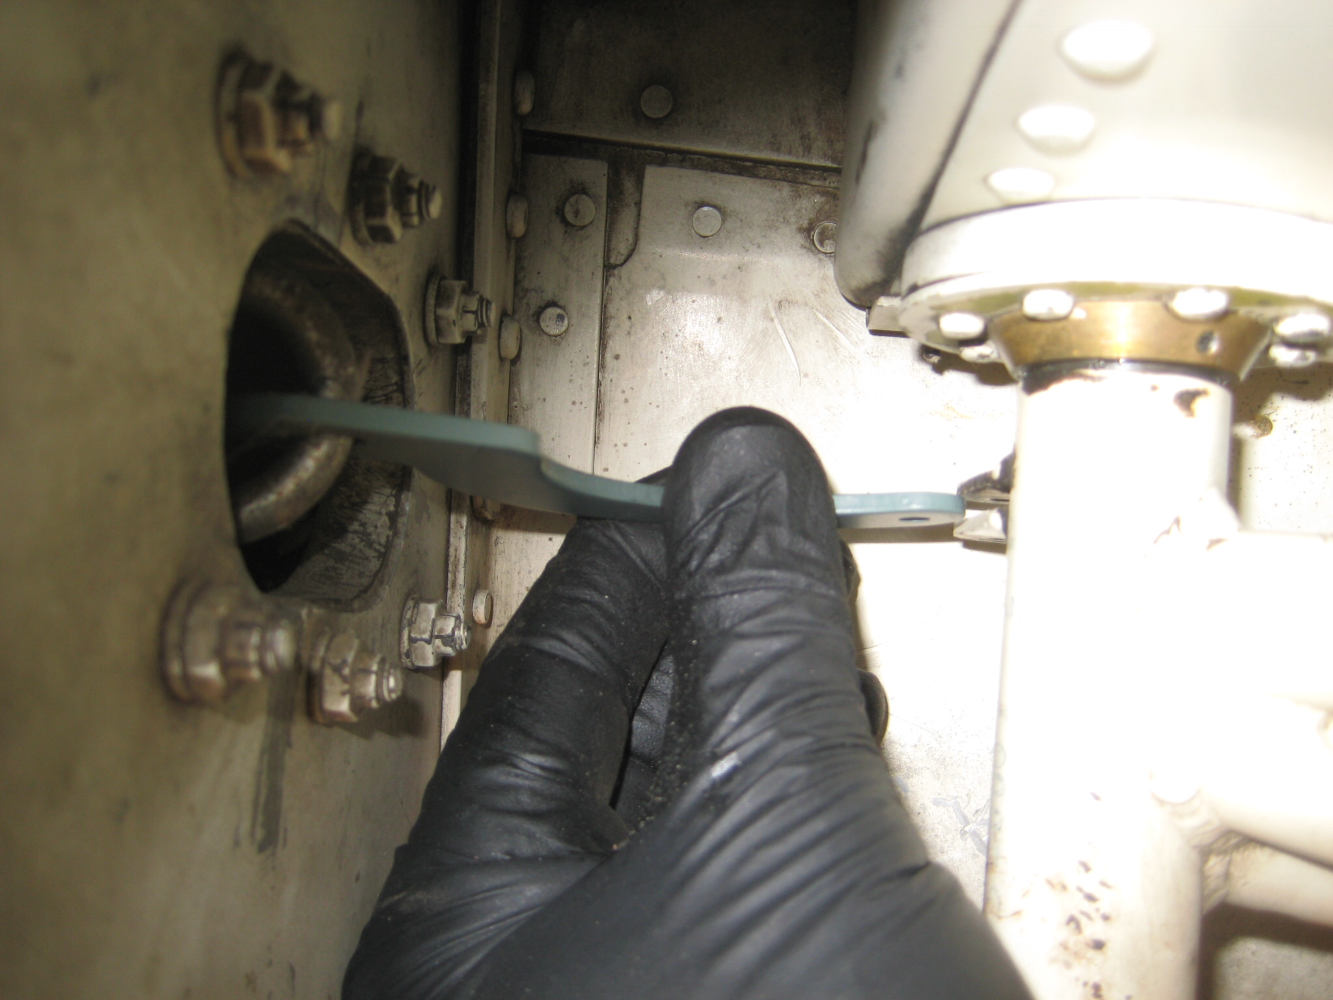
-
I’ve stuck a 1” black pipe in the tube and used an automotive (Mazda) scissors jack (with some dunnage) to lift the main gear high enough to get my too-tall wing jack underneath the jack point. That was in a hangar, though. I don’t know about doing it outside on open ramp. It was a hinky operation though, so I modified my homemade jacks short enough they’ll fit under the wing without jacking the main gear. How hard is it to remove the inner gear door? If you can take that off, since the brake caliper has to come off anyway, that scissors jack will also fit under the axle next to the brake disk. (I don’t think the caliper torque plate will be in the way, but you should check before driving 5.5 hrs.) It’s a much better solution because gear donuts stay compressed thereby reducing the amount of lift required to get the tire off the ground. Scissors jacks are on Amazon for < $50. There’s one rated at 1.5T for < $25.

-
Yes, part of the carburetor. There should be some resistance when pushing the throttle in ‘briskly’… say in about one second. Run the boost pump first to make sure there’s gas to the carb, then shut it off. Be careful troubleshooting. If the accelerator pump is working, excess raw gas will run out of a drain tube in the bottom of the air box. There should be a short length of hose to guide that excess gas out a hole in the bottom in the cowling and onto the ground. If that hose is not there, you don’t want raw gas to accumulate in the cowling.
-
Does the throttle provide some resistance when pushed in which would indicate the accelerator pump is functioning? Maybe less resistance on the first push in of the throttle, but more resistance on subsequent throttle actuations as the accelerator pump gets primed. As far as compression (which is most likely NOT your problem), what were the cylinder compression checks at the last annual inspection?
-
If the seat rail holes have never been cleaned out, you may likely find the debris in the shape and consistency best described as wood stove pellets. I used a thin awl to loosen that stuff up so the vacuum grab it.
-
Anything wet with fuel or through a pressurized structure was installed wet with sealant.
-
I’m not a sheet metal guy. Aircraft Spruce lists an 1/8” structural rivet a full inch long. I think that would cover it. AN470AD-4-16 Then again, as my sheet metal troops used to tell me, a bolt will replace a rivet according to T.O. 1-1A-8.
-
The LASAR version… .2 amu. It looks a lot more robust than the standard MS nutplate. Might be cheaper in the long run, if not for you then a future owner.

-
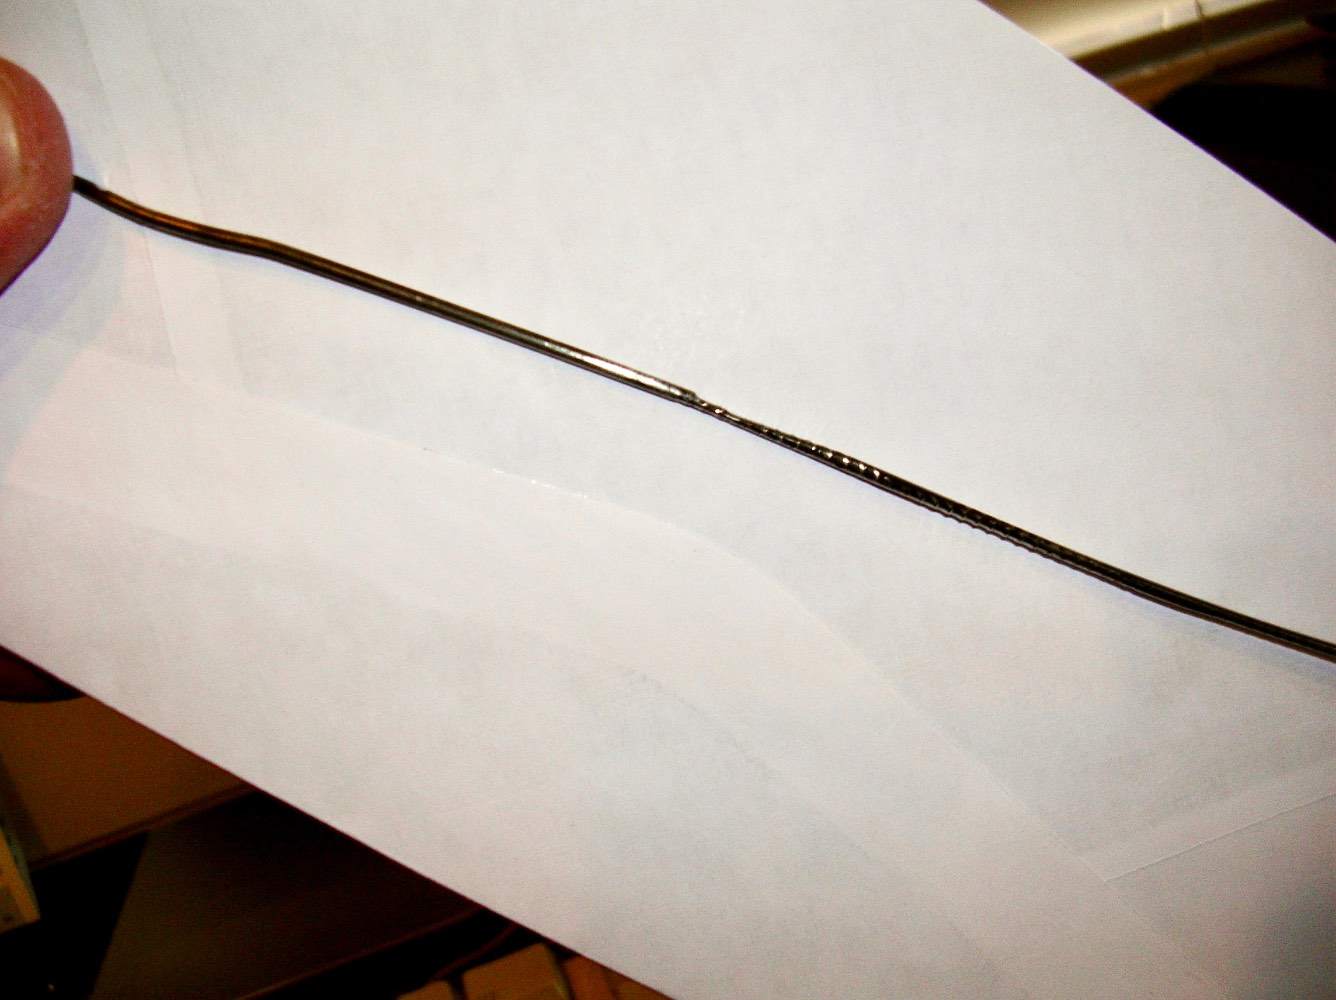
What cliffy said…. this was my carb heat cable. It was worn almost all the way through where the wire exited the sheath. LASAR put a new wire on it for me in 2010.
-
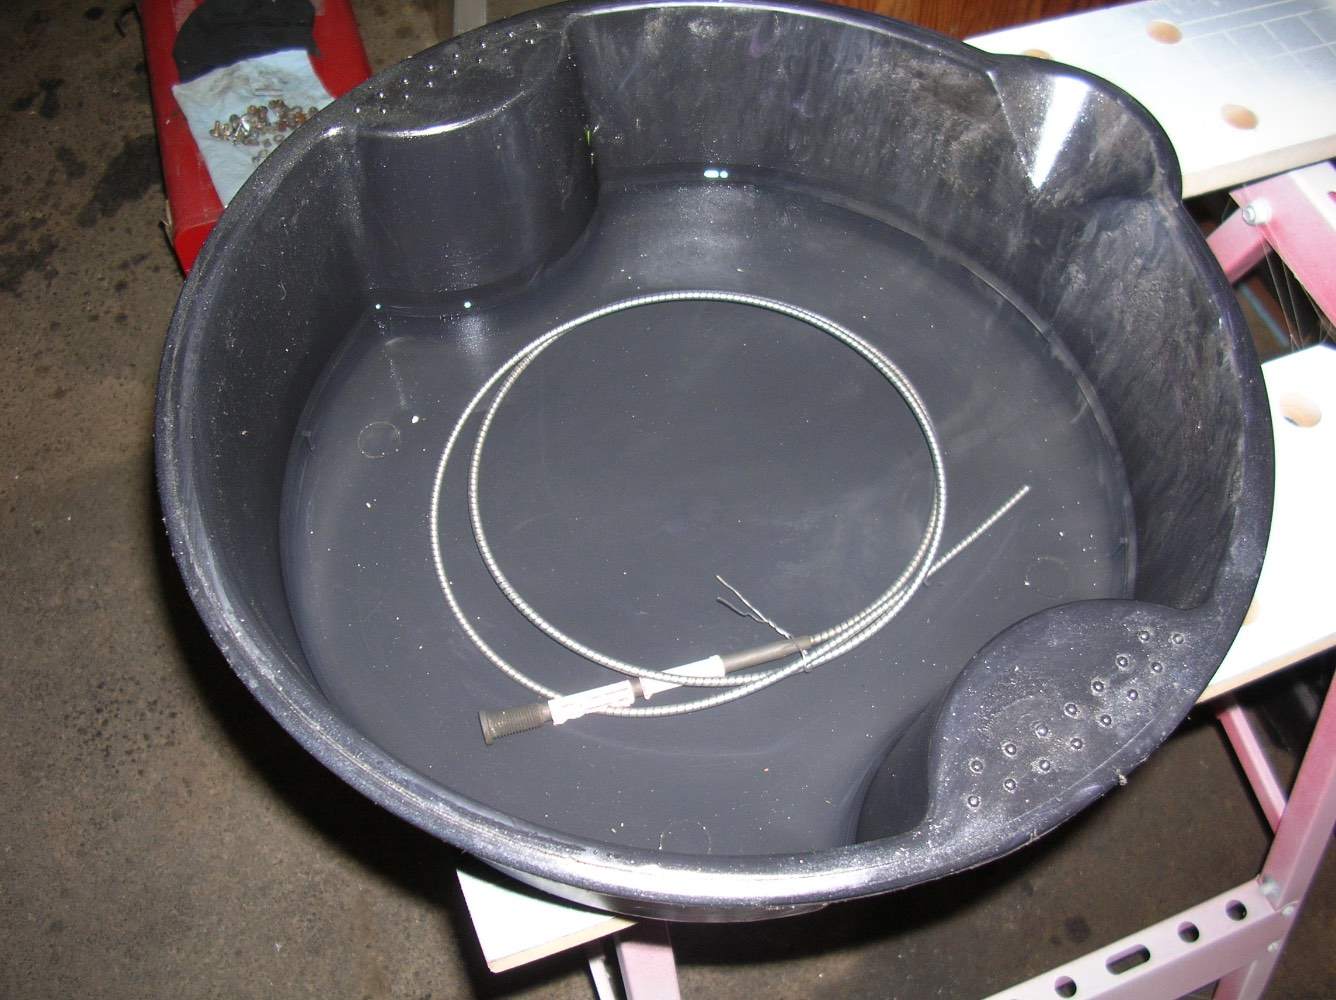
When I rebuilt my flap pump (Sept, 2010), the wire broke off and now it was too short. It was also very stiff to actuate. So much so, that someone (NOT me) put a ‘helper’ spring between the lever and the clamp holding the sheath so the flaps could be extended. I pulled the whole flap cable out of the airplane and sent the knob to LASAR who silver soldered (?) a new wire onto the knob. I put the sheath in a pan of mineral spirits to soak. When LASAR sent the knob back with the longer wire, before I installed it, I lubed it up good (I forget with what… probably Triflow) and then encased the whole cable in heat shrink. The cable is a little stiff now when I retract the flaps, so I could probably benefit from the cable lube apparatus.
-
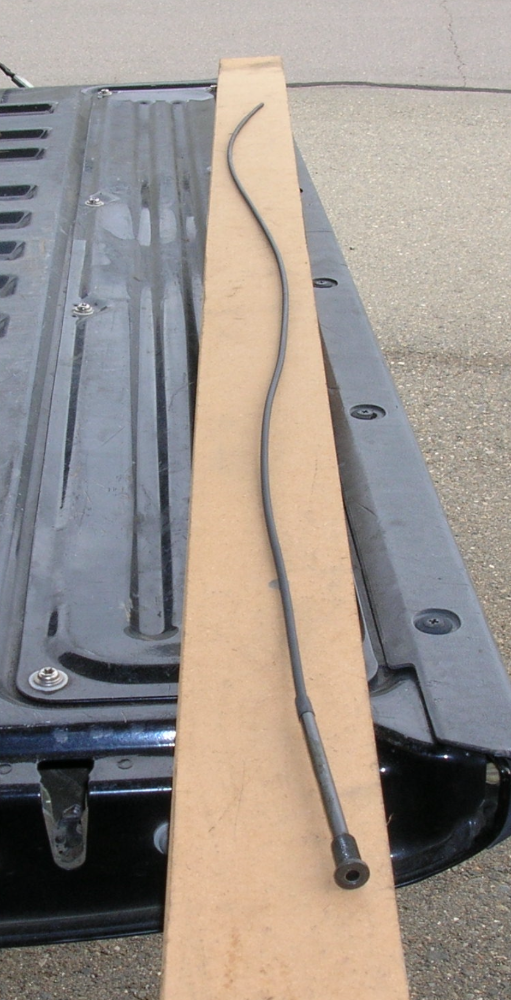
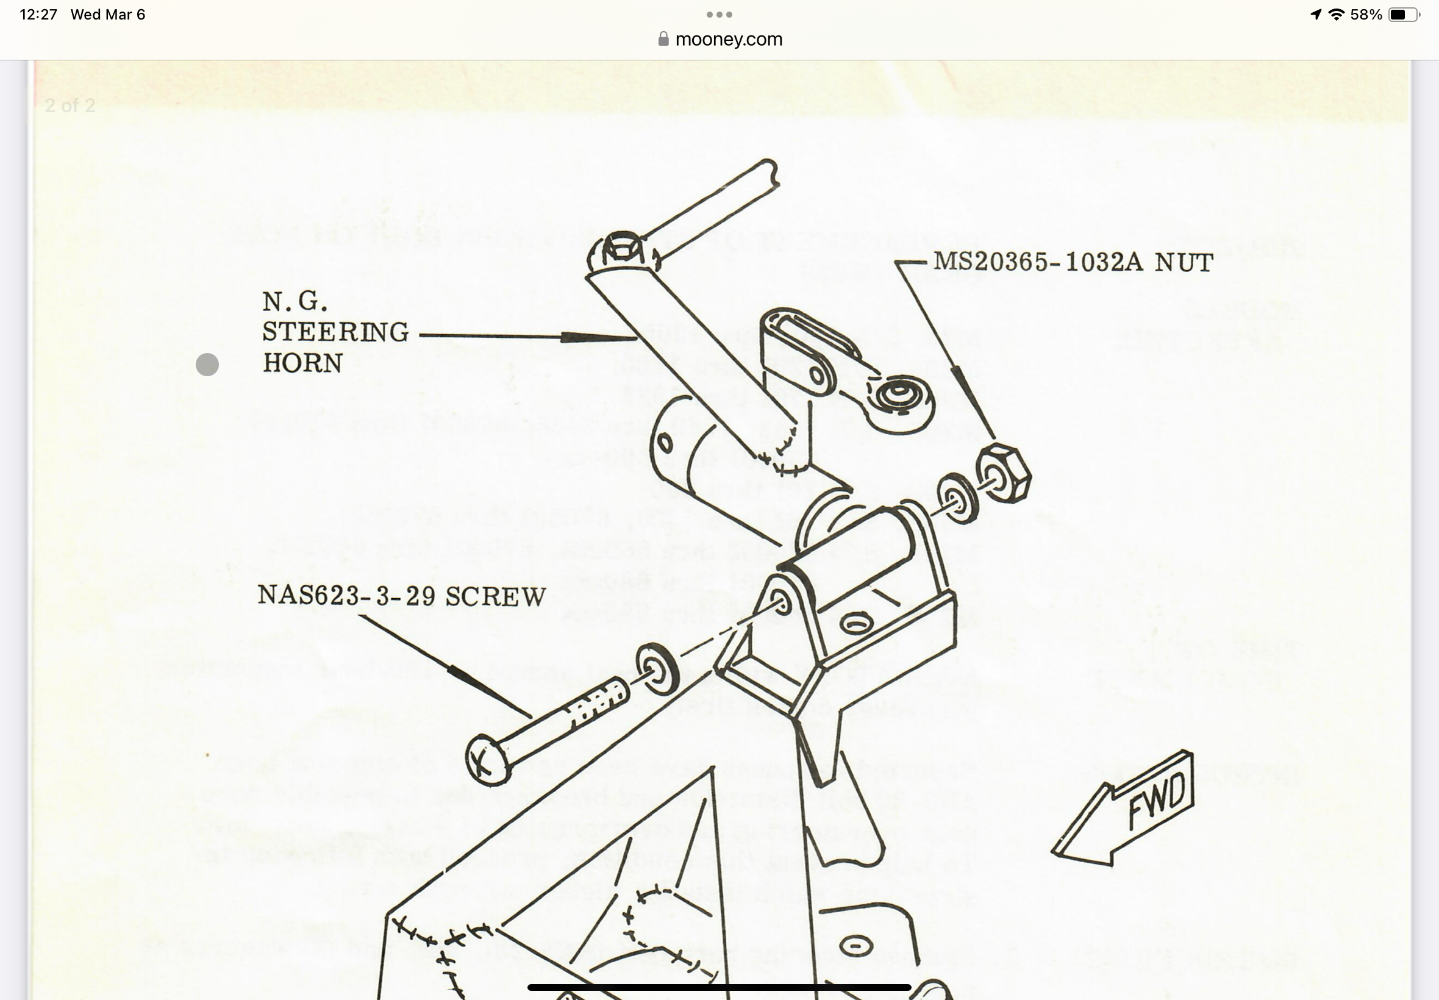
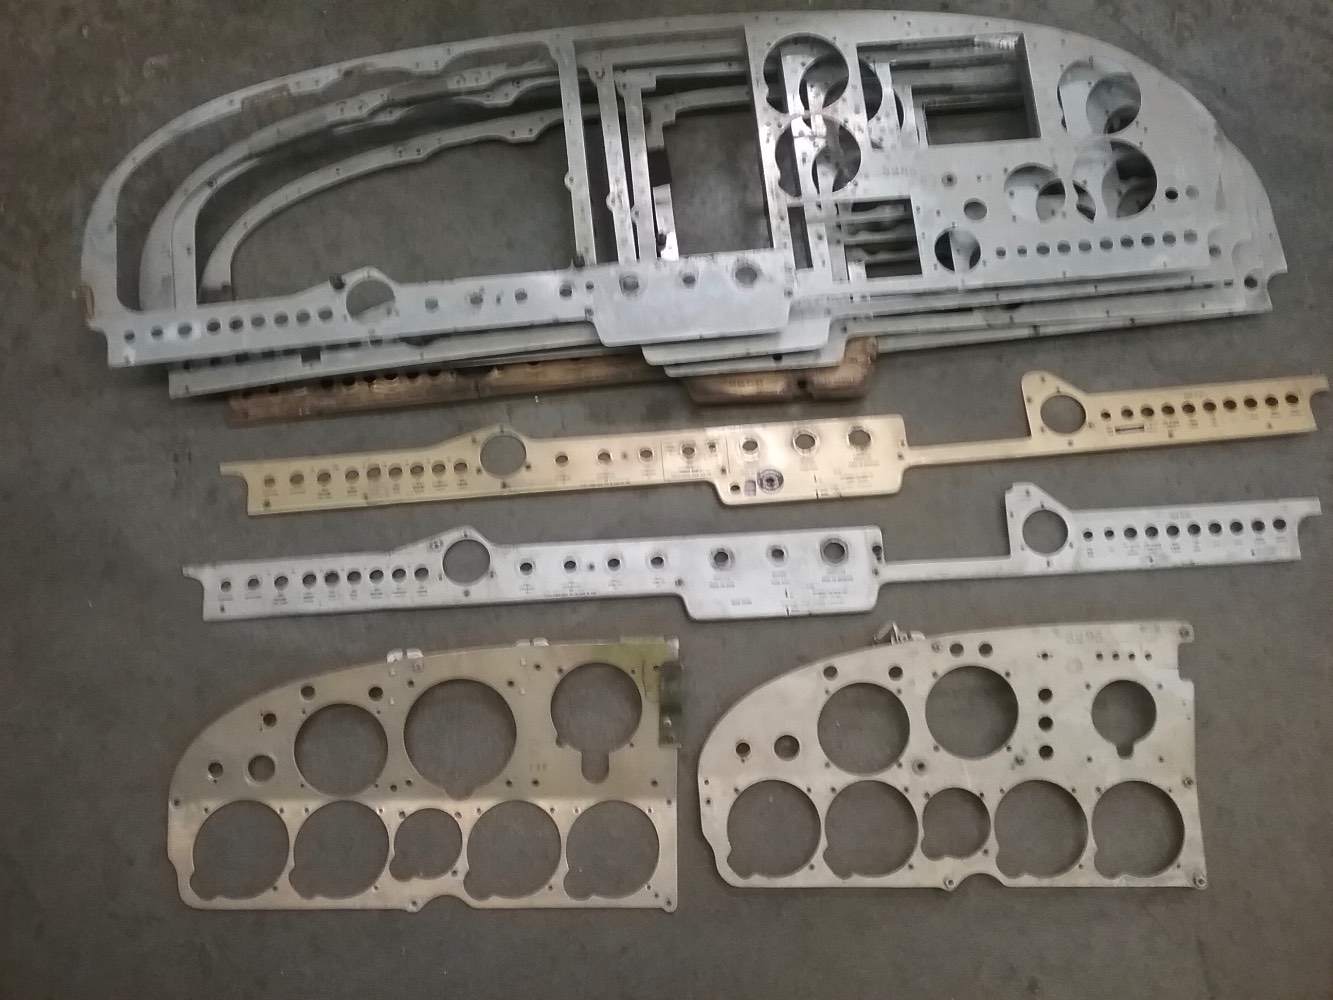
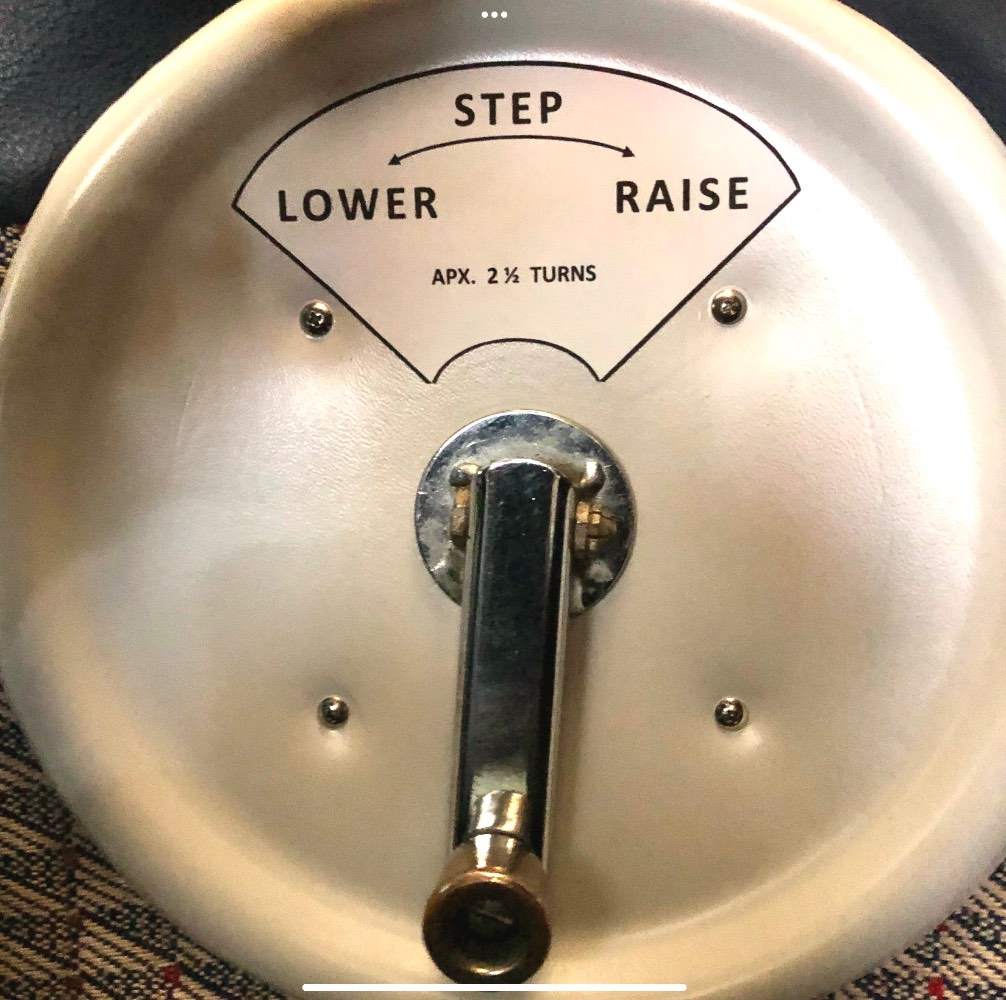
You might be able to find a leg from one of the recyclers, or on eBay. Skip is correct, your leg is technically unserviceable because of the dents. As far as the shimmy issue, I cannot tell if you have the shim installed spelled out in SBM 20-202 which may address your problem. https://mooney.com/wp-content/uploads/2020/12/SBM20-202.pdf When I rebuilt my nose gear last year LASAR quoted a price for a new leg from the factory, in addition to their overhauled leg. I opted for the overhauled because I wanted the steering stops. They also rebuild steering horns and will inspect the linkage. Mine was pretty sloppy, although I didn’t have any shimmy. I did have the spacer in 20-202, though. As far as the decal with the switch labels, that’s a problem I’m dealing with, too. I thought about a used panel from a later model with the silk screened (?) labels, but wonder if there would be installation issues, label inconsistencies, hole spacing, or other unknowns. I think eventually I’ll remove the control cables, switches, etc., pull the plastic overlay with the decal off, paint the aluminum sub panel, and print labels for the switches/control cables. It won’t turn out as slick as a new panel, but it will be a lot cheaper and look a lot better than it does now. It will be a lot of work, though, removing all that stuff… I should have done it when I replaced my throttle-mixture-prop controls cables. Maybe when I’m down for an engine overhaul (someday) I’ll get motivated to do it.
-
Titanium?
-
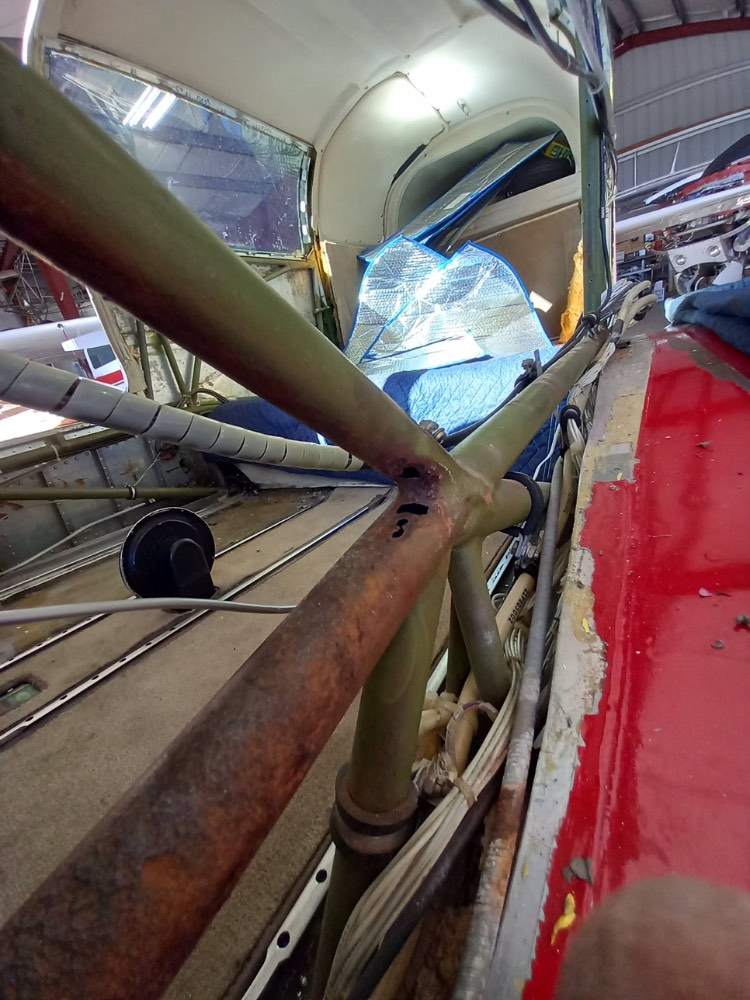
Hangtown Aviation in Placerville. They’ve done a friend’s G model the last couple years. And I saw a J there a couple years ago that had fuselage tubes replaced under the pilot’s side window. The tubes were ugly. They pulled the sheet metal off the fuselage to get access for a proper repair. When they were done, you could not tell that there had been an issue. They had an A&P there for a while, who formerly worked for LASAR when they were in Rancho Murieta… he’s moved on to teaching, but he always said good things about the company’s leadership.
-
Wasn’t in the kit. One of the prints listed the pn (or equivalent). Spruce has it. MS25089-1CR. Thinking back, the pn on the print might have had a typo. Main thing I gathered, it has to have a red button.
-
Got a pic? The IPC seems to be vague… it lists a washer and nut in the vicinity of the crank handle, but no screw or bolt? My ‘63C has a bolt, washer, and nut to hold the step handle on. The trim piece is held on by the four sheet metal screws.
-
Need left cowl cheek support bracket, 66 M20C
47U replied to M20 Ogler's topic in Vintage Mooneys (pre-J models)
If you remove the good support rod from the other side and take it to the welder with the broken one, they can get the angle(s) from the good one. They can also check the good one for serviceability at the same time. -
Things to look out for with an older C / Ranger model?
47U replied to Losbright1's topic in Vintage Mooneys (pre-J models)
If the airplane has a flap-extend speed of 100 mph, you should check to see if the center splice is cracked, SBM 20-217. Best way to check for a crack is to pump the flaps all the way down which puts stress on the center splice. If there’s a crack, it will be much easier to see. The repair isn’t difficult, but will require a significant number of shop hours. https://mooney.com/wp-content/uploads/2020/12/SBM20-217.pdf -
Maintenance Manual (106) lubrication chart lists graphite and kerosene for the starter drive. But, I would try some graphite spray. When it dries, it won’t attract dirt.
-
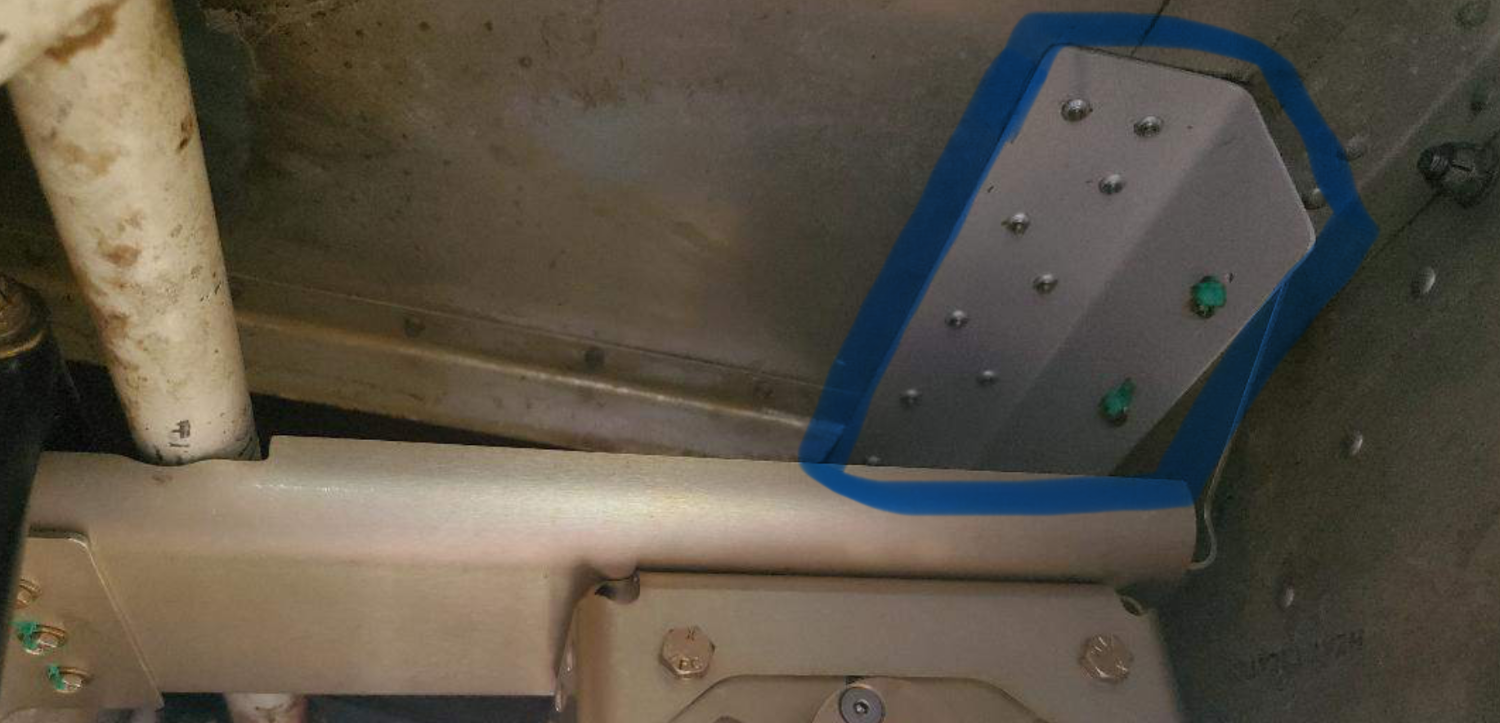
@cliffy Thank you for posting these pictures. Did you fabricate this angle (circled in blue) to support the servo tray aft mount bracket, or was it in the kit? Were the servo tray forward and aft mount brackets you installed in your initial kit order, or did Duncan send them to you as a modification after your kit was delivered? Your servo mount tray didn’t have to be shortened? My servo tray forward and aft mount brackets are bent at 90 degrees, and my servo tray is too long… it’s for a mid-body. Per a draft print Duncan sent me, the servo tray needs to be shortened and the forward and aft mount bracket’s angle changed so the servo tray is installed at an angle slightly off from horizontal… which the reason appears to be to cleanly install the aft servo tray mount bracket through the step support structure on the aft side of the bulkhead. Your installation appears to avoid the structural variances between models in the aft bulkhead. I think I need to contact Duncan… this is progress.
-
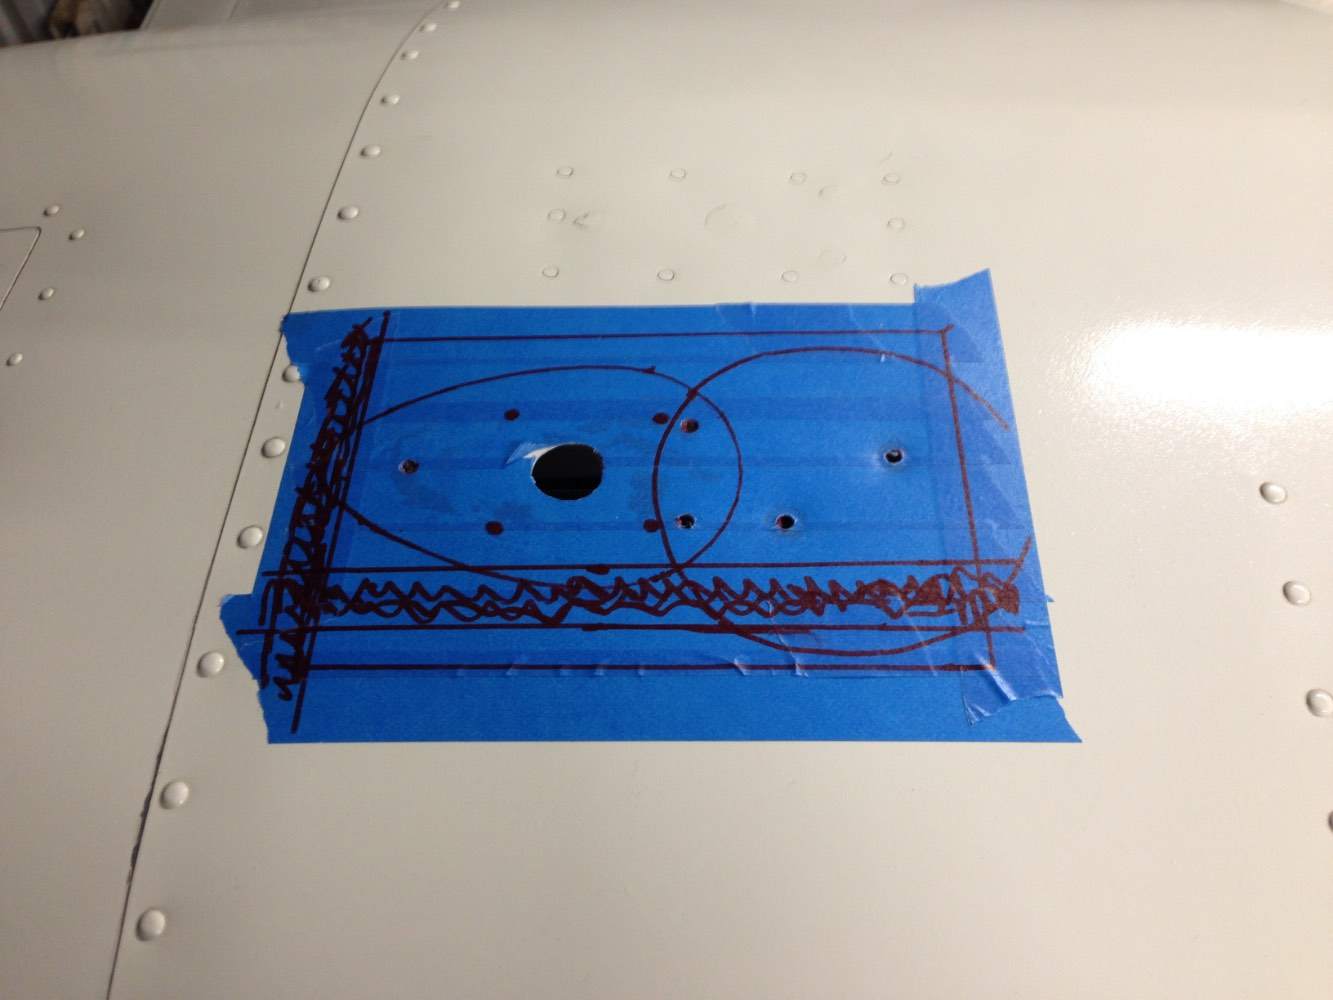
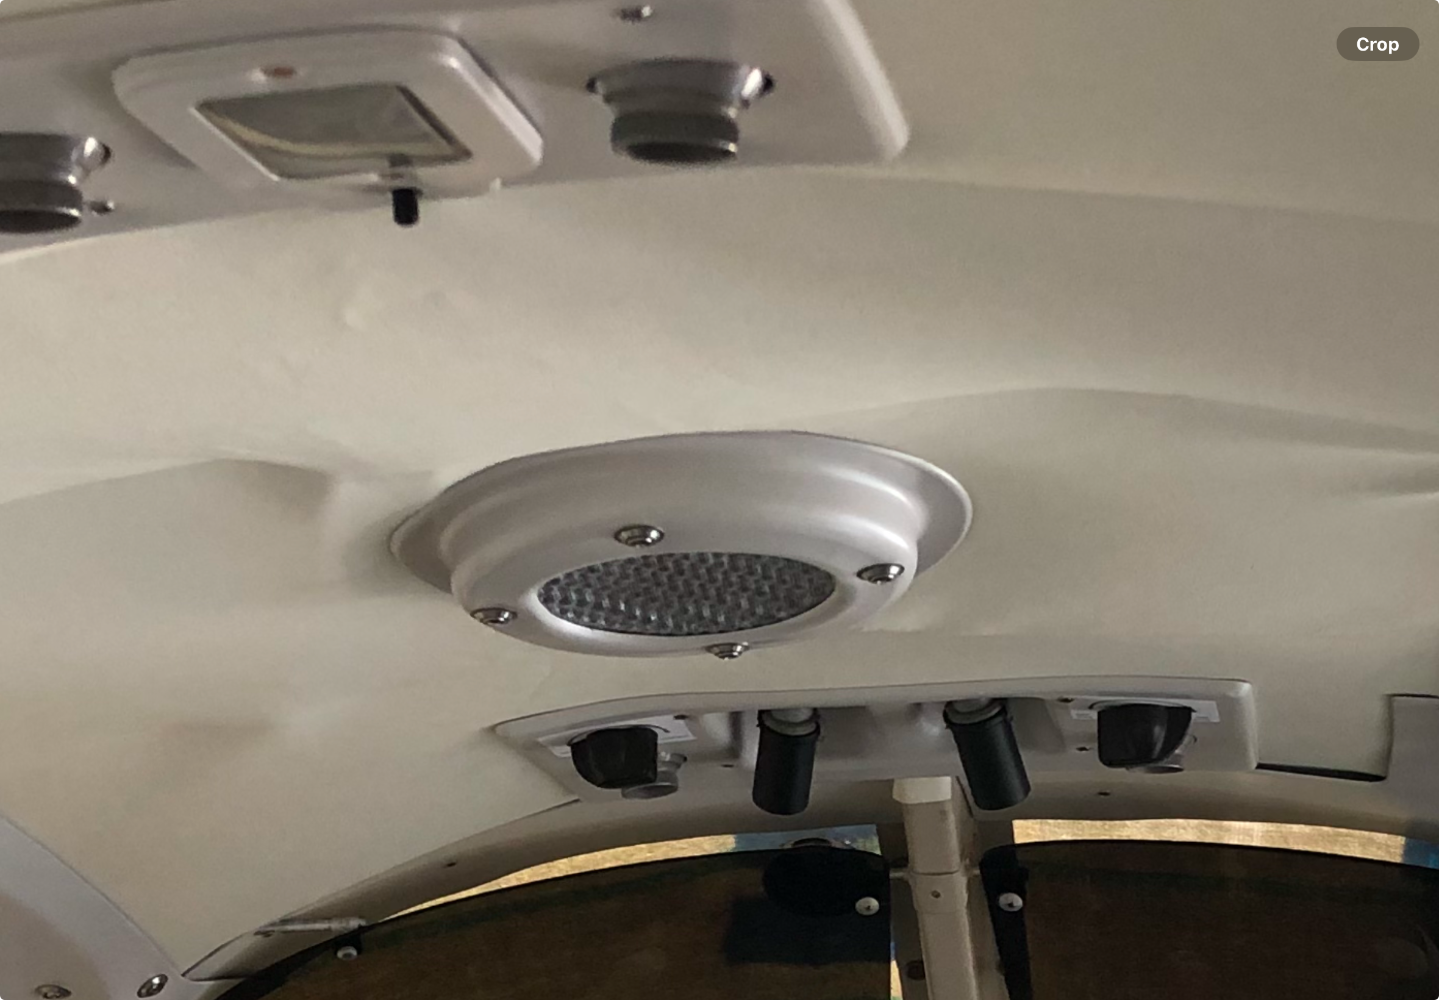
‘63 C model… when I was doing the layout for my gps antenna I was trying to use the same coax hole as a previous comm antenna. Since the fuselage skin is so thin (albeit, not structural), I wanted to do a doubler, but it was complicated by the speaker footprint. Here’s my layout, the speaker mount screws (in the circle) are through the external skin. Remove those screws and the speaker should be able to get fished out through the hole in the headliner after the speaker trim piece is removed. As far as a replacement speaker, there was a thread about that a while back…
-
And the modifications to change the angle of the elevator servo mount brackets was approved on a 337? Which would be my first option. I have the draft drawings and mock’d up the installation, it’s not rocket science. I just haven’t approached my IA to see their opinion, yet. Looking forward to your next report…


