All Activity
- Past hour
-
Retract Gear or Flaps First in a Go Around ?
hazek replied to donkaye, MCFI's topic in Modern Mooney Discussion
Okay, this is a good finding that is in favor of your argument. This I wonder if it is really a point in favor of your argument. Here's my thinking: If you retract flaps first to T/O flaps, you do so by the definition when you are the slowest in your approach, this causes the pitching moment to be least severe. Then you retract gear which introduces a nose down pitching moment and therefore helps with managing the nose up pitching moment buying you time to retrim. Then you retract the rest of the flaps and retrim easily. If you retract gear first, you will get a nose down pitching moment and you will accelerate. The consequences of this will be that you might not retrim as aggressively feeling a false sense of security in your pitch trim and when you do retract flaps, especially if you do it in one go, the pitching moment will be larger and more severe due to now accelerated speed. Both combined, so the still nose up trim and larger pitching moment could surprise you and will present you with more difficulty keeping the plane under control. Is my argument flawed? In addition, if you keep the gear down, you still have the option to touch down without damage in case you are just above the runway. Also if you retract flaps to flaps T/O you are in exactly the T/O configuration i.e. how you takeoff. - Today
-
Retract Gear or Flaps First in a Go Around ?
Ibra replied to donkaye, MCFI's topic in Modern Mooney Discussion
In Ovation, I don't think they do much under say 80kts? * They don't make flare or landing shorter, so they should not be deployed. * They don't make takeoff longer, so does not matter if they are open or closed. They only affect L/D near VNE and don't seem to affect L/D near VS. Then looking at their size, they doesn't seem to change stall speed, I would say Gear & SpeedBreak at the same time on go-around. Ovation airbreaks have zero effect on "induced drag" at slow speeds near VS, they only matter for "parasite drag" on high speeds near VNE (and to keep engine CHT warmer while on fast & steep descent ) -
Maritza3645 joined the community
-

Retract Gear or Flaps First in a Go Around ?
PeteMc replied to donkaye, MCFI's topic in Modern Mooney Discussion
Okay, so you are now in your stabalized climb..... Gear or Flaps first???? -

Retract Gear or Flaps First in a Go Around ?
Ibra replied to donkaye, MCFI's topic in Modern Mooney Discussion
I have the same (with takeoff marker but with continuous positions anywhere in the middle) -

Stripped wheel cover thread on nose gear
0TreeLemur replied to 0TreeLemur's topic in General Mooney Talk
I tried the Helicoil. The kit I bought had a slotted insertion tool that exhibited a strength similar to plastic. Somehow as the Helicoil started to get harder to turn- the tool end stripped. It's toast. A search for another insertion tool turned up $150 pre-winding units that I"m sure would work. -
Hi GeeBee!! Have you made the cowling rub strips for KingAir and Pilatus? This is a silicon looking/rubber seal that is bonded to the nose cowls on the PC-7. I need about 23ft of the material. Est 3/16” thick, by 5/8” wide. Any recommendations? -Matt
-
Toto, Sorry for my formal writing style. It’s a habit of writing academically and for the military over the last 35 years. My day job requires precision communication in all forms. Also, my team would rib me for any grammatical errors I present to them in written form. Integrity first, so plagiarizing an AI bot’s product is poor form. My wife sometimes tells me I am exhosting to talk to because a thesaurus is required to know what I am saying. It’s hard to turn off TangoTango, The devil is in the details, you could interpret, “Since its original certification” to mean exactly that and then allow Sport Pilots to operate an airplane that doesn't have a VS1 of 59 KCAS when loaded above 2740 LBS. But I feel that the intent of the final rule is to reduce the kinetic effect to people and property on the ground should a, less trained/experienced or unhealthy, Sport Pilot crash on takeoff. I believe pages 109, 232, 236, 263, 264, and 684 of the final rule clarifies the FAA’s intent for the speed limitation which drives the takeoff weight for a given airfoil down. -Cheers
-
Just to emphasize what someone else mentioned, the GW change requires re-marking or replacing the airspeed indicator. Digital ASI makes this a lot easier. If you look at SL 92-1, you'll see that the kits they originally sold to accomplish the change included a new ASI. On mine, the bottom of the white arc went from 54 KIAS to 58, and the bottom of the green arc went from 58 KIAS to 62.
-
For future reference: If you take off the lower interior panel you'll see the clevis pin for the hold open arm coming through with several washers... Door Cotter pin AN380-2-2 (MS24665-132) Washer AN960-10 Washer AN960-10L
-

Insane impulse coupling issues AGAIN, seeking theories
Ryan ORL replied to Ryan ORL's topic in General Mooney Talk
As for the color of the cracked material, I believe it probably wasn’t cracked at all until it finally destroyed itself in one violent event. The persistent failing I believe was the pawl rivets wearing and elongating their hole. And probably the pawls themselves were wearing some on the “heel” end. Some of that’s visible in the photos. Once it finally caught at running engine speed, kaboom. -

Insane impulse coupling issues AGAIN, seeking theories
Ryan ORL replied to Ryan ORL's topic in General Mooney Talk
Unfortunately I didn’t get a photo of that side, but it visually looked mostly ok. Engine is definitely going for IRAN at this point so maybe we will find something more… -
Insane impulse coupling issues AGAIN, seeking theories
Paul Thomas replied to Ryan ORL's topic in General Mooney Talk
Sorry, I mean on the engine side. A loose or wonky (technical term) gear could be a culprit. I'm looking at the flange and surprised that the material is all the same color; unless those piece separated a while ago, I would have expected darker where it first cracked and a lighter color where the rest of the flange finally came apart. In this case, you have the opposite where it's almost all dark, except for a small piece. -

Insane impulse coupling issues AGAIN, seeking theories
Ryan ORL replied to Ryan ORL's topic in General Mooney Talk
This is the best explanation of my failure mode I have seen https://youtu.be/Pw0FOB54tV0?si=b45tvQVACVpwxqqf (b) Pawl rivet wear. The 500hr inspection involves checking the pawl rivets for wear. Excessive wear allows the heel end of the pawl to start contacting the stop pin which will eventually cause the latching end to be thrown out. Centrifugal force at normal engine speeds keeps the latching end clear of the stop pin but when this fault occurs the sudden engagement with the stop pin will destroy the coupling which may then shed broken metal into the engine accessory case. This will likely result in both magnetos being put out of action plus further damage to the engine. Such an occurrence in a single engine aircraft will leave you looking for a suitable field in a hurry. -

Pirep - Gee Bee Aeroproducts Baggage Door Seal
Gee Bee Aeroproducts replied to Z W's topic in General Mooney Talk
Can't use rubber cement on silicone, rtv 806 will work, too thick , takes to long too setup. I sell sell thousands of cases of this silicone to government agencies and aircraft mfgs with canopies. 2.0 oz 57.50 4 oz 72.50 both with catalyst. -

Transmit Antenna on M20J for a GNX375
Yetti replied to zerotact's topic in Avionics/Panel Discussion
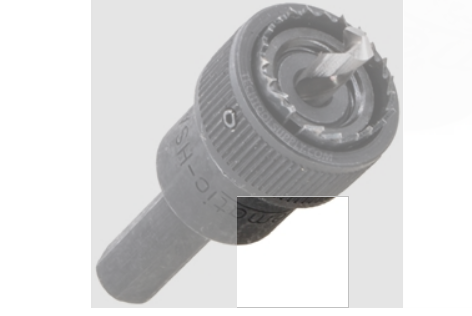
Bandwidth describes the range of frequencies over which the antenna can properly radiate or receive Which is what I was describing, yes I used to tune 5/8 wave antennas using a SWR meter. I was pretty good at it. The frequencies targeted here are Mode S/ADSB 1090 and ADSB UAT 978 are much closer together than the Antenna you are suggesting that does DME which is down in the 960Mhz up to 1215MHZ. So your suggested new antenna is not really that better. There is actually a formula to calculate the length of the Antenna and in the case of the 1/4 wave just take .25 of the calculated length. The best thing to do would be to hook up an SWR meter and tune the antenna to the lowest SWR. For us mortals everyone should strive for a good antenna install is make sure the ground plane is good. So the ground of the antenna needs to have really good contact with the aluminum skin of the airplane that forms the ground plane. For cloth planes an aluminum disc should be used. This would include removing paint before installing the antenna or cleaning corrosion after it's been on for awhile. For a time there was a dielectric compound that was used to insure a good ground plane contact with the antenna. The Motorola antenna hole saw had a lip to clean the metal around the outside of the hole. -

Pirep - Gee Bee Aeroproducts Baggage Door Seal
Gee Bee Aeroproducts replied to Z W's topic in General Mooney Talk
Door remains open 12/18 hours to cure Cement is good for a few hours mix what you need , we now send 1oz bottles with catalyst. It doesn't matter what door is is or seal . mask both sides of the door where the seal is going to be installed. Apply cement to door, let dry Apply cement to the seal in 3-5 inch increments and attach to the door and dry in sections until your seal is completely installed and dryed . Let the seal cure. i stock various inflatable door seals and static seals with fabric that are attached via hardware to the airframe. We will be producing a new BST foam seal that is extremely soft . The seal is used on the utility doors on A36/58 models and MU2 . i will extrude and try it on the TBM model , the easiest aircraft to fly. Note: Material cost based on 12500 inches will be around 977.50 dollars in various shapes . Gee Bee -

Insane impulse coupling issues AGAIN, seeking theories
Ryan ORL replied to Ryan ORL's topic in General Mooney Talk
The impulse coupling locked up at speed and tore itself apart. How this occurred exactly is still a bit of a mystery, but a cursory examination of the internals revealed that both rivets on the pawls (the hinge points I guess?) were sheared off, with one of the holes being elongated. From my reading, loosening or failure of these rivets can allow the pawls to shift outwards slightly and grab onto the catch pin when they should be held in by centripetal force. This occurring at normal engine speed results in the damage you see here. The scary thing here is, given this happened well under the 500 hour inspection interval, it is not something that can be inspected reasonably at annual or any other way without disassembly. And this can in theory fail in flight. -
Transmit Antenna on M20J for a GNX375
MikeOH replied to zerotact's topic in Avionics/Panel Discussion
Keep up with posts like that and you're going to lose your CB card! -
Digging up old threads. I've helped put together a 10. They are great flying machines and they do perform better than our J but will but slightly more fuel. The reason I own a J over a 10 is cost. An RV10 is significantly more than a J... and I mentally struggled to buy the J. If it wasn't for my wife telling me to spend some money, I wouldn't have bought a J. Even with her support, I wouldn't buy a 10 at this point in life.
-

Transmit Antenna on M20J for a GNX375
N201MKTurbo replied to zerotact's topic in Avionics/Panel Discussion
Everybody on here is always trying to get that last 1% of performance out of every aspect of their plane, and now they are espousing using a sub optimal antenna when a shiny new one is $150 bucks and two minutes to change it out.I don’t get it…. You are going to spend that much for the new coax and connectors. -
Marc_B started following Pirep - Gee Bee Aeroproducts Baggage Door Seal
-
@Z W Couple of questions about install with the silicone cement... What is the “usable” life of the glue once mixed? Long enough that I can mix vial into bottle, glue the frame, let dry then come back and glue the seal? Is this correct process?? Mix small vial into large tube and mix well. Apply thin layer of cement to door frame where seal will be applied and dry with hair dryer Not sure how long it takes to dry? Do you also apply thin layer to silicone seal and let dry as well or just to door? Apply thin layer of cement to door seal in 3-5” section and apply to door…let dry Is it better to just go 3-5” at a time and let dry holding in place? Vs would clothes pins put enough pressure to hold seal in place to keep moving around the door? How long do I have with the cement to dry enough to keep it in position without holding it? Will this hold in position at this point or would it be better to use clothes pins help hold in place? GeeBee's instructions sounded like keeping the door OPEN?? to cure rather than I’ve read others seal install suggested closed the door in position to hold pressure to set the glue? If I need to adjust a section after gluing, how long do I have to adjust and can I just peel up a small section and move and re-glue? Similarly, if I need to “shim” a section of seal using a small tail of the “P”, how long do I have to do this and can I just peel up, glue and slide in? I was originally considering using the yellow 3M 8001 adhesive others have discussed, but that won't work for silicone. Confirmed with 3M that 8001 does NOT work with silicone. So was just going to use the 2 part silicone adhesive that GeeBee included with the seals. @PT20J I think in another thread you mentioned RTV 108?
-
Good evening I have a Question for you. I'm in the process to buy GKRP here in Canada and I have 2 question? 1) Is it possible to run a Mooney 252 at 2000-2100rpm , wide open throtle (oversquare ),lean of peak like Mike Bush learn and run is 310 cesna . I know is 310 is reulated t 32inc manifold pressure instead of 36 Mooney 252. 2) when I see on flight aware the speed of this Mooney (supposed to run at 252 Max ) and only see 140Kt the major part of the time I wonder for what reason I sold my old Mooney M20F who's run at 140kt TAS at 2350 wide open trothle and agressively lean of speak for a max of 8,5 to 6.9 gallon an hour. Thanks martin
-
Insane impulse coupling issues AGAIN, seeking theories
Fritz1 replied to Ryan ORL's topic in General Mooney Talk
Sounds like the accessory case needs to come off at least, then gear on engine side can be checked for defects and whether it is the right part, debris will be found in sump and in suction screen and in oil filter, then a determination can be made whether engine needs to be torn down or not, time to consult with your favorite engine shop, glad you got on the ground safely, curious what caused the mayhem -
Blown Cigar Lighter Fuse from Inogen G5- 12V M20J
Aerodon replied to mikechaf's topic in Modern Mooney Discussion
It's a proper aviation inverter, KGS LT71A. Lonestar also make them. They are really expensive, but if you look around you will find a deal. I mounted it on the nose gear well, where the avionics fan used to be. My new avionics either don't need a fan, or have a built in fan or two. Cessna used Astron 2412 inverters in late model 172's. With a Cessna part number stuck on. These are less than $100 on the used market, but a little big for my location. These have an internal 3A fuse on the input side, so no need for another one. Aerodon -
Blown Cigar Lighter Fuse from Inogen G5- 12V M20J
MikeOH replied to mikechaf's topic in Modern Mooney Discussion
Curious as to details on that inverter. My concern would be electrical interference from a SMPS.

