

wpbarnar
-
Posts
127 -
Joined
-
Last visited
Content Type
Profiles
Forums
Blogs
Gallery
Downloads
Events
Store
Everything posted by wpbarnar
-
I up graded the main gear on my Encore to the “Molded Seals”. I think it is a big improvement. Much better than a piece of felt sandwiched between a couple of washers. There are several different molded seals listed in the 6” Cleveland wheel assembly. For the Encore these fit my aircraft: P/N 154-12400 for inboard and 154-12000 for the outboard. Bill
-
According to the installation manual the JPI 900 does allow some some customization on a few of the non primary channels. I wonder if it would be possible to use another manifold pressure sensor to determine the pressure in your vacuum system. Not enough detail in the manual to tell how much latitude ( scaling, labeling,etc..) was available in the customization. Maybe worth a call to JPI Bill
-
Does your JPI TIT and the ship’s TIT gauge use the same probe? In a lot of installations they do. If that is the case, take another look at the ship’s guage and it’s grounding. I suspect it maybe grounding related in the SigmaTek cluster guage. I can not explain why your landing lights initiate the TIT spike when they have nothing to do with the cluster gauges however I have experienced strange problems due to the grounding within the cluster gauges. Bill
-
@larrybIn the 18 months that I have owned my Encore, I have found 3 recurring trouble spots. One is the front exhaust cross over heat shield, which is prone to cracking. The next is the inter-cooler mount which is prone to cracking. And the third is this, the air filter rubbing against the lower cowl. I have experienced the same issue on the crossover tube a couple of times. My solution so far: Start with new brackets or standoff’s. Not repaired, welded, or high life cycled pieces. Use a die grinder or Dremial tool and relieve all the edges on the standoff that is riveted to the shield. The manner in which it is stamped and bent creates numerous sharp edges and stress risers. Grinding or rounding the edges helps relieve the stress and their potential to crack. Follow the service manual guidance on the two clamps that secure the shield. One needs to be tightened more than the other. Lastly, I scrutinize this area everyoil change. Bill
-
cylinder 5, for which I captured both exhaust valve images and what appears to be evidence of a leak past the piston ring (see below). Are you referring to photo 10? I think that is a shadow. 76/80 is not indicative of a leak Bill
-
Panel light dimming affects gauge indication
wpbarnar replied to wpbarnar's topic in Modern Mooney Discussion
Problem resolved! As most suspected it was a grounding problem. Grounding problems can be like looking for the needle in a haystack. Thankfully @PT20J comments pointed me in the right direction. The SigmaTek cluster gauges use the case for lighting ground. The problem turned out to be a poor ground between the cluster gauge case and instrument panel. @pwhicks you most likely have the same problem. The cluster gauge case has a hard paint coating and the electrical contact area between it and panel is small. Be meticulous and clean the back of the aluminum instrument panel and the cluster gauge case face and you should be good to go. Bill -
Curious if maybe the Permatex Nickel based Anti-Seize would be better in this application? It is rated for higher temperatures. Just asking, don’t have an opinion either way. Part of my oil change routine is to apply penetrating oil (Mouse Milk is my favorite) to all the slip joints. I use a small syringe to dribble it in place. Capillary action will pull the oil into the joint, even the slip joints in a horizontal position. Bill
-
Panel light dimming affects gauge indication
wpbarnar replied to wpbarnar's topic in Modern Mooney Discussion
@PT20J I identified and checked from the ground pin on the connector to the airframe and it appears Ok. The individual gauges are removable from the cluster. I think I may pull a few and see how the connections are made when you “rack” them in. -
When I turn on the instrument panel lights, several of the gauges in the cluster panel will decrease in indicated value. There is a noticeable jump or needle flicker when the lights are first turned on. Increasing the light brightness will decrease the gauge indication a little more. Total needle movement is probably less than 2 needle widths. Although the movement is minor, it definitely correlates with panel light brightness. Increase the brightness and the needle moves down. Dim or turn the lights off and the needles return to the earlier position. The fuel gauges have the most noticeable moment. The lighting loads are controlled by a set of transistors mounted in the back. The rheostats in the panel control their output. As the affected instruments basically just read resistance, I am at a loss trying to understand how one impacts the other and where to look. The rheostat for glare shield lights does not cause any change. Bill
-
Why does my Rocket have a dent in its exhaust?
wpbarnar replied to SpamPilot's topic in Modern Mooney Discussion
@R.May Curious is to the function of the piece that has the three fire sleeved lines on it. Fuel pressure? I assume it is hanging there due to the cylinder replacement and that is not the normal location. Bill -
I throughly understand the engineer’s mentality and wanting to understand. In your Dec 3 post you mentioned several issues with your engine monitor and I read into it that you may not trust the data. I always believe that first you need a good data set that you can trust before analyzing a problem. What I intended to convey, is you may not have a problem because you are being mislead by your data. The injection lines and talk of cam wear could be red herrings. Bill
-
Engine runs smooth, fuel economy is good, oil analysis is good. Oil consumption not great but acceptable. You are apparently not afraid of flying it long distance cross country. @jkarch What is the problem you are trying to solve? After digesting the thread, I personally think you are in search of a problem that may not exist. In several of your early post, you commented on the difficulty of obtaining information from the engine monitor, large changes in fuel flow with small vernier moments, age of the engine monitor etc.... don’t think I would spend money chasing a problem until I could completely trust the data. Bill
-
Good point. Minimal mag drop can be an indicator of advanced timing. Also advanced timing increases cylinder pressure. Would not have thought it could make that big of difference in blow by and oil consumption, but maybe.... Blow by also contributes to oil going black faster. You indicated that it was staying honey colored longer...
-
power loss on takeoff when cold M20K 231 Turbo
wpbarnar replied to Aspen2013's topic in General Mooney Talk
A couple of questions to help in trouble shooting. 1.) Are you still climbing when the issue goes away? 2.) How is fuel flow being determined? Actual flow measured via a Shadlin, JPI, etc... or is this flow being derived by fuel pressure at the divider. If you had engine monitor data, Paul or Clarence would have already solved this. Bill -
My experience is similar. I started this post and have had experienced another failure after my initial repair with parts purchased from Mooney. I am thinking about trying something like below. The heat shield is not rigid which should eliminate the potential to crack. Additionally, most of the respondents in this thread are Encore owners. Is this problem unique to the Encore or do other K models experience similar failures. Bill 6E645805-140B-4D13-9F18-6A420CE46CE3.jp2
-
Any tricks to pulling oil screen on IO-360?
wpbarnar replied to RobertGary1's topic in General Mooney Talk
Chip detectors pick up ferrous metals. To best of my knowledge, they do not dectect non ferrous material. Bill -
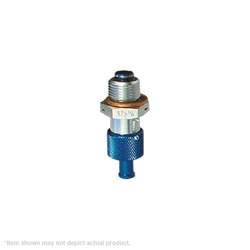
My Encore has this type. It is the one piece type. Slip a hose on it and push up to drain versus some of the others that require removing a cap and attaching the drain fitting and hose. I find this one easier to use when taking an oil sample. Don't have the part number but it should be 5/8 - 18 threads as the crush washer is AN 900-11 Bill
-
Good first-hand information. Much appreciated. Bill
-
I am flying into Green Bay WI during Air Venture to see visit friends. Any recommendations on FBOs as I see there is two on the field? I assume I need to reserve a spot. Bill
-
252 Turbo loss - exhaust gasket failure
wpbarnar replied to Bryan's topic in Modern Mooney Discussion
While you are at it, take a close look under the heat shield on the exhaust cross over tube in front. On my TSIO 360 SB, I found the mounting standoff for the heat shield, chafing into the exhaust tube. Bill -
Unfortunately not much you can do. On Monroy equipped aircraft, total fuel level in flight is difficult to determine by the fuel level gages, once the mains have been filled above 1/2 capacity. Given time the quantity above 1/2, will equalize into the aux tanks. The senders only read the level in the mains. Hence your gages will only report the volume in the mains, where In actuality, total volume is what is indicated in the mains plus the volume in the aux tanks. You can not measure the aux level in flight. This can only be done on the ground with a “stick” You depend on your fuel flow meter/totalizer and maintain your tank level senders to be accurate on the bottom half of the tanks. This the case in my Encore. Not sure about other Mooney models with Monroy tanks Bill
-
@CaptRJM, Who’s Ni plated cylinders did you use? I would like to use Ni cylinders when performing a TOH on my TSIO 360 SB. I did not think CMI offered Ni cylinders for the TSIO 360. Bill
-
Labor Time To Replace Rocker Cover Gaskets?
wpbarnar replied to agoessling's topic in Modern Mooney Discussion
I replaced all 12 on my TSIO-360 with silicon gaskets . Done correctly as per the instructions it takes longer than you may think. I torqued them to 25 inch pounds in steps, ran the engine and checked the torque again. I spent all afternoon (4+ hours) You may want to check the condition of your rocker covers before you invest in new gaskets. Make sure the sealing surface is flat. The covers may be deformed, especially if they had silicon gaskets and someone over tightened them. I had to replace several of mine to eventually stop the oil seepage. Bill -
New to me M20K - many questions (now AOG)
wpbarnar replied to anonymouse's topic in Modern Mooney Discussion
Check to see what type of CHT probe your JPI monitor uses for the #2 cylinder. It may be different. The factory or primary gauge is usually in the #2 cylinder and some JPI installations use an under the spark plug sensor as they cannot remove or replace the “primary” probe. The spark plug gasket sensors read significantly higher versus the probes in the other seven cylinders. I agree with what others have said about your fuel setup appearing to be on the lean side, but the problem may be also compounded by an inaccurate reading if that one cylinder has a different type of probe. I had an identical problem when I first purchased my K model. I replaced the spark plug gasket probe with the JPI probe that inserts underneath the factory bayonet. Search for 3/8” JPI CHT probe. Bill -
GTN Software Version 6.41 STC ---FINALLY!
wpbarnar replied to donkaye, MCFI's topic in Avionics/Panel Discussion
My Encore was in the avionics shop for some work. After reading @donkaye & @Oscar Avalle posts and playing with 6.41 on my Ipad simulator, I quickly requested the shop to update my GTN 750. Tried it out today and it was great! My home base (L31) is in a black hole with no VASI or equivalent. This will not change anything during daylight, but will be a much appreciated additional tool at night. Bill

