Gagarin
-
Posts
345 -
Joined
-
Last visited
Content Type
Profiles
Forums
Blogs
Gallery
Downloads
Events
Store
Everything posted by Gagarin
-
Mooney gear up landing in germany
Gagarin replied to brndiar's topic in Mooney Safety & Accident Discussion
Wonder if he tried the emergency extension. On my M20J I have a Voice Alert https://www.aircraftspruce.com/catalog/avpages/voicegearalert.php gear alarm, it has paid multiple times. When on base to final the gear alarm gets mistaken with the stall alarm (both have similar tones) and the pilot push the throttle (muting the alarm) thinking he adverted the stall. The Voice Alert is perfect for pilots over 65. Unfortunately Medicare does not cover it. -
Electronics International instrument install problem
Gagarin replied to Joe Larussa's topic in General Mooney Talk
Post pictures of the new panel. At least gives you more instruments options -
It beats the airline comfort.
-
Electronics International instrument install problem
Gagarin replied to Joe Larussa's topic in General Mooney Talk
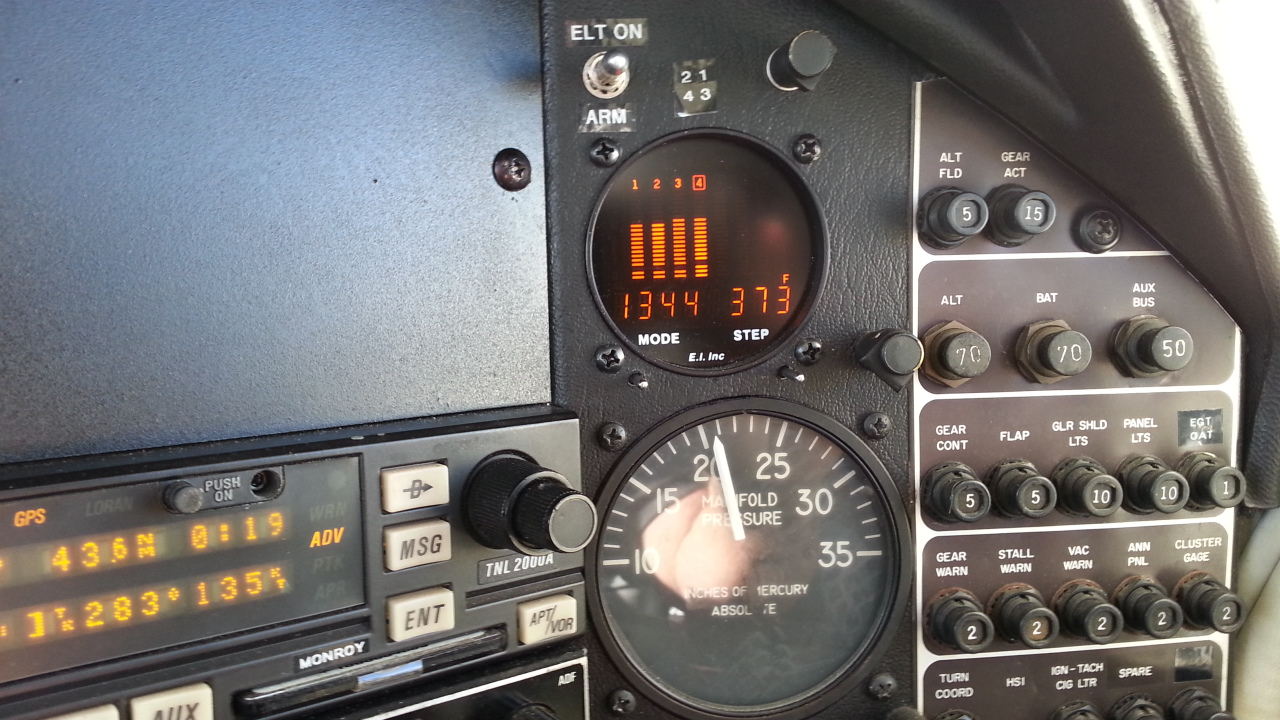
I opted for the UBG-16 https://buy-ei.com/portfolio/ubg-16/ because of it's multiple functions (Volt, fuel flow, etc.) easy install with no changes to the panel and plasma display. Unlike LCD displays that deteriorate and are hard to read overtime. -
got a dent in my nose gear truss. Opinions?
Gagarin replied to rbridges's topic in General Mooney Talk
On a tight turn the hose material compress allowing the wheel to turn without denting the tube, -
Electronics International instrument install problem
Gagarin replied to Joe Larussa's topic in General Mooney Talk
The only EGT I could find that will fit in the corner location is the EI UBG-16. The display separates from the main body so you could fit it in tight spaces. It works very well.
-
got a dent in my nose gear truss. Opinions?
Gagarin replied to rbridges's topic in General Mooney Talk
I would just leave it alone, it does not look that bad. I splitted in half 1/2" piece of rubber hose an wrapped around the tubing to prevent tubing direct contact to avoid dinging it when the plane is towed by a truck. Any time you leave the plane at an FBO you are risking a ding. -
Local hangar and tie down costs
Gagarin replied to NotarPilot's topic in Miscellaneous Aviation Talk
We have also have free snow removal included at KFXE -
Local hangar and tie down costs
Gagarin replied to NotarPilot's topic in Miscellaneous Aviation Talk
I am based at KFXE in Fort Lauderdale, FL and pay $719/month including taxes and electricity for a small T hangar for my M20J. When I first moved in there was trimmed grass but now is trimmed weeds. The hangars are well kept with palm trees for relief before boarding -
Now that's better, I was getting vertigo on the previous one.
-
Flying the plane is not everything. The design, flight testing, and certification of aircraft is a very interesting and rewarding aspect of aviation. An airline pilot may know everything about flying a B777 but a Boeing flight test engineer fly the plane to the envelope extremes to insure its safety. I enjoyed more myself testing for flutter speeds, structural limits and avionics performance. Thanks to the engineers we fly safer planes. The joy of the first flights
-
With a six pack of Diet Coke on ice and the pilot relief tube you will feel cooler than any AC. Just start drinking when pulling out of the hangar and you will need a jacket.
-
RIP Coy. Met him at Sun'Fun several times. I too had a stroke but not recovered 100%. Going tomorrow for acupuncture therapy. José N11606
-
I added an extra washer to the bottom Lord Mounts to lift the engine a little bit. This keep the engine from sagging to the bottom cowling piece. after 1000hrs glad I did it.
-
Check for a leak on the manifold pressure line like a loose connection
-
Something I learned with electronic displays is to warm up the cockpit before engine start in cold weather, otherwise you don't know if you have oil pressure at engine start. It can take up to a minute for the LCD display to warm up.

-
Precise Flight has a low cost engine driven standby vacuum system http://www.thevacsource.com/svs.php that uses the engine manifold pressure as a vacuum source. I have it on my M20J and only used once in VFR conditions. It works very well below below 8,000 ft and on approach. Another option is to replace the VSI with an IVSI (Instantaneous VSI) to control pitch attitude more accurately.
-
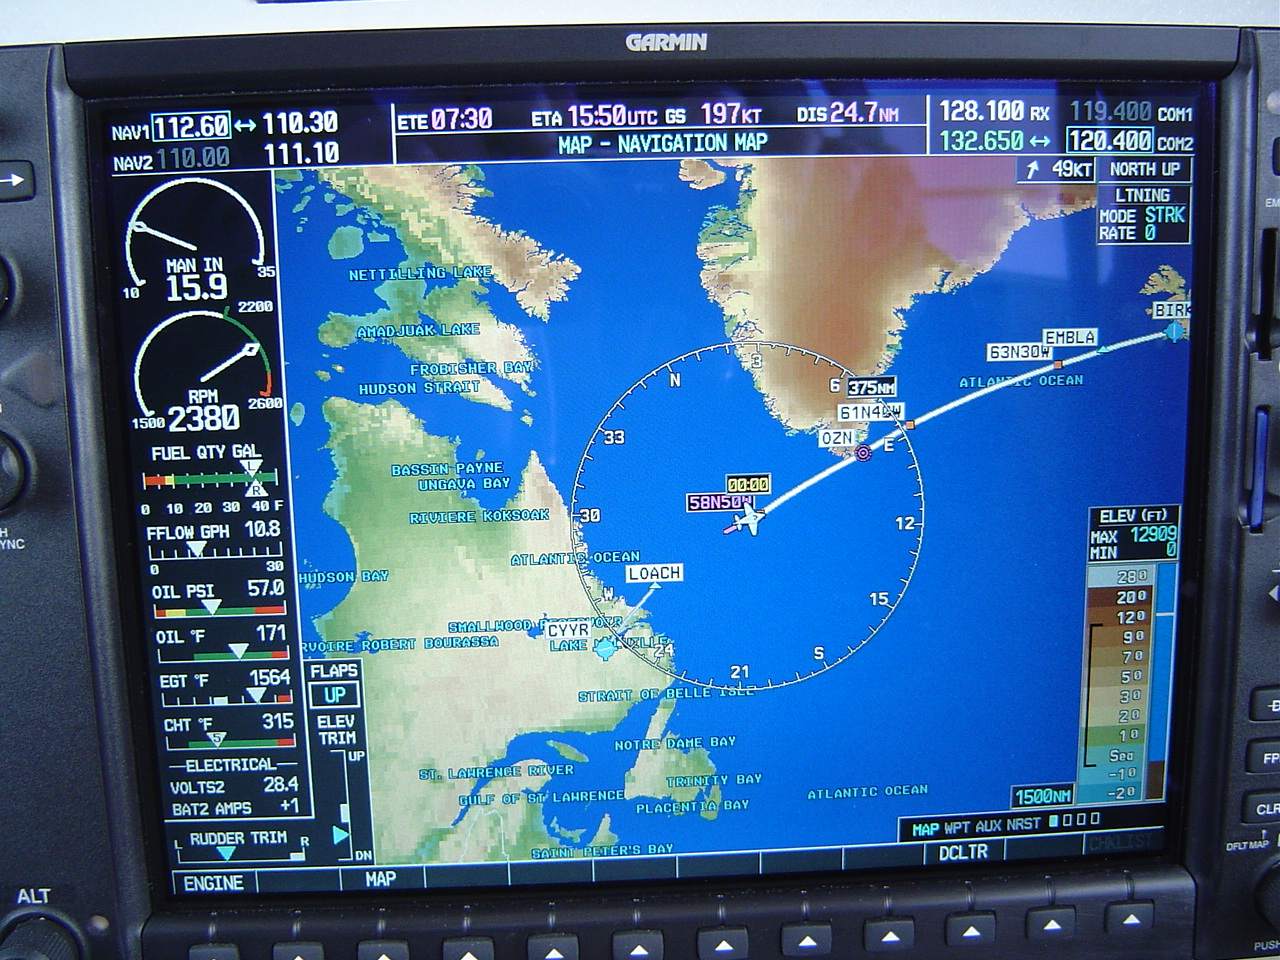
But notice that the electronic displays require backups while the steam gauges do not. A traditional altimeter, airspeed indicator, VSI and compass are pretty reliable and do not require power to work. And a simple turn coordinator will keep you level in case of vac pump failure.
-
What is the advantage of the G5 over traditional gyros? After all the traditional gyros are easier to read as shown on the picture and the factory engine instruments are easier to read than those on integrated electronic displays. I may sound old fashion but it is a reality, just look at instrument panel pictures with both electronic displays and old steam gauges and you will notice that you can read altitude and airspeed on the old gauges but not on the electronic displays.
-
I would walk by my ramp with a screwdriver to see who has one to borrow it
-
M20K-231 - cotter pins found in engine
Gagarin replied to Pilot64's topic in Modern Mooney Discussion
These pins were improperly installed. They broke at the head because the leg was stretched when it was bent. How to Properly Install a Cotter Pin By Debbie Lamb|May 2, 2018 SAVE Installing a cotter pin prevents parts from backing out of or slipping off other parts. Standard, straight cotter pins, also called split cotter pins, have two straight prongs that are spread apart to keep other fasteners, such as bolts and nuts, in place. credit: prabhjits/iStock/GettyImages How to Properly Install a Cotter Pin VIDEO OF THE DAY It is essential to properly install a cotter pin -- it can mean the difference between life and death when working with machinery or structural assemblies. Selecting the Right Cotter Pin Always buy new cotter pins whenever you need to install or adjust them. Never reuse cotter pins, because the metal weakens when bent and can break off if bent repeatedly. Cotter pins are sold with different diameters (sized for the hole in the bolt or other part that needs securing), head sizes (the head is the loop at one end of the pin) and prong lengths. The usable length of the cotter pin is measured from beneath the head to the end of the shorter prong. It is acceptable to use a pin that's too long because you can trim the prongs to an appropriate length, but a pin that is too short may not perform its job properly. Cotter pins come in a variety of materials including steel, stainless steel and copper. Select the correct cotter pin material for your project. For instance, when installing a cotter pin where corrosion is a problem, you may need to use stainless steel. Also choose the size of the cotter pin according to the size of the hole. The pin should be the largest size possible for the hole, with the head of the pin slightly larger than the hole to ensure that the pin will not wiggle in the bolt. Installing a Cotter Pin Insert the cotter pin into the hole of the bolt until the head of the pin rests against the bolt. Secure the cotter pin by spreading the prongs in opposite directions, using pliers if desired. Use diagonal cutters to cut excess length from either prong, according to your application standards. Cutting the prongs to the correct length helps when it is time to replace the pin. Leaving excess prong length can lead to snagging injuries. However, the prongs must be long enough to prevent the pin from slipping back out through the bolt. If the cotter pin has a curve on one side rather than two straight prongs, ensure that the bolt rests firmly between the "v" on the cotter pin.