

Skates97
-
Posts
3,389 -
Joined
-
Last visited
-
Days Won
29
Content Type
Profiles
Forums
Blogs
Gallery
Downloads
Events
Store
Everything posted by Skates97
-
I did tint the front windows but decided to take it off because it does affect the clarity a little. They were easy. I just have some scrap squares and move them around on the front windows when needed. The hardest part is doing the brow on the windshield, it is curved and you are working against gravity. Do not use any tint that has adhesive, just the static cling. To my knowledge all the ones with adhesive specifically say not to use on plexiglass. The static cling holds so well that I can mount gopro suction mounts to it and they don't move, and it leaves no residue when you remove the tint. If you just use the static cling it is no big deal. Pulls right off when you want and leaves no residue. It is a non-event. I replace it every couple years as it does lose some clarity over time and the grandkids seem to nick it up with their finger nails from time to time. Take a piece of string, tape it at the sides across the windshield. Sit inside to see how it looks, then adjust until it is where you want it. Slide a piece of tint under it and lightly trace along the string with a pencil or sharpie and then cut the tint along the line. That will help get it straight instead of lopsided. I have pictures of how to do the windshield brow on my website if the description doesn't make sense.
-
 Yes, different range for the J's, same wording about continuous operation. Posting the C POH is just showing the reference to cruise power that you mention above, which doesn't seem to be spelled out in the J POH. However, this topic comes up a few times every year as new people join the board with people essentially asking the same question and not understanding that "continuous" is talking about a cruise setting.
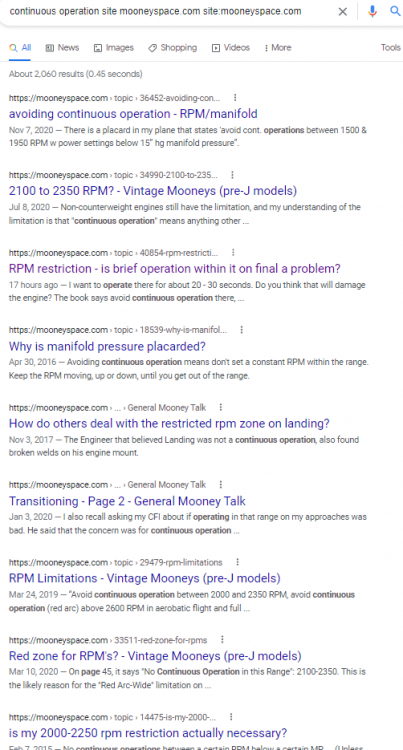
-
My POH refers specifically to cruise settings in that range.

-
The video quality is very good. This was with a Drift Ghost X, you can see even in low light they do well. If you skip forward to the three minute mark it's just past sunset and you can see the lights from the ships anchored off shore shining up through the marine layer.
-
This is a video from a little over five years ago when I was working on my PPL, but you can see the angle when using the double suction cup mount on the side window.
-
I have used one of these stuck to the rear window. https://smile.amazon.com/gp/product/B00PQ4ACQ2/ref=ppx_yo_dt_b_search_asin_title?ie=UTF8&psc=1 I have also used a sticky GoPro mount to the headliner. It doesn't seem to stick very well so I took a screw out and mounted it with the screw back through it. The challenge is that during certain phases of flight there is quite a bit of vibration in my plane, not enough that you really feel it much but enough that the video is shaky. I'm still looking for a perfect solution, moving it around to different places to see if there is less vibration. I have also seen a gimbal mount used, but you need someplace to mount it. If you have rear seats with headrests you could mount it to one of the headrests. This is a gimbal I have, but just have the right seater use it as a handheld as I haven't found a way in my plane to mount it yet. https://www.bestbuy.com/site/zhiyun-crane-m2-3-axis-gimbal-w-wifi-for-compact-mirrorless-cameras-smartphones-and-gopro/6362228.p?skuId=6362228
-
The Drift Ghost X is a fraction of the price and you get 4-5 hours of battery life. For just a bit more you can get the larger battery which provides about 9 hours of battery life. I wrote an article about cameras, mounts, and cables back in April 2021 for The Mooney Flyer. You can find it in their archives. https://themooneyflyer.com/archives2021.html
-
Throttle setting for gear warning
Skates97 replied to Dream to fly's topic in Vintage Mooneys (pre-J models)
An easy way to set it where you want is go up and fly, pull the throttle back to 11-13", wherever you want it set, and make a little mark on it with a sharpie. Once back on the ground simply pull the throttle out to where your mark is and adjust the switch so that is where it comes on. Along with some of the comments above about setting it higher than lower I have mine set at 13". -
I would recommend everyone to bounce things off Parker. If he can do better for you he will and if he can't he will tell you to stay with whoever you have. He will also let you know where the breaks are and make recommendations. I had him quote me I think two years in a row and recommend I stay with my current provider until my renewal in 2020 when he was able to get me a better deal, enough of a change to switch and I renewed with him in 2021. I can't say enough about how nice it is to work with him, he's an honest, straight shooter that has your best interest in mind.
-
Just total remaining based on what you had as a start value and what it is showing as used. There is no connection from the JPI to the fuel senders.
-
I bought a set of the Alpha Aviation jacks about three years ago. I think it was just under $800 for the pair. In the grand scheme of aviation expenses that's not a lot of money. I spend that much in fuel for a couple trips to Salt Lake to see family and don't think twice about spending the money on fuel. I have seen a couple of very stout home-made jacks, but most I see are not something I would trust my plane on. I have a friend who often would say "Buy the best and cry once." In this case, buy jacks made for a plane.
-
Old Republic both years 2020 - $75k hull - $2053 Premium 2021 - $100k hull - $1860 Premium
-
Increased my hull coverage by $25k for additional avionics and a GFC500. Flew 170 hours and added on an instrument rating, decrease of 9.4% from 2020 rates.
-
Part 38 for reference.

-
There is a bushing and a bolt where the jack screw attaches to the tail. Over time it will get wallowed out and allow more and more play. Remove the covers on the sides to expose the hinge and the jack screw. Have someone lift up and down on the tail and watch what moves. Pay attention to where the jack screw attaches and you will likely see play there. You can get the bolt and busing from Lasar. After letting it go for a number of annuals my AP/IA finally decided he wanted to have it replaced so we did that a year ago.


-
And it seems every now and then a clamp will fail. After many hours of leak free flying I've been trying to find one. It's just tiny but makes a mess inside the cowl. On my last oil change I found a drip hanging from the oil return line from the #1 cylinder. Went to tighten the clamp and it was stripped. Replaced the clamp and all is well again. This is the best way I know of to find a leak. We did this but instead of just a ground run flew it around the pattern once. Yes, it can blow around inside, but one trip around the pattern doesn't blow it around much and with a black light you should be able to see where the leak is coming from. It is often not anywhere near where you think it is.
-
I second the www.myflightbook.com option. I started using it early in my PPL training. All kinds of options for reports and keeps track of your currency. Instructors and DPE's can sign your entries (assuming they are marginally tech savvy). I still have my paper logbook that gets signed for flight reviews but that's about all.
-
PM sent with some files, they may be the ones you already have.
-
Does anyone even have that Dukes pump on stock? That wasn't available when I had to replace mine earlier this year. I ended up putting in a new CJ Aviation pump. I could have sent mine off for a rebuild but this was a faster way to get the plane back in the air and it is a new instead of rebuilt pump. https://www.aircraftspruce.com/catalog/eppages/cjaviation-newex.php
-
Nope, but I am very careful to clean them before putting the tint on. 2-3 passes with Plexus and a clean micro-fiber cloth for each time. Edit: I think the tint has actually saved the back windows from scratches from the grandkids a time or two. I have found scratches in the tint but the window was fine.
-
Just like @skydvrboy said, also if you add a drop or two of dish soap to the water it will slide around easier when you position it. Stays in place, I have even put up cameras with the suction cup attached to the tint and nothing moves. When it gets old and you want to replace it just peel it off, clean the window, and do it again. I replace the stuff on my rear windows every couple years as it starts to get a little blurry over time.
-
I just have some squares cut out of leftover pieces of static cling tint from tinting my back windows. They work great, will move them around depending on where the sun is. https://www.lowes.com/pd/GILA-Glare-Control-36-in-W-x-6-1-2-ft-L-Smoke-Smoke-Glare-Control-Window-Film/1095827
-
1967 M20F: Prop Grease Leak?
Skates97 replied to PierceM20F's topic in Vintage Mooneys (pre-J models)
I had the same thing in 2018. I ended up flying it a bit longer and then getting it resealed. the prop shop wanted to do an overhaul because of the time since new. After talking with them he said he would take a look at it when he got it and if he could just reseal it instead of overhaul he would. It was a new prop, new hub, never cracked open before and he ended up just re-sealing it and has been trouble free since. -
You would need to move a couple things, but if you moved your CDI up next to the altimeter the EDM830 would fit there on the left side of the panel which is a better spot and also free up room on the right side. That is where I had mine until I switched it out for an EDM900. When I put the EDM900 in along with the G5's I moved it up to put it more in line of sight.


-
If it is like on my D there are different lengths depending on where they are in the cowling, some longer than others. If you look at the one on the other side in the same spot I think you will be able to see the numbers on the head and go from there.


