Search the Community
Showing results for tags 'LED'.
-
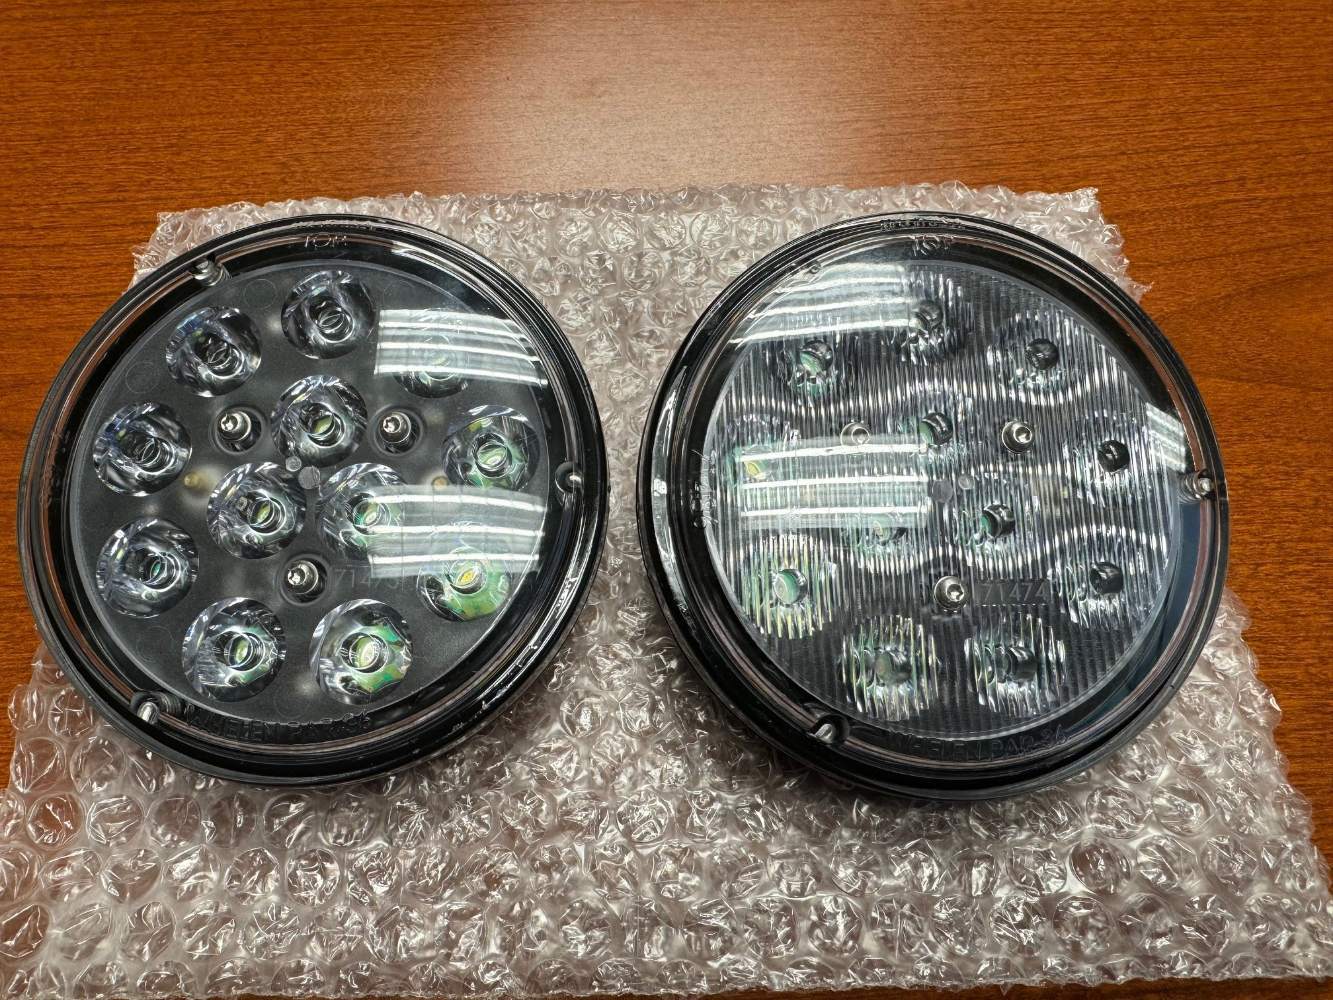
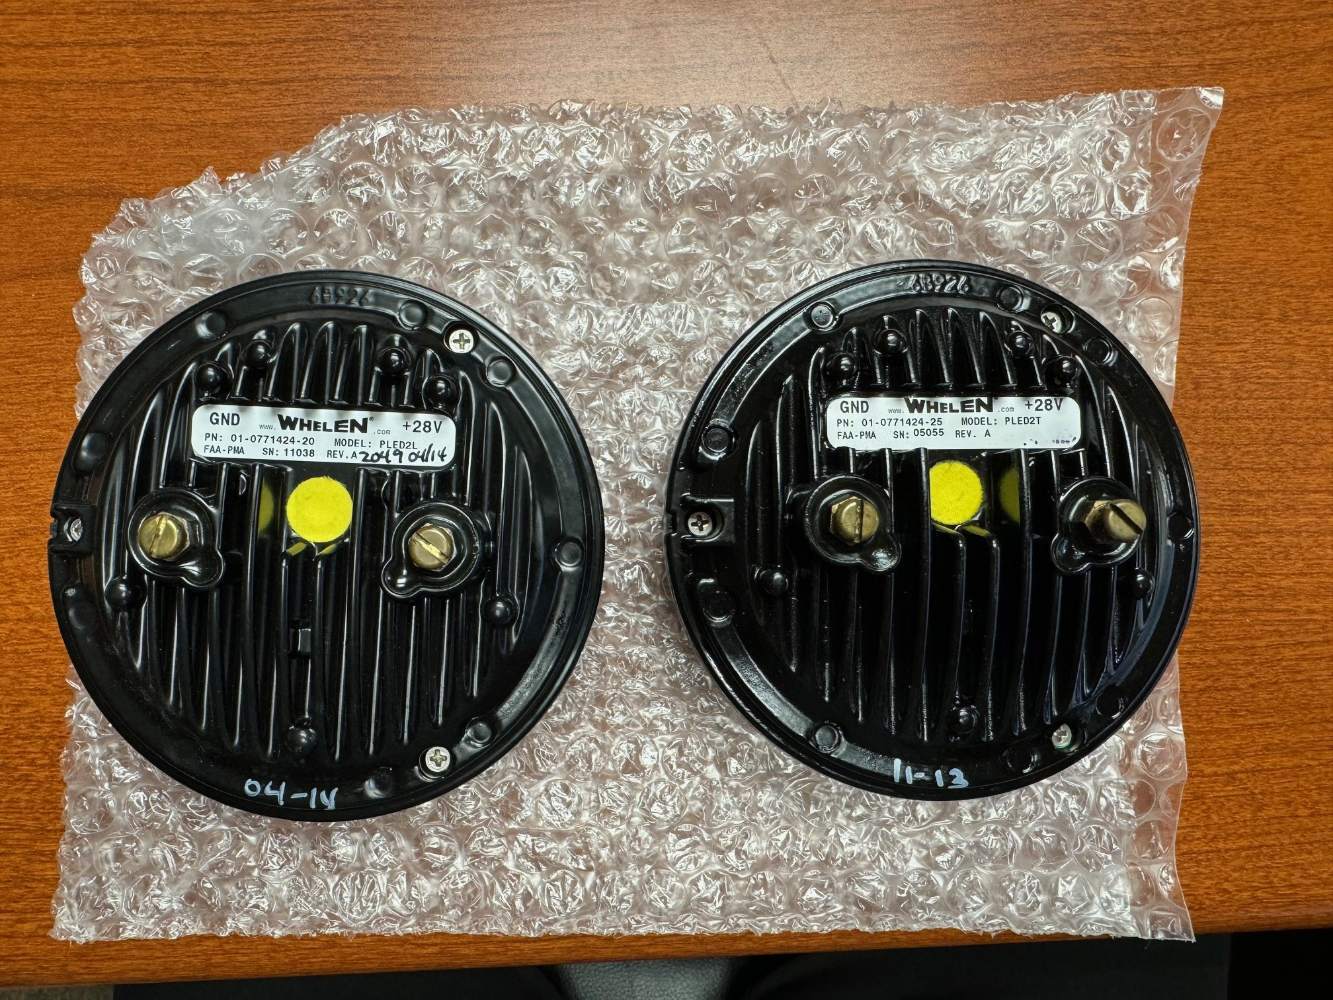
For sale I have four 28V Whelen LED lights. 2 landing (PLED2L) and 2 taxi (PLED2T) lights that were removed from my Ovation. They were working normally when removed and only done so to upgrade to the G3 lights. Ebay prices are roughly $100-150 each. All four are available as a package deal for $300. I will not sell these individually; package deal only. I will include free UPS ground shipping to addresses in the continental US.
-
Anyone have any experience with the latest LED landing lights from Whelen or AeroLEDs? Since we have an M20J with a single PAR46 in the cowl, the AeroLEDs Sunspot 46LX with both landing and taxi optics is attractive. Thoughts? Anyone try the latest Whelen Parmetheus Pro PAR46 light yet?
- 44 replies
-
- m20j
- landing light
-
(and 3 more)
Tagged with:
-
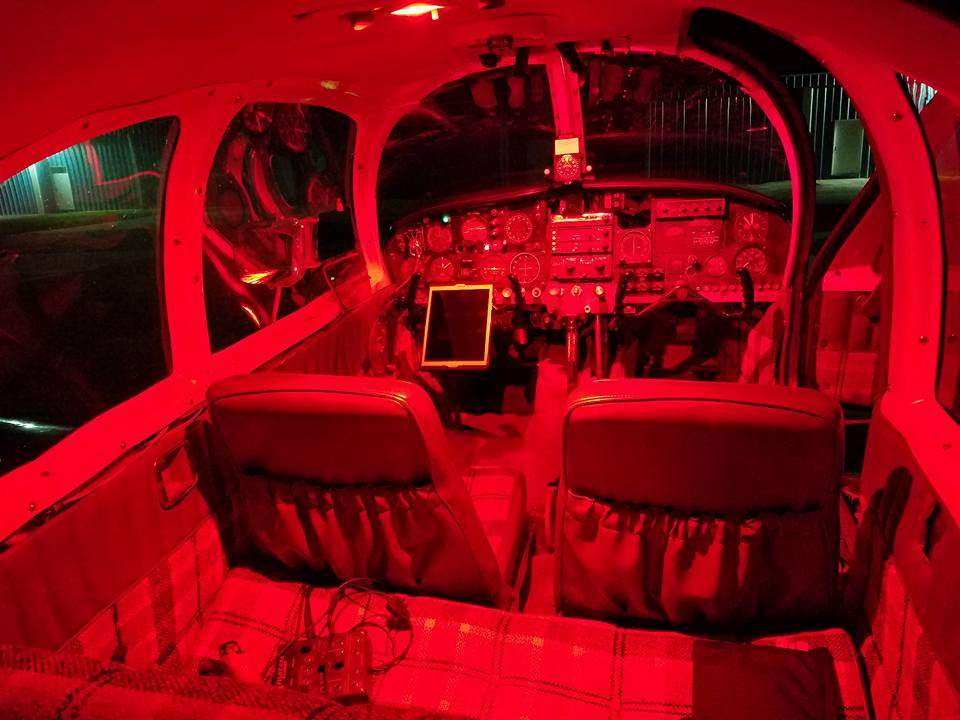
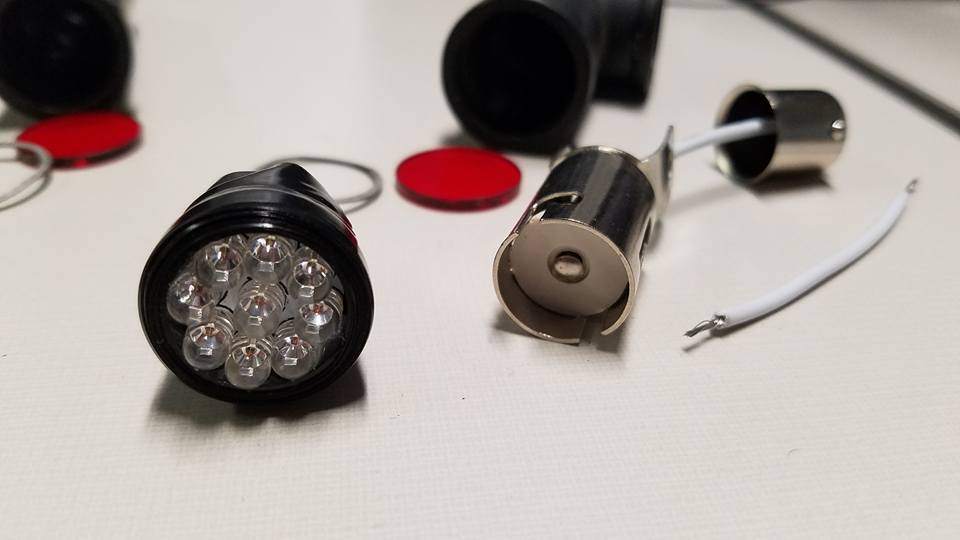
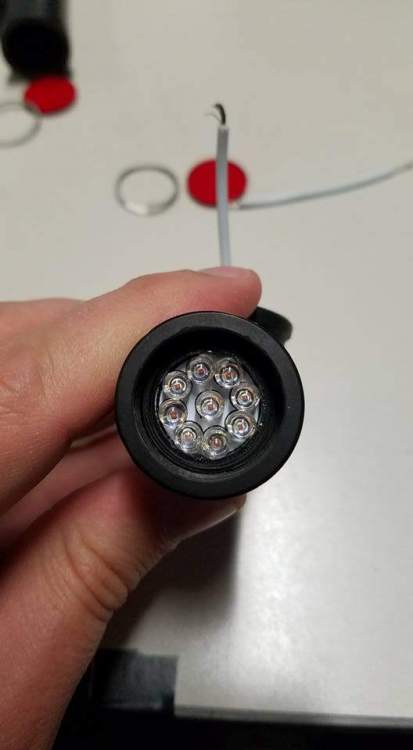
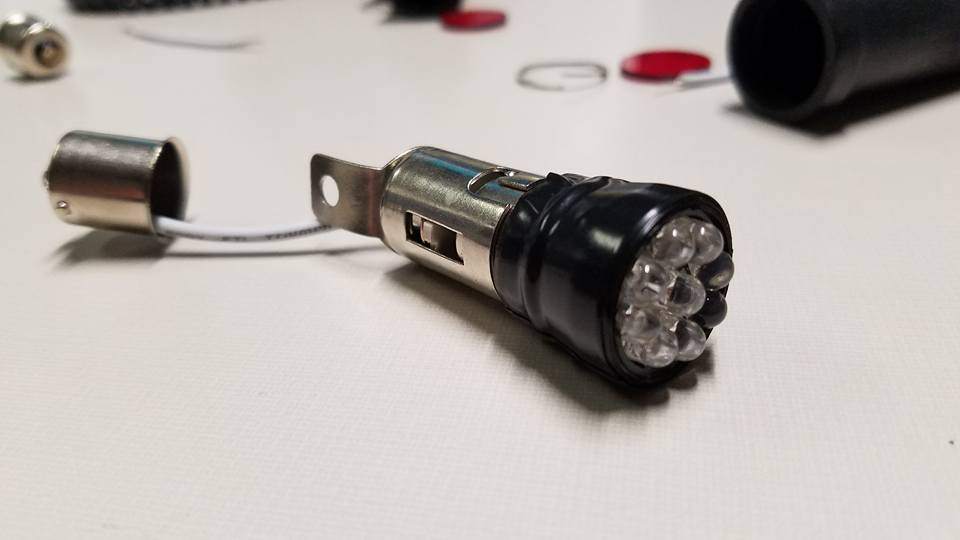
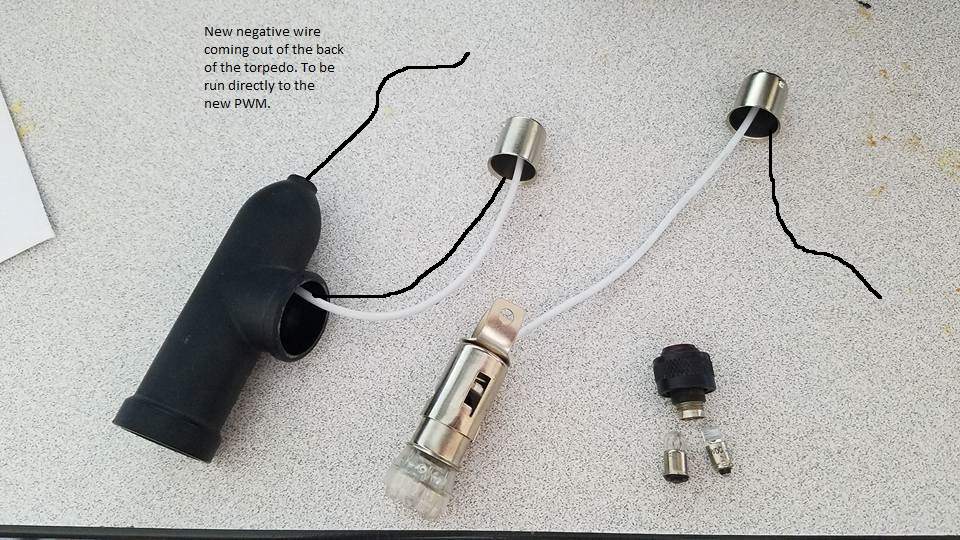
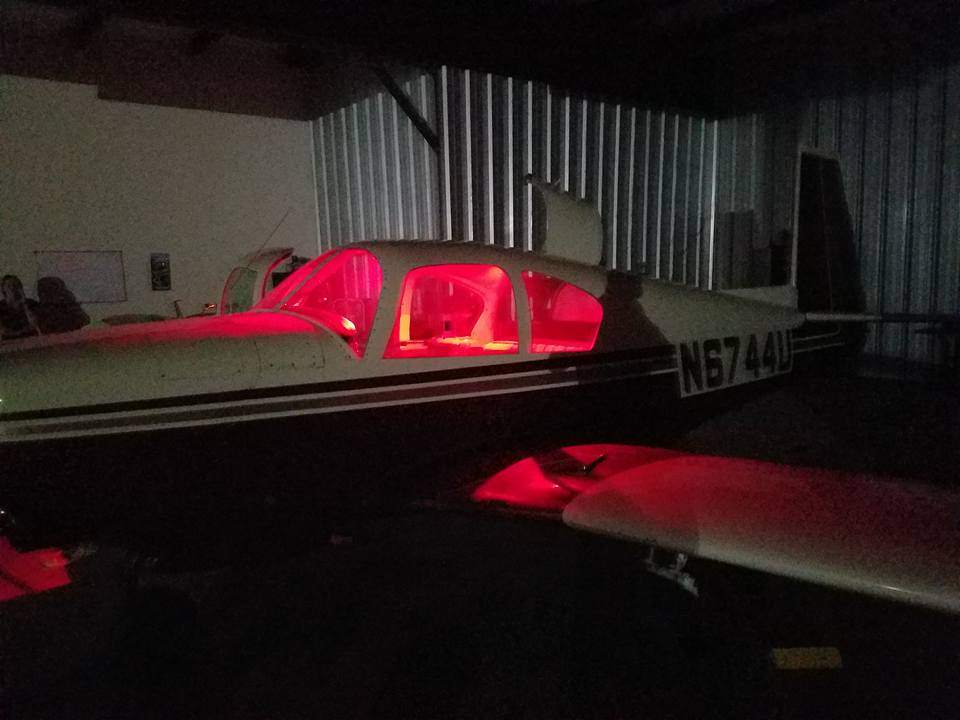
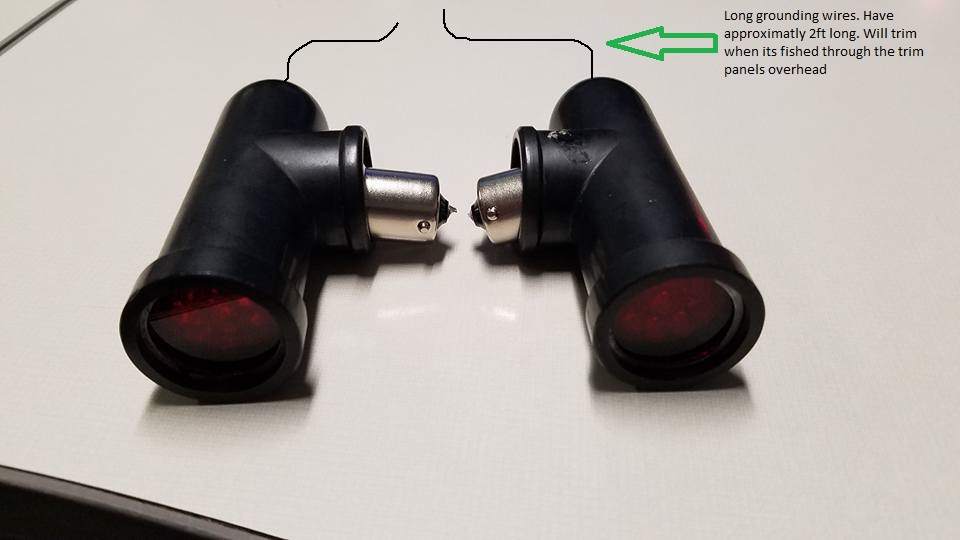
I did this a while ago but seem to be getting a lot of private messages on finding it, so I've consolidated the pictures and will be making a "how-to" in its own thread which can be searched. This is a purely informational post about the possibilities of LEDs and is tested on a grounded aircraft and is no way airworthy pending your IA, local FAA DAR, or 337 modification. This requires rewiring and removal of the old overhead rheostat that controls the lights. Approx time to complete: 2-4 hours. |Approx cost: $50 Parts needed: (I ordered my parts from SuperBrightLEDs.com, but some of these have since gone out of stock. You will need to source them elsewhere) Note: The wiring layout in these pictures is incorrect when I took them. I later rewired them. I have edited the photos that needed new wiring since taking them. Refer to the final wiring diagram at the bottom of this post. 2x BA15S Empty Bases (BA15S-EB) 2x BA15 1156 wired sockets (BA15S-SW) 2x BA15/1156 LEDs (67-R15) LED PWM Dimmer (Oznium makes a great product that is small enough to fit where the old one goes) Soldering Iron Solder Electrical tape Knife or another pointed object Wire strippers/dikes Thin (20+AWG) wiring approx 2 feet 1.)Pop the existing torpedo's off the stock lamps by gently pulling them off. Twist and remove the 1156 bulb. 2.) Using a knife, gently pry up one end of the retaining clip holding on the red lens. Remove the red lens. 3.) Turn the focusing ring counterclockwise until it stops. Using a pair of pliers, grip the twist knob and continue to turn counterclockwise. You will feel resistance, you will be ripping apart the solder holding it to the clip inside. *THIS WILL RESULT IN PERMANENT DESTRUCTION OF THE OEM FOCUSING LENS*. Once it is broken off, tap the insides out. 4.) Now that everything is disassembled, clean everything good. You'll have 50 years of crap over everything. 5.) Using the electrical tape, wrap it around the 1156 bulb about 8-10 times. Keep test fitting in the housing, it should slide back into the torpedo and fit snugly. 6.) Bend the two tabs of the wired sockets back about 85 degrees. You want a little bit of flare in them as they will press against the inside of the case to hold the fixture in place. 7.)Solder the positive 12v+ lead into the center electrode. Add some solder to the inside of the empty base and attach your 22AWG wire to that. Leave about 2 feet of dangling wire as we will need to fish through the overhead panel. Insert the soldered base into the torpedo, fishing it out through the side hole. Run the (-) wire out of the back of the torpedo. Slide the rest of the LED into the unit, and reinstall red lens and clip. Put the units back together and they should look something like this. I recommend having another 4-5 inches between the torpedo and the base socket. These were ultimately too short as you have to twist-lock the bases with the torpedo out of the way before you slide the torpedo back onto its mount Now for the hard part. (Again, please have an A&P handy for this if you are not versed in 12v applications. Of course, this is not a legal modification for flying aircraft and appropriate documentation and paperwork needs to be filed before flying). I don't have any pictures of this process but its simple once you see what I am talking about. You'll need to drop the overhead trim panel and find your old rheostat. Remove it but carefully identify which wires are which. You should have a positive and negative ship input, and one positive output (the factory map lights are grounded at the sockets. We cannot have that- they need to be grounded at the PWM hence the new wire). Remove the old rheostat and install the new one. Run factory wires into the INPUT terminals of your PWM. Run the factory output (+) wire into the appropriate terminal. Fish your 2 foot long ground wire through the steel roll cage and all the trim pieces, and then trim it down and attach to the PWM. Flick on the master, and with the PWM in the OFF position, nothing should happen. If the LEDs come on full brightness, they are prematurely grounding somewhere else. Turn the rotary dial on. It has a duty cycle of 5-100% variable and the LEDs should correspond. If this works, you have completed it. Put everything back and enjoy. (In the following pictures, I also changed out the cargo compartment dome light with a simple 3156 LED that replaces the old bulb. This is full-brightness output and can be dimmed by 95%). Any questions, feel free to PM me. -Alex
-
This if my first post, was wondering if anyone can lend a good suggestion on replacing my old rotating beacon with an LED Strobe. Thanks,
-
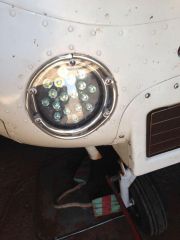
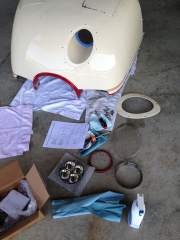
I just replaced my original PAR 46 incandescent light with the AeroLed Sunspot LX. I'm not an electrical engineer so if i use the wrong term and you feel the need to correct me...get over it!! This post is informational only and to share my experience and outcome in making this big investment (assuming you agree $500 for a landing light is a big investment). ...on a side-note For those of you that made it to "Frost Kosh" early enough to join the Mooney Caravan BBQ on Sunday, wow what a great group of folks! The pulled pork, corn on the cob and draft beer (spotted cow...I think) was wonderful. I'm sorry I didn't make the Caravan this year but I assure you I will there in 2014. Dave Martin, thanks for the hospitality, you made us feel very welcome and part of the Mooney family. Ok back to the landing light, as you can see from the attached photo's the light itself is pretty cool looking with the 4 big LED's and 5 small ones. The next picture is simply reminding you it does matter which wire you're using unlike the original bulb that doesn't care which side the ground is connected. The next shot looks like a campsite but I found it easier to spread out some towels so I could manipulate the cowling while removing the light assembly. And lastly the finished job and don't ask why the little LED's are glowing yellow...I'm not a photographer either. Overall the job was very simple, the PAR 46 slid right into place and other than making sure your wires are not crossed...nothing to it. The light is crazy bright, myself along with two pilot buddies walked in front of the plane about 40 feet and you could not look at the light...keep in mind it is noon, clear skies and sun shining bright. Unfortunately i can't tell you in this post how it does down the runway but I am planning a night flight this evening and will give you some feedback. Rick
- 17 replies
-
- 1
-

-
- landing light
- led
-
(and 2 more)
Tagged with:
-
Woot Just finished my first MAJOR upgrade, well Major to me. First time I've taken a screwdriver to my bird.
-
I see a lot of older certified aircraft specificaly mooneys in other posts on this forum are installing the Sextan System they seem to fit as drop in replacements for the factory position lights. They also provide a strobe option. The documentation i can find http://deltaaviation.comnav%20page/POH/M20C%201966%20Mark%2021.pdf seems to indicate this kit is strictly for experimental aircraft and while it meets FAA requirements is not FAA approved for nor is it meant to be used in a certified aircraft. Can anybody elaborate on why or why not this kit can or cannot be used legally as a replacement for position lights on my 1963 M20C? Also what are the potential legal consequences for installing? Alternately does anyone know of another LED drop in replacment compatible with an M20C and approved for use in a certified aircraft?
- 28 replies
-
- led
- position lighting
-
(and 2 more)
Tagged with:
-
I have Whelen A650 strobe/nav lights which appear to be replaced directly with Whelen 71110, anyone done this and is it just as simple as unscrewing the old one off and screwing the new one on? Appears to be from reading. What I can't figure out is what I have for a position light in the tail (67 M20F). It looks like Whelen 71554 replaces it but not positive and unsure what the difference is between horizontal and vertical mounting. It has Cessna for the vertical so assuming I need a horizontal? Appreciate input!
-
LED landing light, M20D which is the best
M20D6607U posted a topic in Vintage Mooneys (pre-J models)
My incandescant landing light stopped working. I wanted to use the Teledyne LED Alphabeam landing, but it's not approved for my Mooney. I would also like to replace the nav lights at some point. What LED landing light do you recommend? Happy Holidays! -
From the album: M20C
-
From the album: AeroLED Landing Light
Replaced original bulb with AeroLED landing light-
- LED
- Landing Light
-
(and 3 more)
Tagged with:
-
I have a '79 M20K with Hoskins Nav and Strobe lights. The power supply and the light/base (PN 7839) are both bad on one wing. It appears that I have three options: Replace the bad power supply ($300) and HOPE that I can find a Hoskins PN 7839 light/base. (see attached picture) So far no luck on the light/base. Convert the bad power supply ($300) and light/base ($250) to Whelan which requires a 337 Convert everything including NAV lights to LED of which there are two options, both TSO'd and do not require the 337 Aeroled, Pulsar model (1080-b/c) for $1190 which includes the tail position light http://www.aeroleds.com/LinkClick.aspx?fileticket=VgPG5vCTuB4%3d&tabid=6270&mid=13206 AVEO, Ultragalactical model for $1,200 http://www.aveogroup.com/aveo-shop/galactica-c-series/68-ultra-embedded-wing-set-of-2-green-and-red-with-white.html Any recent experience with any of these options?

