
M20F-1968
-
Posts
1,832 -
Joined
-
Last visited
-
Days Won
3
Content Type
Profiles
Forums
Blogs
Gallery
Downloads
Media Demo
Events
Everything posted by M20F-1968
-

Re-fueling - What do you use for ground?
M20F-1968 replied to Paul Thomas's topic in General Mooney Talk
Would the fact that the engine is mounted with rubber Lord mounts insulate it sufficiently to break the ground connection? John Breda -
I can give you some of my personal experiences. I have an extensively rebuilt and highly modified F that is more than a Factory J would be. I stripped the early into the project, with an A&P's helper and then myself doing the work. Years later I had two guys from Gulfstream doing mostly sheet metal work on the plane. The sheet metal work of the primary guy was first-rate, to the level that it was better than factory work, and as good as Beegle's in Colorado, which is saying a lot. Both had some experience sealing tanks and to fly the plane I needed tanks sealed. There were leaks after they finished which they tried to seal. It was good enough to fly to plane from point A to point B, but was not good enough to be the finished product. I took the plane to Paul Beck who completely stripped and resealed the tanks. If the two Gulfstrean guys could not do it, an owner who has never done tank work before will have leaks. Stripping both tanks will make the plane unairworthy. Stripping one tank will still allow you to fly it, but the shop you take it to will need to strip and reseal the other tank as well. You are not be gaining much, if anything at all. It is terrible, messy grunt work. There is really nothing to gain except maybe making a recycling device, testing your knowledge of fluid dynamics, for a device you will likely use once, maybe twice depending on how old you are. Give Paul Beck, Weep no More a call. He will advise you well. John Breda
-
Is the 1967 M20E model year different?
M20F-1968 replied to ArrowBerry's topic in Vintage Mooneys (pre-J models)
I see no reason why the 67 and 68 E relative to the control cables. The 68 F has a different Johnson bar than the 67. There are some changes elsewhere, but you should be able to get what you need from McFarlane, or even find what you need as a stock cable from an MSC. John Breda -
TSIO360 Turbo check valve leaking.
M20F-1968 replied to squeaky.stow's topic in Modern Mooney Discussion
10 years ago: Turbo overhaul $1000 Scavenger pump overhaul: $500 John Breda -
I bought a number of PTT switches that fit into the Mooney J-model yoke. They came in a low of 10 or so. If you need me to look for them I will. They work well and have a good feel to them. John Breda
-
I have a compass that came out of a 1998 Ovation with 400 hrs total time. I bought a flat-card compass. The Ovation compass has been in my stash of parts meant to be put on E-bay but never got around to it. You may want to mount it to the edge your your glareshield with a fiberglass housing that would be easy to make. John Breda
-
The tight space in our planes between the outbound side of the seats and the side panels is a particular concern for Mooneys. I am planning to but a fur sewing machine to enable making sheepskin seat covers for myself. I have Ovation seats so the seat bottom is velcroed to the bottom seat pan, and the back is as normally attached. I plan to make covers that have a sheepskin face on the seat bottom and seat back, and then have regular leather elsewhere. They will be made so the seat bottom slides into the bottom cover which is made like a pouch, and the back seat cover slides over the back from the top (headrest removed before installing). They will be tailored to the seat without any straps, and there will be an opening in the back to access the seat pockets. I am now retired from medicine and am willing to take on some projects. The other two people have contacted me about are 1) making travel boards, and 2) teflon seals for vintage flap pumps. I have some deadlines lurking for the next couple of months, but have not forgotten about these requests. I would be interested in doing sheepskin seat covers for people interested. The easiest would be Ovation owners as those are the seats I have (1998 model) and will have the patterns made, but I am up for requests. John Breda
-
Is there a 12 V LED version? John Breda
-
Call me at (617) 877-0025. John Breda
-
I will throw in my two cents. There were three aftermarket turbo systems applied to the IO-360 Mooneys. (Models E, F and J). The original RaJay Turbo system had a manual wastegate and no intercooler. Next in line was the Rocket Engineering turbo-boosted system for the J which is the one that was involved in breaking crankshafts and was taken out of production. M20 Turbos took the Rocket Engineering system exactly as it was designed except configured it on an IO-360 engine as a turbo normalized system with a pop-off valve set at 31 inches of manifold pressure, an intercooler, and keeps the original high compression pistons. It has a fixed wastegate. In that configuration with operating manifold pressure limited to 30 inches, it is a very good system. The STC's for both the original RaJay system and the M20 Turbo system are orphaned STC's. A turbonormalized E, F or J increases the capability of these planes considerably. The original E or F can only use the original RaJay system if it has the original cowling. The M20 Turbo system has STC's for the F or J only. The F cowling must be converted to a 201 cowling to be covered under the STC. John Breda
-
Foggy/muted wing taxi/landing lights lenses
M20F-1968 replied to PeterRus's topic in General Mooney Talk
Also, when done, leave all screws 1 turn loose. Work very slowly with the sander to fit the lenses. The hardest part is to see that the lenses fit the curvature in all aspects of the compound curves without any stresses when fitted in place. John Breda -
Foggy/muted wing taxi/landing lights lenses
M20F-1968 replied to PeterRus's topic in General Mooney Talk
Allow about 8 hours to fit both lenses (sounds like yours are wing-mounted lights). You will need a combination disk/belt sander bench-mounted machine - The Harbor Freight version will work. Also get countersinks from Aircraft Tools Co. They have fluteless countersinks that have a single hole in the side. The cutting edge is the single hole. They do not chatter and will safely cut without cracking. Work slowly with the sander to fit the lens in place, with sufficient play. It should not fit tightly. The holes for the screws will also be oversized. The screw heads will use couner-sinked washers. Do not use the aluminum frame. John Breda -
It doesn't matter as long as the thread type is proper, ande the screw (or likely machine screw) in long enough to easily reach the threds. What I dis, and the reason for my posting, his realize that the slot of the screw had is a PITA to access and engage with the 201 windshield and the height of my panel (which is an inch and a half higher than standard), I used a machine screw with a head that can be turned with either a socket wrench or ratcheting box wrench. This makes it a whole lot easier to take screws in and out and tighten them.. John Breda
-
I have some paperwork relative to the 201 conversion. John Breda
-
Do You Pull Obsolete Equipment or Leave it Be?
M20F-1968 replied to bigmo's topic in General Mooney Talk
All you need to do is build the panel supports with 1/4" aluminum bars into which screws could be placed to hold the trays, etc... in place. When you need to get back there, just disassemble what you need to gain access. That is how my panel was designed. The panel itself uses an instrument panel bow taken from an Ovation. John Breda -
Do You Pull Obsolete Equipment or Leave it Be?
M20F-1968 replied to bigmo's topic in General Mooney Talk
Weight is always a concern. Old wiring complicates future repairs. Unneeded wiring and equipment, should always be pulled before adding new stuff. It does make more work but it is proper to keep the plane current without complications. John Breda -
Have a 63 m20c that I’m scrapping/play forting
M20F-1968 replied to saltydecimator's topic in General Mooney Talk
And flap actuator. John Breda -
Have a 63 m20c that I’m scrapping/play forting
M20F-1968 replied to saltydecimator's topic in General Mooney Talk
What kind of fuel selector does it have? Is it an H&E. I am interested in it and the flap pump. John Breda -
As I recall, the Magic Arm came in two lengths. It has a threaded end which threads into the Super Clamp. Just but what seems right from a source that accepts returns (returnable e-bay merchant, Amazon, etc...) John Breda
-
Cigarette Lighter socket as USB power source
M20F-1968 replied to PeterRus's topic in General Mooney Talk
If you keep your eye out, you can find a USB panel mount unit in the $100-200 range. I found a used Stratus, 2 USB-B ports for $100 on ebay. The stratus needs only a proper hole size for the unit itself, no additional mounting holes (unit and face place hare sandwich the panel). Has worked fine. Prior to that, I had a cigarette lighter with an adapter which also worked without any radio interference. John Breda -
I retrofitted Ovation rear seats into my 1968 F model. In fact my entire interior came from a 1998 Ovation. John Breda
-
Baffling for a 1965 M20E
M20F-1968 replied to Bart Chilcott's topic in Vintage Mooneys (pre-J models)
Buy a bottle of machinist's dye, a new, sharp machinist's scriber. Trace the old parts, make heavy paper or poster-board weight cardboard templates. Leave a bit of extra material for and fitting with files and a dremel tool, and go at it. It is time consuming but you will get a better fit it you work slowly, and it will just cost you for the aluminum. Make it a bit heavier than the ones made commercially, probably 0.090". John Breda -
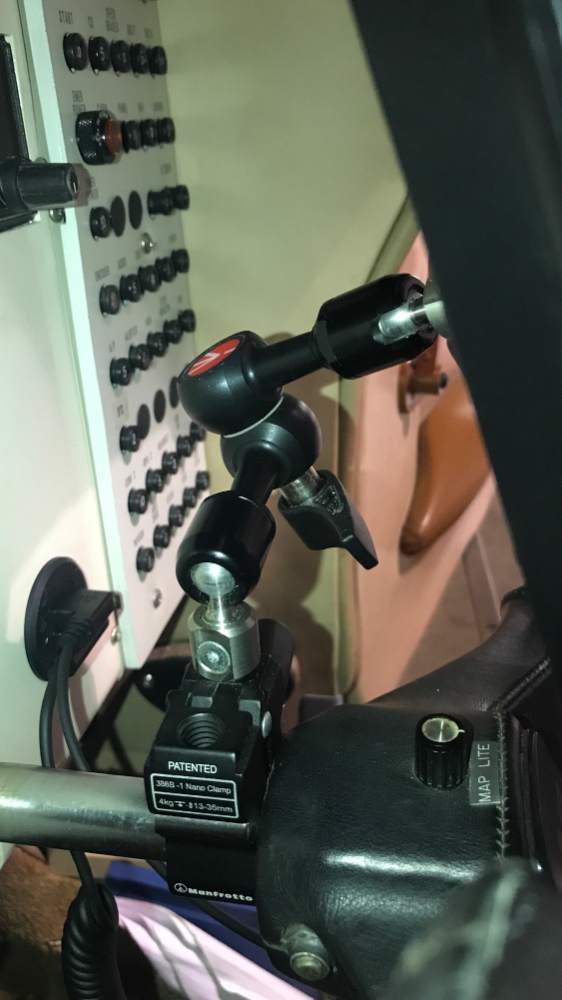
I promised pictures of the installation I use currently of my I-pad. After auditioning a bunch of Magic flexible arms, I settled on the Manfrotto Magic arm and super clamp. They are Italian made, and expensive, but much much better than their Chinese knock-offs. Also pictured is a cooling base which I just added. It needs the My-Go-Flight adapted. John Breda


-
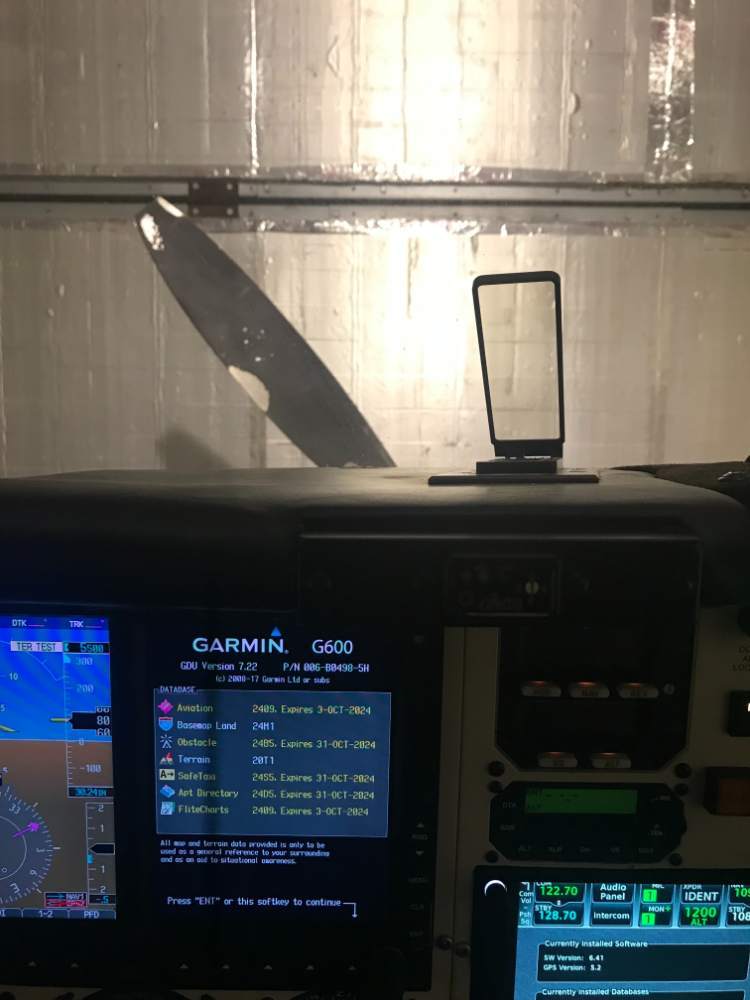
This is how my AOA is positioned. The post is just to the right, and the G600 is in the center of my vision straight out. Still need to shift my eyes to see the AOA. Alpha Systems wants it right in the straight-ahead visual field. How many of you have it straighht-ahead, and how many have it similarly placed to mine. What seems to be preferable? John Breda
-
Recognize the teflon seals you have are likely 60 years old. I am expecting to make some soon. I have been quite busy with some pressing deadlines. If you would like to be put on the list for some, PM me with your request, name, address, phone and e-mail. John Breda Cell (617) 877-0025
