
231MJ
-
Posts
191 -
Joined
-
Last visited
Content Type
Profiles
Forums
Blogs
Gallery
Downloads
Events
Store
Everything posted by 231MJ
-
Hobbs meter not working. Airplane = M20K 25-0308. Would appreciate advice on trouble shooting. Specific questions: 1. What drives the meter - oil pressure switch? 2. If I put 12V to the meter, should it run? 3. Is there a fuse or CB in the circuit? 4. What am I not asking that I should be asking? Thanks
-
Dynon Avionics - No major announcement today?
231MJ replied to NotarPilot's topic in Avionics/Panel Discussion
The servos were not installed but all the wiring was installed while the interior was out and the wing panels were open. Should make the final install more efficient. -
Dynon Avionics - No major announcement today?
231MJ replied to NotarPilot's topic in Avionics/Panel Discussion
The Dynon website now shows Mooney certification in the first half of 2021 and the progress bar has not moved much, if any. I'm enjoying the heck out of HDX but not having an autopilot is a real bummer. This is really disappointing news. Picture of the panel in the climb out of HWD...notice the blanking plate where the AP head should go...UHHHH.
-
SOLD to Mr. Ross Taylor. I had an E before the K and loved the heck out of it. Flew it everywhere!
-
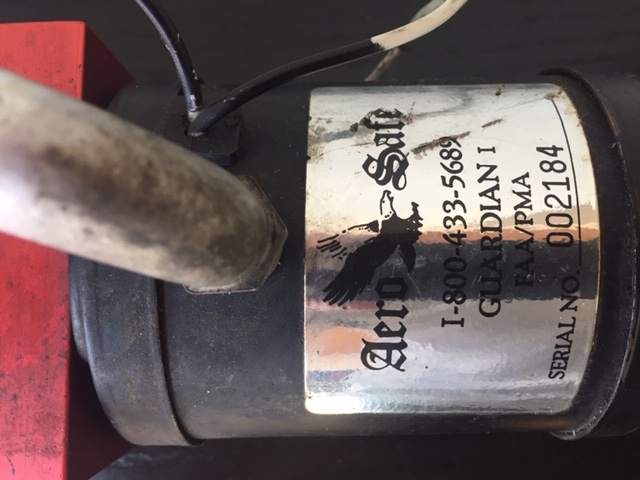
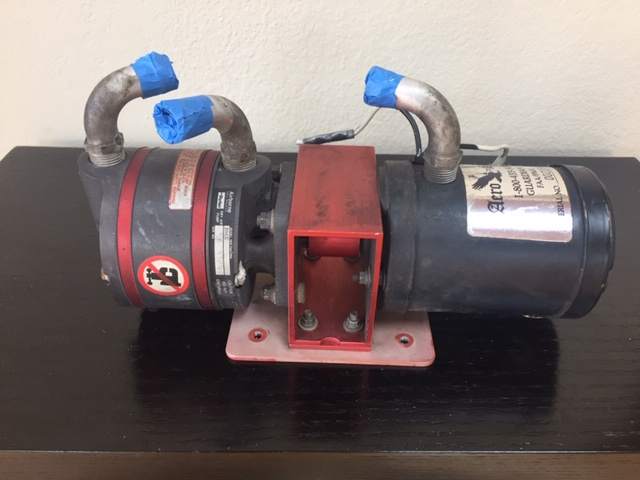
I know...no one needs a standby vacuum pump anymore...so, anyone want this for just the shipping cost? That's $20. I'm hoping this goes to someone that can actually use it, otherwise it's going to sit in the hangar for the next 10 years, which is a waste.
-
Pump removed as part of Dynon conversion. In 10 years I used it once (other than periodic testing) - not in IMC but it was nice to throw the switch and the gyros came alive again. $100.00 plus $20.00 shipping.
-
A while back a bought a set of boots from LASAR - they probably still have them.
-
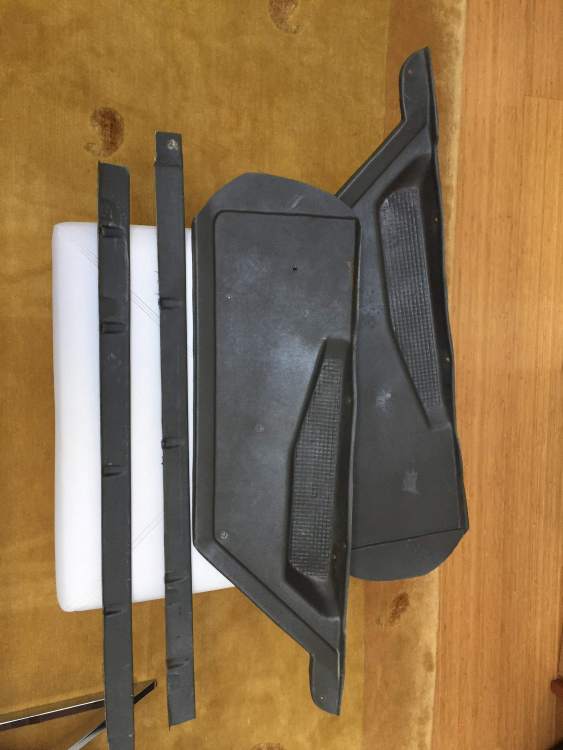
Thanks, Larry. Yours look a lot better than my beat-up panels and not putting those little strips back in make sense - really can't see much of em anyway. Did you buy yours in black or paint them?
-
Sold. Use in good health and clear skies.
-
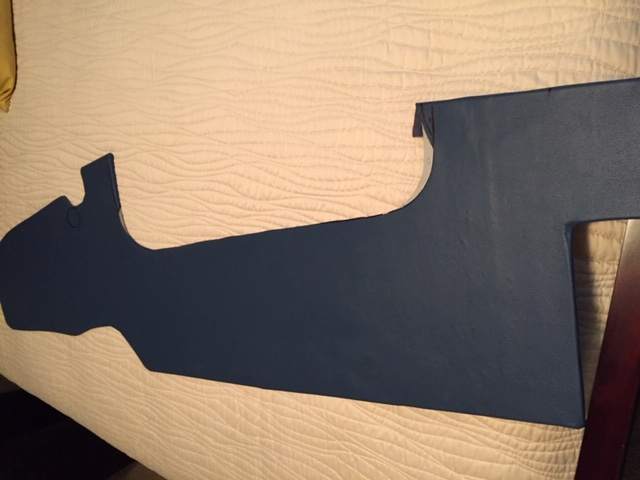
Thanks, Anthony. This is a picture of the copilot side panel covered in blue leather. The seats are gray leather and I thought the blue leather would be a nice accent and it matches the exterior blue accent stripe. My work is not perfect, but the imperfections will be covered up by the time it's installed. The leather was kinda inexpensive, about $300 for a full hide and one hide did both side panels and the panel under the rear seat. I also had three pockets made - they will attach with snap fasteners. Aerocomfort did the seats and covered the plastic panels - what a fantastic job. Hector is an artist. But this interior stuff is a lot of work...
-
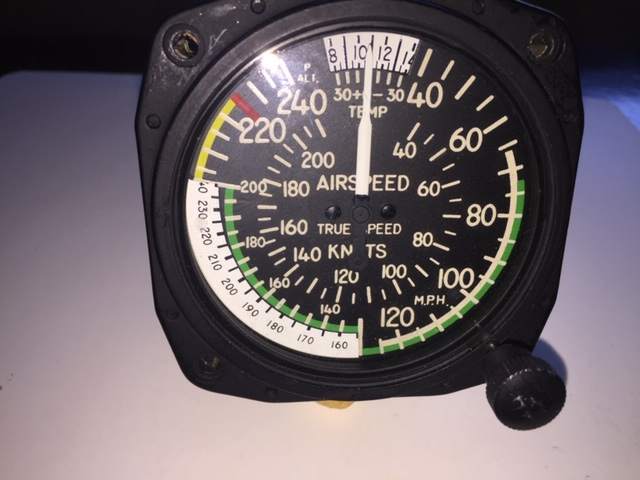
Removed for glass upgrade. United Instruments part #8125, don't know the Mooney part #. I think the speed lines are fairly clear in the pictures. $100 and I pay shipping. Money back guarantee.

-
ATTN: Anyone with a TSIO 360 MB engine in a 14v 231
231MJ replied to Falcon Man's topic in Modern Mooney Discussion
The Niagra Air Parts guys know the T drives very well. They have worked on mine and strongly recommended NOT going with a light weight starter. Interestingly they also recommended using a "less slippery" oil, I was using Aeroshell at the time. A year a go my starter was cranking slow so I installed a rebuilt starter and it was a great improvement. -
I used the same side panels but covered in an accent leather rather than carpet. I should have just made new panels that go to the floor and covered it all in leather. I think SEM paint is in my future unless I can dream up something else. Anthony, please send me a picture of your interior when it's done and I'll do the same. I also have a 262 and enjoy the heck out of it.
-
Anyone do anything interesting with these side kick panels? Cover in a vinyl wrap? Reproduce in carbon fiber? Replace with something else? I have a new interior and hate to put this back in.
-
Art, It is a better view without the compass in the way, for sure. From the view I see the hurricane has passed . Do you know why the compass was surface mounted rather than flush mounted? Not enough room in the back? I like the panel!
-
Has anyone converted to a panel mounted compass? Good or not good conversion?
-
Rivet question. Can a panel be worked on too much?
231MJ replied to rbridges's topic in Avionics/Panel Discussion
The rails from Mooney are really expensive - I remember getting a quote 10 years ago and it was crazy expensive, like $800/pair so a few more holes went into the old rails. The 231 has an advantage on the right side because there is a support underneath that holds the stack. Not sure if these are any cheaper for if they work for the Mooney. https://www.aircraftspruce.com/catalog/avpages/radiorax.php?clickkey=3294974 -
There's 3/4" foam insulation that goes over the skin and therefore over those two squares - that's what those glue marks are. That would provide electrical insulation but I could see where it's not foolproof. The sonoalert has rubber boots over the connectors and the speaker is in a plastic housing. The lights are in a separate housing in the headliner. I'm not saying you're wrong but it just looks unusual to me. Perhaps a Mooney mystery, if only Bill Wheat was still with us...
-
There are 4 squares stuck to the inside of the cockpit - what are they for?

-
Dynon Avionics - No major announcement today?
231MJ replied to NotarPilot's topic in Avionics/Panel Discussion
If you've been tracking their AP certification progress (like I have), you may have noticed the Seneca and Bonanza 36, A36 have been making progress - the progress bars are moving! I think the 182 bar has also made some progress. Unfortunately, the Mooney bar has not moved in some time. I can only hope that once they get the Seneca and Bonanza certifications pushed out they can put more resources on Mooney. I wish there was more meaningful dialogue coming from Dynon about the Mooney certification but let's not give up. Those of us that are committed to Dynon just need to keep pressure on them. They do monitor the Dynon Certified forum and I encourage anyone interested in Dynon to join the forum and communicate with Dynon. NotarPilot and I met on that forum and it would be good to see more of you on that forum also. -
Miscellaneous CNC adaptor panels and USB
231MJ replied to Aerodon's topic in Avionics/Panel Discussion
And he makes really nice panels - get him to send you pictures or perhaps he will post a few here..come on, Don. -
It's going to be about 70 hours. That included removing the old avionics (autopilot, stormscope, MX20, GX50, standby vacuum and all the round dials). I installed the Garmin GTX335 myself and while the install was successful, it took many hours so I'm satisfied with the 70 hours the shop is taking to do this up-grade.
-
Erik, I'll send you a separate email with the costs. I had a lot of stuff removed, a new panel cut, silkscreened, etc. It all adds up. I think Dynon is a little cheaper to install because of the pre-wiring for their components but I also had a new audiopanel installed along with a Garmin GPS 175 and I kept my Apollo SL30 and SL40 radios so there's still a lot of conventional wiring that needed to be done.
I'm out of town right now, give me a few days to respond with more data.
-

Thanks MJ!
-
-
You can put the engine monitor on the 10" display (on the bottom of the display is where I have seen it most often) but it looks too crowded (to me) and a full PFD and map seems appealing plus the 7" display can be back-up to the 10" display. The AP is not Dynon only and to be IRF legal you need to have a different navigator - that's why I have the SL30 and GPS 175.
-
It's not done yet but wanted to share progress on the Dynon up-grade. Ignore the right side of the radio stack - that will be a future 7" Dynon display for the engine monitoring system. Also ignore the black panel under the radio stack - that will be a gray panel when I do the engine monitor. I'm doing this progressively - waiting for Dynon to certify the autopilot for the Mooney, when that's certified the right side will be done. There's a blanking plate where the AP controls will go. Note that there are some Garmin products in the radio stack, which play well with Dynon (I hope!) - I did not want the wrath of Don Kaye coming down on me (just kidding, Don). So far, so good. I'll post a more complete PIREP when it's done and flying.


