Gary0747
-
Posts
506 -
Joined
-
Last visited
Content Type
Profiles
Forums
Blogs
Gallery
Downloads
Events
Store
Everything posted by Gary0747
-
I cant seem to find anything in the Brittian manuals we have here on Mooneyspace that explains what this is? Is it simply an elactrical switch that overrides the inputs to the Accutrack allowinng voltage deviation inputs from a dg or HSI capable of interfacingwith an autopilot?
-
I got the expensive orings on my caps and they do not leak either but I hate the water that collects on top and around the edges of the cap going into the tank when the cap is removed plus having the extra protection
-
Has anybody made a rain protector for their fuel tank caps for use when tied down? I seem to recall that the “Mooney Miser” years ago had such an item.
-
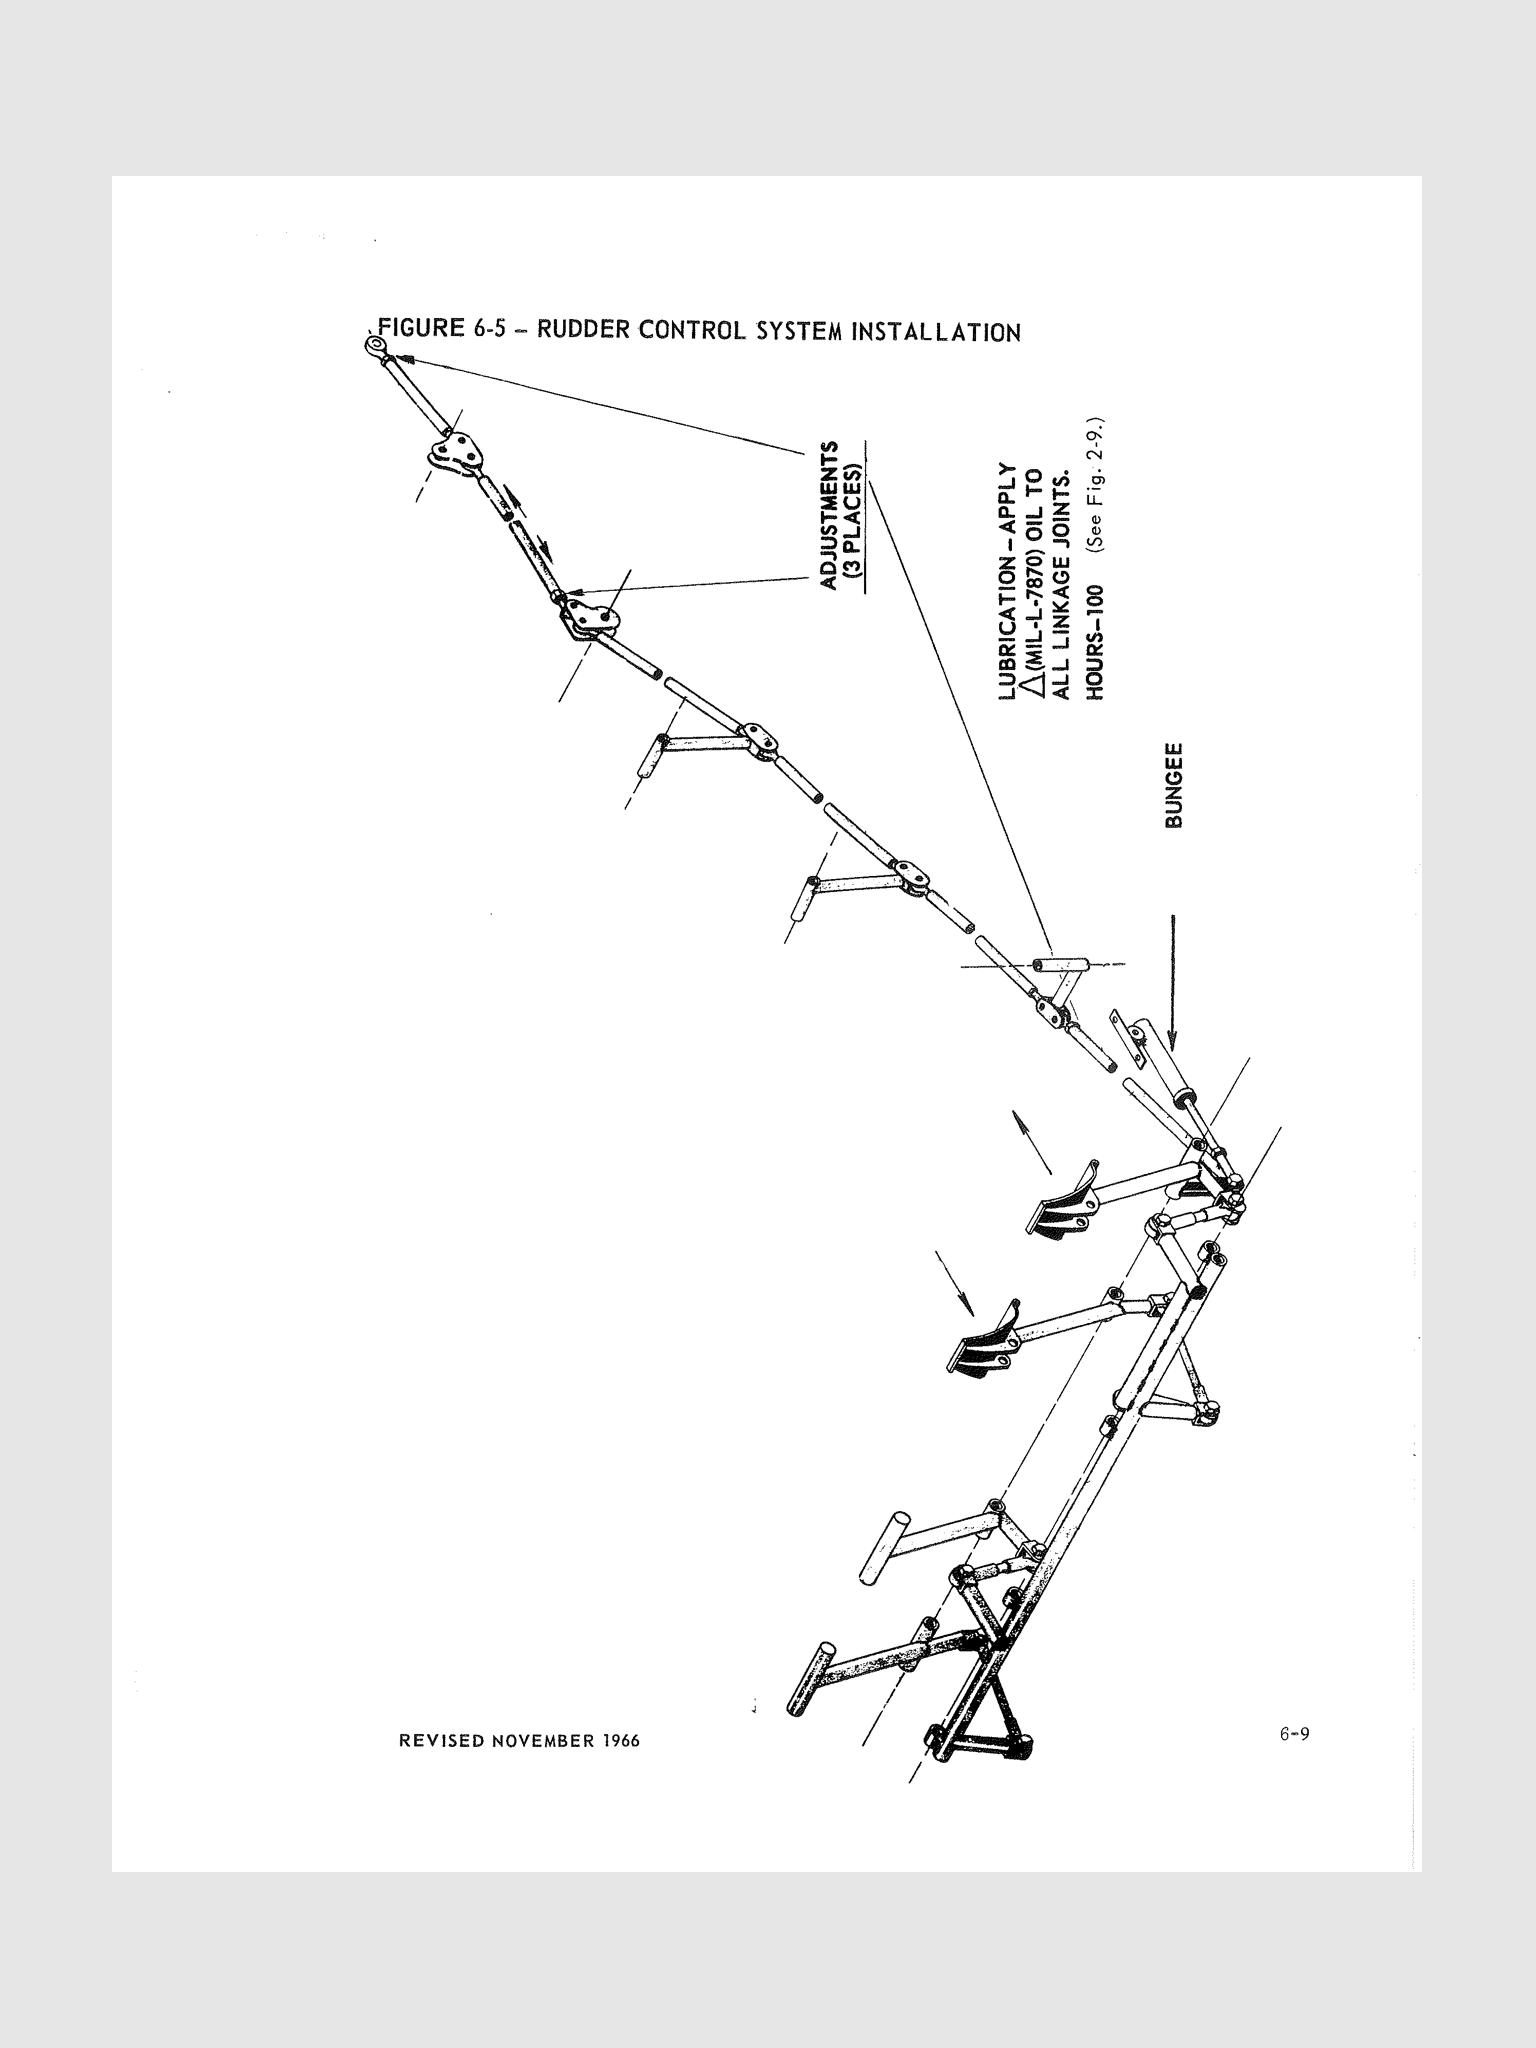
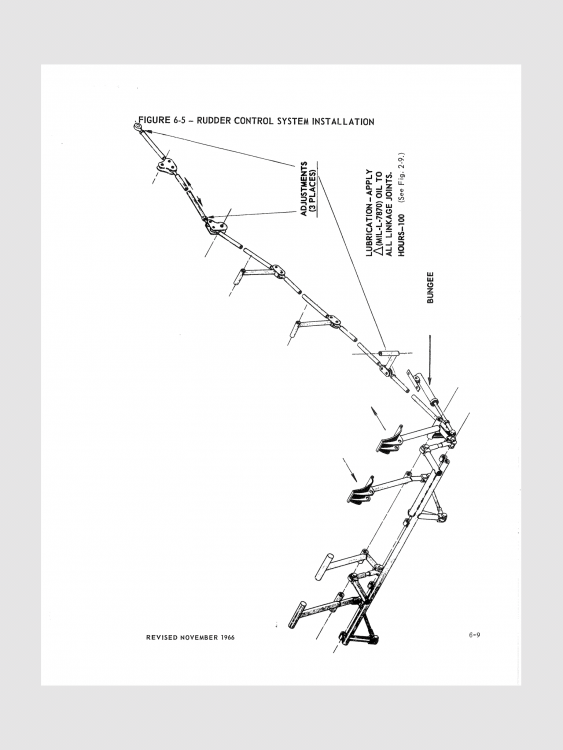
This shows a bunge in the rudder system but I am only assuming it keeps the pedals or rudder in the neutral position?
-
-
I thought the bunge would maintain the same neutral point on the pedals and the rudder would be off set in the direction of the adjustment?
-
All the service manuals say rudder trimming to maintain TC ball center (yaw) is done by slight bending to the rudder trailing edge. I just do not understand why it is not simpler to make adjustments to the heim bearing on the rod to the rudder?
-
It is amazing to me that they got a 3700 pound airplane (at max gross) to fly on what appears to be the same wing as the other Mooneys. Must be the rubber brisket landing gear that limits things certification wise.
-
The last inch or so on locking the gear into the up position has always been a bit hard while putting the bar into the up socket. But it seems a little more difficult recently. Maybe it is just me getting weaker with age. I was wondering if my gear doors might be set too tight when closed but the manual is not very clear on how to check or measure how tight they should be in the up position. Any similar experiences or suggestions?
-
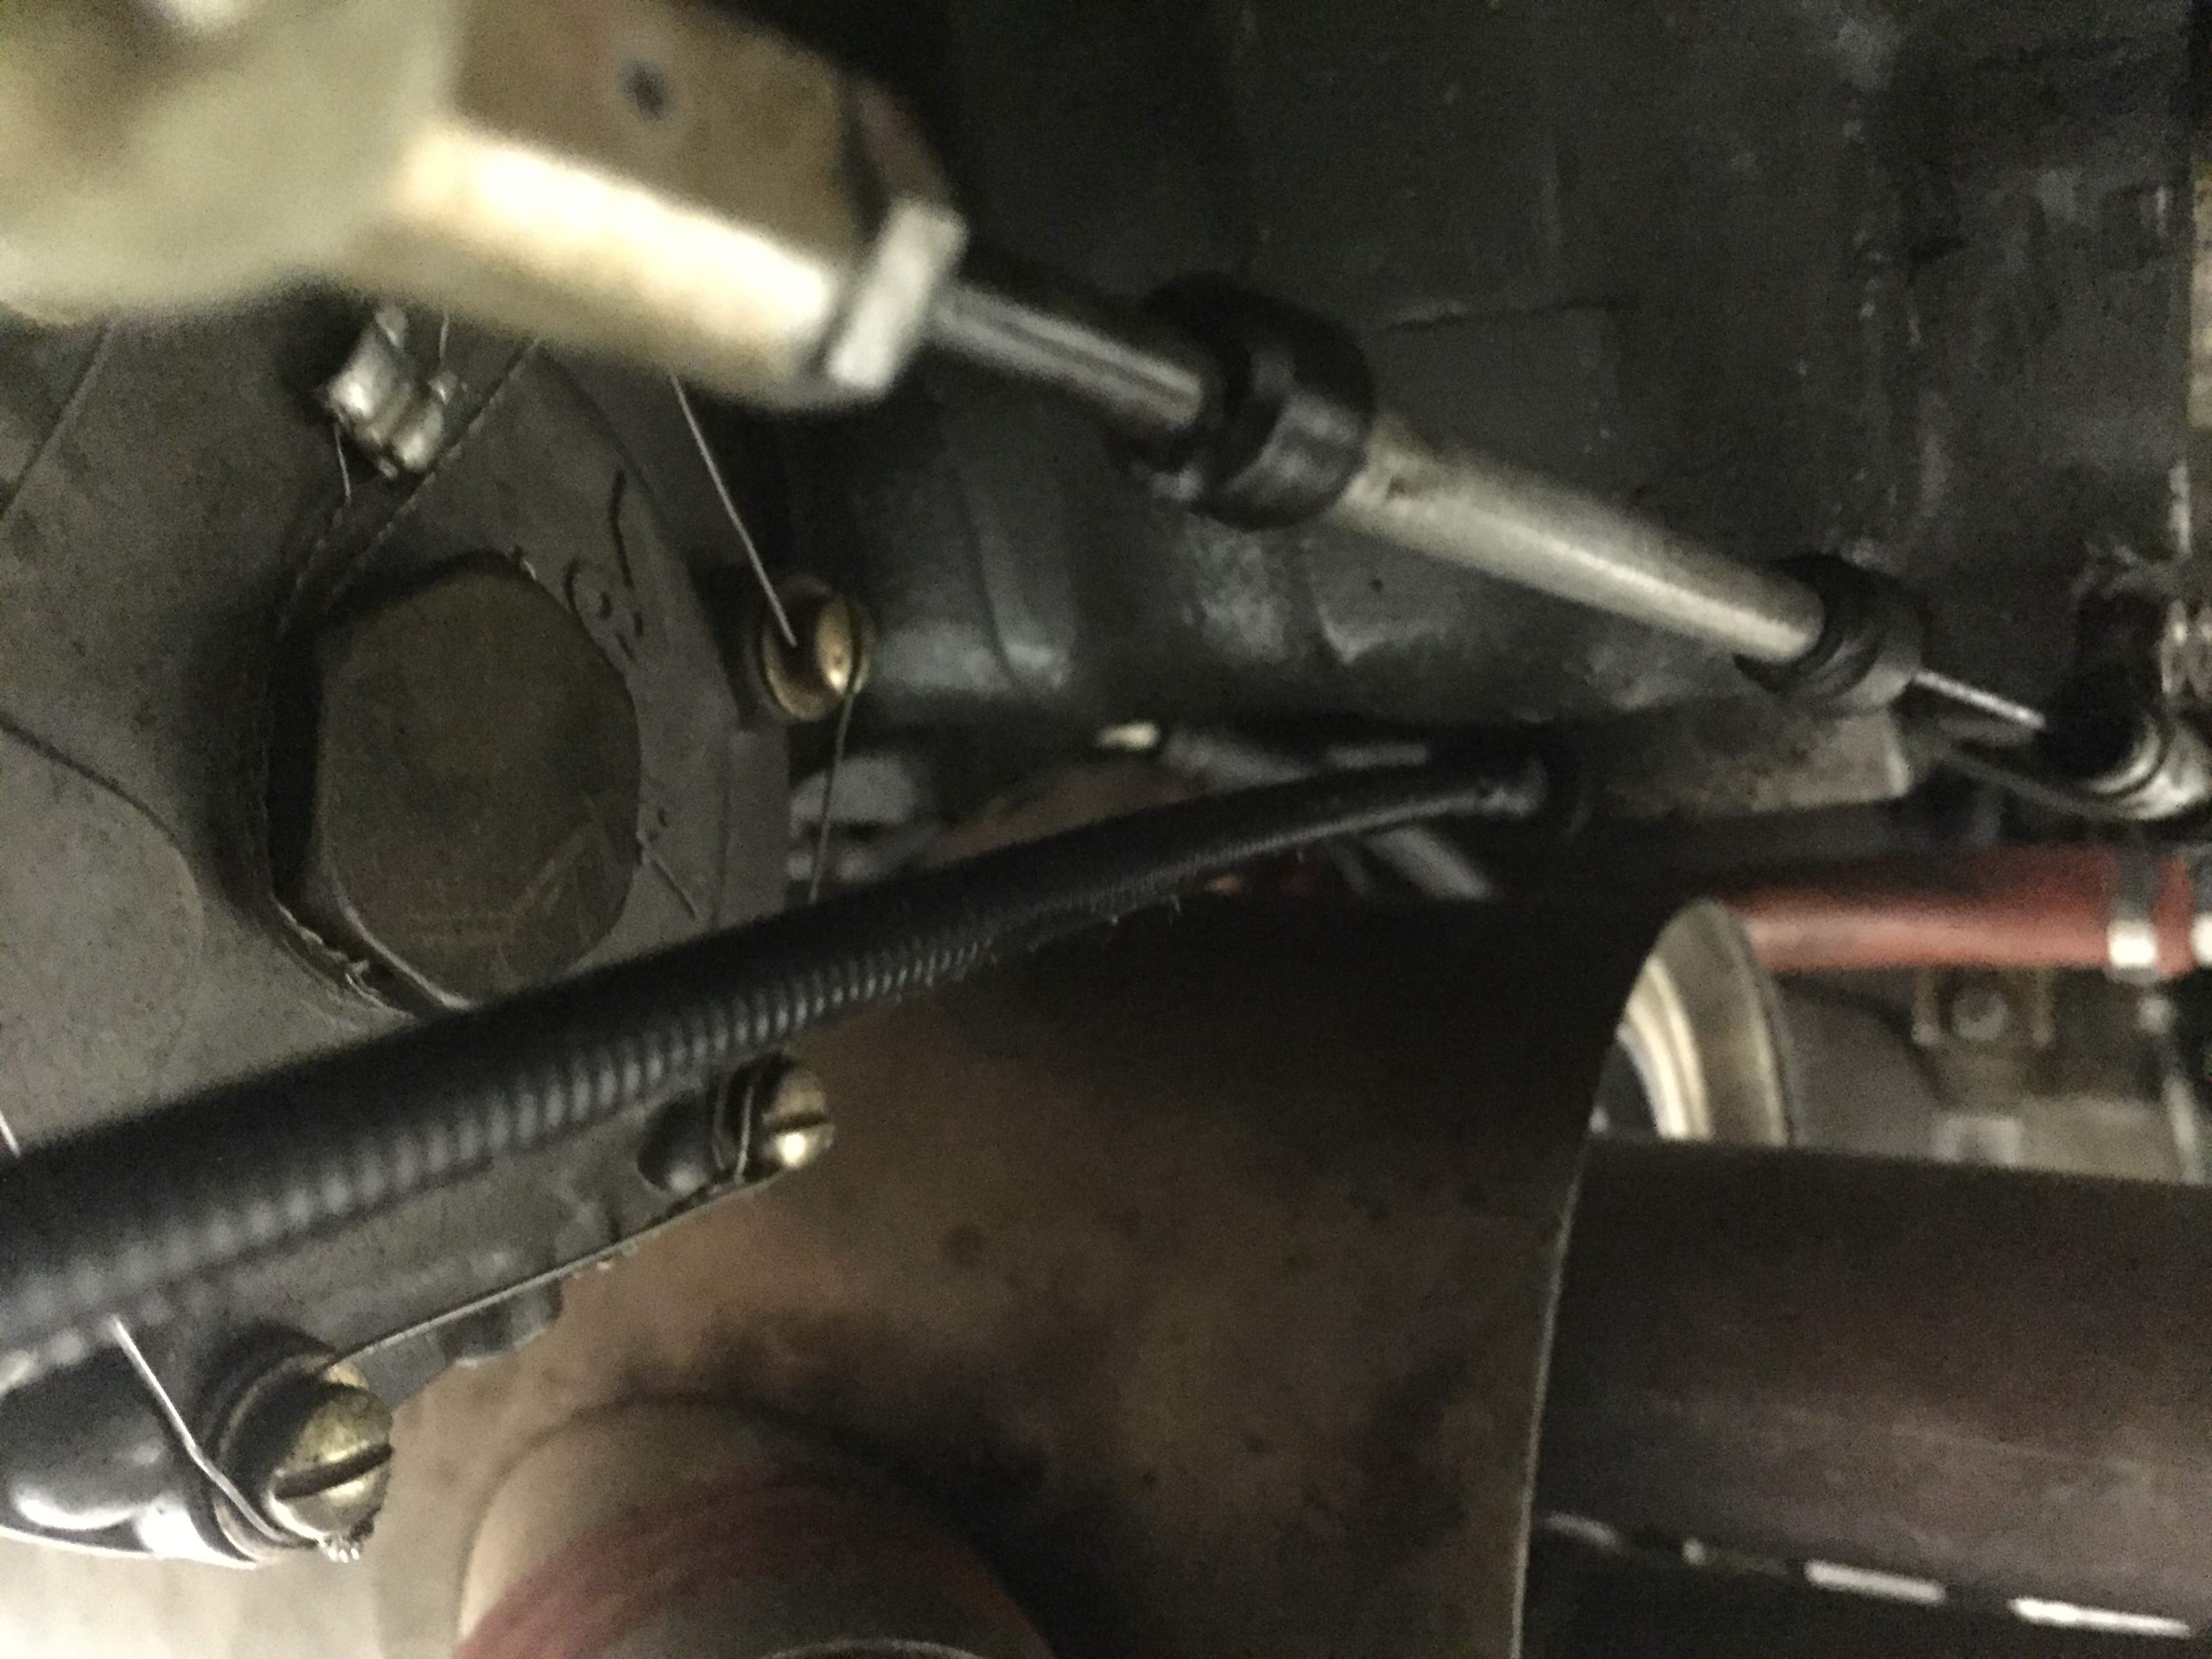
Steering arm too close to structural, steel tube
Gary0747 replied to Gary0747's topic in Vintage Mooneys (pre-J models)
I talked to Dan at Lasar and he said he has seen many situations with a rub on the steel structure and he gave me a simple solution that amazingly worked. Just move the one or two circular shims on the inboard side if the steering horn tee (part #15 in the drawing) to the outside location and that creates the clearance needed to remove the rub. -
Steering arm too close to structural, steel tube
Gary0747 replied to Gary0747's topic in Vintage Mooneys (pre-J models)
Good suggestion we actually tried this but it actually pulls the arm up once the rod end #20 drops below the elevation of bolt #21. -
My steering horn was replaced a few years ago but we just noticed a slight paint rub between the upper side of the arm (part #18 in attached parts drawing) and the horizontal steel structural tube at the bottom of the firewall. I don’t see a simple adjustment to increase clearance. Has anyone else seen or solved this issue?

-
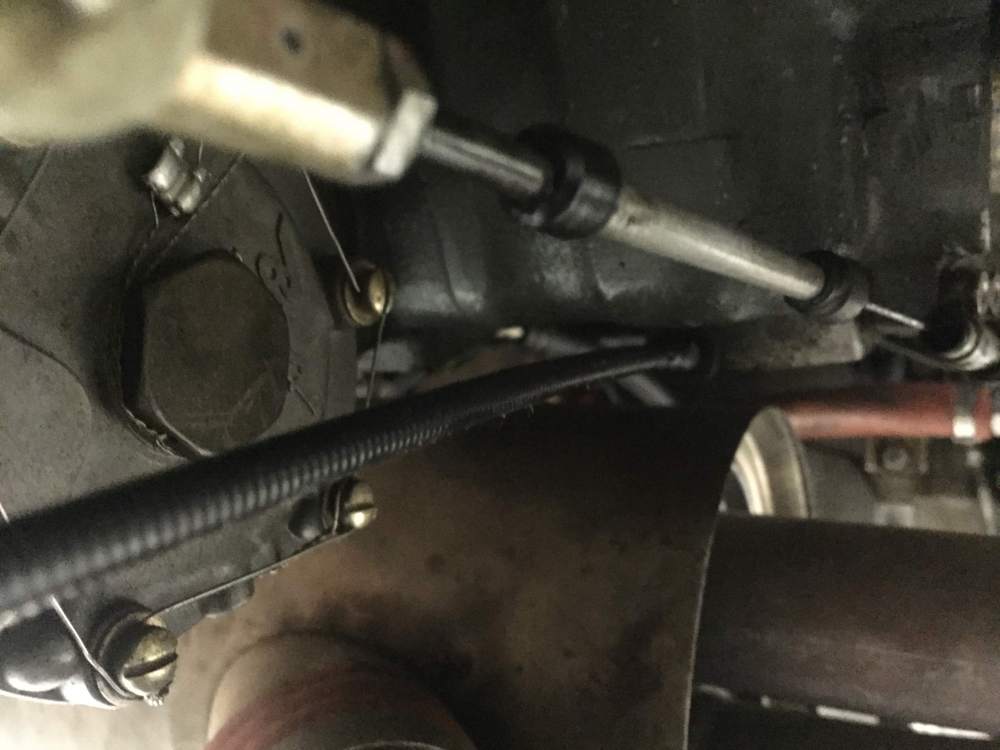
Mixture cable does not look right?
Gary0747 replied to Gary0747's topic in Vintage Mooneys (pre-J models)
I added a photo to my original post. -
Had never noticed this before but the rigid end piece on the servo end of my mixture cable seems to have separated? Not sure how it is supposed to attach? Maybe time for a new one. Appreciate any advice
-
Power setting while on the clime on Mooney M20J
Gary0747 replied to Shawn26's topic in General Mooney Talk
I remember seeing a red box APP somewhere but can’t seem to find it now? -
Looking for Technique or Tool to Run wire in the wing?
Gary0747 replied to Gary0747's topic in Vintage Mooneys (pre-J models)
Maybe my wing access panel design is different from other models, but the access panel hole is nowhere near the grommet. Someone with a smal forearm will have to get their arm in the access panel past their elbow to reach the grommet. You can not even seethe grommet from he access hole directly. -
Looking for Technique or Tool to Run wire in the wing?
Gary0747 replied to Gary0747's topic in Vintage Mooneys (pre-J models)
Thanks for all the good ideas but I am still confused as to how or what tool you use to guide the piano wire, or tubing or fiber pole if you can not get your fore arm through the access hole? It takes some kind of a tool to guide things and to either feel or see the grommets ? I do not have weight lifter arms but may be bigger than some. -
Looking for Technique or Tool to Run wire in the wing?
Gary0747 replied to Gary0747's topic in Vintage Mooneys (pre-J models)
I have run wires through a number of planes, Mooney aren’t too difficult. Tape your new wire to a 6’ length of Mil spec piano hinge pin and use it like a giant sewing needle. With little effort you can run it from tip to belly through every grommet. Clarence Do you do this using mirrors or by feel? I can only reach the piano wire with a long hemostat. We were able to do the lead wire trick on the right wing for the last 5 ribs using the nav light wire. At that point a number of other wires intersect the bundle and they are all tied together. The left wing is worse with pitot tube and stall vane all joining the bundle and being tied together. No good way to separate a leader wire. I also have that same set of fiberglass rods Bryan linked to but found the brass ends a little too big for some of the grommets that are already full. -
Trying to run a couple of wires through the grommets in the leading edge of the wing. Neither I or my mechanic can reach the grommets due to our arms not fitting through the access panel. Either need a trick or a tool or someone with small forearms. Any suggestions?
-
They say you should not reuse tubes for fear of pinching or getting a wrinkle that eventually causes a hole. The price of a good tube can be 60 to 75 pct of a new tire unless you are running something like a Goodyear flight custom.
-
Water Drainage. Anybody else had this?
Gary0747 replied to MyNameIsNobody's topic in Vintage Mooneys (pre-J models)
Keep the drain holes in the tail and fuselage open or you can trap a significant amount of water in the tail. Not sure if enough to throw off the weight and balance. If you seldom open and clean all at the inspection plates you will find grease, grass and mud collecting in the tail drain passages and on the bottom of the tail skins. -
Looking for experience with using Kelly Aerospace Rebuilt Slick mags. Good or bad ?
-
Were you also able to remove your belly beacon as part of this install? Which is the better system the Orion 650 or 600?
-
I do not like the possibility of RTV, fiber glass or duct tape being sucked into the air intake. There used to be a process of patching rubber called hot vulcanizing. Does anyone know if it or something like it is still available? Any body have an update on availabity of new boots from factory or elsewhere?