RocketAviator Posted April 20, 2014 Author Report Posted April 20, 2014 Thermoforming Vacuum box ready for trial run. Keeping my fingers crossed. Going to try my first form hopefully today. Only have acrylic material today, will try and pickup polycarbonate material tomorrow. Quote
BigTex Posted April 20, 2014 Report Posted April 20, 2014 Looks like you're tooling up to start cranking out those Rocket kits! Quote
carusoam Posted April 20, 2014 Report Posted April 20, 2014 Quickly looking at you male mold, Might I cordially suggest the following... For the polymer... Heat the polymer as evenly as possible. Heat both sides or turn it over halfway, etc. - Too hot, the polymer will sag or drop out of the frame/holder... - Too cold, the polymer won't stretch or will freeze too soon.... - Too uneven, it will stretch preferentially where hottest. You might consider Different sources of raw materials. PET or PETG are good and easy to form. The bottles might be too thin already. They will definitely show their internal level of stress when you heat them! Search the web for other sources. Staples sells flat sheets called transparencies. That might work... Again they will be too thin for the finished product. Transparencies are about 10 mils thick. mils = thousandths in plastics parlance... Drive thru soda cups are another favorite source of good thermo-forming polymers. Similar opportunities are often found in the deli section or bakery section at the local grocery store... It is important to know if a cup is thermoformed. If they have the tell-tale signs of the cup being injection molded, it probably won't work as well. IM parts are heavier, have a runner mark(center, bottom, pointy) or show a mold line at the rim. For the mold..... Fill in any of the odd dents and smooth them over. The dents and surface details will have a tendency to be replicated. It helps to put fine vaccuum holes in the male mold. This will draw the softened sheet around the mold and into the corners (at the bottom) To get good holes, it may help to carve out a good amount of the back side of the mold first. Use the smallest drill available. After that.... If you make a good part, but can't get one thick enough.... You may start thinking about a replica steel tube structure that emulates the Mooney roll-cage for support. Then... If you are successful in producing a usable part, you have earned a master's degree in chemical engineering / polymer processing by experience! Let me know if this is the least bit helpful? Best regards, -a- Quote
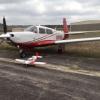
RocketAviator Posted April 24, 2014 Author Report Posted April 24, 2014 Homemade vacuum formed canopy completed & installed on Mini Me Headed to San Marcus tomorrow. This time I won't slide my seat back & crush the darn thing! 2 Quote
Marauder Posted April 24, 2014 Report Posted April 24, 2014 Homemade vacuum formed canopy completed & installed on Mini Me Headed to San Marcus tomorrow. This time I won't slide my seat back & crush the darn thing! Naturally we expect to see the TSO, PMA, STC conducted by the local AP under the guidance of the IA who carefully submits it to the FSDO -- after the DER gets done with it first Quote
Marauder Posted April 24, 2014 Report Posted April 24, 2014 And oh, yeah, don't forget the 337! 1 Quote
Hank Posted April 24, 2014 Report Posted April 24, 2014 Homemade vacuum formed canopy completed & installed on Mini Me Headed to San Marcus tomorrow. This time I won't slide my seat back & crush the darn thing! Woo-hooo!!! WE NEED VIDEO!! Rocket Jr video, of course. 1 Quote
Recommended Posts
Join the conversation
You can post now and register later. If you have an account, sign in now to post with your account.