Vance Harral
-
Posts
1,564 -
Joined
-
Last visited
-
Days Won
6
Content Type
Profiles
Forums
Blogs
Gallery
Downloads
Events
Store
Everything posted by Vance Harral
-
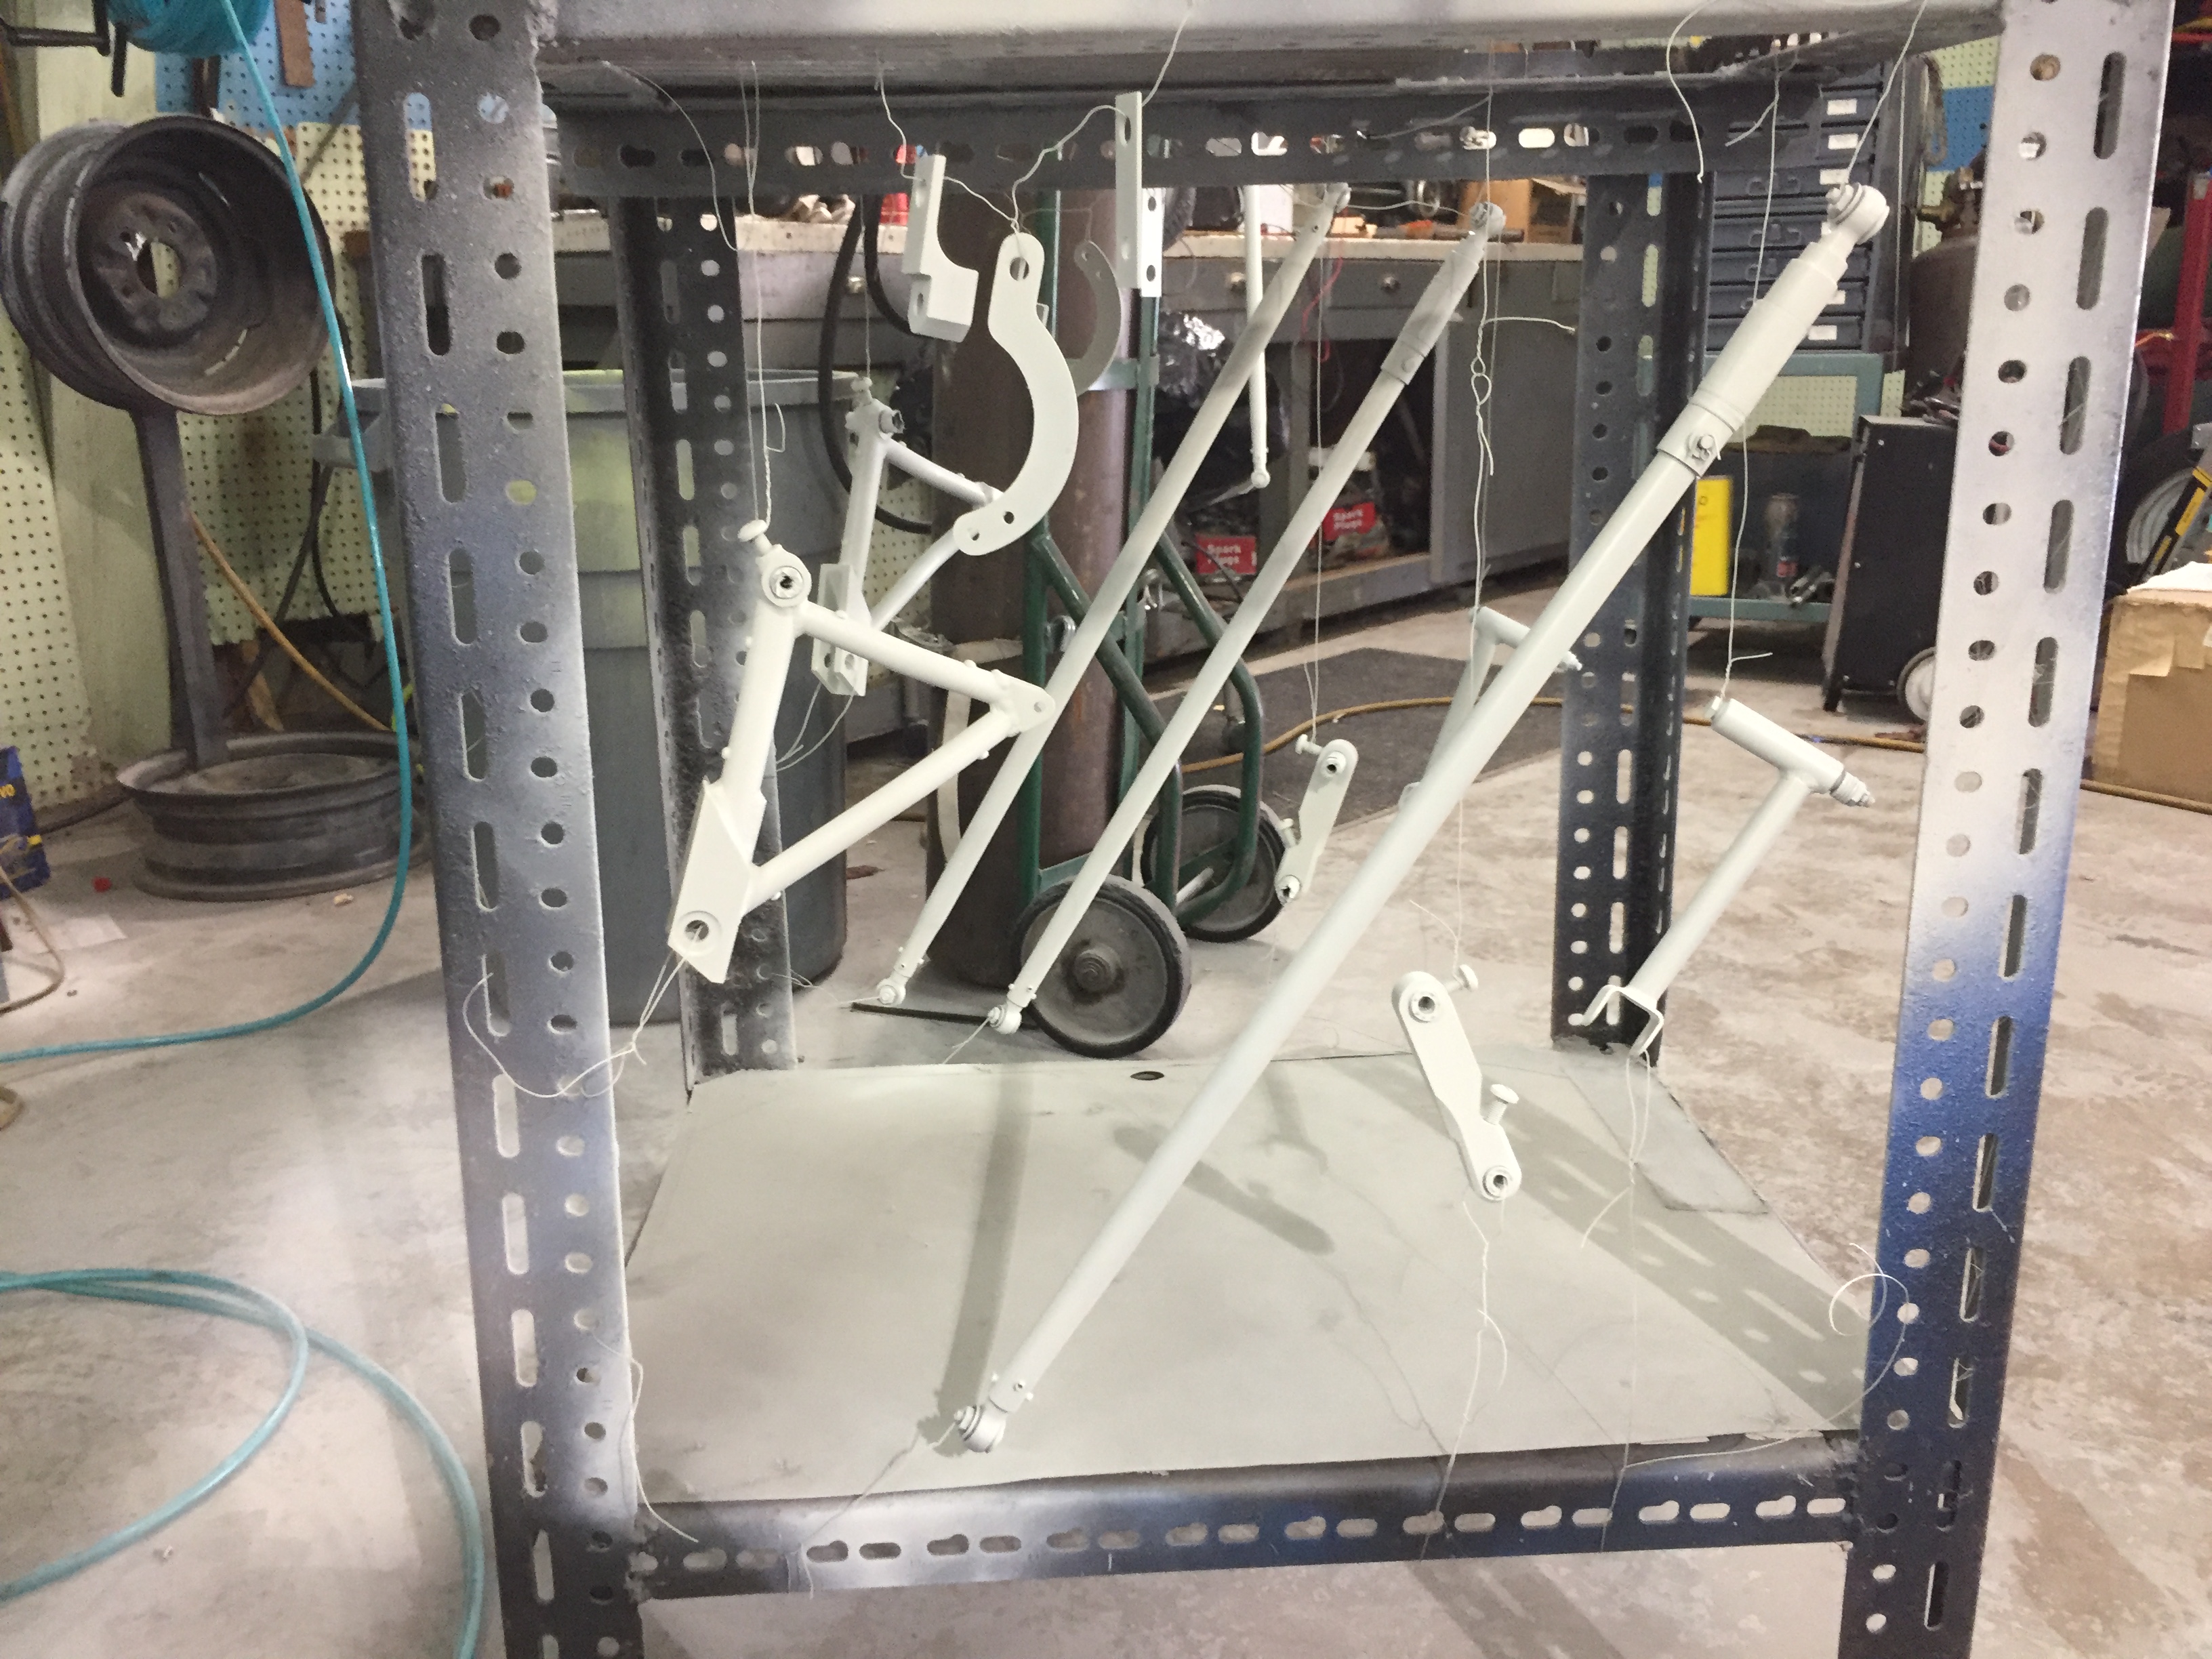
 Well, the plot thickens. I reinstalled the starboard side gear this morning and couldn't be happier - smooth operation, no slop, plenty of clearance at the bolt, not to mention everything looking cosmetically much better with the newly painted parts and new hardware. When I started putting the port side together - which was the side that was rubbing - the problem is still there. All the slop is gone from the links, but the center pivot point just comes down too far, and bumps the landing gear truss. The video below shows the problem.
 -
<raises hand> It's tempting to skip it, because it's a PITA to get the jacket off the muffler down in the lower cowling. But, with stubby screwdrivers and patience, it's possible to slide the jacket sideways, just about completely off the muffler itself, and then do the pressure check. Our mechanic taught us this trick at our first annual 14 years ago, and we've been doing it every year since.
-
Just paint today, other activities (including removal of the pitch trim system) took up most of the day. One quick pic of painted parts. Re-installation begins tomorrow.

-
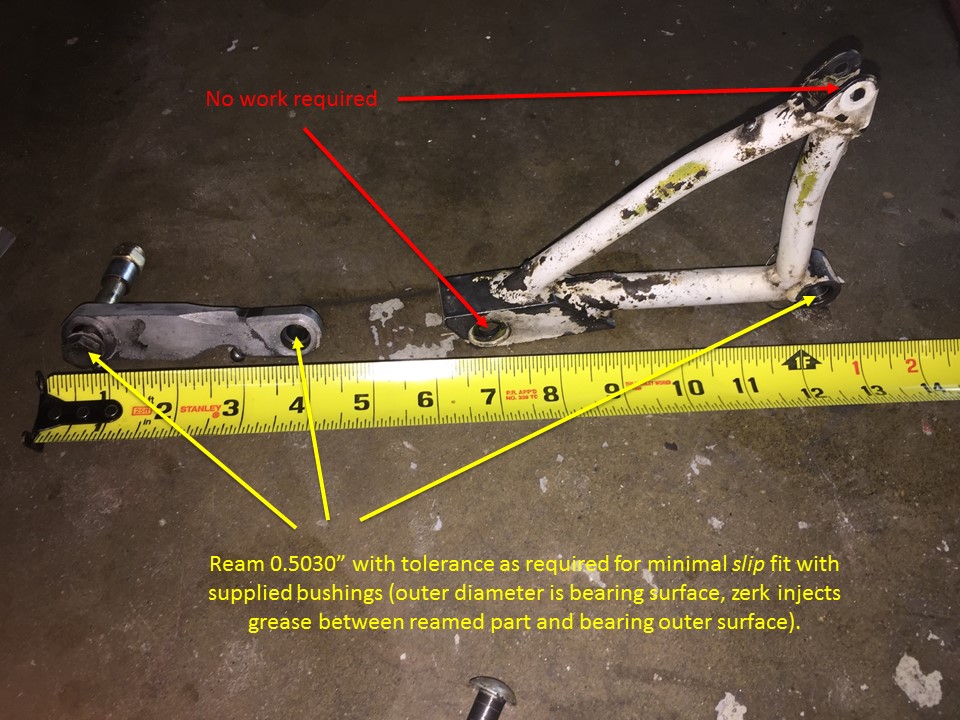
Interesting observations about wear on the bolts. Completely agree that bolts are prone to wear in fittings where the bushing rotates around the bolt. But when the bushing is supposed to be held captive by the bolt and nut - which I believe to be the case on the landing gear links - wear on the bolt suggests the bolt and nut were not properly tightened in the first place. Might have worked loose or might not have been tightened properly by a mechanic who mis-understood which surface was the bearing surface. What is true is that if the bolt rotates at all, it's likely to wear quickly. There is no hole in these bushings for grease to pass through from the outer to inner diameter of the bushings, and the ends of the bushings are covered by the bolt and nut. So there's really no way to get any kind of lubricant between the bolt and bushing.
- 81 replies
-
- 1
-

-
- landing gear
- drag link
- (and 5 more)
-
One of the airplane partners wanted the job done professionally, and had a shop in mind from the get-go. I won't try to justify the $400 charge, but it's not that big a deal split 3 ways across the partnership.
-
Unlikely in this case. Again, the links rotate around the bushings. The bolts do not rotate inside the bushings, they are held captive.
-
In our case, no single bolt/bushing was the obvious primary problem. All had some degree of slop. If you could only replace one of the three, I'd do the one in the middle, at the junction between the drag link and the retract truss - i.e. where the castle nut is that rubs the landing gear leg. However, you're not going to get to that one without completely disassembling the gear as I've shown. In fact, I'm skeptical you can improve much of anything without removing the gear legs. First, while the inboard bolt and bushing (red arrow in my second post) are accessible without doing this, that's only one of the three fasteners. The other two cannot be removed in situ. Second, understand that the wear is primarily between the bushing outer diameter, and the links into which the bushings insert. That's the bearing interface, where the grease goes. The bushings themselves are held captive by the bolts, and the links rotate around them. This is different from more common bushing arrangements where the bearing surface is between the bolt and the inner diameter of the bushing. This outer-diameter-bearing-surface design is the reason why LASAR recommends reaming the links and installing oversize bushings. Just installing a new bushing with the original outer diameter doesn't address the wear on the links themselves. If you absolutely must avoid removing the landing gear legs, I think the only meaningful action you can take is to remove the shim between the "baby shoe" bracket and the strap that connects to the spar (or use a thinner one). That will buy you a little more clearance at the castle nut. But in my opinion it's a kludge fix that doesn't really address the primary problem.
-
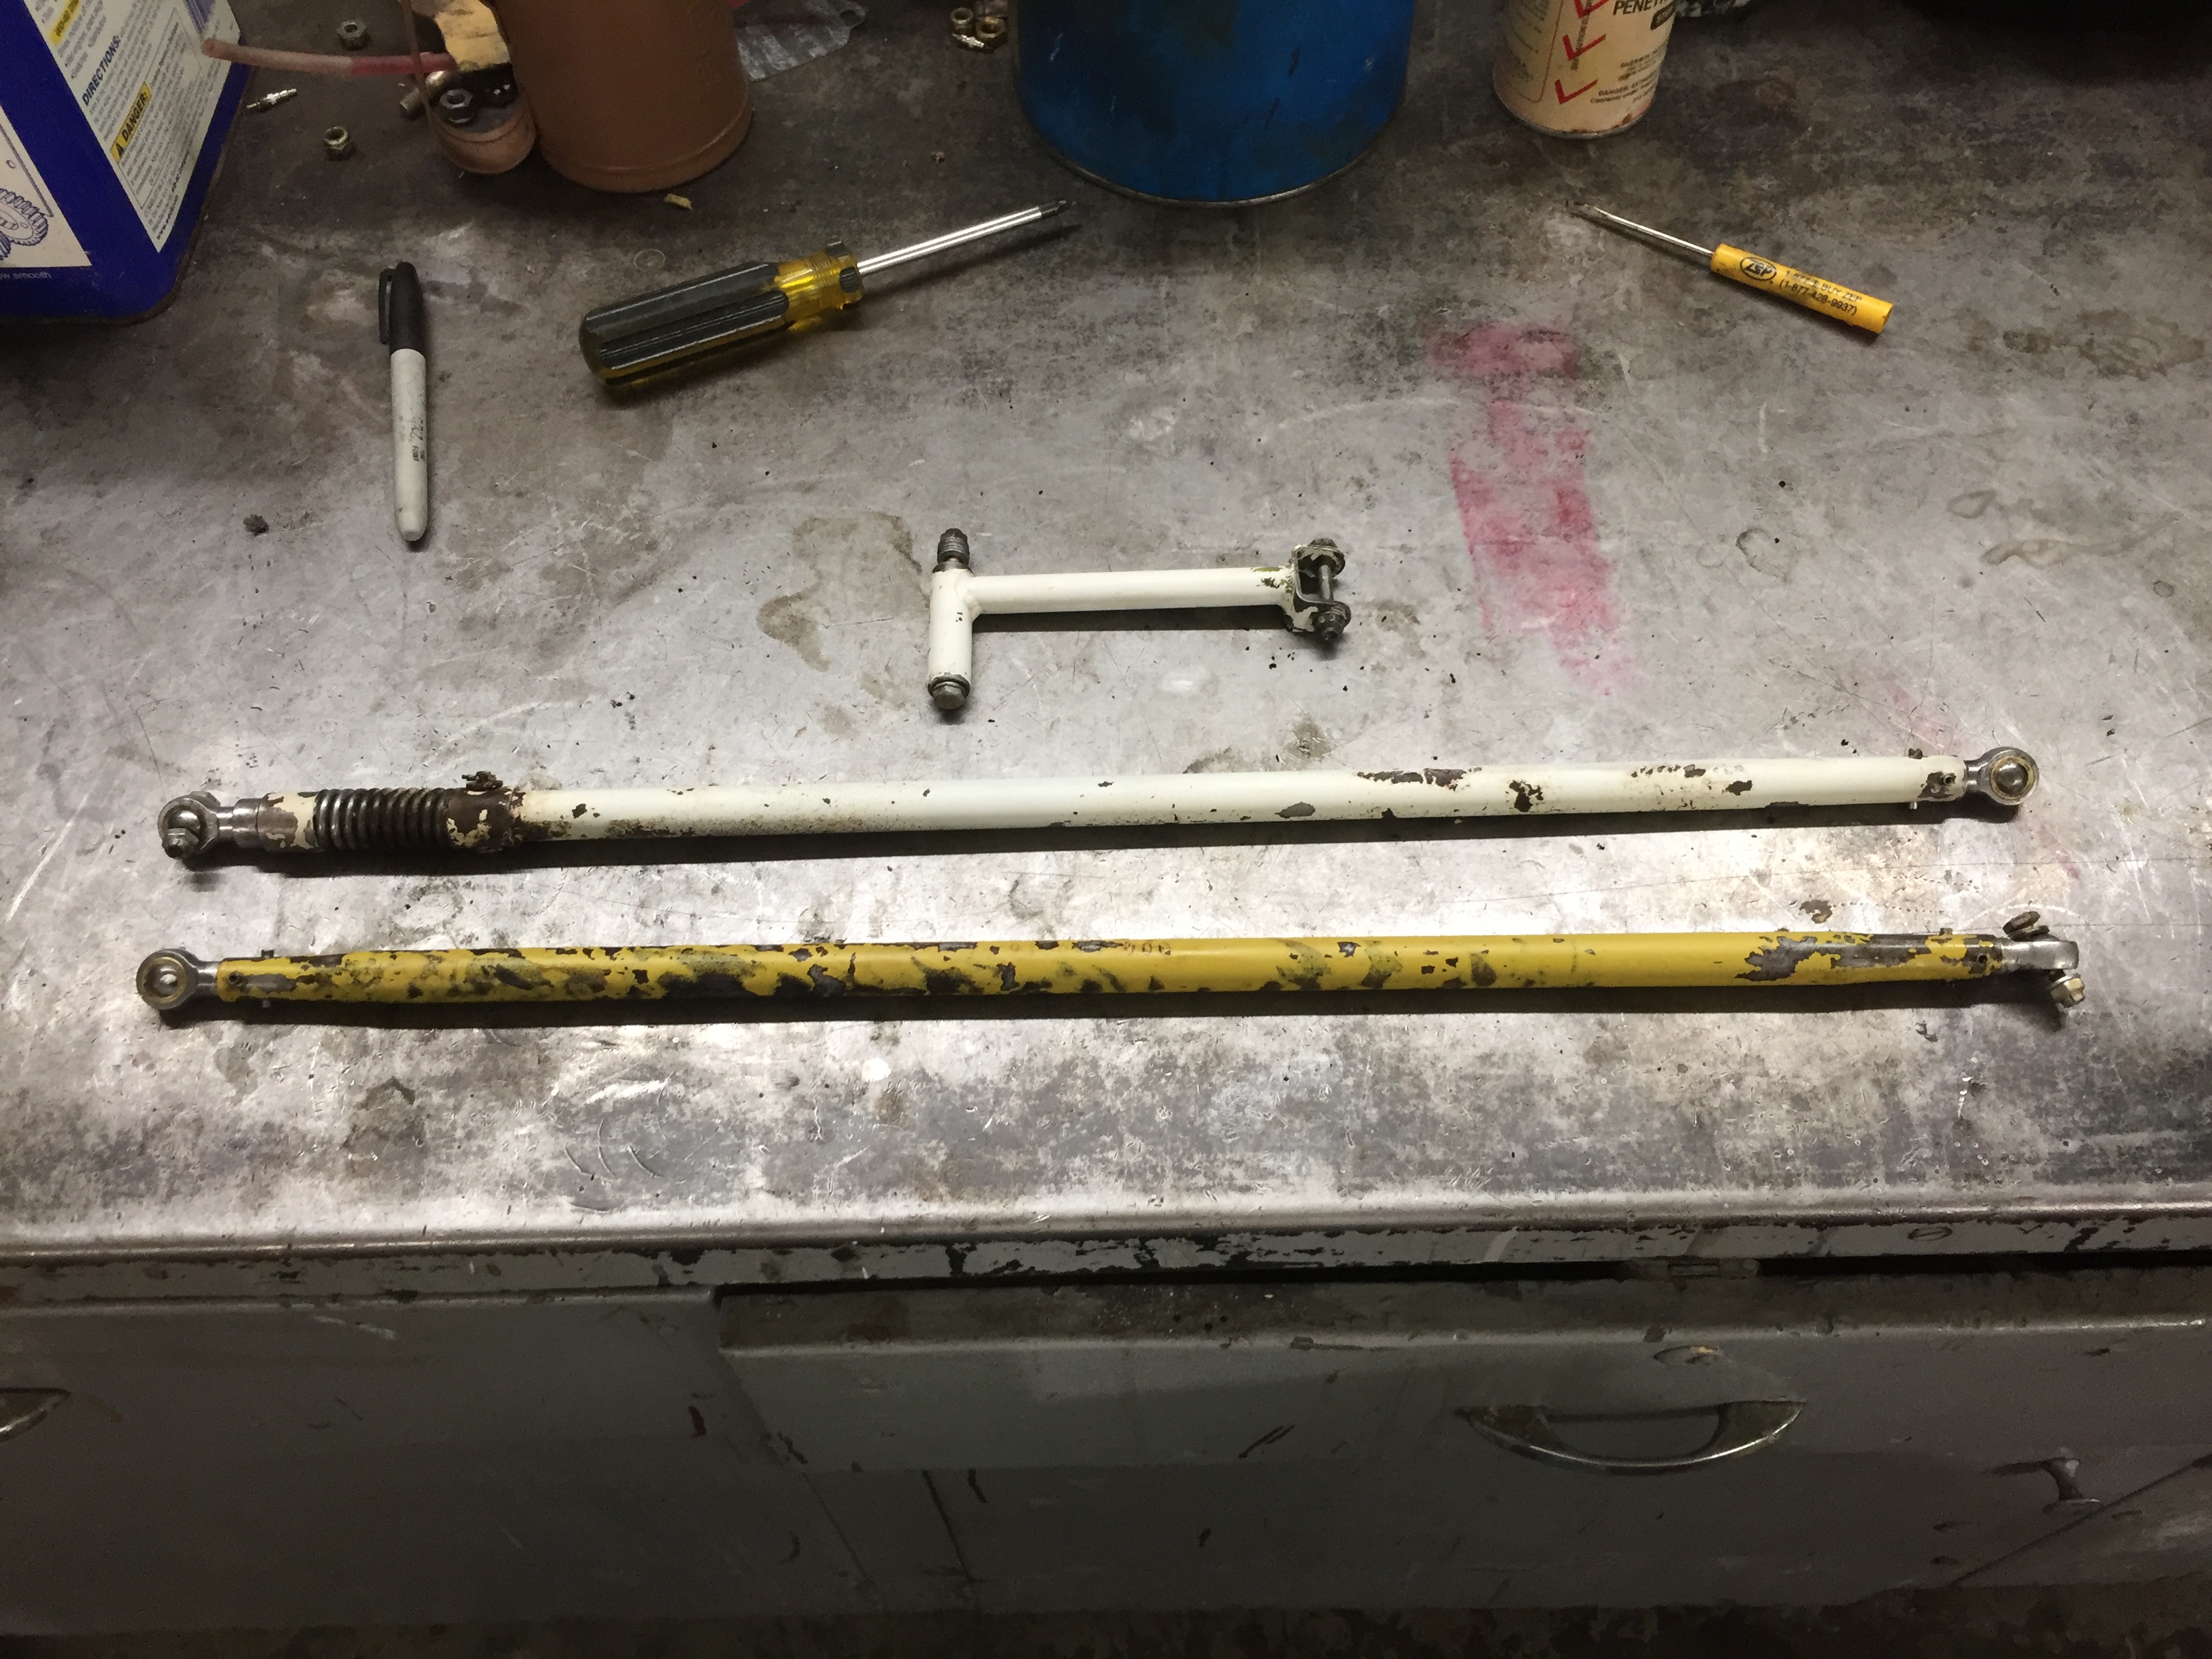
Parts came back from the machine shop last night. The bill was $400. If I had it to do all over again, I'd just ship them to LASAR for reaming. $400 seems excessive to me, but to be fair, it was a one-off, expedited job. Here are the parts on the paint bench after final wash and prep, and a coat of primer. Color coat goes on tomorrow.
- 81 replies
-
- 1
-
-
- landing gear
- drag link
- (and 5 more)
-
Sorry to hear about your bad engine luck, Stephen.
-
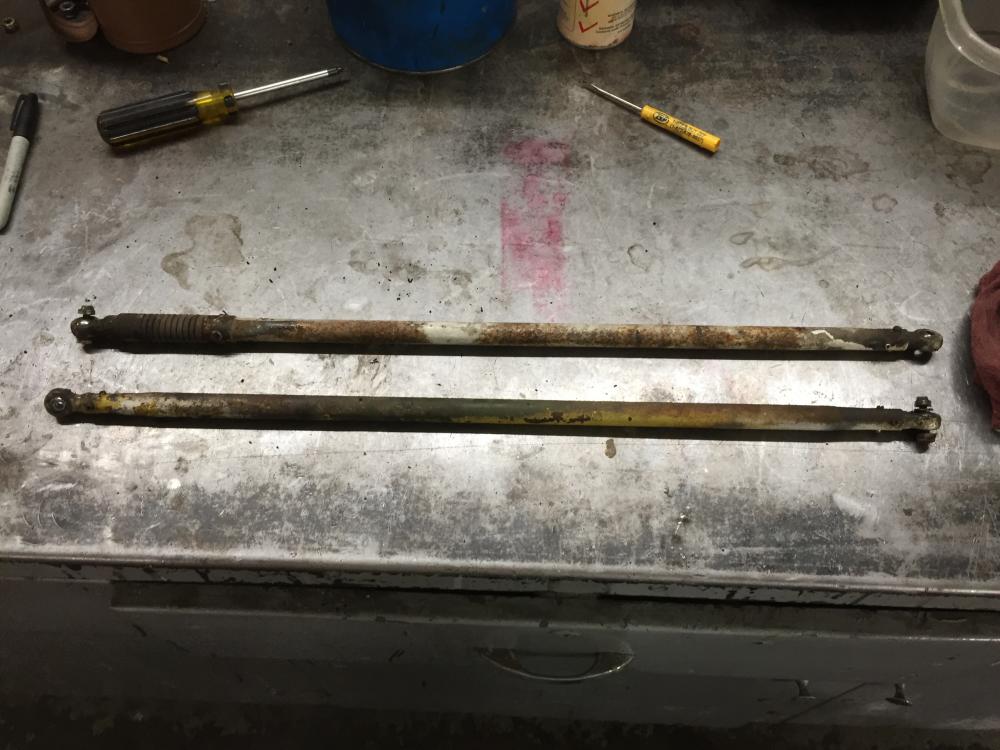
Nice and clean after bead blast. If you're contemplating doing this yourself, make sure you tape off rod ends and springs for blasting. I don't personally think it's that big a deal to get a bead or two in the moving parts as long as you wash them thoroughly in solvent afterward and lubricate them properly before re-installation. But you don't want to directly blast the rod ends or the moving surfaces under the springs. You may or may not be able to tell by zooming in, but the parts aren't really "pristine" with respect to corrosion. There's some very minor pitting here and there, but nothing close to 10% thickness. Mechanic says they look fine to him, and a healthy coat of prime and paint should protect them for another decade or two. I'll start on that when the retract and drag links come back from the machine shop later this week.
- 81 replies
-
- 1
-
-
- landing gear
- drag link
- (and 5 more)
-
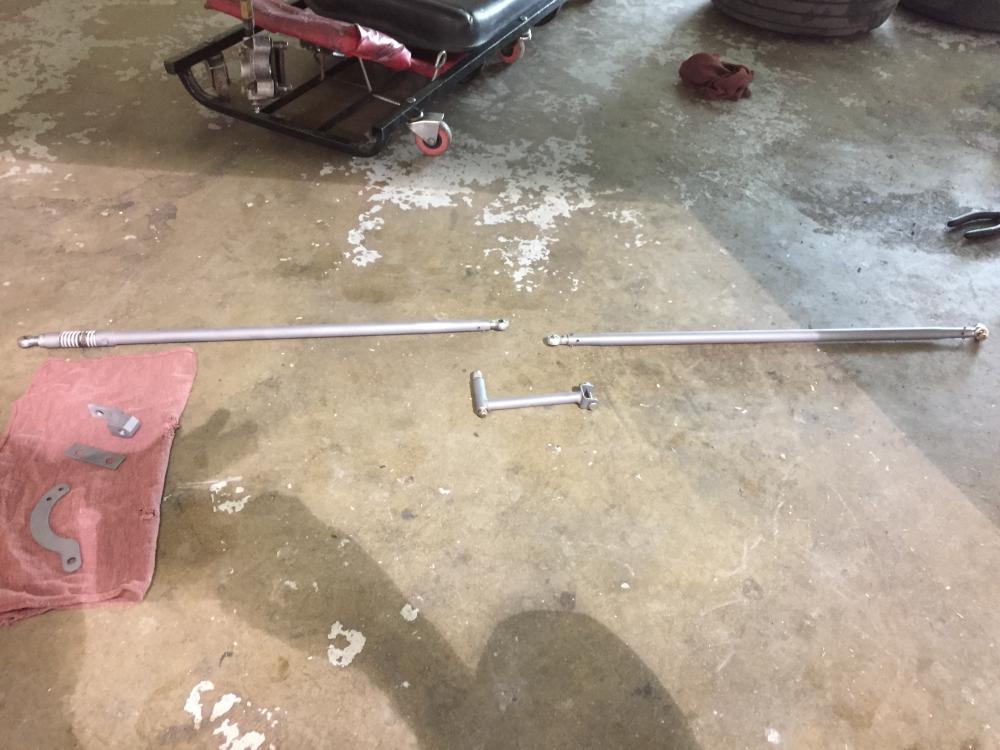
A lot of what I thought was corrosion turned out to just be "goo" - decades of grease, lubricant, and brake dust mixed with a healthy dose of dirt and other detritus from runways and taxiways. The parts looked much better after a good solvent scrub. But still plenty of missing paint and surface corrosion.

- 81 replies
-
- 1
-
-
- landing gear
- drag link
- (and 5 more)
-
Decided to go ahead and pull out the idler arms and walking beams for inspection, bead-blast and re-paint. They've looked awful for years, despite our mechanic's assurances they're "fine".
-
I hear you, but it's a piecemeal job as the years go by. I did the lower half of the landing gear trusses last year, which you can see here. To do the upper trusses I'd need to compress the shock disks and separate the upper and lower trusses again. That was a tough enough job with the gear mounted on the airplane, lots more trouble with it out. I think we'll make do with a thorough cleaning. I've only got so much time off from my real job, and the airplane has never been a beauty queen anyway.
- 81 replies
-
- 1
-
-
- landing gear
- drag link
- (and 5 more)
-
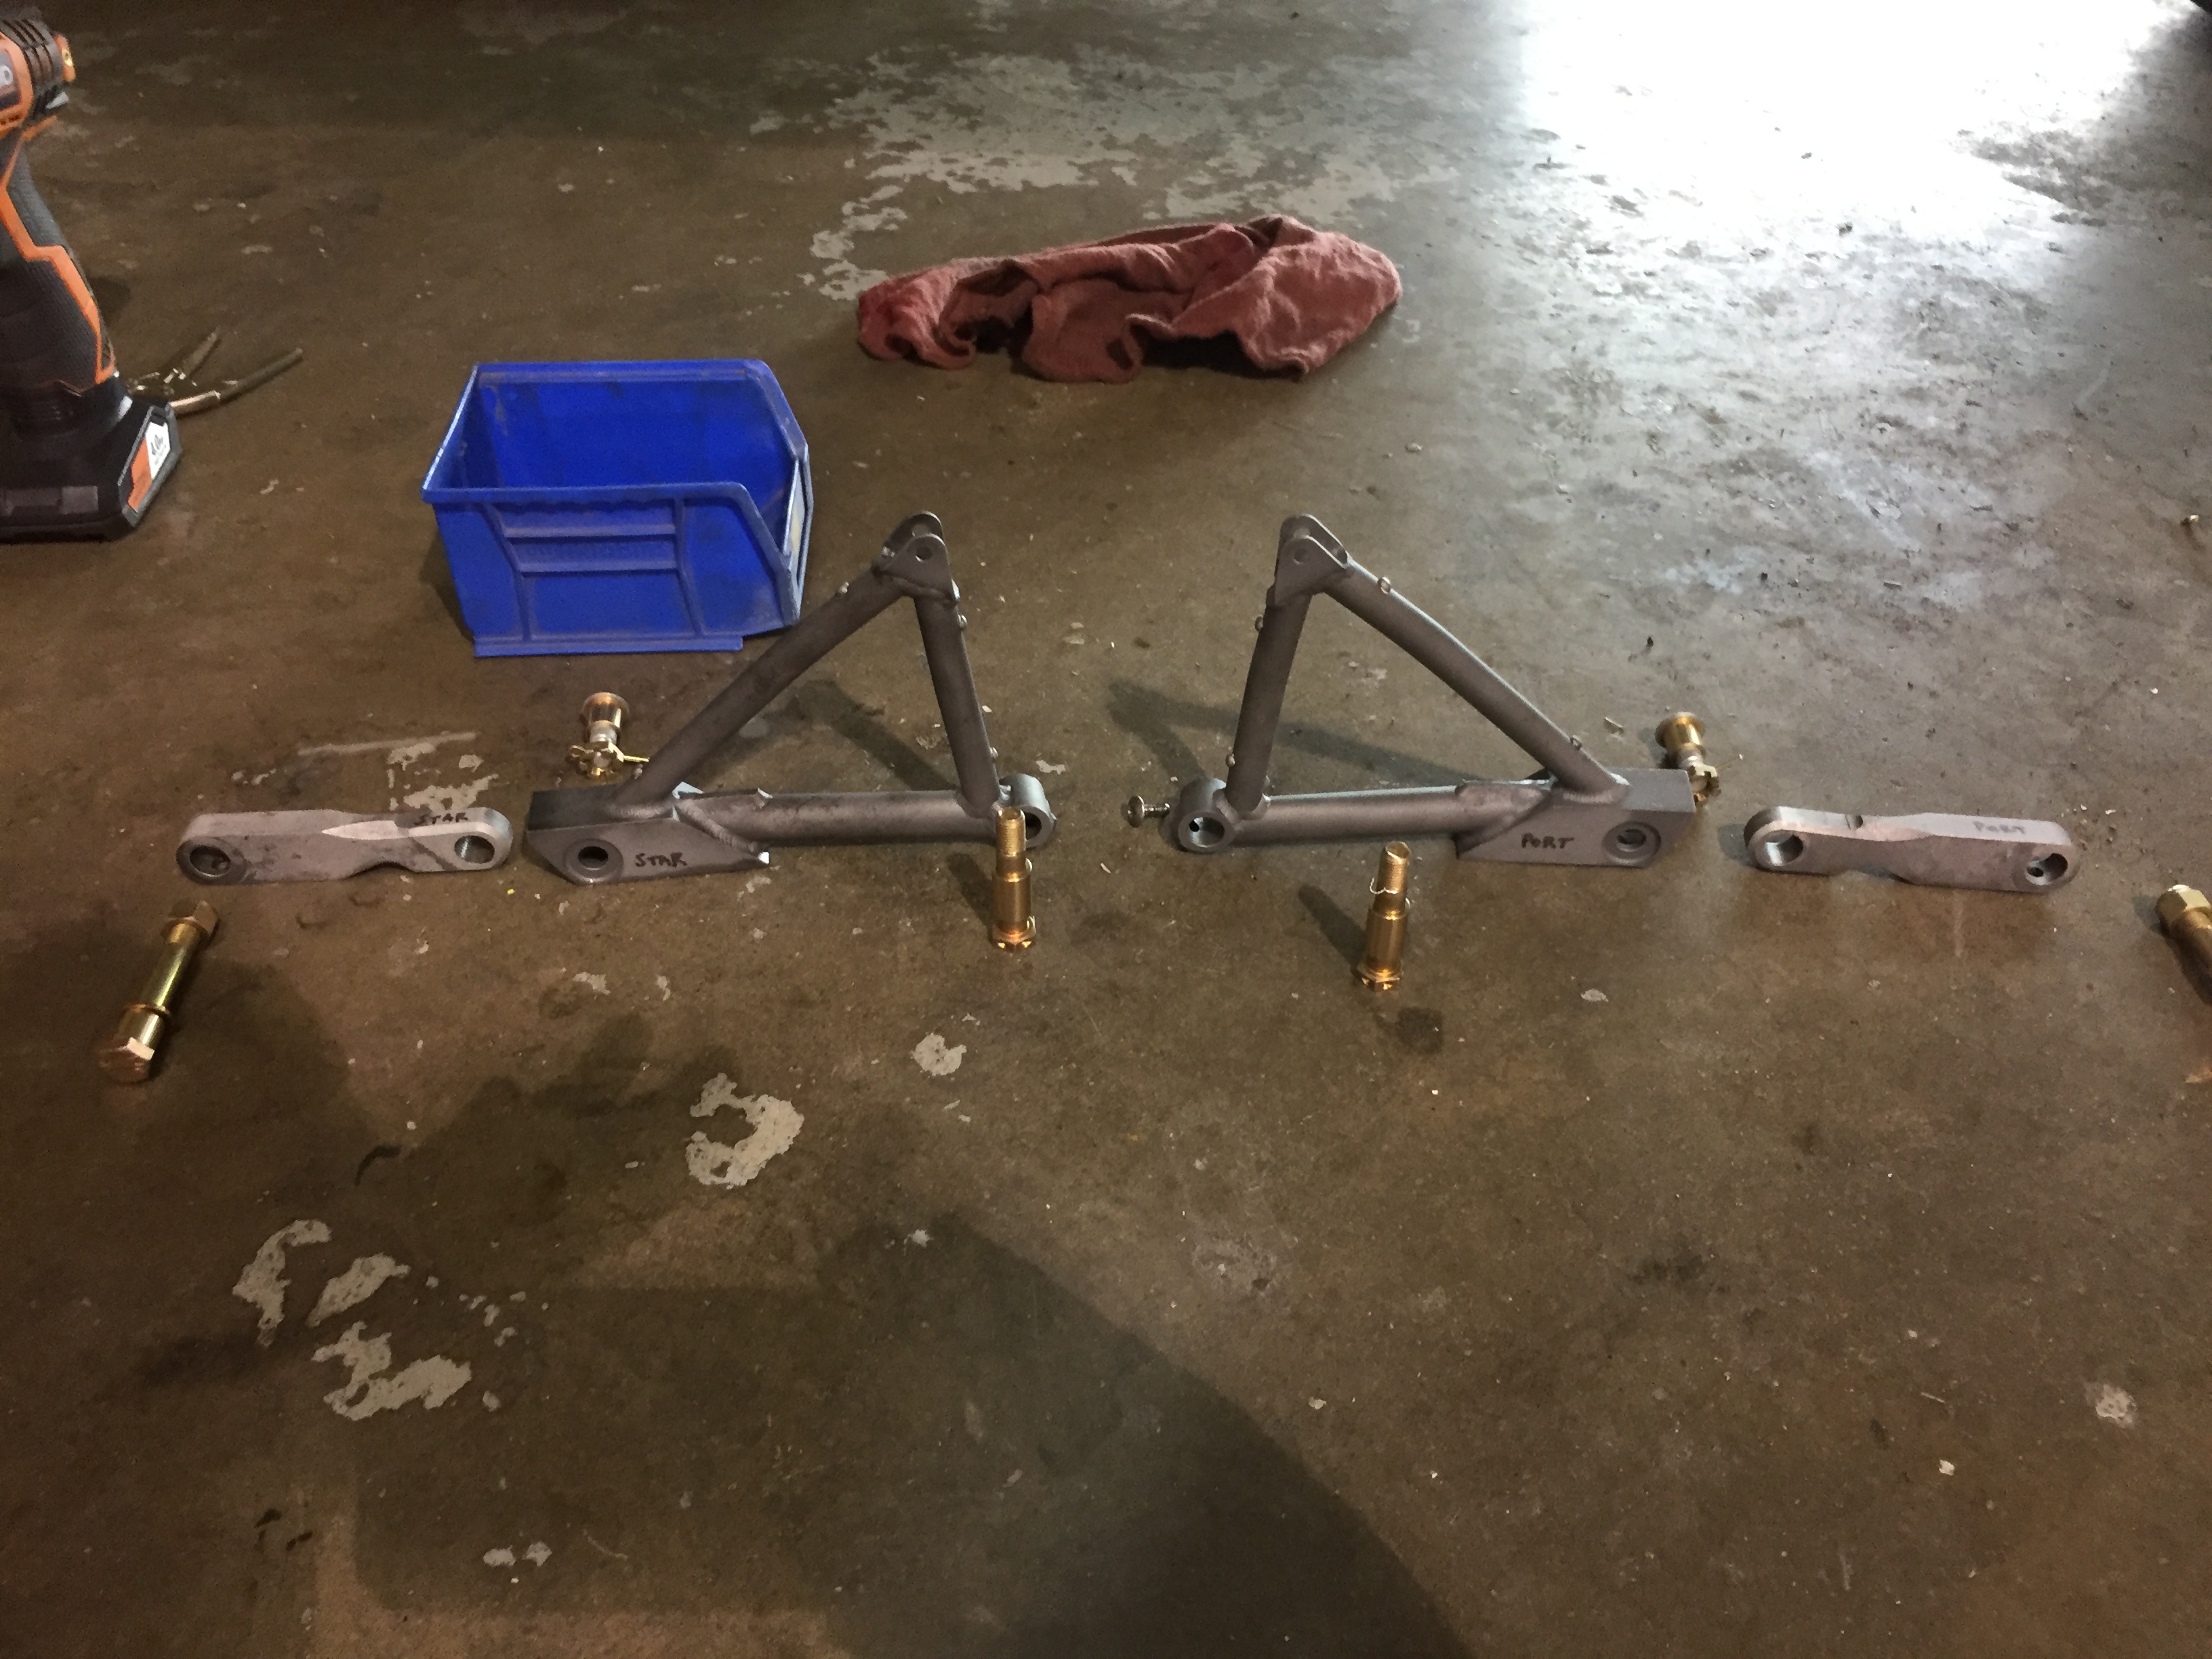
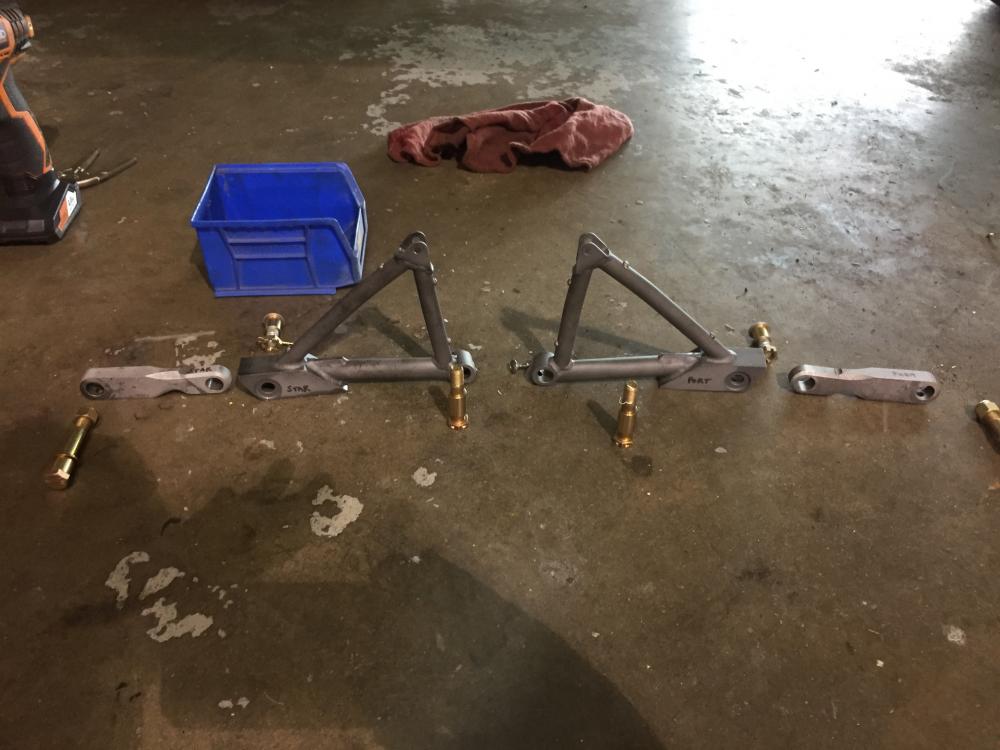
Parts ready for delivery to machine shop, after bead blasting and with new hardware.
-
Drawing for the machine shop.
-
Dan said the newer ones are indeed press fit. Older models have (or had) threads, but if you can get any leftover bits out, you can apparently install a press fit zerk in the same hole. Will be looking at this today.
-
Decided to start a new thread for pics and video, with a more descriptive title and better tags for searching:
-
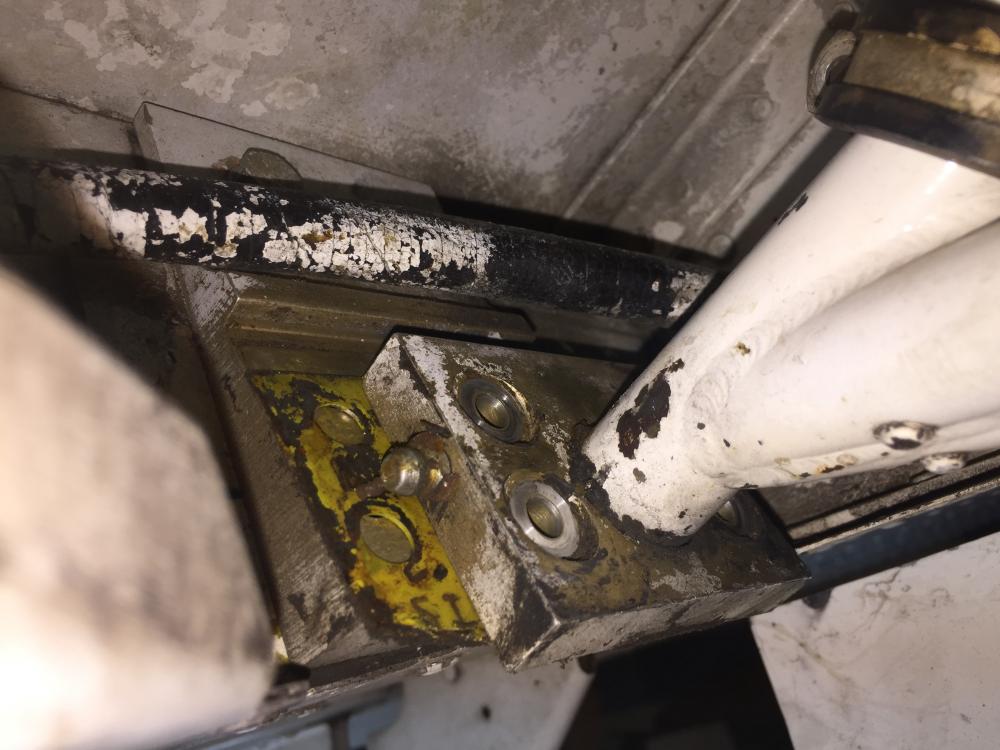
Tomorrow, we'll be taking the retract truss and drag link to a machine shop to have them reamed out to accept the oversize bushings sent to us by LASAR. I plan to bead blast and paint the parts before re-installing. As for the effect of the castle nut rubbing on the landing gear truss, there is indeed a shiny spot on the truss where the castle nut was making contact, but just the tiniest amount of wear - much less than 10% thickness and my mechanic is unconcerned about it. Would have been a serious issue if allowed to continue, though. One other topic of interest regarding grease fittings... you can see the zerk on the aft pivot point bearing plate in the post two above this one. I meant to take a picture of the forward pivot point bearing plate as well, to show how there is apparently no grease fitting there. I always thought this was odd, but ignored it. Should have trusted my intuition. There is definitely supposed to be a grease fitting there, too, and in fact the maintenance manual specifically mentions removing it. Turns out if you look closely, there is a very tiny, 4-40 thread hole there. I mentioned to Dan that I guessed someone had removed the zerk and forgotten to reinstall it. Dan say that in fact, these zerks are so small and fragile that it's common for them to get broken off over the years, and a lot of places just don't bother to fix them. One of my tasks for tomorrow is to see if I can dig out any pieces of zerk from the hole and install a new one. I'll try to come back and update this thread with more photos as I complete the re-installation process. Will likely be well into next week as we wait on the machine shop to install the new bushings.
- 81 replies
-
- 1
-

-
- landing gear
- drag link
- (and 5 more)
-
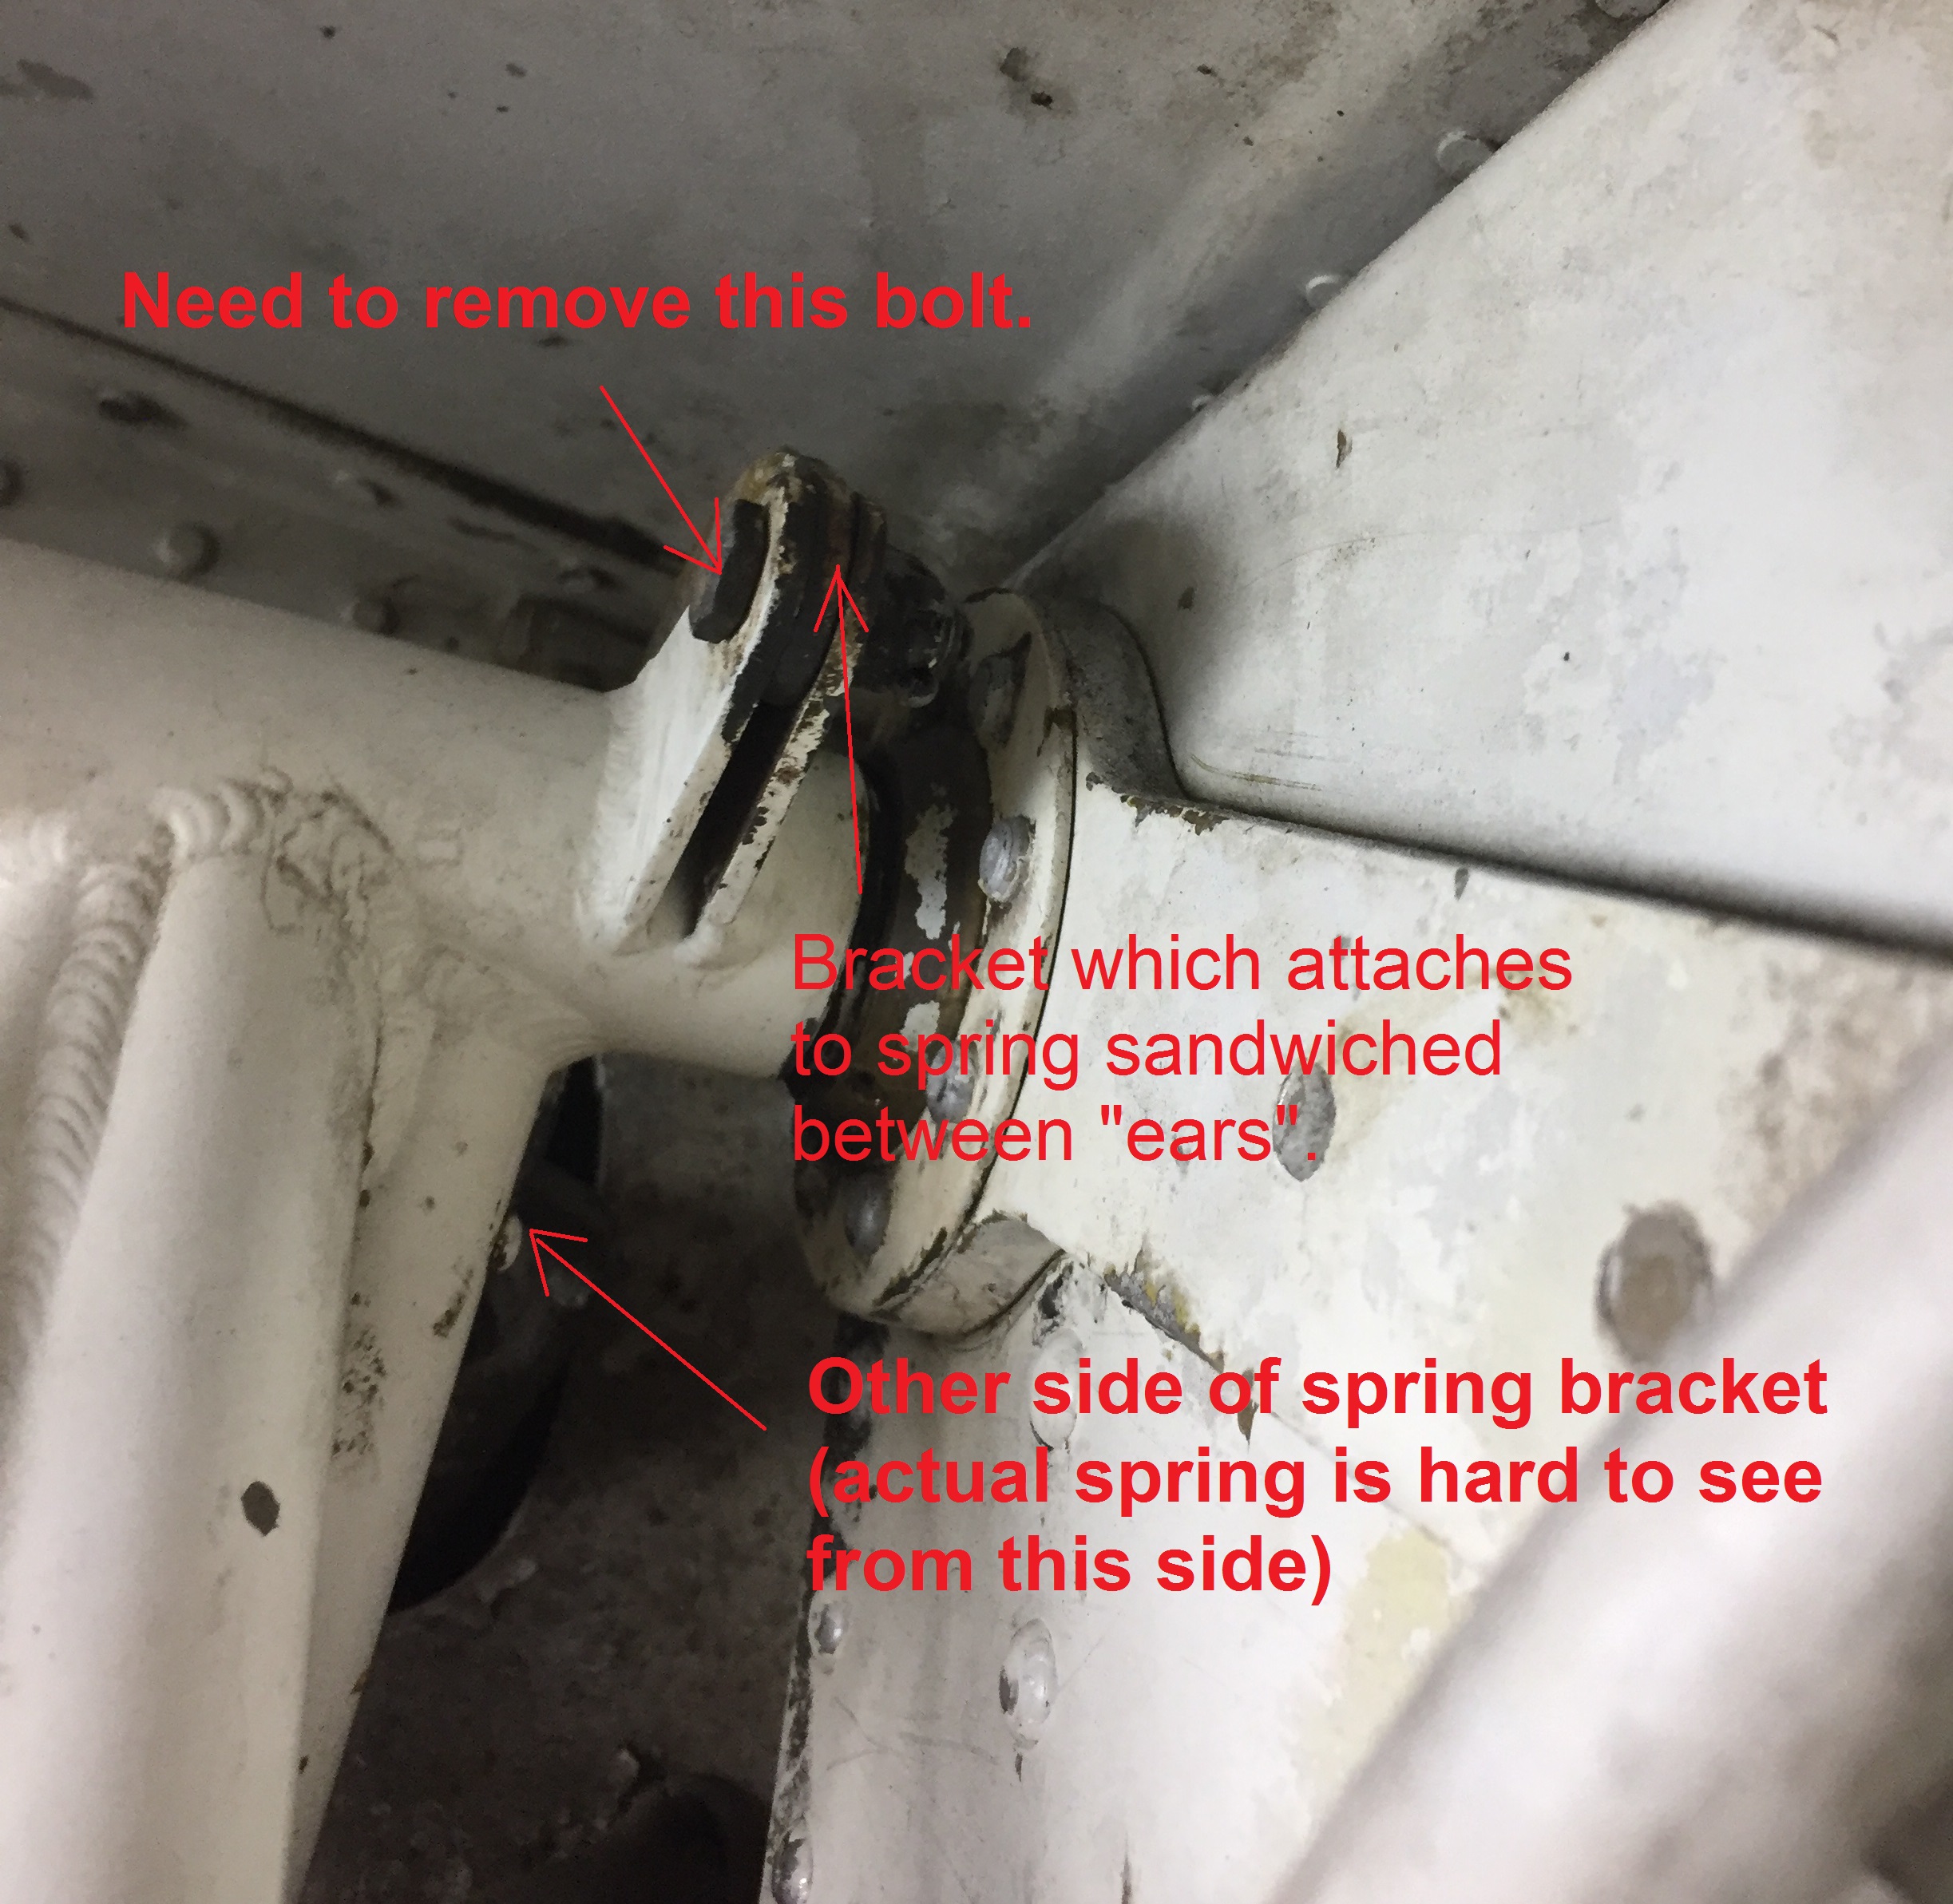
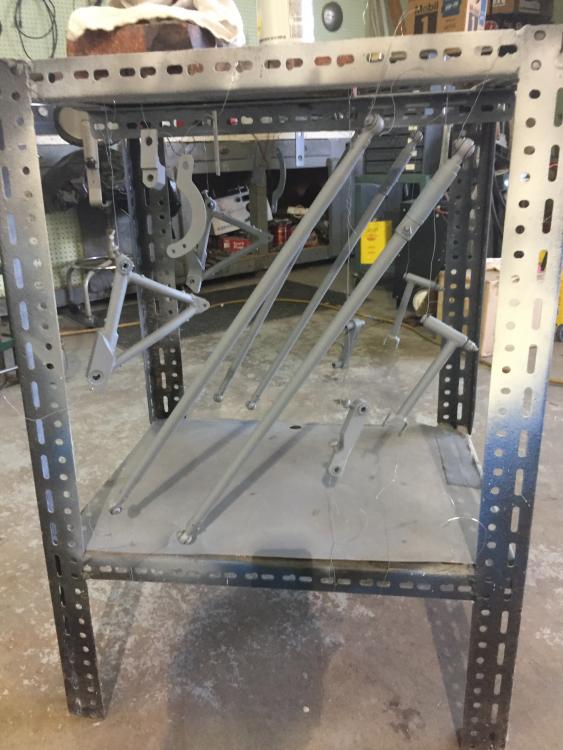
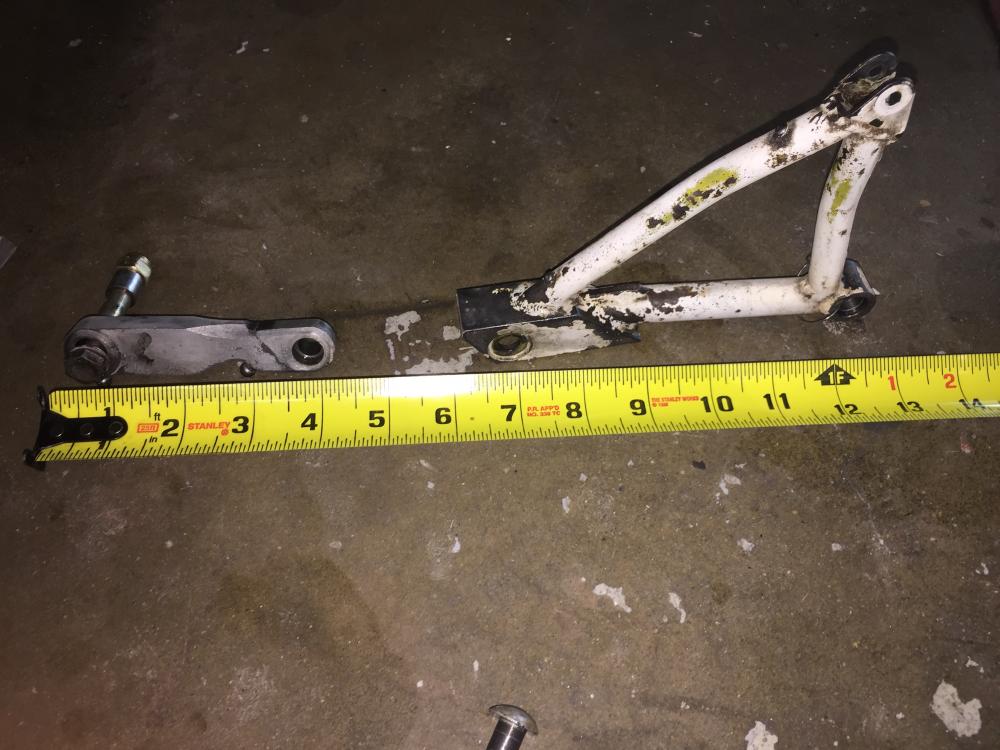
With the entire assembly out of the aircraft, you can finally remove the third pivot bolt at the interface between the drag link and the landing gear truss (I "reinstalled" it for the photo below, it's the bolt at far left).
-
Now we're ready to remove the entire landing gear assembly. The aft end of the pivot shaft is held in place by a wedge-shaped bearing consisting of a pair of steel blocks with a shim in the middle. In the photo below, I've removed the lower 4 bolts which fasten the primary block to the secondary block, and wiggled it a bit so you can see the shim and secondary. Due to the wedge shape, the gear won't slide down until you remove the upper two bolts from the secondary block and slide it sideways. You need to be really cautious about this. Once the secondary block is slid out of the way, the whole landing gear leg just falls out. So, you need to support it as you're sliding the secondary block sideways. Be careful, and don't pinch your fingers!
-
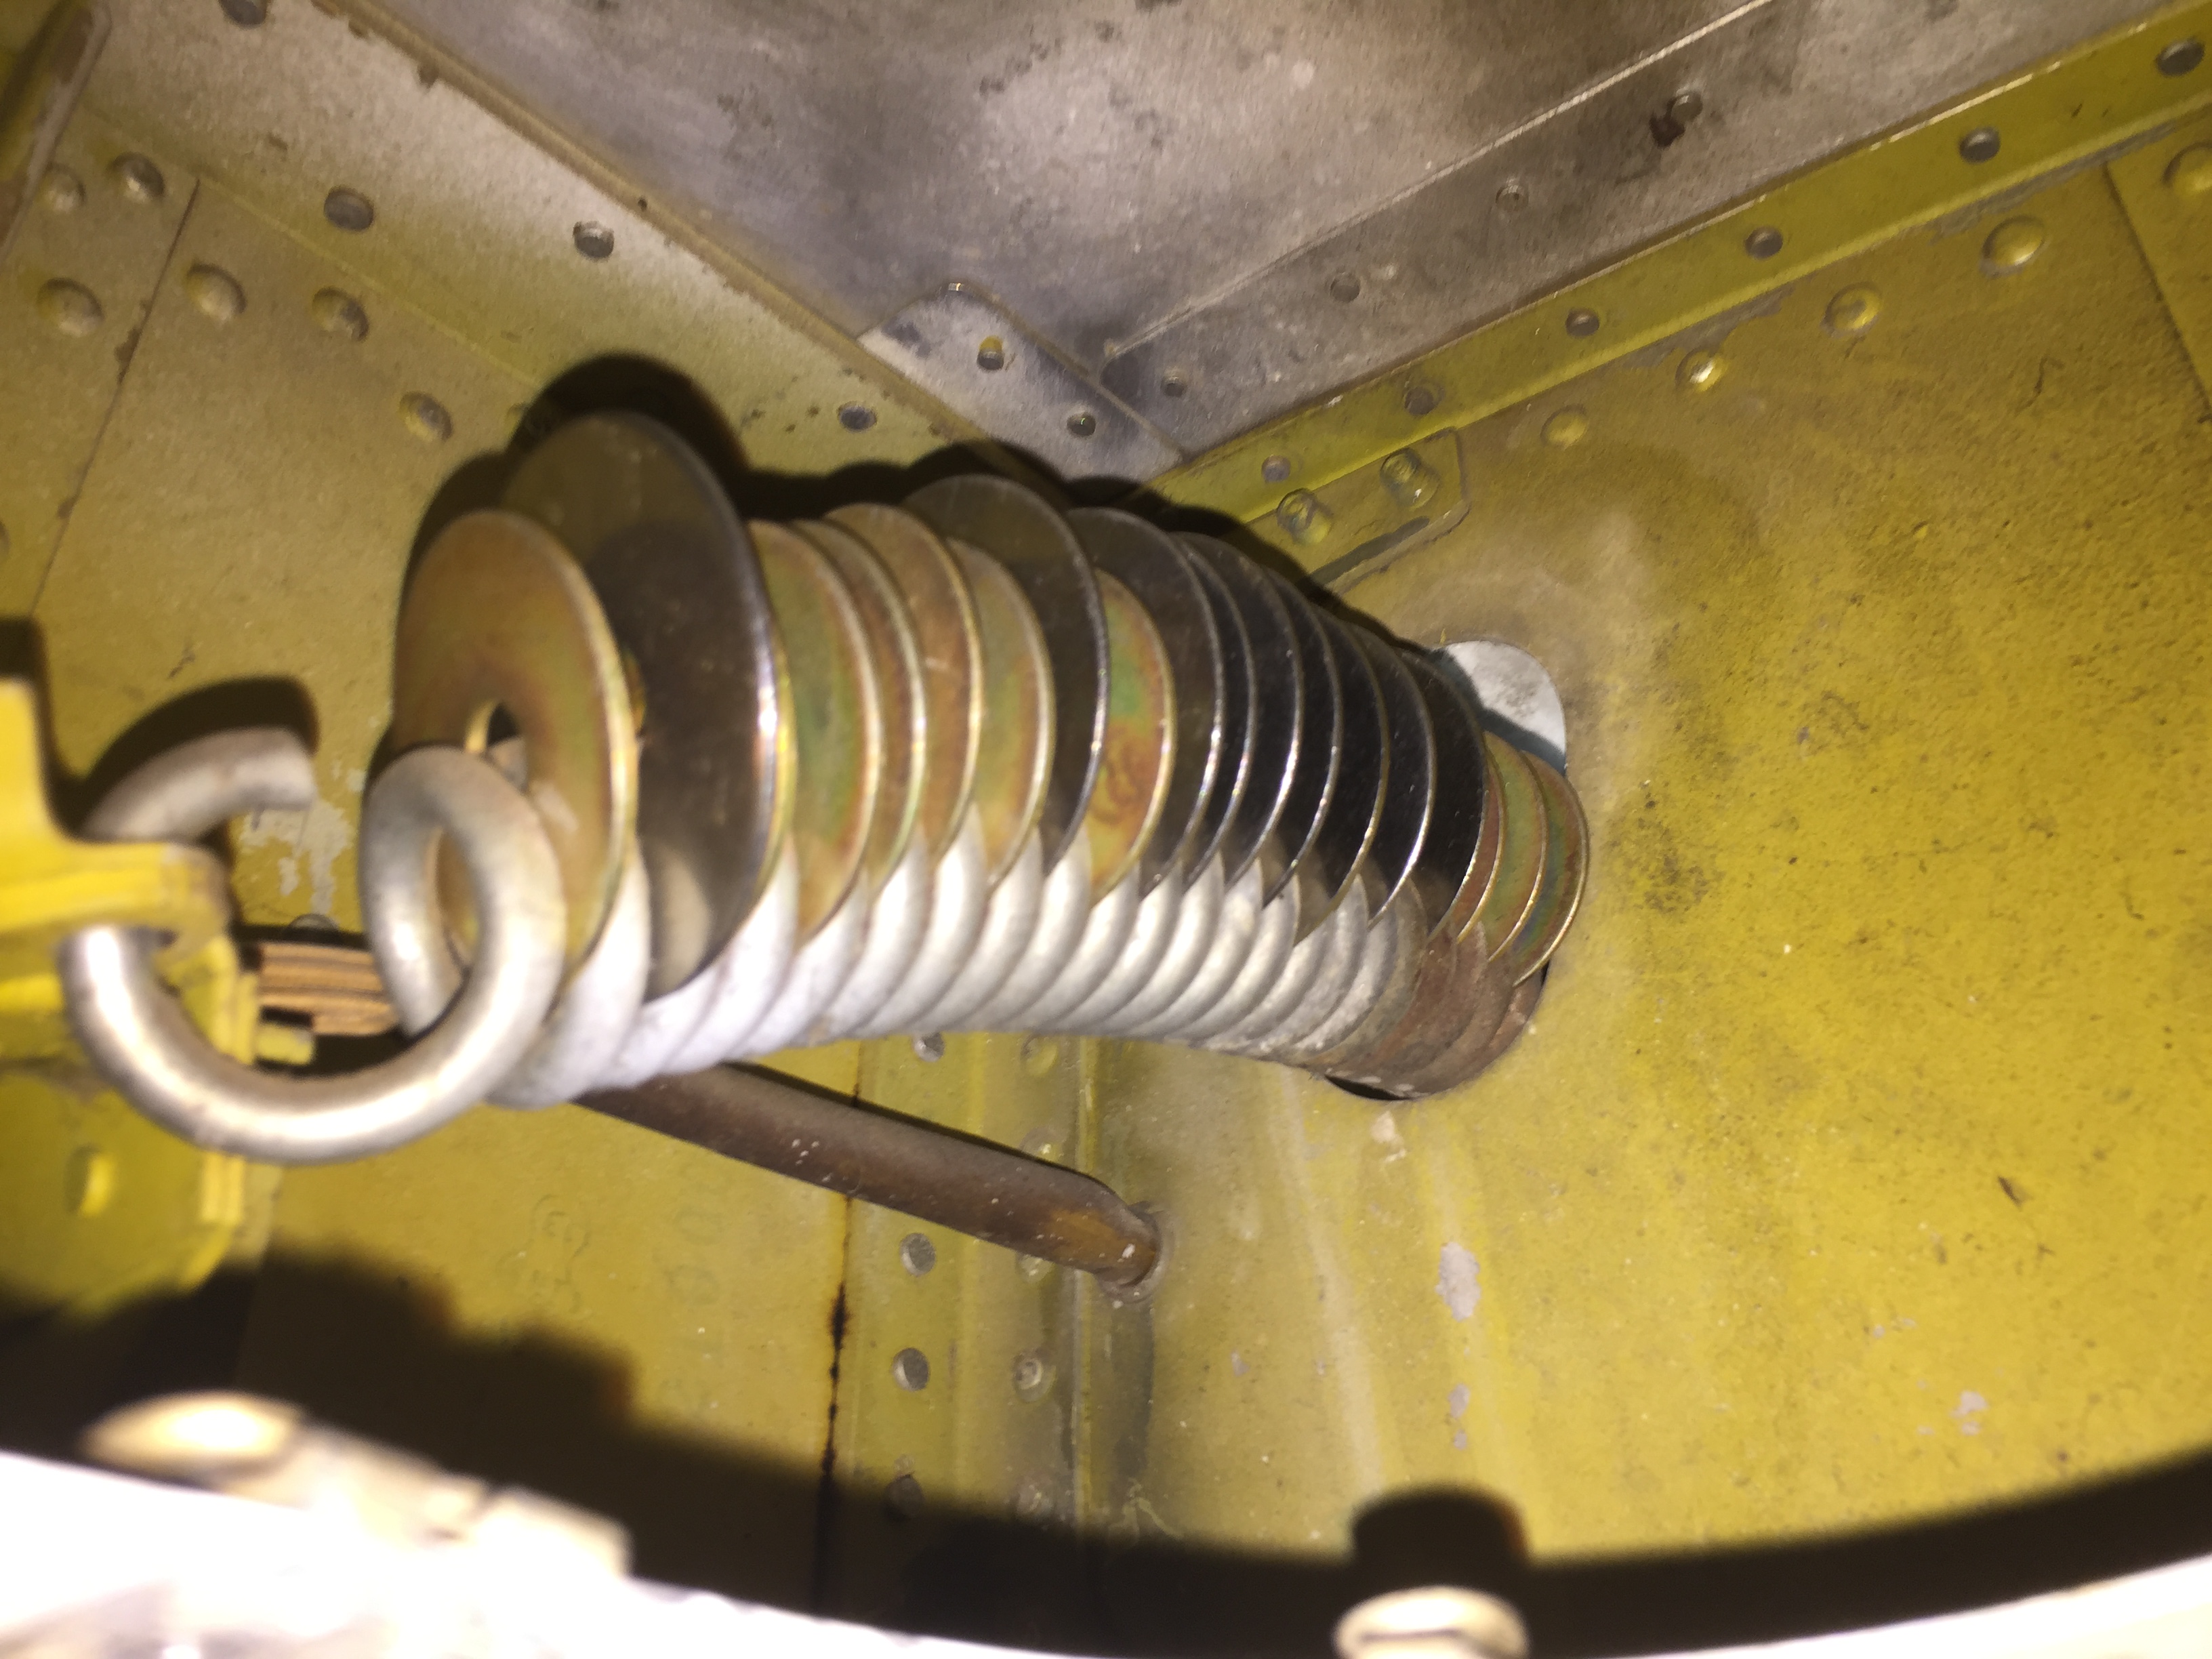
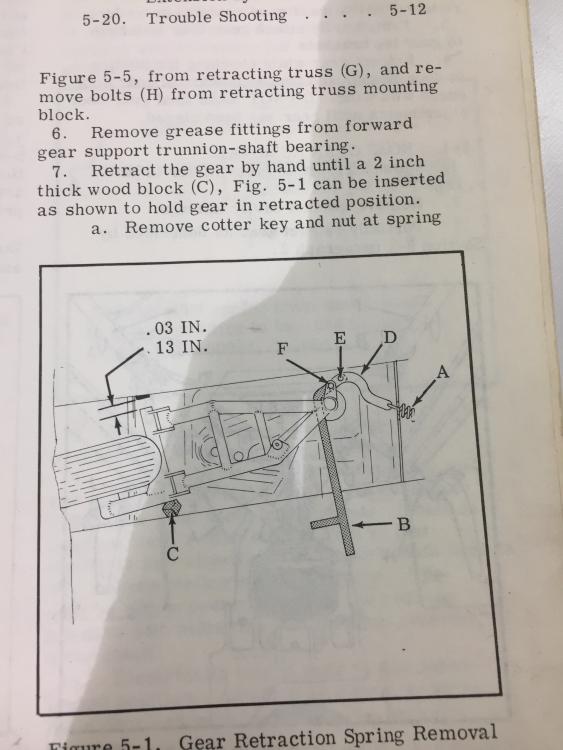
Next, you have to remove the bolt and nut that connect the gear leg to the big spring, which provides tension to help raise the gear. The maintenance manual specs a special tool to take the tension off the spring so you can remove the bolt. I panicked when I saw this, because of course we don't have this tool (it's the lever marked "B" in the maintenance manual page below): I called Dan at LASAR for advice, and he said that tool never worked very well anyway. A trick Dan says he picked up from DMax is to swing the gear down until the springs are at maximum stretch, then jam a bunch of fender washers between the coils to keep them spaced out, then push the gear back in the well until the tension is off the bolt and nut. This worked well for me, but make sure to get plenty of washers - you have to put one between just about every single coil. Note that to access the spring to install the washers, you have to remove the inspection plate just outboard of the landing gear wells. Photo below was taken looking through that inspection plate. There are 18 washers there!

- 81 replies
-
- 1
-
-
- landing gear
- drag link
- (and 5 more)
-
Next, you remove the upper and inboard bolts and nuts on the retract truss. Don't lose the bushing on the inboard side!
-
The bad news is, getting the retract truss and drag link out is a pretty involved operation - you have to remove the entire landing gear. First, you have to remove the tire, disconnect the gear door, and remove the mud guard, and squat switch.
-
It's been discussed here that slop can be affected by adjusting the shims behind the "baby shoe" bracket, but that's just addressing the symptom, not the real problem. The root cause is wear in the bolt/bushing interfaces, which allow the retract truss and drag link to flex fore and aft. You can check the slop by partially retracting the gear and lifting up on the wheel to remove all tension, then wiggling the linkages. As this video shows, ours had gotten quite bad.
-
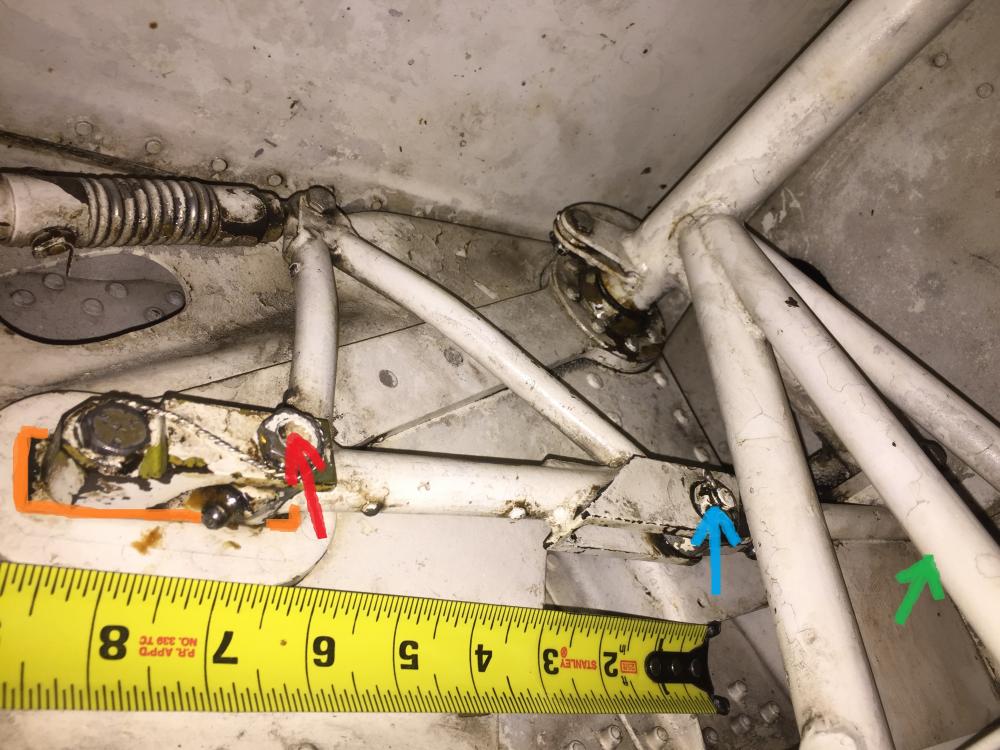
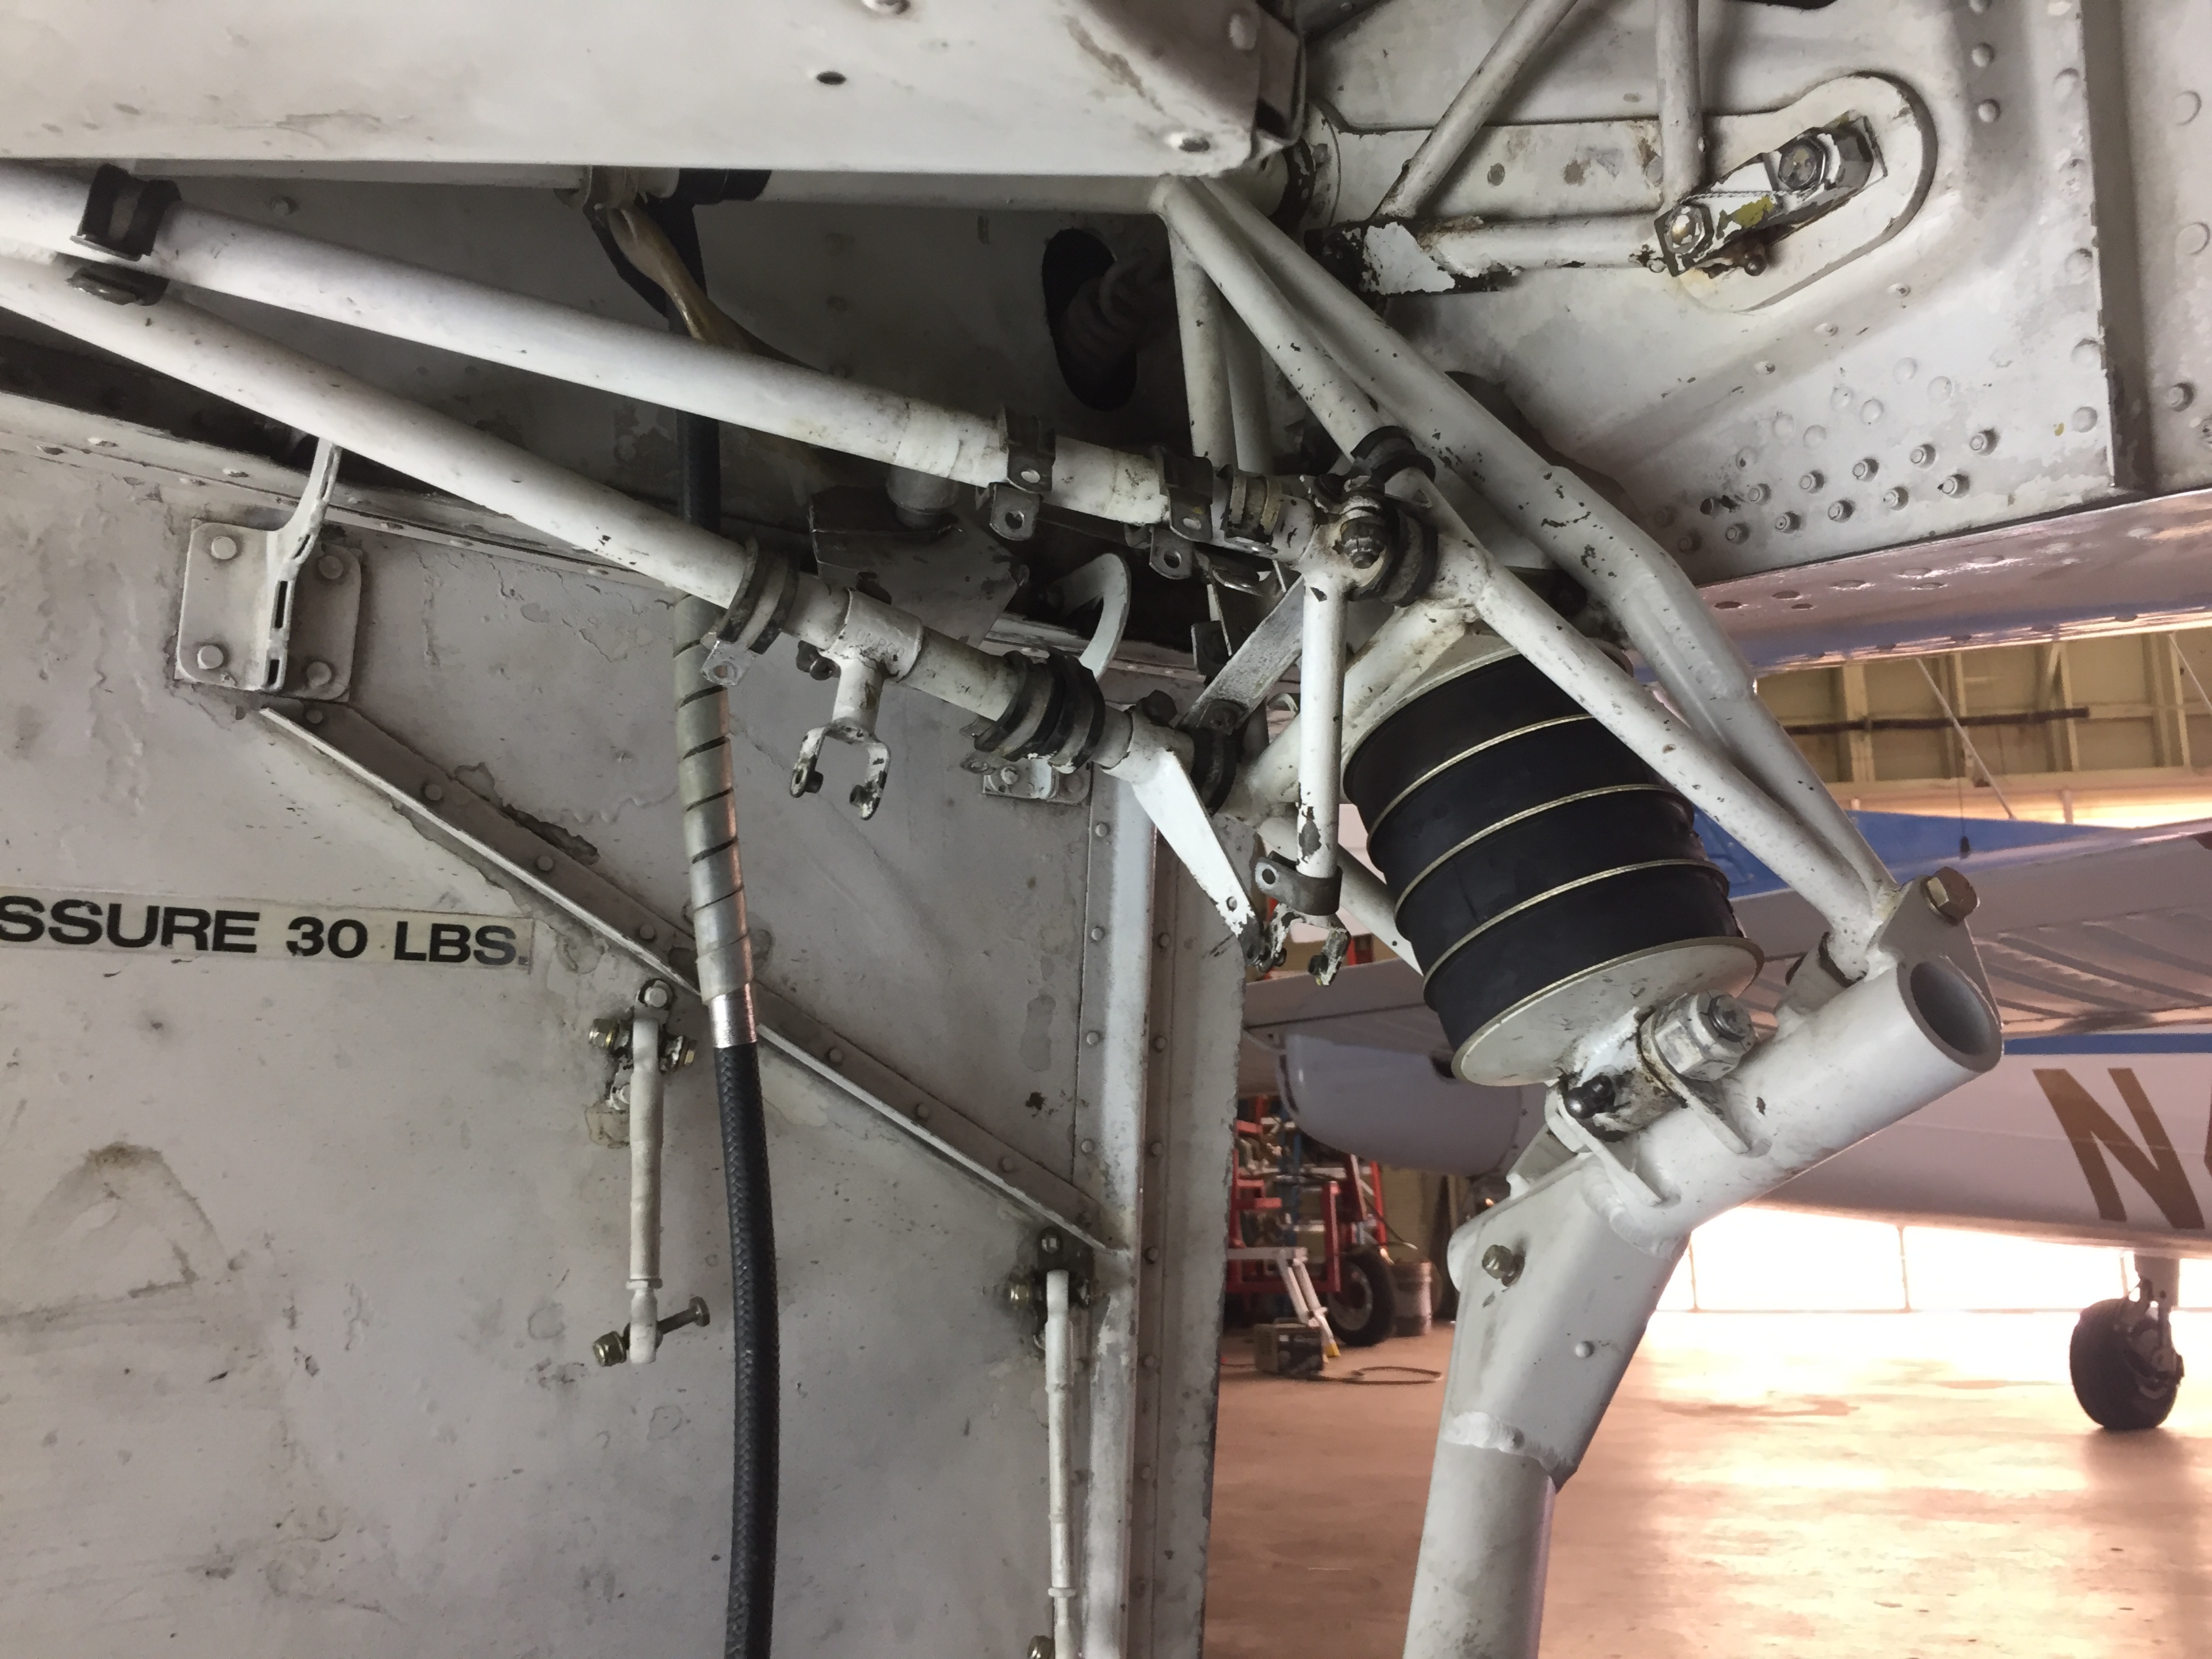
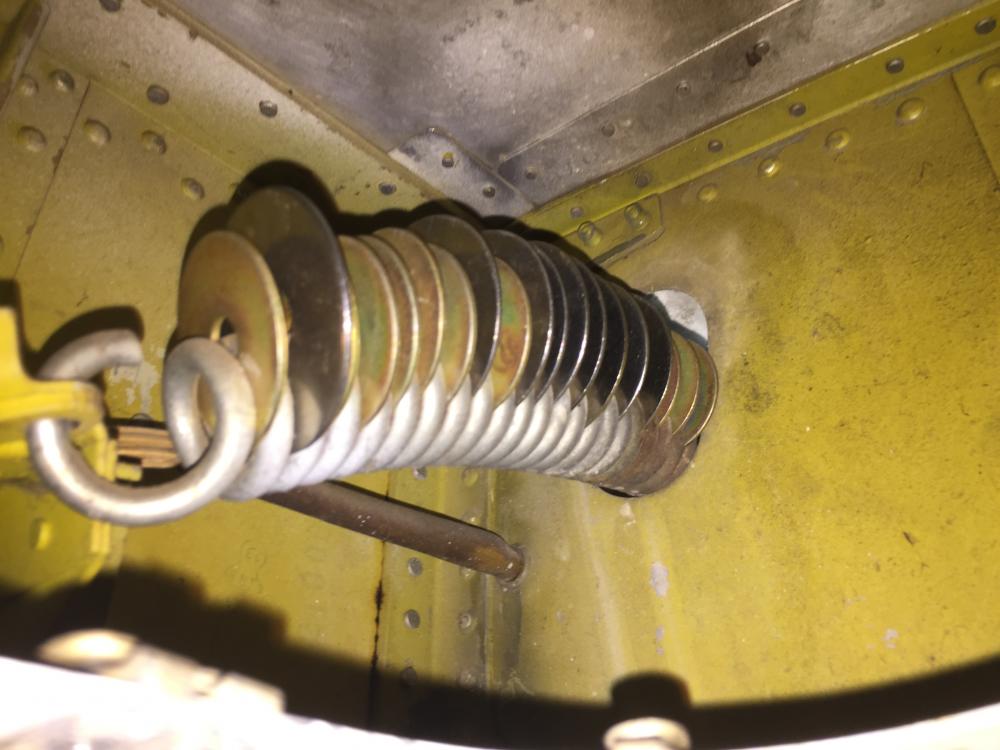
Here's a broader view of the retract mechanism. There are three pivot points in the over-center assembly, each composed of a bolt and nut through a bushing. The red arrow points to the retract truss pivot point, which is supported by the "baby shoe" bracket. Note that the baby shoe bracket has a shim behind it, outlined in orange, which sets the fore/aft spacing of the retract truss. The blue arrow points to the pivot point shared by the retract truss and the drag link. The bolt is held with a castle nut, and this is the nut that hits the main landing gear truss when the mechanism gets sloppy. The green arrow points to the final pivot point, where the drag link connects to the landing gear truss. You can't actually see the bolt and nut in this photo because it's behind the truss, but I promise it's there.