Comet
-
Posts
57 -
Joined
-
Last visited
-
Days Won
1
Content Type
Profiles
Forums
Blogs
Gallery
Downloads
Events
Store
Everything posted by Comet
-
-
Reminds me of the Top Gear “race” from Italy to London with some super car vs. a C182. Of course, they designed it so the car could win (public transit to the airport, can’t fly at night, so they have to land in France, public transit to London, etc). BTW, given that I live 90 min away from a major airline serviced airport, the Mooney is faster than commercial air for anything less than ~500 nm.
-
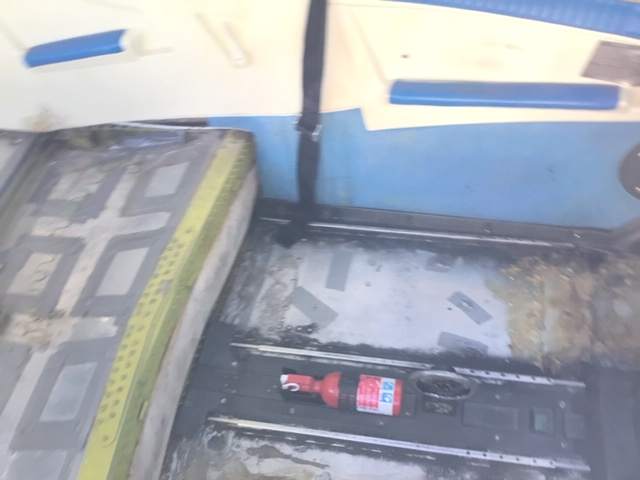
An absolutely mandatory piece of safety equipment; between the seats for easy access during flight. If there is a fire in flight, I want every chance to get back on the ground in as un-burned a state as possible (once I’m out and safely away, it can burn itself out). When I redid my interior earlier this year, I replaced my extinguisher with a Class B/C clean agent model; it’s a nice looking chrome model.
-
Normal procedures and staying ahead of a slippery complex aircraft were vital parts of the transition. The parts that I still find myself thinking about are the abnormal procedures. I wouldn’t wish this on anyone, but I had the good fortune (!? ) to have three abnormal events during transition. First, the previous owner had installed a 12V distribution block under the fuses...on my first transition flight, these started sparking; quick, what’s the procedure for an electrical fire?! A few flights later, put the gear switch in the down position, but no light; manual gear extension procedure (including low pass so the tower could verify gear down). I developed the habit of leaving my hand on the gear switch until I verify a green light. One of the last transition flights was a cross country 100 nm north; on the way back we were going to land where I was going to base the airplane, x-wind around 20kt. About 50 ft above the runway, wind shifted and instead of being aligned with the centerline, I was over the edge of the runway; go around at a DA around 10k will get your attention! Simulated abnormal procedures are useful, but they aren’t the same as the real thing. Popping a door in training isn’t the same as it happening for real and your kids yelling! On a long cross country, I still take out the emergency checklists to review and play “where do I land now if the engine quits” game.
-
The first time I went to Oshkosh was in 2016; I flew the Fisk on Sunday. Weather was optimal, I left my in-laws south of Chicago, decided the weather wasn’t good enough in the morning and tried again in the afternoon. I had to break out twice after the aircraft I was following couldn’t maintain 90kts. Made it in on the third try...exhilarating experience (rock your wings, land on the dot!) Came in with the caravan the last two years. Also marginal conditions, but the decision making is with the leadership; I only have one thing to worry about with flying wing. The camaraderie and training was really worth the extra effort. I don’t necessarily want to take the extra time to arrive on Saturday. My thinking in the future will be if I want to get in for the beginning of the show, I’ll fly the caravan (and have a great time); but if I want to arrive later, I won’t have an issue with Fisk. Has anyone listened to the Fisk controllers when you leave on Wednesday or Thursday? They sound bored to me!
-
Now that the plane is back from the paint shop, I’ve finally gotten around to the armrests. I got an extra yard of vinyl from Airtex. Removed the armrests and peeled off the old vinyl. Most of the padding foam remained on the aluminum armrest, so I decided to just recover the armrest with the new vinyl using the same contact adhesive that I used on the seats. The contact adhesive has gotten a little gummy over the past few months that made it harder to apply. Final step will be to remove the old trim and replace with new vinyl. That will have to wait until after Oshkosh (and I’ll want to take interior pics for when it’s complete).

-
Thanks; I’ve used that joke with my wife...she didn’t think it was very funny!
-
When I did my CPL check ride, when I was doing my pre-flight, the DPE asked about the effect of frost on the wings, which became a discussion on the effect of the poor paint and the added parasite drag. I need to fly it around here to see if I see much difference, it felt a bit faster yesterday, but I didn’t get as high as I usually do.
-
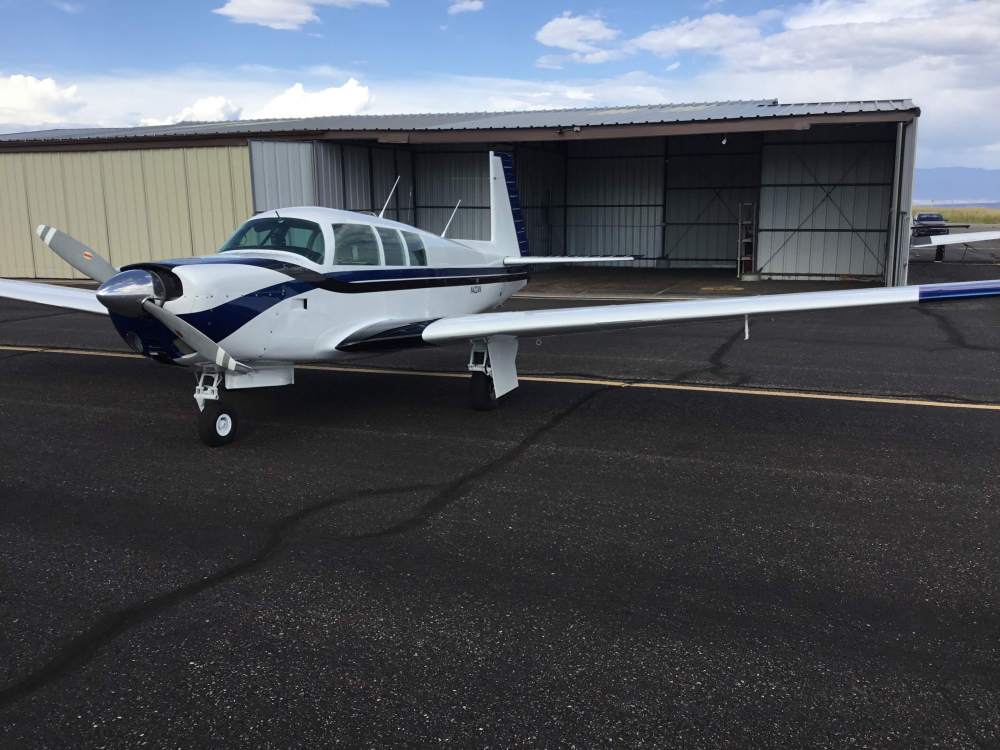
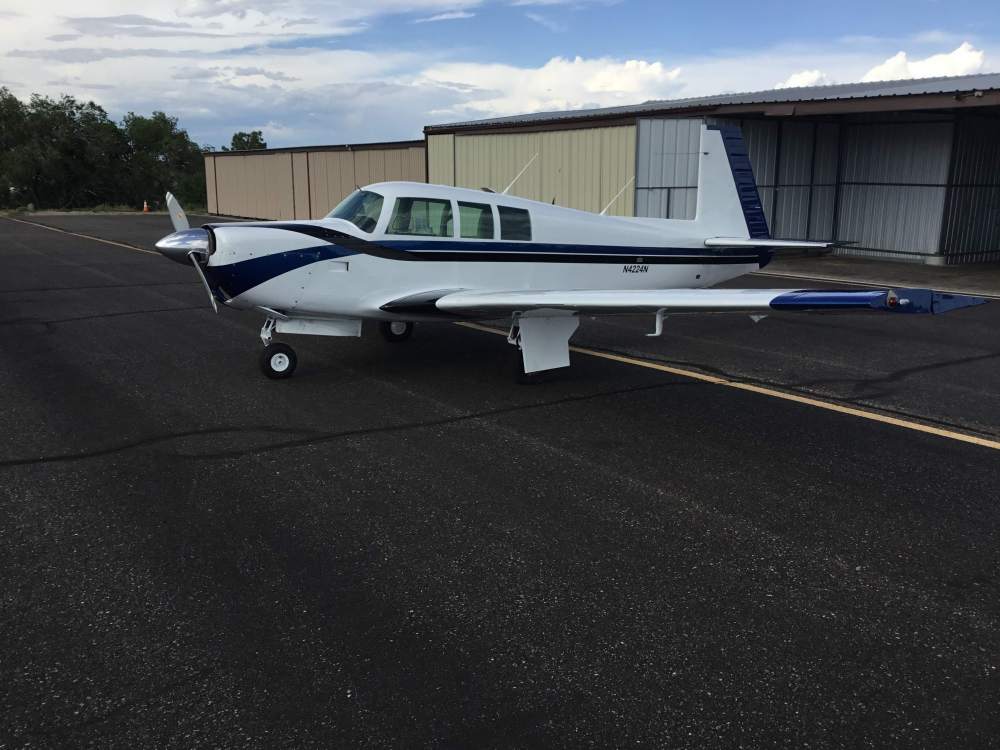
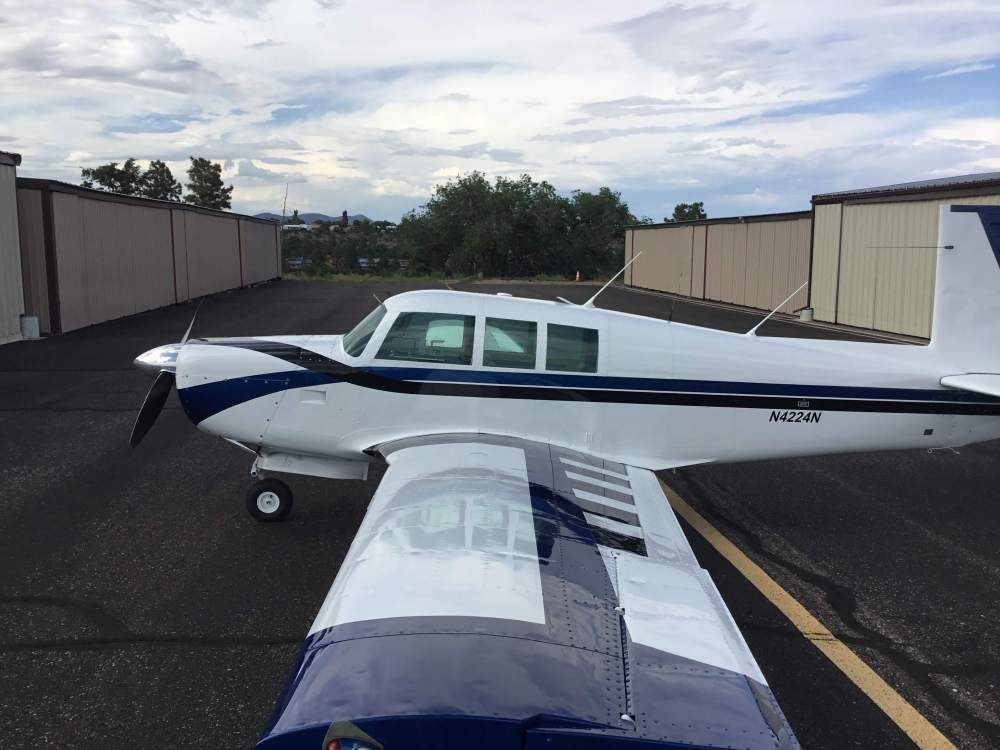
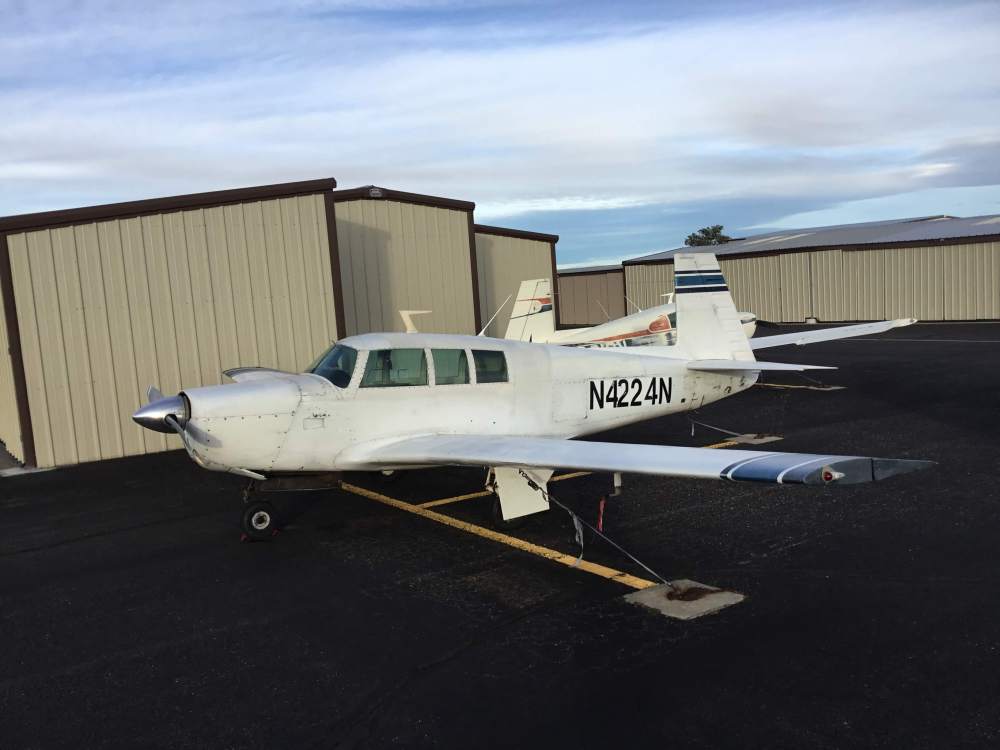
I’ve always liked the palindrome. Not many people notice it, those that do really like it (there are only 110 palindrome n-numbers in the US). If I have to point it out, people either aren’t excited about it or don’t get it. I wanted something different than the usual schemes; the trick was making it not too weird! I did get a touch up kit, so I’ll look for that video when it comes time...
-
And the after pics. I don’t have any detailed of the lines, but I can take some if 5ey would be of interest.

-
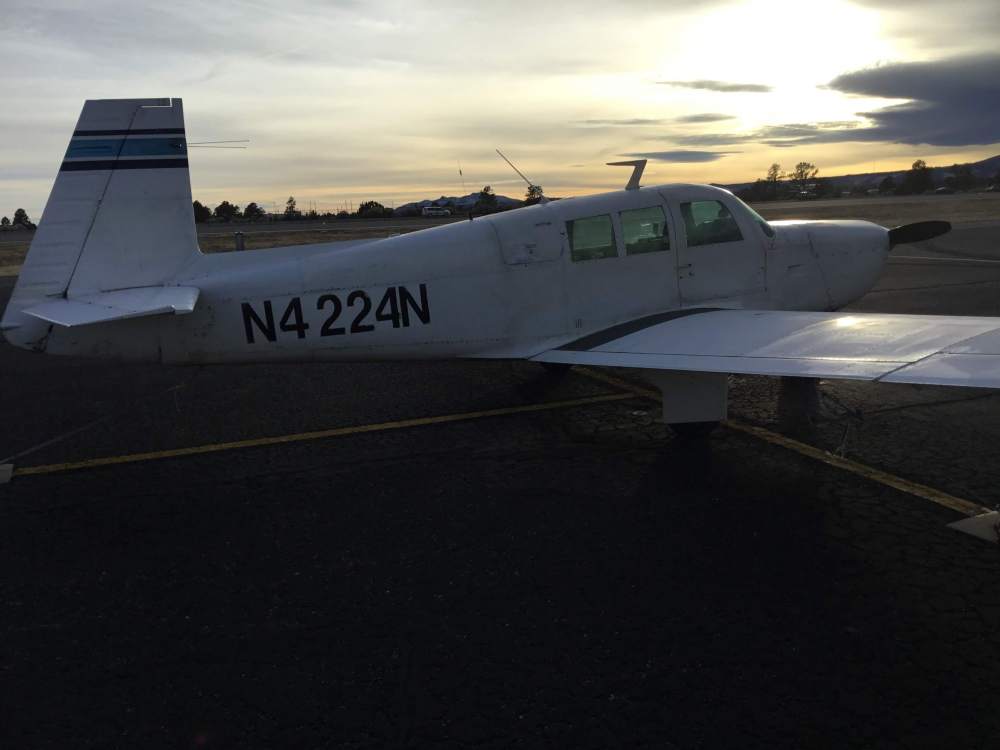
Before pics. The manager at Corona said that some people get their plans painted before it needs it. I was not one of those people!
-
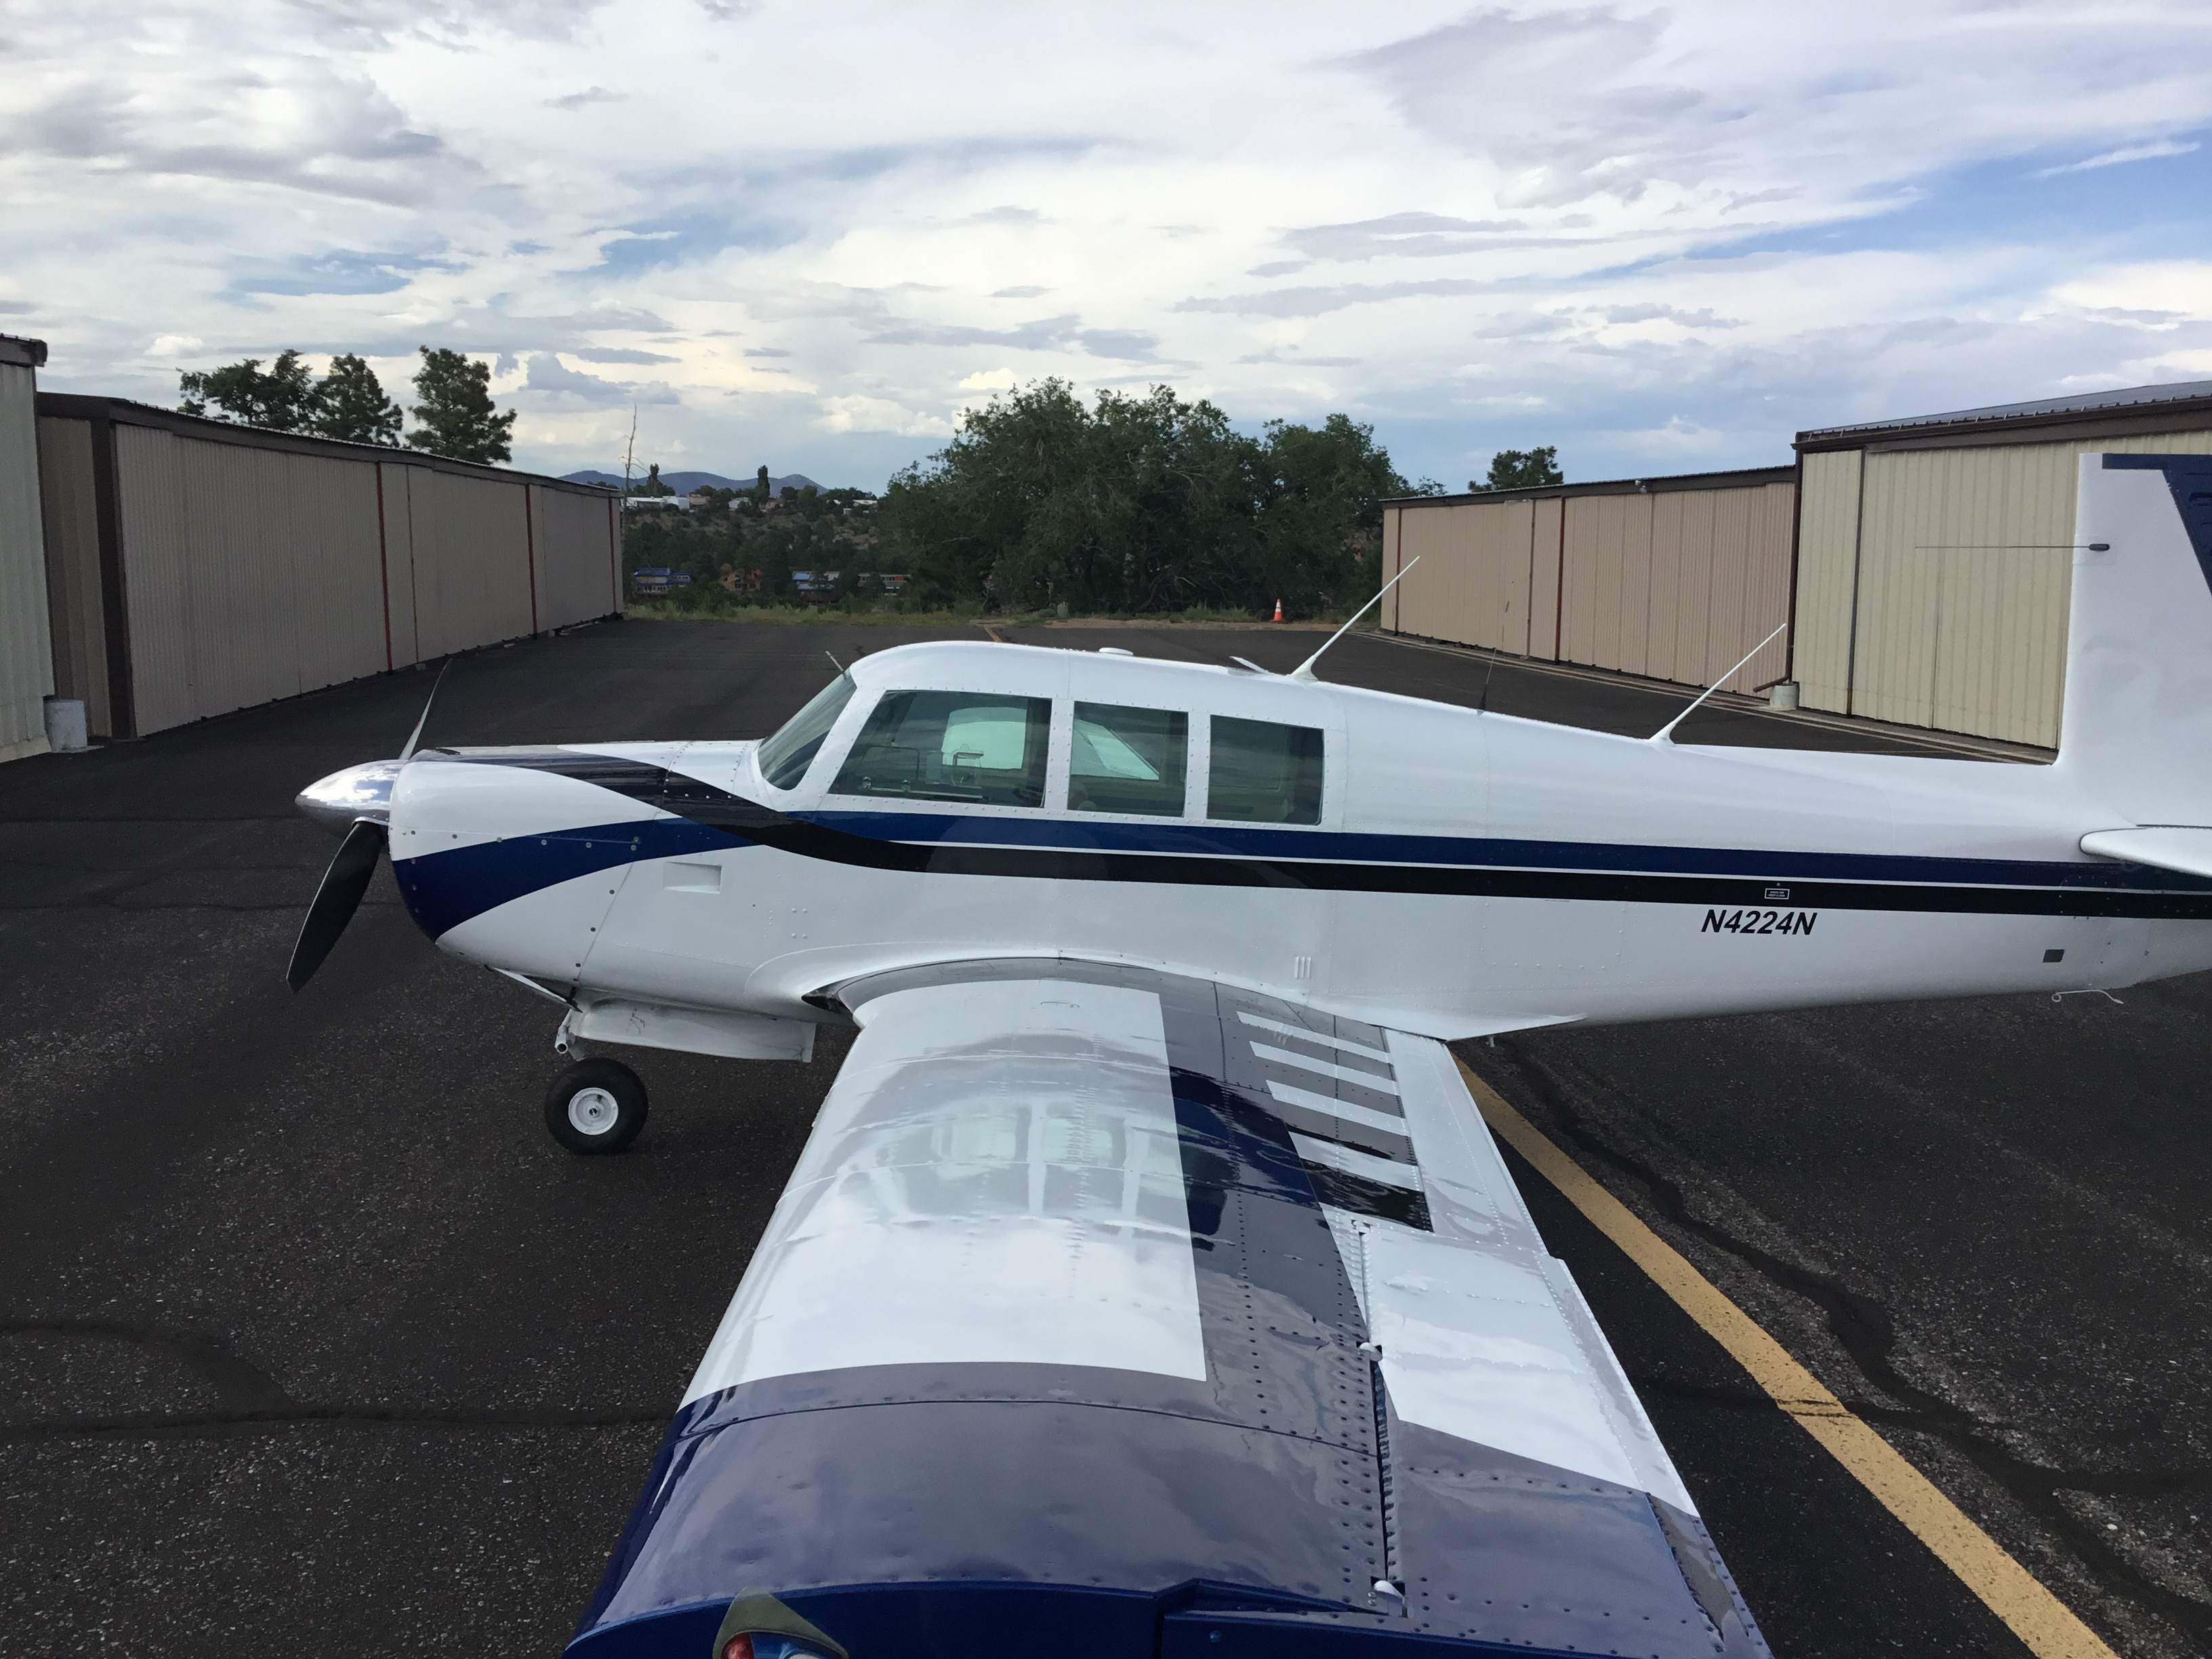
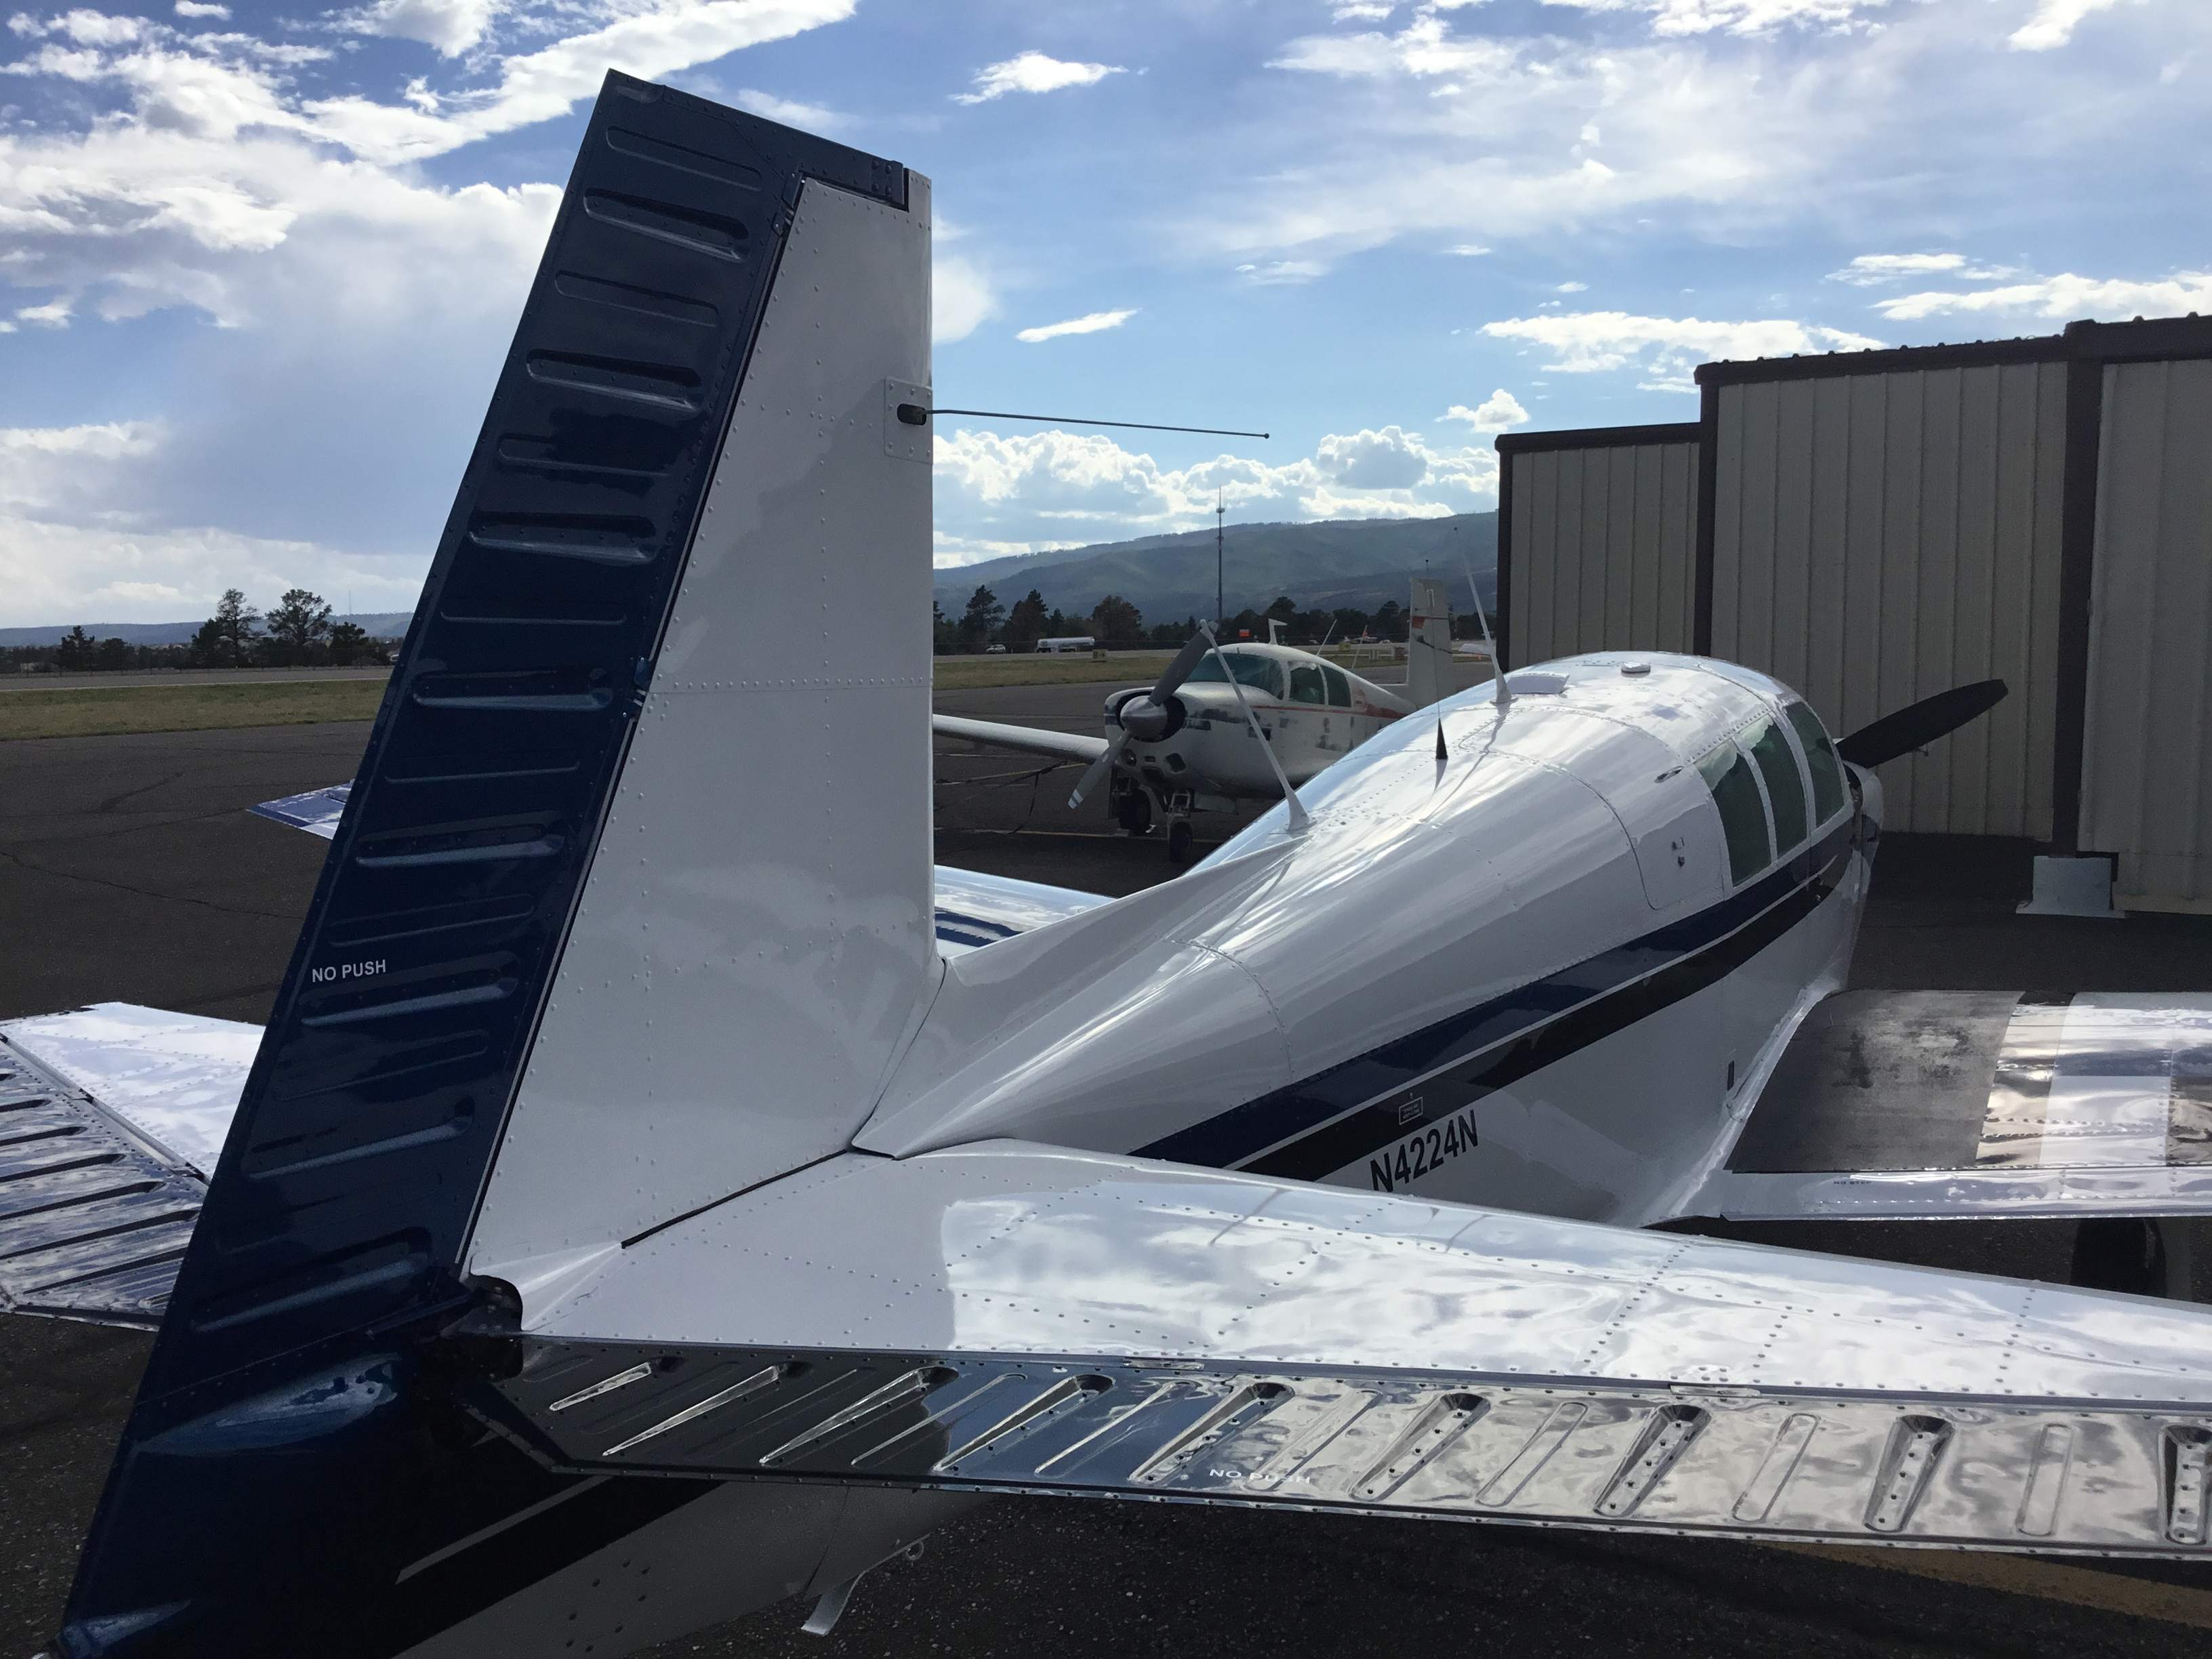
As promised...I picked up my plane from Corona today! When I was looking for paint shops, I requested quotes from across the country (AZ, CA, TX, MO, FL...no paint shops in NM!). Some places didn’t respond, one place was more than twice the lowest cost quote, one had a multi-page legal document as their proposal, most were one page. I was also torn between ArtCraft and Corona. Also, Pia Bergqvidt wrote about having her Mooney painted at ArtCraft (and having seen her plane personally, I know it looks great). https://www.flyingmag.com/inside-much-needed-paint-job-mooney-m20c/ I liked the Corona quote; which was white with two accent colors. Also, since I recently had some avionics work done and replacing the interior, I was a bit price conscious about having paint done as well (Corona was about 20% less). I decided in early February to go with Corona and scheduled for early May. I wasn’t sure how long it would take to drop it off, so I scheduled a late flight back to ABQ from LAX...it only took less than an hour. I wanted a paint scheme “different” than other Mooneys. The manager at Corona did show me a recently painted Mooney with a more typical scheme when I dropped mine off, and it did look nice. Anyway, my son and I put together a scheme, I showed it to the manager at Corona, he asked a bunch of questions, and said it wouldn’t be a problem. The quoted down time was 7 weeks. Corona sent me pictures at several points to let me know the progress. Nothing like seeing your airplane without paint! When it got closer, I asked about when I should schedule to come pick it up. They told me that they were behind schedule and to plan on coming out the next week (considering the experience I had with avionics, not so bad), picking it up actually went one day past what I planned (Saturday instead of Friday); but they let me know, so I was able to amuse myself in LA. I picked it up today (about 8 hours ago, but that included flying home). I did a detailed inspection. I only found one piece of tape that was left on (in the nose wheel well). I didn’t find any connections that weren’t attached. No major issues with overspray or orange peel. Initial impressions are that I’m happy with the result. There were a few “while your at its”...mostly design work for the paint scheme, new cam locks and repair to a dent in one wingtip. Of course, I’ll be keeping a close eye on it; I’ll let you know if anything changes. I’ll be at. Oshkosh with the Caravan if you want to look in person. Oh, I almost forgot...when I was leaving, I stopped for gas at the gas island. While there, I got my first compliment on the paint!
-

G5 attitude indicator... total cost?
Comet replied to Immelman's topic in Vintage Mooneys (pre-J models)
I did both the AI and the HSI as part of a larger avionics upgrade. The quote was 10 hrs for the AI and 20 for the HSI. Actual time was 5.3 for the AI and 19.8 for the HSI. I’ll have the vacuum removed at the next annual; step was removed by the previous owner. -
I’m picking it up Friday. Dropping it off was fine, and they’ve been sending regular updates and pics. I’ll let you know!
-
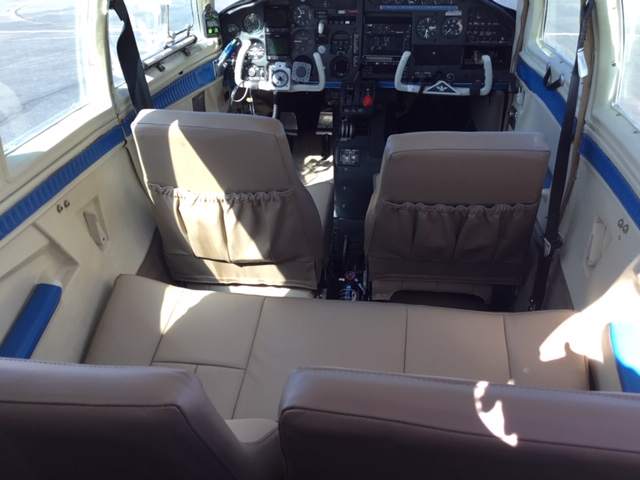
No the seats are not memory foam. The front seats are actually 2 pieces of foam glued together and then glued to the covering. I took the plane to TX las week for the Mooney caravan. Clinic..4+ hrs each way. I found them much better than the old seats (previously, I would have gotten pretty uncomfortable with this length of flight). When I did the co-pilot seat, I compared it to the pilot seat (not done yet) and I felt the new seat was much better. I had my kids and wife try them as well and the consensus was that the new seat was better. The new seat is much firmer and overall more comfortable. As an aside, I have a friend who is a “type P” pilot. His complaint with Mooneys is that it’s hard to cross your legs. I never had a problem...until last week....the new seats do put you a little closer to the panel (and make it a little harder to cross your legs...I’m 6’1”). A few other additions....I found that the new carpet between the seats didn’t fit in my plane; possibly somewhat different than the model they made the template from. I also took the opportunity to replace the fire extinguisher with a better model. I did make a mistake on the pilot side seat; but once it was installed in the.plane, I haven’t been able to see the error (unless I look closely)...so I think the process is pretty tolerant to minor issues.
-
x Overall, I’m pretty happy with the final result. I did make some errors in the process, but once I’ve started flying with it, it’s become less noticeable. I only wish I had done it a few years ago! I did get extra vinyl to redo the armrests and trim, but I haven't gotten to them yet.
- 30 replies
-
- 14
-

-

-
Now for the fun part! Removal of the old foam and installation of the new. The front seat back is removed by a couple of screws (picture is useful to remember the sequence of washers and spacers. The seat back in my vintage of Mooney had a solid plastic piece held by a bunch of screws. Once this is off, there are a bunch of plastic rivets. Some of these will be needed on the reinstallation, but not all (so you don’t need to be too careful removing them. Once the rivets are off the seat back and bottom, the foam can be ripped off. This leaves a fair amount of foam that still needs to be removed. I experimented with a range of methods to remove the excess foam and glue (including heat gun, mechanical and chemical). The best method I found was chemical, with the best chemical being MEK (I also tried IPA, acetone, and xylenes). I’m a chemist, so I’m comfortable with all of these, but be sure to have proper gloves, safety glasses and ventilation. The process can be repeated for the back seats backs. Once the foam is off of the seat bottoms, take a look at the surface. I had 3 cracks in the aluminum (2 on one, 1 on the other) at the front corner of the seat. I decided to stop-drill these, although, on a 44 year old airplane, I don’t know if it would have gotten worse. The back seat bottom is a stand-alone piece so there is no need to salvage the old one. Once the foam and glue has been removed, it’s time to put the new seats on. For the seat backs, the foam will need to be trimmed. I tried a few different ways of doing it and felt that trimming it to cover the tops and sides was best. If you want the foam to extend to th back, it will work as well. I felt it was best to glue the foam on. I used a 3M 1357 neoprene contact adhesive (available from Aircraft Spruce, among others). Since I took a few sessions to do all 6 seats (4 seat backs and 2 seat bottoms), I just used a disposable brush. Good ventilation, gloves and eye protection required (again). Slather the adhesive on the metal seat and the foam (the foam will suck up the adhesive, use liberally). Take th foam piece and carefully align it to the seat. Once, it’s aligned, place the foam. The working time for this adhesive is pretty short, so you may not be able to reposition it afterwards. Once the glue on the foam has cured, you can put on the covers. For the seat bottoms, it’s a matter of folding the leather over and using those plastic rivets to put it into place. I used an awl to position the leather, but a small screwdriver would work as well. The seat backs are a little trickier. I tried to fold the cover inside-out and fold it over the seat. This didn’t work as well as placing it over the foam and “massaging” it down the seat. This took some time (10-20 min), but it worked well. At the bottom, the seat cover is velcroed into place. Reinstallation of the pieces. The pilot side panel has a pocket. I thought this would be nice, but it has to go behind the gear extension panel, so is less useful than I thought. Installation of the panels is tricky; this is where the awl is most useful...as are the pictures for the specific screws and pattern that you’ll need to reinstall everything. Front seats are relatively easy to install, just a reverse of the original process. I chose to put in new cotter pins (the old ones looked pretty beat up). The back seat bottom is pretty easy to put in. The hardest is the back seat backs. I found it easiest to sit in the cargo area while installing them.
-
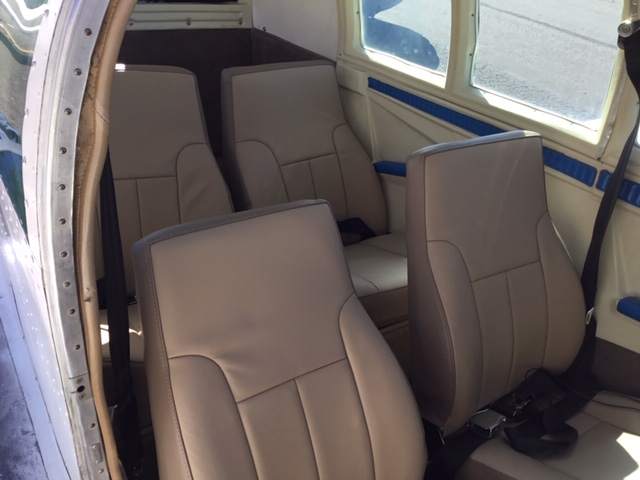
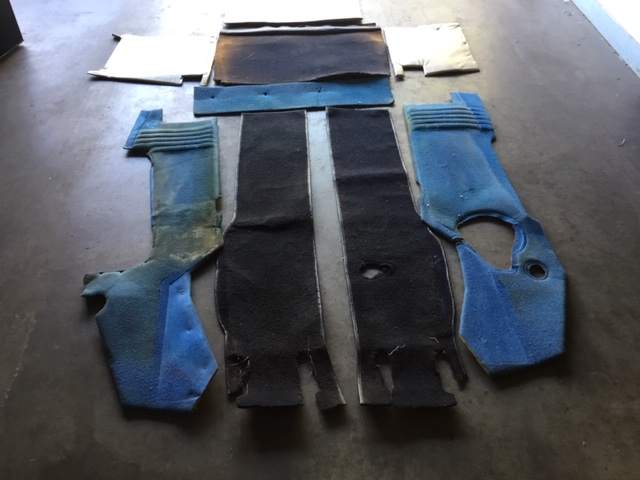
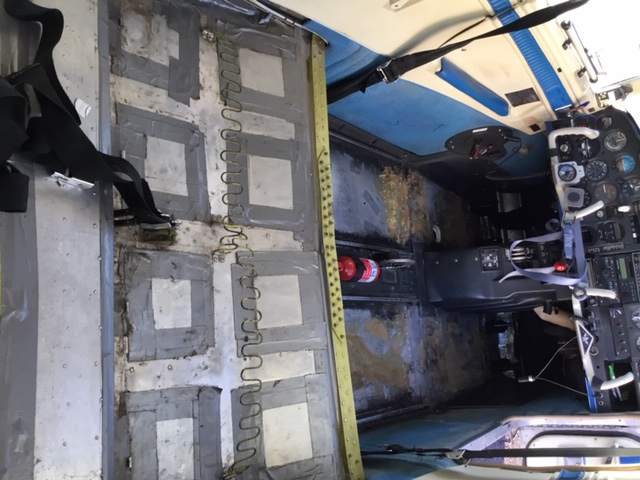
Taking out the seats is relatively easy. Take the cotter pins out for the front seats and forward/back to get them off the rails. As an aside, if you don’t already have 3-pt seat belts, this is a good time to install them. For the back seat, I have a ‘74 M20F. The seats are designed to be removed. A pin in the lower-inboard side is pulled out and the seat can be removed. The best discussion of the process is here: http://flying-geek.blogspot.com/2018/07/seat-back-removal-1969-mooney-m20f.html The seat back bottom is held in place by a couple of short metal rods; simply pull the rod out of the bracket holding it and the seat will come out. Once the seats are removed, the removal of the side panels and carpets is straightforward. This is a good opportunity to vacuum, clean out old foam, etc. most disgusting part of the process...when I took out the right side panel, I noticed a bunch of insulation. When I took it out, there was a mummified mouse head. After that, I did a close inspection behind all the panels; luckily no other sign of mice (and the one I saw was small and old. Of course, here are some pictures of the process.
-
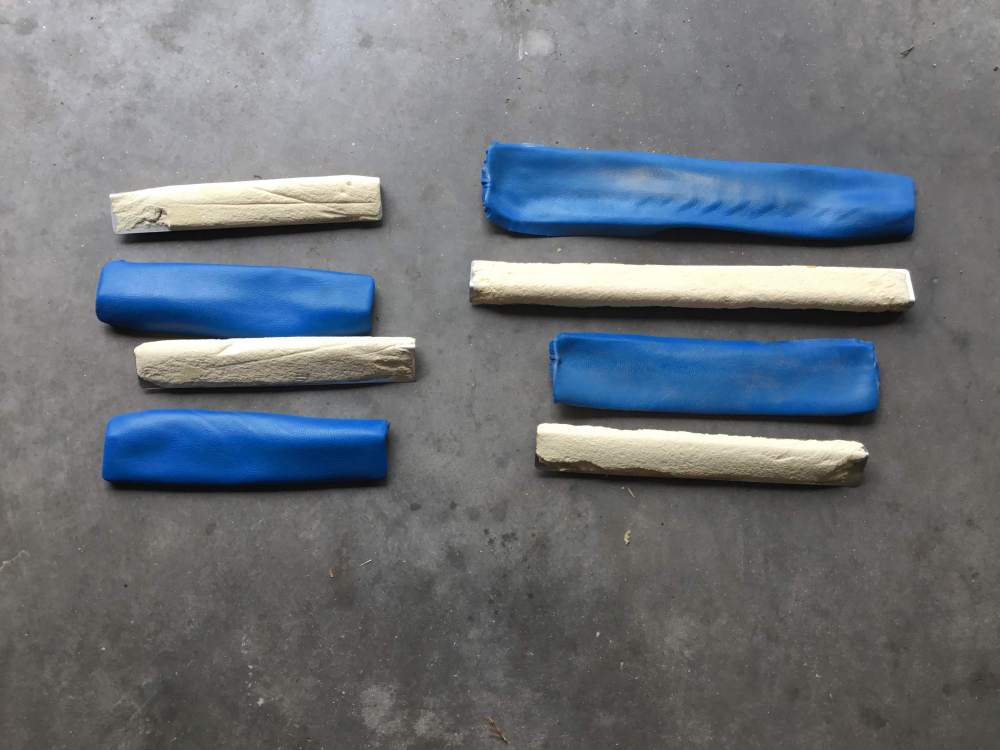
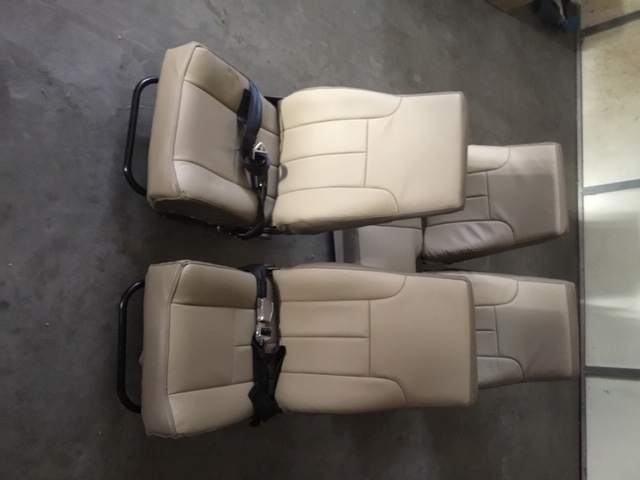
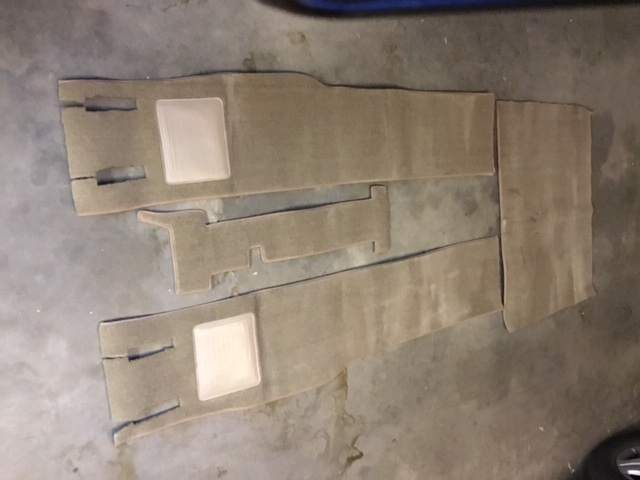
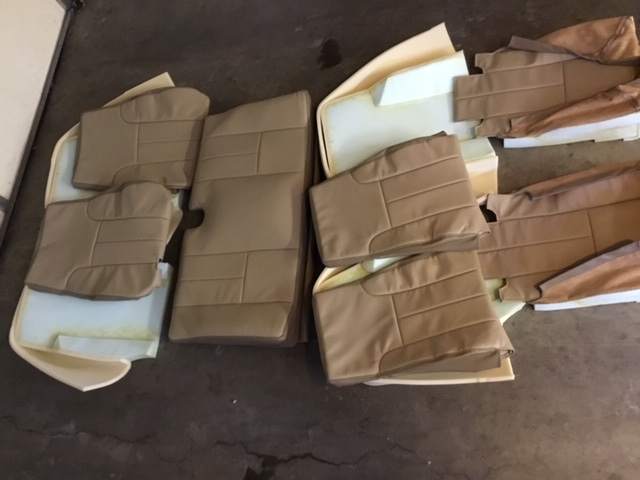
Overall, the process is pretty simple, but it does take time. I did mine when my airplane was in for avionics work (which took much longer than expected...a tale for another time). The prices on the Airtex website are accurate. I decided to install leather seats, which added $1k to the price. I also decided to do carpets and the sidewalls at the same time. The carpets and sidewalls were completed pretty quickly (1-2 weeks). The seats themselves took 7-8 weeks (possibly due to them being leather). I chose tan because I’ll be getting the plane painted, and I didn’t want to limit my color choices. The seats are actually two different shades, but I probably should have chosen shades that weren’t so close to one another. The front seat bottoms have foam glued to them already. For the seat backs, the foam is separate and the back is basically a slip cover. The back seat bottom is a complete unit and can be installed as it. Here are pics of what is in the box(es).
-
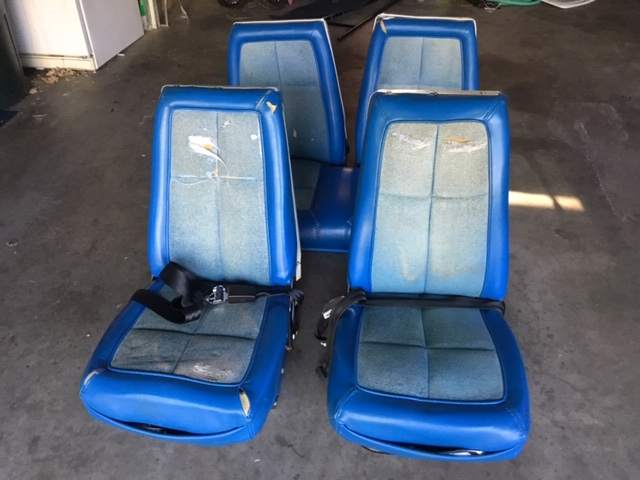
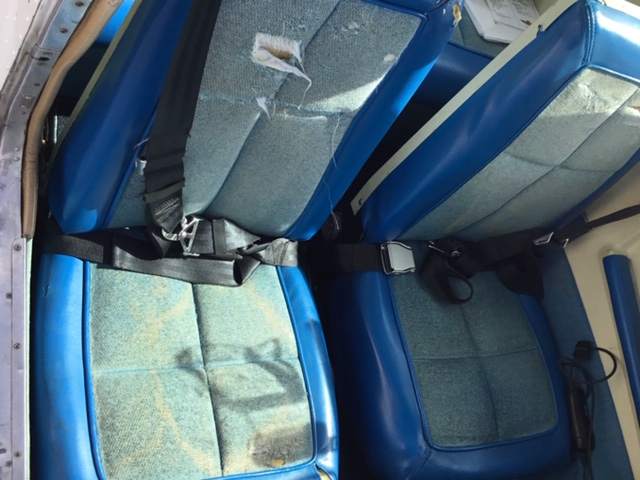
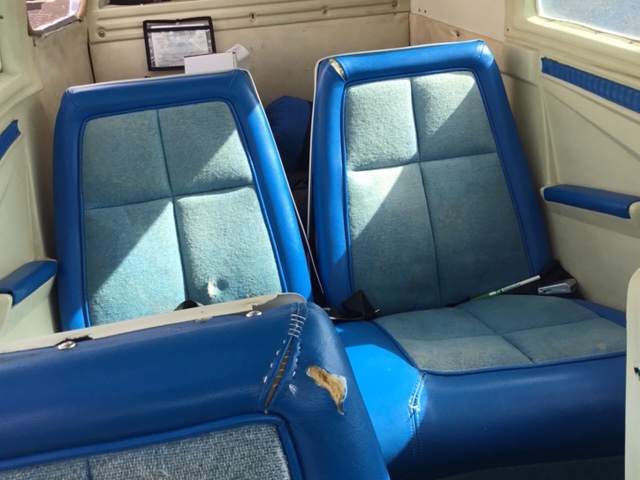
Although I don’t post much, I find the information on Mooneyspace invaluable. In the interest in providing content, I’m posting my experience with putting in an Airtex interior (a common question). Some overarching suggestions, take more pictures than you think are necessary. Especially of screw patterns and how things go together. I kept wishing for more pictures than I had. Also, take time to do each step. The way my brain works is it helps to take a break (even for a few days) and think about a problem to figure out the solution. Things I bought to complete the process are: an awl, 3M 1357 contact adhesive, and some disposable paint brushes. Here are the obligatory “before” pictures.
-
I’m dropping mine off on Monday. I’ll have firsthand knowledge soon!
-
First four years of ownership, I was with AOPA, they only provided more than one quote once (and didn’t seem to want me to change). Last year, got a quote from Falcon with 3 underwriters and went with Global.
-
New Mexico is based on gross weight. For a 2740 lb Mooney it works out to be ~$27. About half what registration is for a car... o other taxes for aircraft.
-
The local news has identified the pilot. https://www.kob.com/new-mexico-news/ntsb-to-investigate-small-plane-crash-near-santa-fe/5158131/?cat=500
-
Well done! I’m getting ready for almost the same upgrade....waiting is the hardest part!