-
Posts
25 -
Joined
-
Last visited
About AVDB
- Birthday 11/29/1986
Profile Information
-
Gender
Male
-
Location
Kyiv, Ukraine
-
Interests
Civil and military avionics modernization,
skiing, cycling -
Base
UKKK
Recent Profile Visitors
1,920 profile views
AVDB's Achievements
-
G1000 COM1 Static Issue - 2005 Ovation
AVDB replied to EarthboundMisfit's topic in Avionics/Panel Discussion
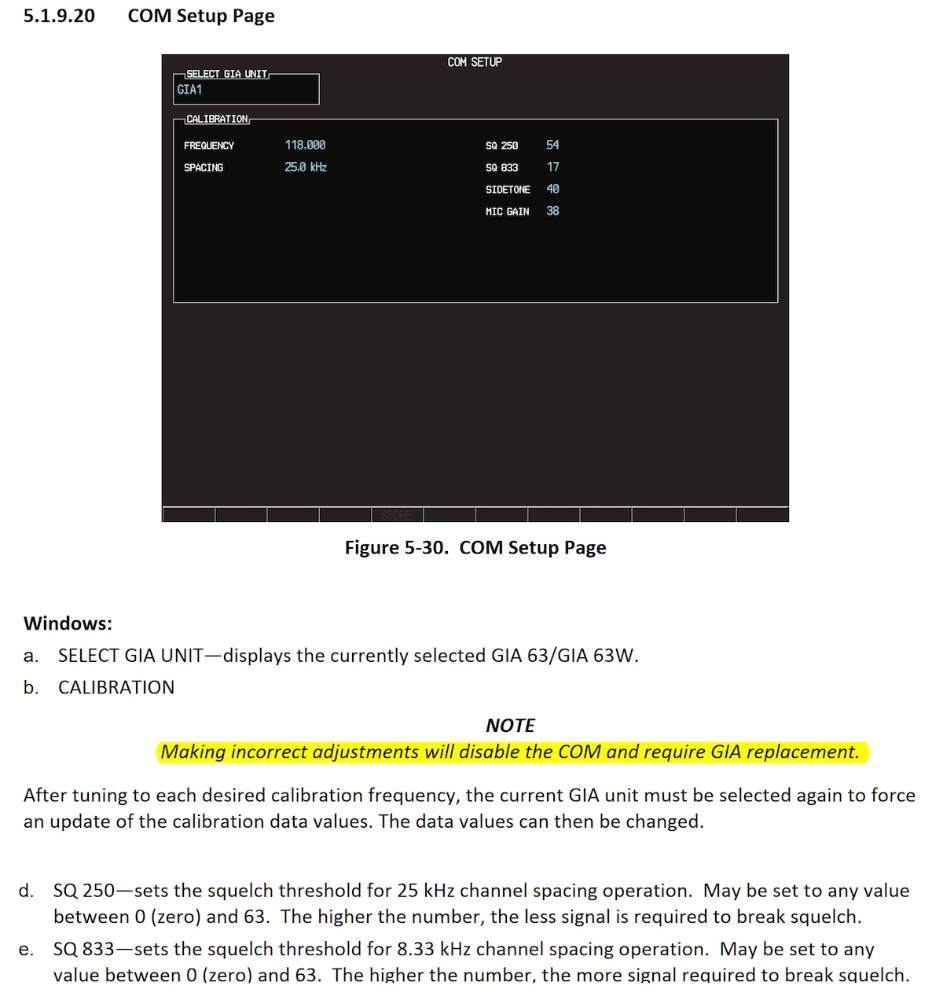
In the configuration mode, please take a picture of the COM 1 and COM 2 settings -> squelch threshold for 25 kHz and 8,33kHz channel spacing -

G1000 COM1 Static Issue - 2005 Ovation
AVDB replied to EarthboundMisfit's topic in Avionics/Panel Discussion
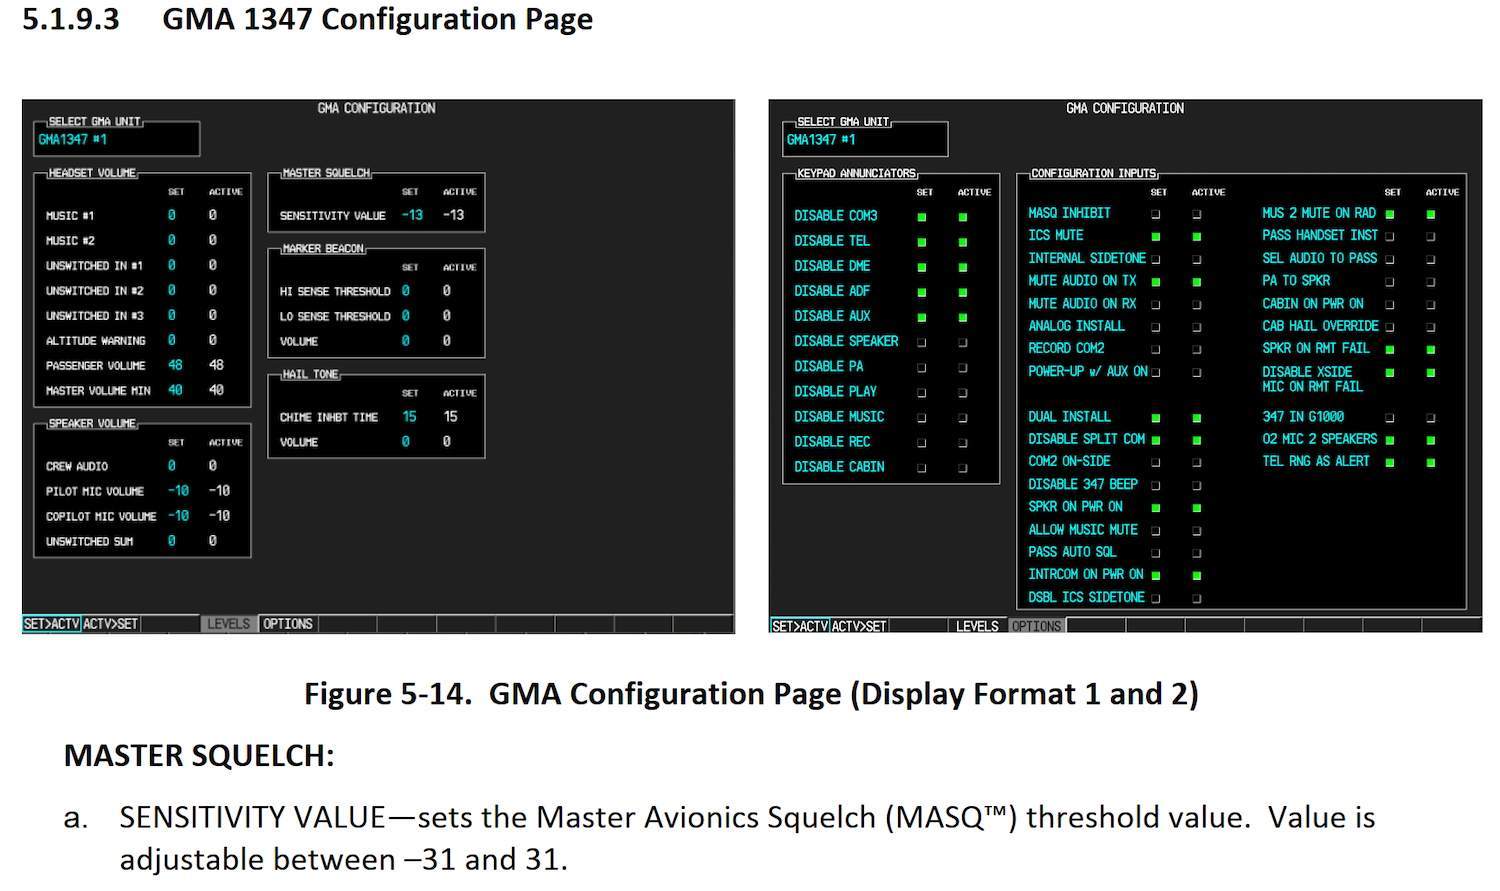
try at the end, when all the previous actions will not give the proper effect go to Configuration Mode -> GMA 1347 Configuration Page -> change Master Avionics Squelch -
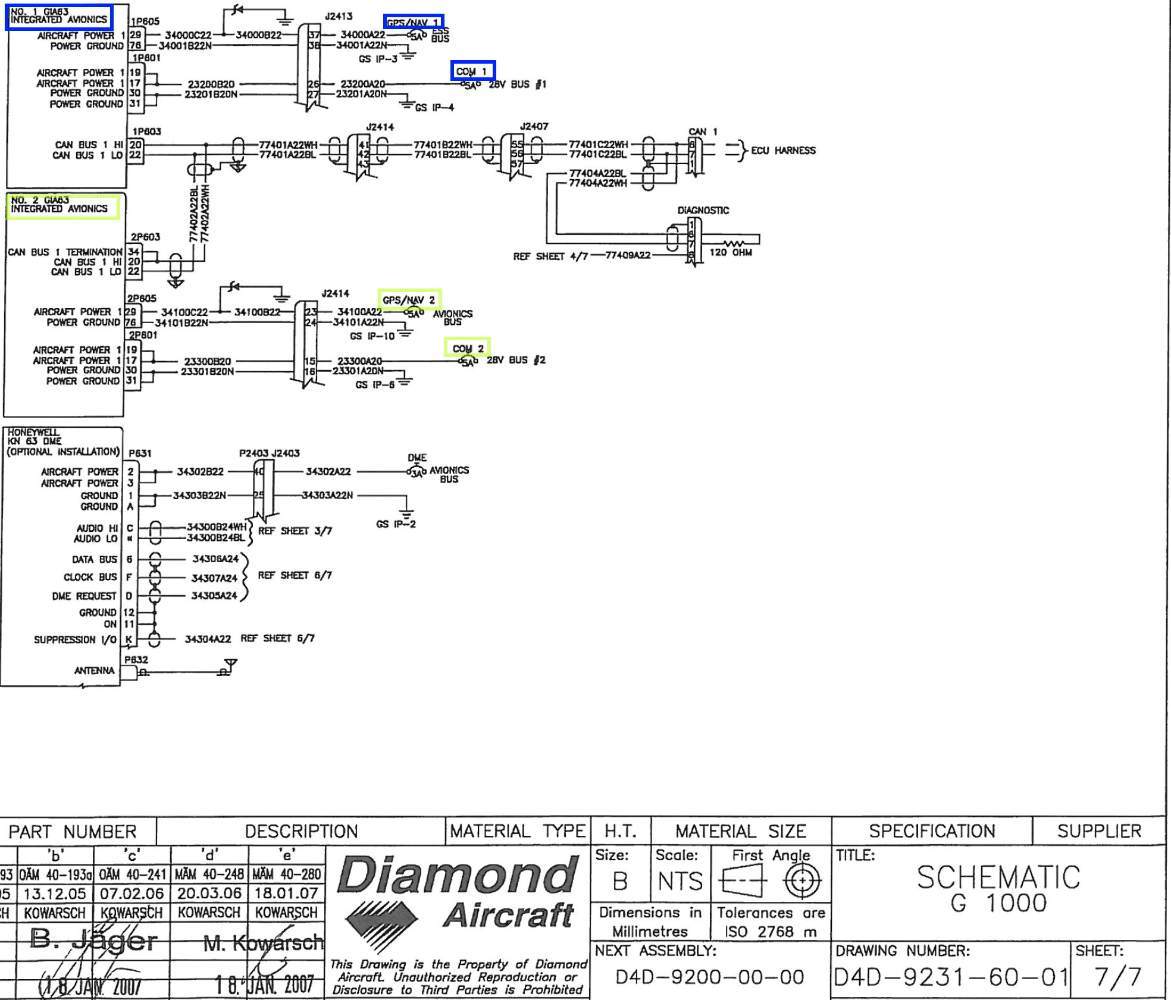
From Diamond DA40NG wiring diagram of G1000 system which is near to me right now, and I can with a fatness of 99% also say that this is true for other G1000 equipped aircraft - GIA 63(W) is the central ‘Integrated Avionics Unit’ (IAU) to the G1000 system. The GIA 63(W) functions as a main communications hub, linking most LRUs with the PFD and MFD displays. The GIA 63(W) contains the GPS (WAAS) receiver, VHF COM/NAV receivers, and system integration microprocessors. It is powered up via two appropriate circuit breakers GPS/NAV 1(2) and COM 1(2) - GEA 71 - LRU that is responsible for receiving/processing signals from engine and airframe sensors) GEA 71 communicates directly with both GIA 63(W)s using RS-485 digital interface it is powered up via one circuit breaker - ENG INST On Seneca this C/B calls GEA, because two engine are installed, we see GEA 1 and GEA 2 C/B on circuit breaker panel.
-
-
There is info from G3X Touch Certified Part 23 AML STC Installation Manual, 190-02472-01, Rev. 2 concerning your question (EIS display is highlighted in yellow):
-
Send me PM if you need GFC 500 Autopilot with Electronic Stability and Protection, Part 23 AML STC Installation Manual, 190-02291-00, Rev. 24
-

How to Mute Avidyne TAS system on G1000?
AVDB replied to Ed de C.'s topic in Modern Mooney Discussion
-

How to Mute Avidyne TAS system on G1000?
AVDB replied to Ed de C.'s topic in Modern Mooney Discussion
Hello Ed, There is only one TAS page which is available for pilot in G1000 normal operational mode - Traffic Map Page From G1000 Pilot's Guide: "Displaying traffic on the Traffic Map Page: 1) Turn the large FMS Knob to select the Map Page Group. 2) Turn the small FMS Knob to select the Traffic Map Page." If we are talking about audio alerts setup - it is available in Configuration Mode only. From G1000 System Maintenance Manual: "To enter configuration mode: 1. Press and hold the ENT key on the PFD while applying power. Release the ENT key after ‘INITIALIZING SYSTEM’ is displayed in the upper left corner of the PFD. 2. Repeat step 1 for the MFD and PFD2 (if installed). The System Status Page (Figure 4-1) is displayed on the MFD and the PFD. 4.2.1 User Interface Once the G1000 is placed in configuration mode, the large and small FMS knob is used to cycle through the different configuration pages, to change page groups, and to change pages in a group. The FMS knob is also used to perform the following: • To activate the cursor press the small FMS knob. • To cycle the cursor through different data fields rotate the large FMS knob. • To change the contents of a highlighted data field rotate the small FMS knob. This action displays an options menu for the particular field, or in some cases, allows the user to enter data for the field. • To confirm a selection press the ENT key. To cancel a selection, press the small FMS knob. Pressing the small FMS knob again turns the cursor off. The CLR key can also be used to cancel a selection or turn the cursor off." In Configuration mode, on PFD, go to System page group -> Audio Alert Configuration page As this page is not shown in G1000 MM, for the purpose of training, please make a screenshot and load it in this post. TAS alert volume settings have to be there. Note: When G1000 system is powered up in Configuration Mode, the system may sound an Audio Warning Tone. This tone can be silenced by using the following steps: on MFD: - rotate Large FMS knob to the right to select GDU group page - rotate Small FMS knob to find Alert Configuration page - Across the button of display are the softkeys. Locate the button under the letters ACK for acknowledge and press the soft key This should stop the chiming of the audio warning system Regards, AVDB -
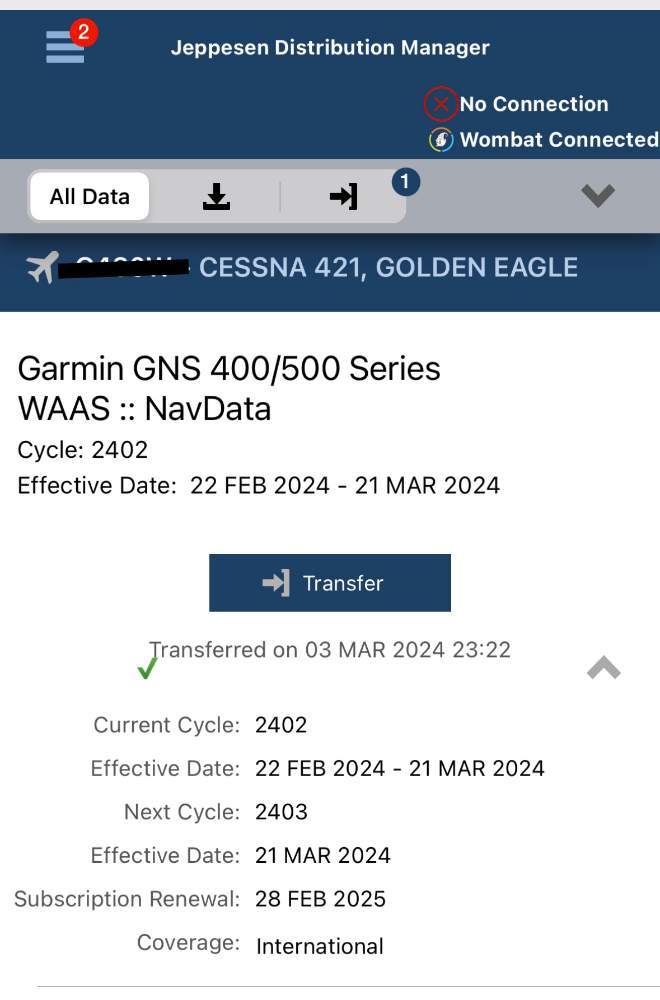
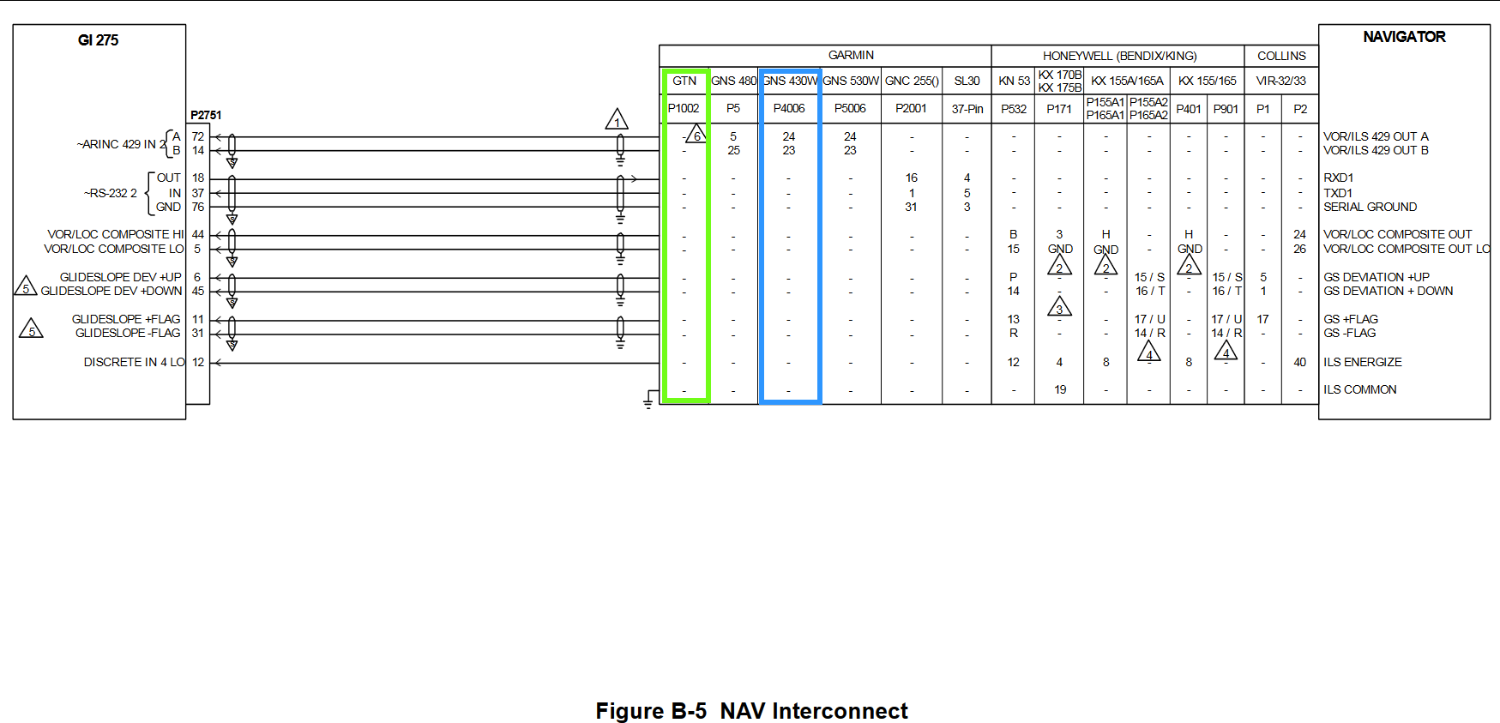
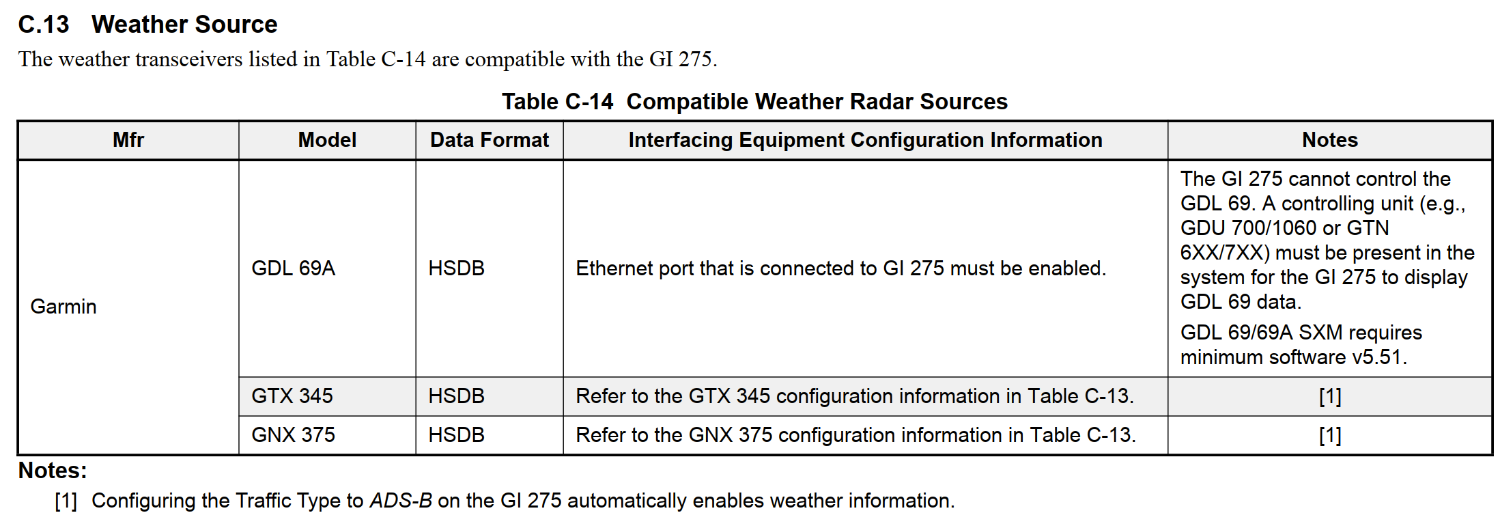
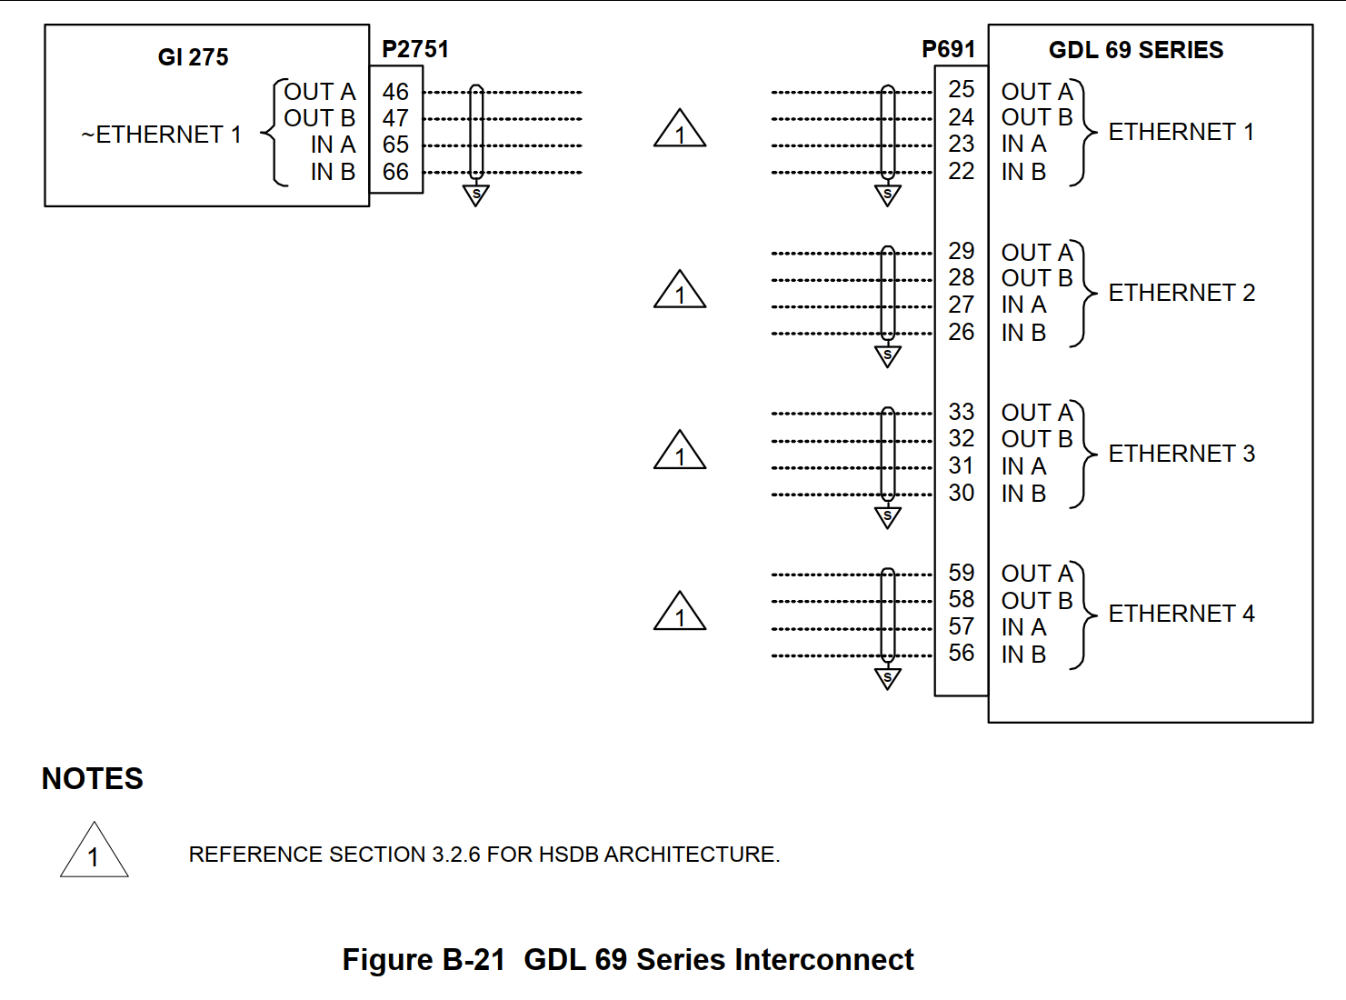
Interconnection wiring diagram GTN 650 as GPS1/NAV1 system, GNS 430W as GPS2/NAV2 system GI 275 Configuration GTN 650 / GNS 430W Configuration Few words about TAWS Few words about WEATHER / TRAFFIC
-
From Maintenance Manual: "Select the GRS/GMU Calibration page and enter the following softkey password: a) 9 b) 10 c) 11 d) 12 (Far Right softkey)" During calibration, taxi the aircraft in a good BIG nice circle - you will get smooth and precise taxiing G1000 Magnetometer calibration.pdf
-

Troubleshoot GI275/GMU11 calibration failure
AVDB replied to NicoN's topic in Avionics/Panel Discussion
Please attach photo of physical GMU 11 installation Make sure that GMU location meet all installation requirements. if it is required - replace metal fasteners into stainless steel perform Magnetic Interference Test my advice: During calibration, taxi the aircraft in a good BIG nice circle - you will get smooth and precise taxiing Magnetometer Calibration.pdf GMU location requirement, magnetic interference.pdf -

"traffic failed" messages - G1000 GTX 345
AVDB replied to Ptsticks's topic in Avionics/Panel Discussion
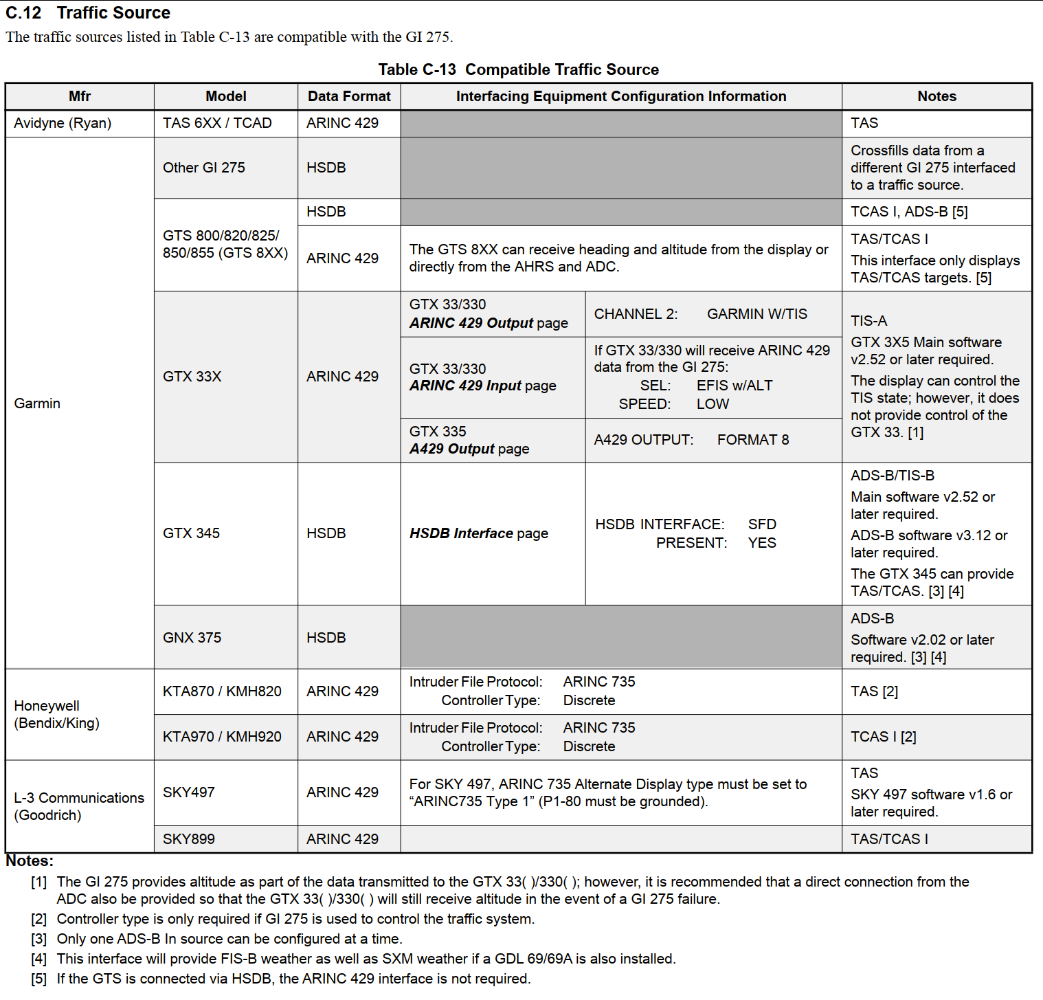
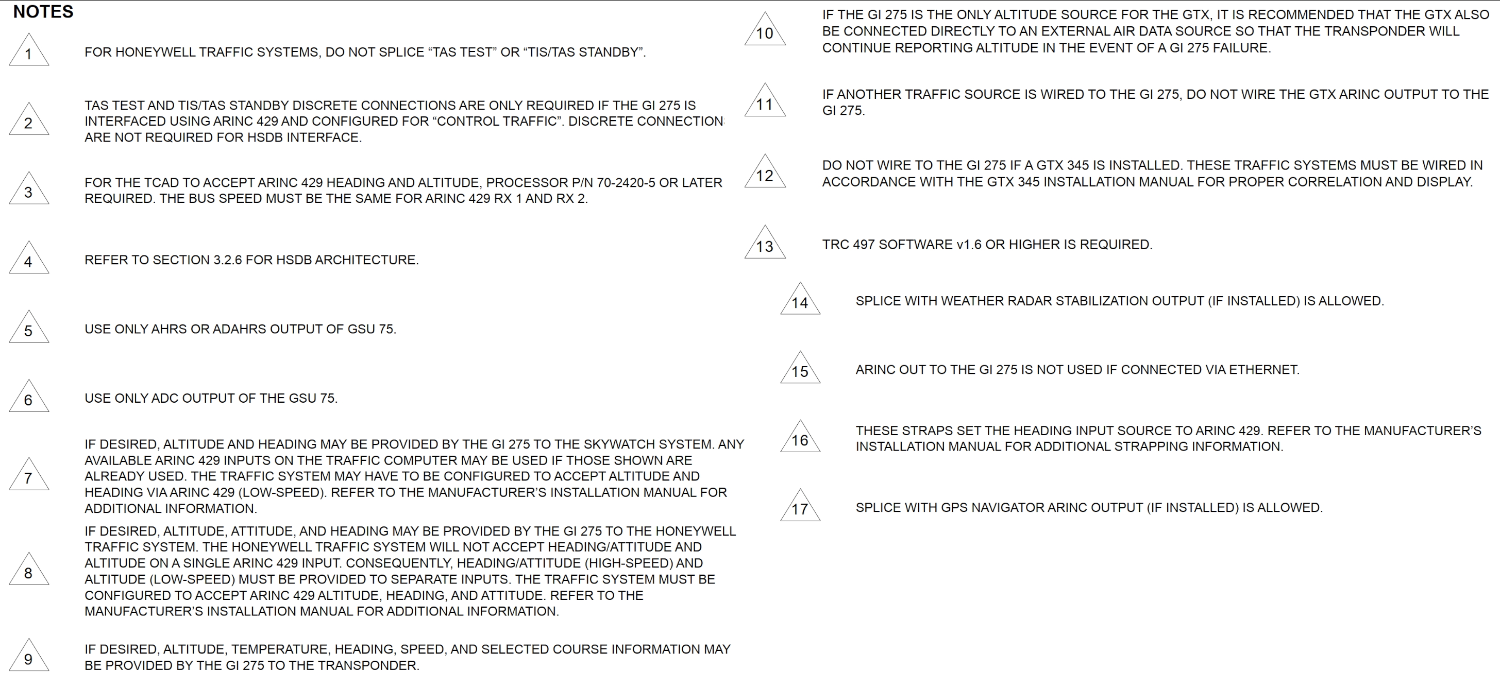
Hi Ptsticks, Please specify or attache screenshots with GTX 345, GTS 325 and G1000 system. I recommend to check configurations first of all. The best manual which helps you with this issue is GTX 3XX Part 23 AML STC Installation Manual, 190-00734-10. There is description of GTX 345 configuration, taking presence of GTS and G1000 system into account. page 169.pdf -

Gi 275 indicating 130PSI oil pressure
AVDB replied to redbaron1982's topic in Engine Monitor Discussion


