
65MooneyPilot
-
Posts
174 -
Joined
-
Last visited
Content Type
Profiles
Forums
Blogs
Gallery
Downloads
Media Demo
Events
Everything posted by 65MooneyPilot
-
Positive Control System $550 shipped USA!
65MooneyPilot replied to VWGuy's topic in Avionics / Parts Classifieds
I only see 3 servos in the picture. Do you have the fourth servo? That would make it a complete set. Thanks -
Removing the Undercarriage.
65MooneyPilot replied to Denis Mexted's topic in Vintage Mooneys (pre-J models)
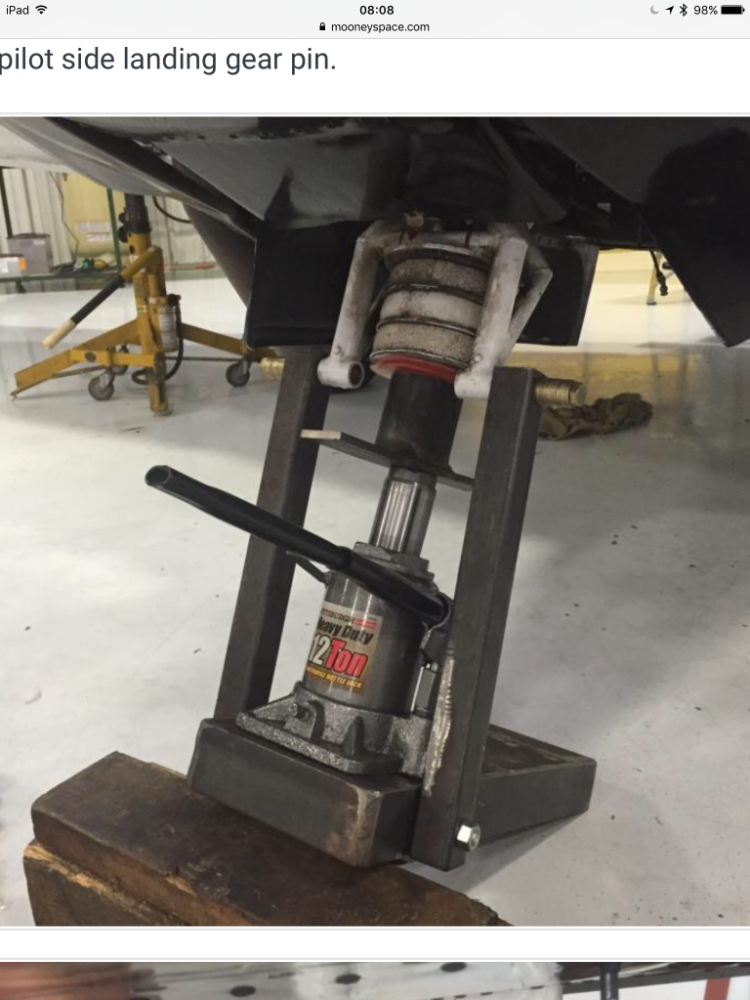
When you get the airplane up on jacks, check the nose gear by grabbing the axle on both sides and lifting up. When I did that on my plane the nose gear moved up and down about and inch. It was totally worn out. I replaced it with a LASAR rebuilt one and no more shimmy and all the steering issues after landing were fixed. It was like getting a new plane. I also installed the LASAR steering horn mod. When I removed my main gear I used a hydraulic press to get the shock discs out and it it worked well. Putting large washers in the spring is a great idea, I made a tool similar the one in the manual which worked ok. Just let us know if you run into an issue as usual there is always one of us that has been thru it before. -
The lowest setting on the dimmer is still to much current to dim the led.
-
Weldon 8163A fuel pump availability
65MooneyPilot replied to Vance Harral's topic in Vintage Mooneys (pre-J models)
Here is the pump I installed in my Mooney around 4 years ago. It works fine no STC bracket required.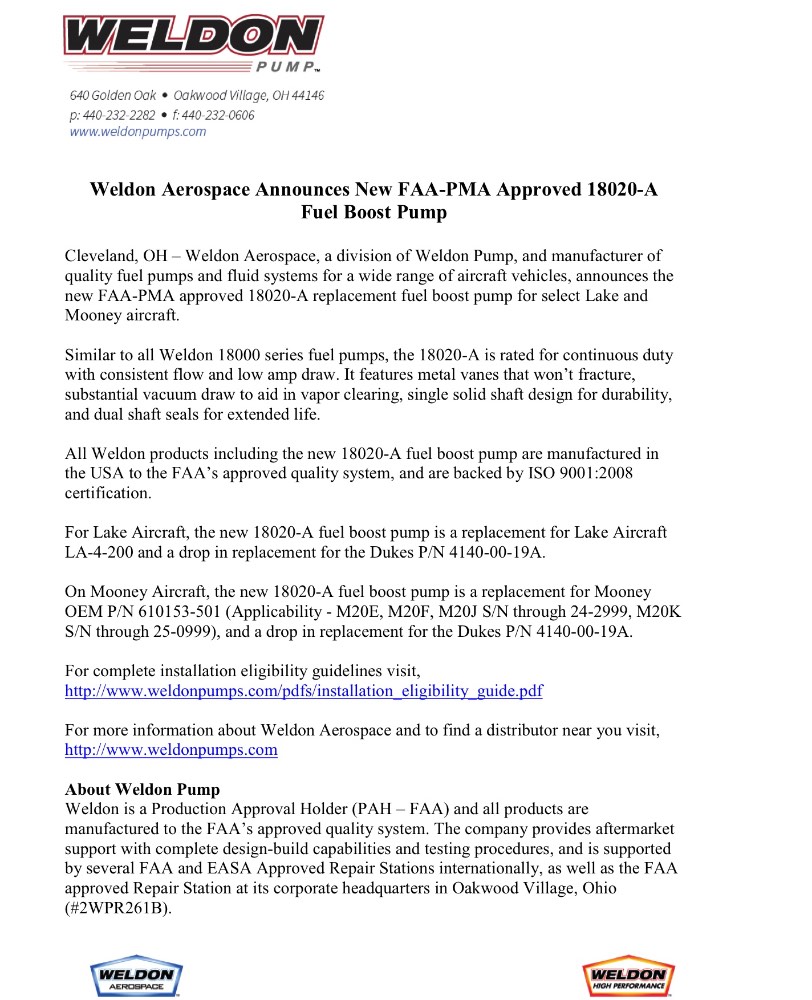
-
There are a lot of seatbelt discussions on this forum. There is a reason why every car has inertia reels. But you have a choice. I have the inertia reels and they are great. Your lap belt should keep you in your seat when it is turbulent. Bending over for the fuel valve would be a challenge with a straight belt. Having it tight before you really need it is the key.
-
My PC, on my E model, does not require the TC. Some do depending on which one you have installed. I left the TC in.
-
I just received my new registration and it still has a 3 year renewal date on it. Looks like they have not reprogrammed the computer to 7 years yet.
-
My registration is due in March and I already renewed it online a couple of days before the announcement and payed the 5 dollars. So we will see what happens. I am expecting a new registration that will be good until 2030.
-
Is M20C brake bleeding possible?
65MooneyPilot replied to Kelpro999's topic in Vintage Mooneys (pre-J models)
Knowing what I know now, I don’t know if I would bother. The sale price was 25.00 and I could not resist. Nothing in aviation is 25.00. -
Is M20C brake bleeding possible?
65MooneyPilot replied to Kelpro999's topic in Vintage Mooneys (pre-J models)
RobertGary1 has the correct procedure especially if you have not bled the brakes in a while. A couple of years ago LASAR had a special on the STC that allows you to swap the calipers to the front to get them out of the airstream when the gear is up. When I took the calipers apart they were full of 5606 jelly. After I cleaned them up and swapped them over, I then bled them from the caliper to the reservoir. Worked great, no air.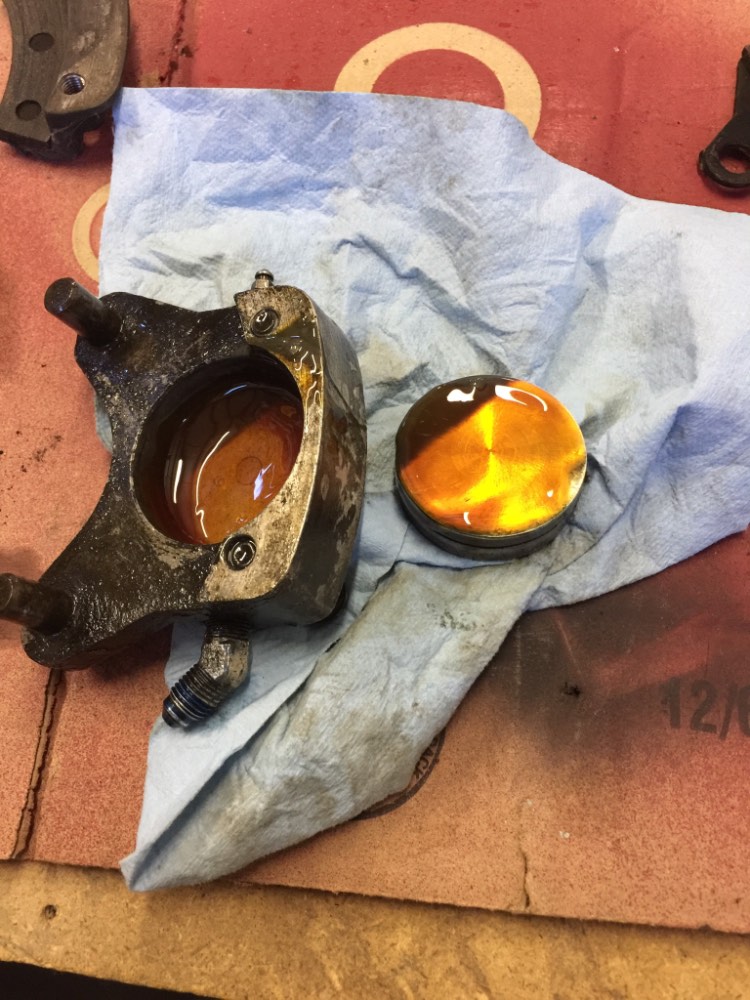
-
I just bought an LHS system also and I am going to attempt to install it in the left wing forward inspection plate just outboard of the gear door. The wires can go in the same hole as the pitot tube, Nav lights, pitot heat and above the aileron control rod. Getting the wires secured will be the challenge. I am out of town this week but will be attempting the install in about a week.
-
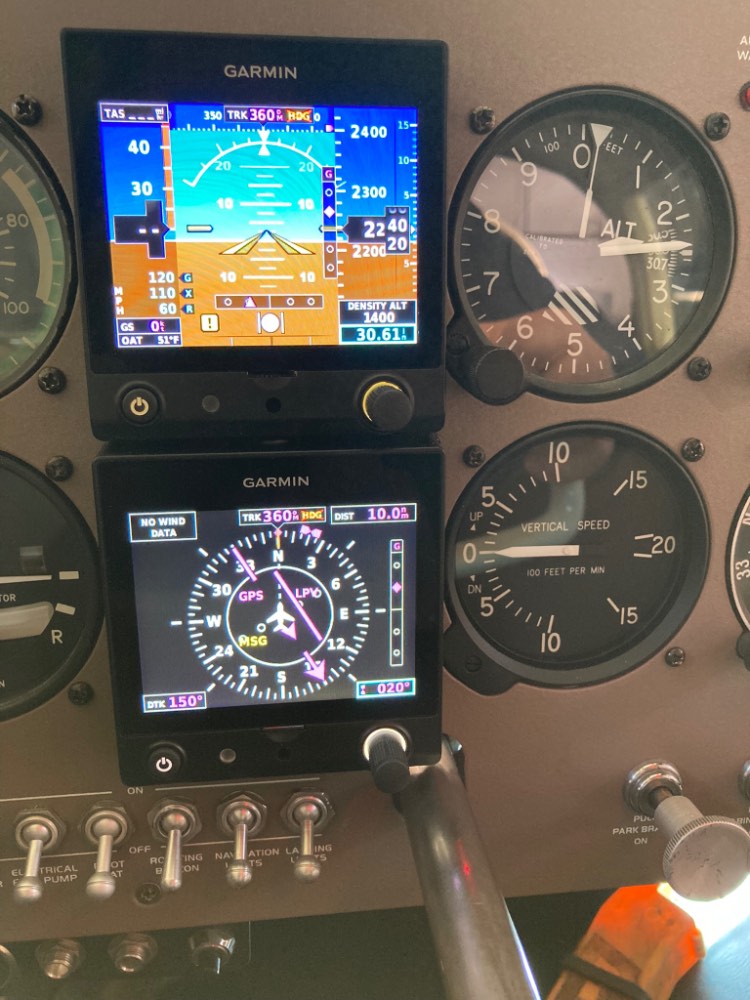
GMU 11, Davtron Temp sensor, and LHR
65MooneyPilot replied to 65MooneyPilot's topic in Avionics/Panel Discussion
Another question, when you install the second G5 are they installing the pitot static lines on the bottom HSI or do they leave them capped off. I have looked all over the install manual and cannot find the answer. Thanks -
GMU 11, Davtron Temp sensor, and LHR
65MooneyPilot replied to 65MooneyPilot's topic in Avionics/Panel Discussion
Ok, thanks for the info, I guess I will have to find a small arm to go into the wing panel to secure the wire. No worries about the strobe because I don’t have one on the wingtip. Roger on the hardware. -
GMU 11, Davtron Temp sensor, and LHR
65MooneyPilot replied to 65MooneyPilot's topic in Avionics/Panel Discussion
So is your GMU 11 out at the wing tip or just after the skin split as I have see on other posts? The real question is how did they get there hands in there to secure the wires. I guess my arms are to big. I only have one Nav light wire going out to the right wing tip. I don’t think the hole will take any more wires. -
I am going to install these units in my plane, but I am wondering how they normally run the wires. Do they go thru the wheel well out to the wing or do they somehow route them down the leading edge past the aileron and then back to the middle of the wing. I have read previous posts about the GMU11 but no specifics on the routing of the wires. Thanks
-
Battery Minder Interface Installation
65MooneyPilot replied to MisfitSELF's topic in General Mooney Talk
Thanks for the response, I talked to tech support at Battery Minder today about the temp sensor. My unit is an older model and the temp sensor went to the battery lug. He told me that the sensor needs to be in the same temp environment as the battery. I will be ordering the kit soon. -
Battery Minder Interface Installation
65MooneyPilot replied to MisfitSELF's topic in General Mooney Talk
I have a question, is the temp sensor circuit in the kit? -
I don’t know if I would be overly concerned about water dripping out of the airplane after a rain. The fact that the water is draining is a good sign. I have worked on a lot of planes and they all drip water in or after a rain. The worst one was a 727. I was changing a tire on the right main gear and of course it was raining. It was a waterfall right over the tire. I would just make sure all the drain holes are clear and hopefully your name will come up on the hangar list quickly.
-
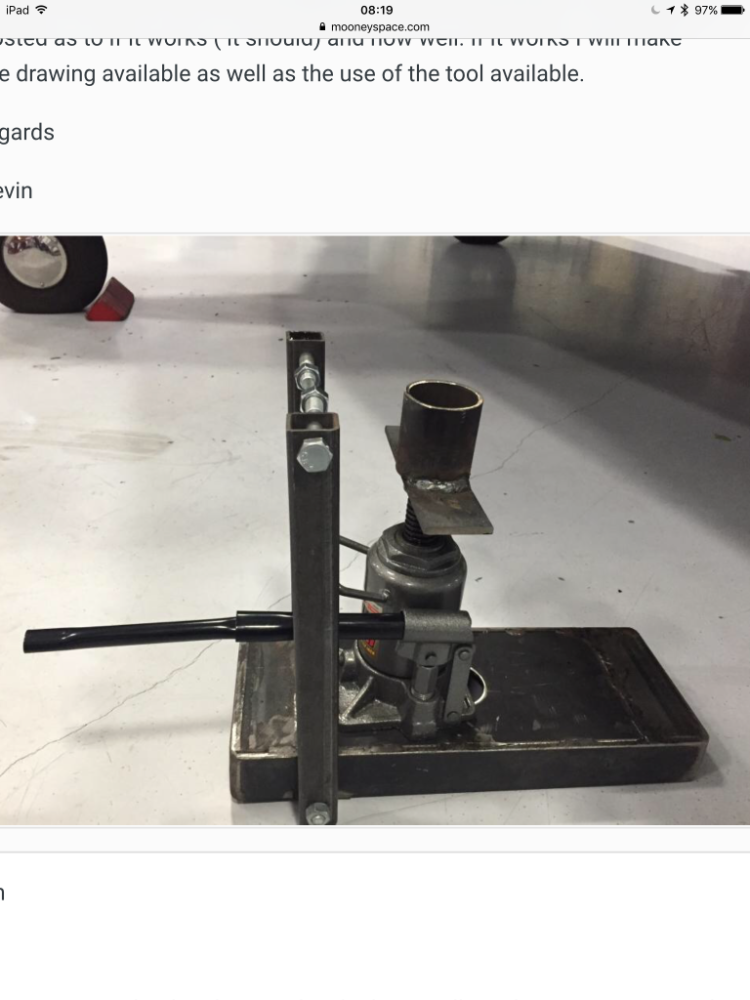
Here is another shock disk tool that a resourceful Mster made. I saved the pics.

-
hangar rash - flap dammage
65MooneyPilot replied to rwabdu's topic in Vintage Mooneys (pre-J models)
I have this tool and it works well. Drills out the rivets. https://aircraft-tool.com/shop/detail.aspx?id=1341A -
Positive Control System
65MooneyPilot replied to Mkruger2021's topic in Vintage Mooneys (pre-J models)
Just put a wide rubber band over the yoke switch. That is what people did in the old days. -
Try McFarland, they make the factory cables for Mooney https://www.mcfarlaneaviation.com/products/product/MC0713050-2/
-
KY 196 not going all the way to 136.00
65MooneyPilot replied to canamex's topic in General Mooney Talk
My Yaesu hand held transceiver will do 136.00. Would not have checked it if it wasn’t for this thread. -
My yokes are already powder coated, but maybe someone is interested.
-
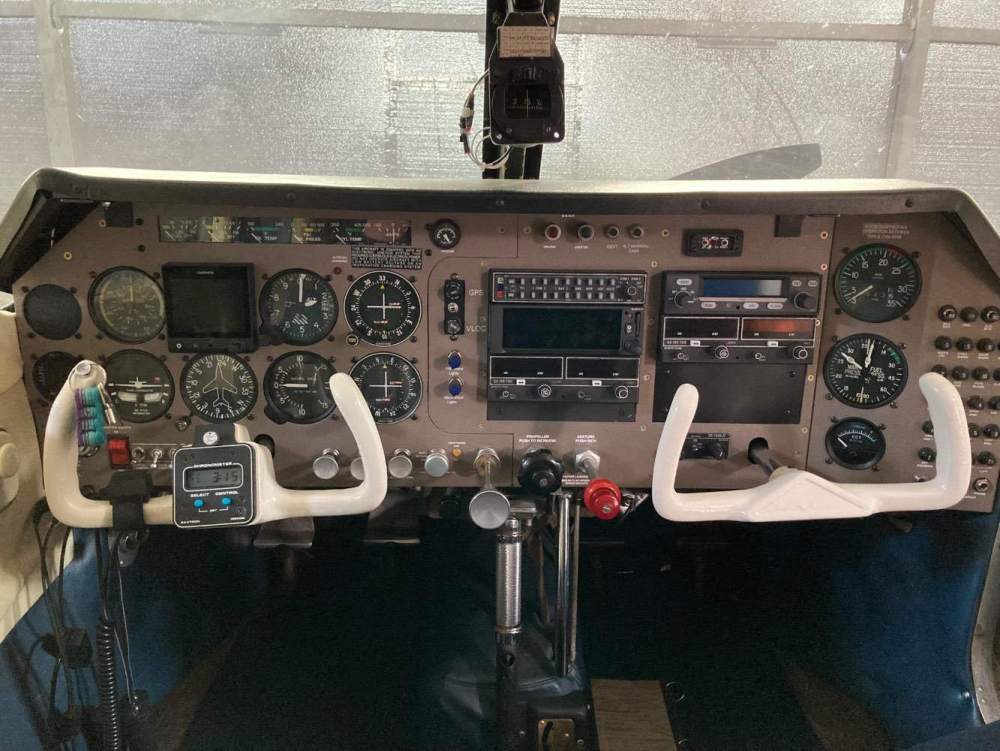
When I first bought my Mooney the PC system did not work and it took me approximately 5 years to get it going. I started with the gyro and had it overhauled. Then I found I had plastic servo cans that were completely cracked out, so I got a new set from Britten and changed the red tube in the left wing because of cracks in the wheel well. So at that point my system was tight and still not working. The next step was the pressure relief button on the yoke. I changed the O rings and that sealed it but did not fix it. I took the clock out and while flying I stuck a pencil in the grey vacuum line and the PC started working so then I knew the yoke button was the problem. However the problem turned out to be the holes where they are drilled in the yoke itself. The plastic on the yoke was pealing off so I removed it and saw the metal tape used under the plastic had fallen off under the cracked plastic and exposed the drilled holes. I removed the yoke and installed set screws in the holes, had the yoke powder coated and the PC system has worked ever since. I used a hand vacuum pump with a gauge on the servos instead of my mouth and that worked for me.


