

Shadrach
-
Posts
11,926 -
Joined
-
Last visited
-
Days Won
163
Content Type
Profiles
Forums
Blogs
Gallery
Downloads
Media Demo
Events
Everything posted by Shadrach
-
Has your F ever puked fuel out of the vents? I’ve managed to do that with other makes, but never the Mooney. Even if I did, it would end up on the ground not on the paint. Did Mooney have an alternative vent design that deposit fuel onto paint?
-
Have you ever had your lead levels tested? I have… While I am below the “safe” threshold, I am 99.9% sure that the lead present in my system is from exposure to TEL in avgas. I have been around airplanes since birth and have certainly been careless with regards to PPE while exposed to things like exhaust stains on the belly or direct skin exposure to Avgas. It is nasty stuff. However, I don’t think it has a measurable affect on those not directly exposed to it (pilots, line personnel, mechanics etc.) the idea that overflying airplanes are poisoning the public is pretty silly.
-
Are you concerned that the vented vapors are going to stain the paint?
-

Gold Plated Mixture Cable wanted!
Shadrach replied to Glen Davis's topic in Modern Mooney Discussion
I’m very sorry for your loss Cliff. That was one of the most horrific commercial aviation accidents of my lifetime. There was no way out of it. My sincere condolences. -
Gold Plated Mixture Cable wanted!
Shadrach replied to Glen Davis's topic in Modern Mooney Discussion
Something as simple as simplifying the mfg certification for parts that are non critical to flight. The FDA classifies medical devices according to risk. The level of regulatory oversight is determined by classification. Then there is FDA approval vs clearance which is a process to determine safety by comparison to an existing approved product. I’m not saying it’s a perfect fit, but we should not be regulating light bulbs and fuel servos under the same set of regs and level of scrutiny. It’s bad for everyone, including the FAA. -
G100UL is available at Reid Hillview (RHV)
Shadrach replied to UteM20F's topic in Miscellaneous Aviation Talk
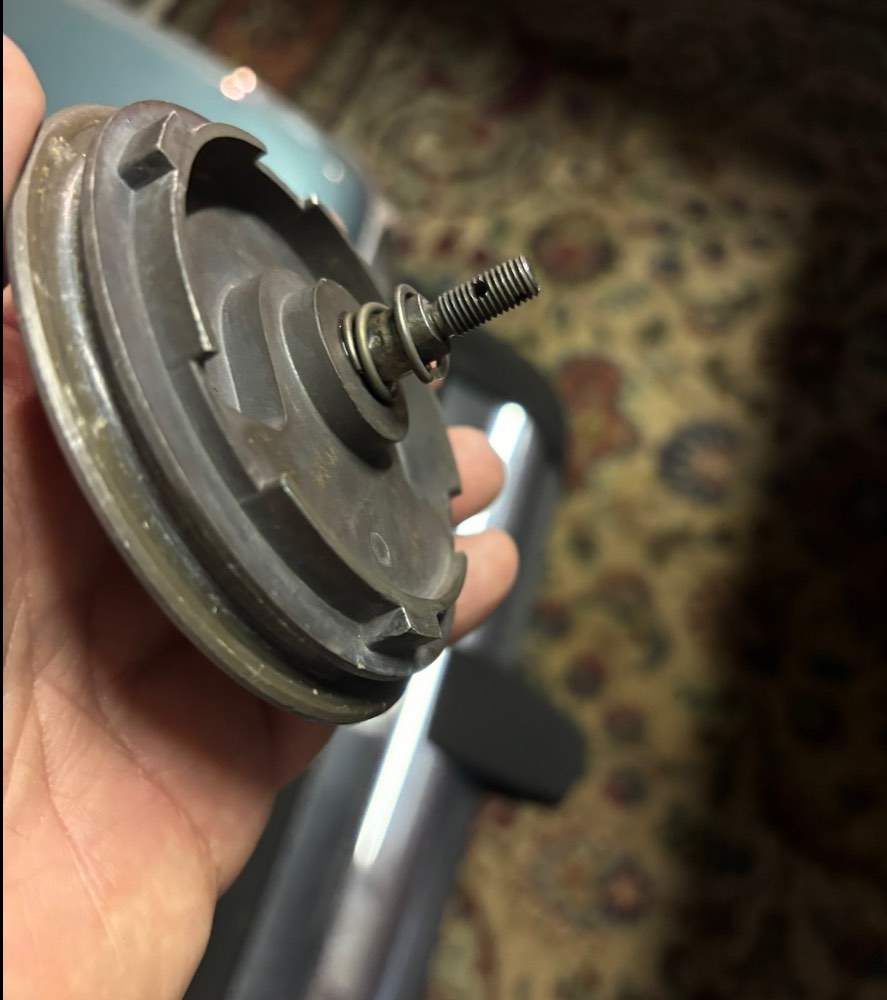
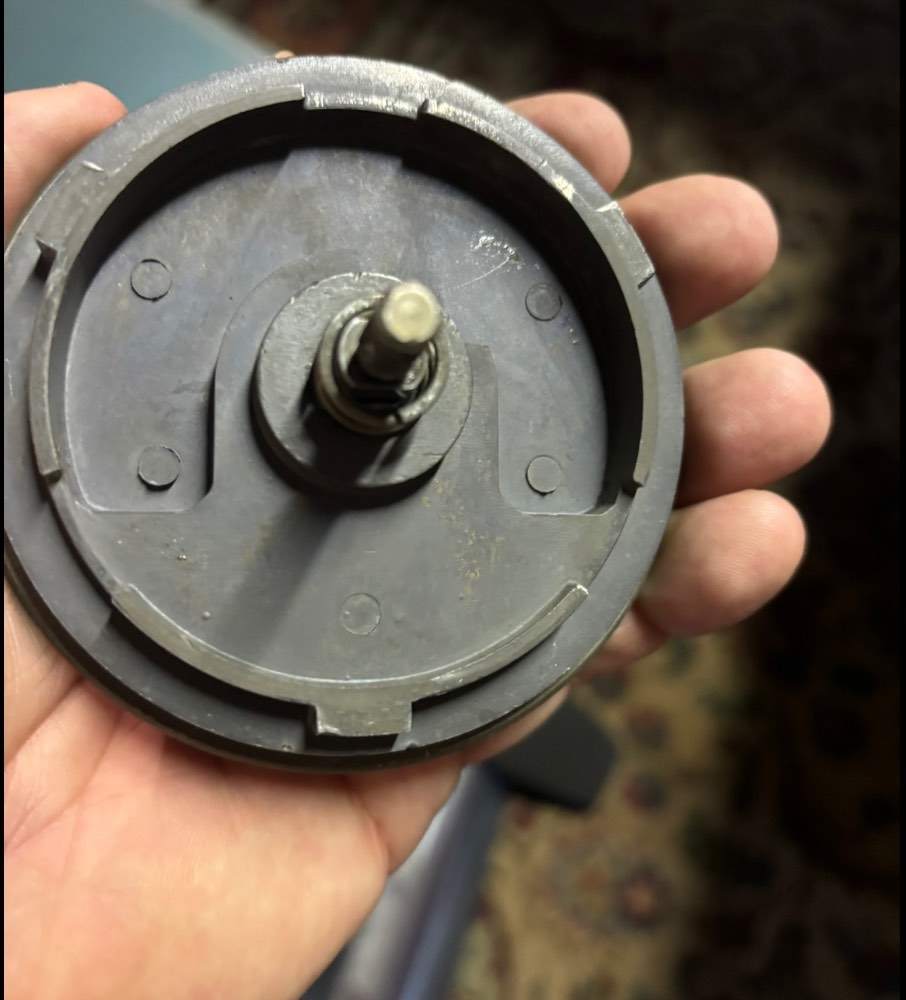
So I looked at mine yesterday (good excuse to swap out the o-rings and lubricate). They are not adjustable in terms of clocking position, nor is it really possible to install the locking plate upside down. The orientation of the cleats is fixed when the caps are fabricated.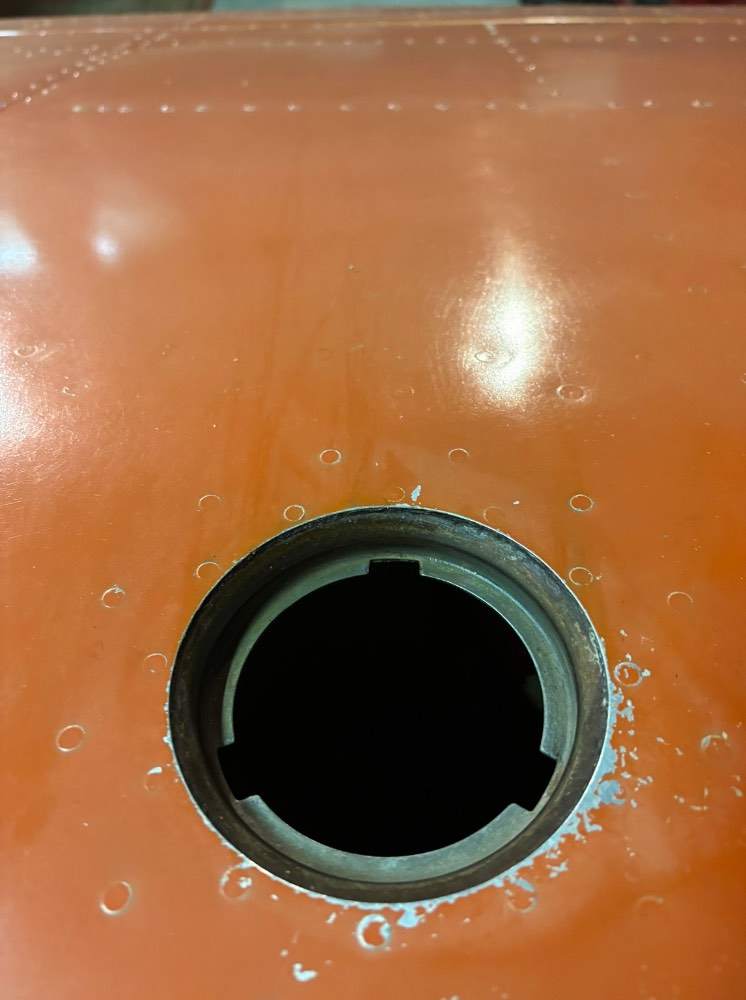
-
I would not call it lying exactly, just an unrealistic view of the shop’s liability. There’s always that first case and award that makes rational people think WTF? Hard to talk a service provider out of their policy decisions even if the current facts are on your side. Especially given some of the frivolous payouts awarded by juries.
-
Maybe he elected to “go around” when he heard the sound of metal on pavement and then landed normally. Would not be the first time.
-
Ram air cable?
-
Gold Plated Mixture Cable wanted!
Shadrach replied to Glen Davis's topic in Modern Mooney Discussion
The GA supply chain is in desperate need of some regulatory relief and has been for quite some time. It may be too late to make a difference. I’m nervously watching Univair and Wag Aero. -
Gold Plated Mixture Cable wanted!
Shadrach replied to Glen Davis's topic in Modern Mooney Discussion
Indeed, GA suffers from a surplus of capitalism…what we need is greater regulation. That should do it. -
G100UL is available at Reid Hillview (RHV)
Shadrach replied to UteM20F's topic in Miscellaneous Aviation Talk
This is why I wanted to look closely at mine. I don’t believe you can clock the top piece. I could be wrong. -
G100UL is available at Reid Hillview (RHV)
Shadrach replied to UteM20F's topic in Miscellaneous Aviation Talk
I don’t think so. I’ll look at them next time I’m at the hangar. No comment on the dirt. I have a T hangar neighbor behind me that squares up his Cessna with his hangar before putting it away. He has a dirt floor and every time he parks he blows a little bit of that floor over the wall and coats everything in my hangar. -
G100UL is available at Reid Hillview (RHV)
Shadrach replied to UteM20F's topic in Miscellaneous Aviation Talk
Are your left and right fuel caps indexed differently? Ive never seen that. -
G100UL is available at Reid Hillview (RHV)
Shadrach replied to UteM20F's topic in Miscellaneous Aviation Talk
Are they not peel and stick! -
G100UL is available at Reid Hillview (RHV)
Shadrach replied to UteM20F's topic in Miscellaneous Aviation Talk
CFR 14 § 27.1541 General. yes, you can install fuel tank placards on your plane. -
Lycoming Connecting Rod Bushing AD 2024-21-02
Shadrach replied to MikeOH's topic in General Mooney Talk
I am treating it the same way. We IRAN'd in 2010. The main bearings were replaced, but the rod bearings and bolts remained in situ. Not applicable. -
Io360 a1a cylinder blow by. Replace?
Shadrach replied to Teddyhherrera's topic in Vintage Mooneys (pre-J models)
“Learning it out” will increase combustion temps thereby heating up the plugs to a temperature that enables lead bromide to convert to gas. I’m not sure what that does for an oil fouled plug. Describing an engine that is only running on three cylinders as a 2-300rpm mag drop is a confusing way to explain what is actually happening. -
G100UL is available at Reid Hillview (RHV)
Shadrach replied to UteM20F's topic in Miscellaneous Aviation Talk
Since we’re talking fuel trucks, I’ve never seen one off field and I know we don’t have unleaded on field. I wonder if they burn 100LL in them. -
G100UL is available at Reid Hillview (RHV)
Shadrach replied to UteM20F's topic in Miscellaneous Aviation Talk
I wasn’t speaking about trucks in Utah. I was suggesting that the folks there mostly know homemade from purpose built…. This is a purpose built Isuzu N series fuel truck: And this is what you call homemade… The “Water” label is a surefire way to keep the authorities from questioning you.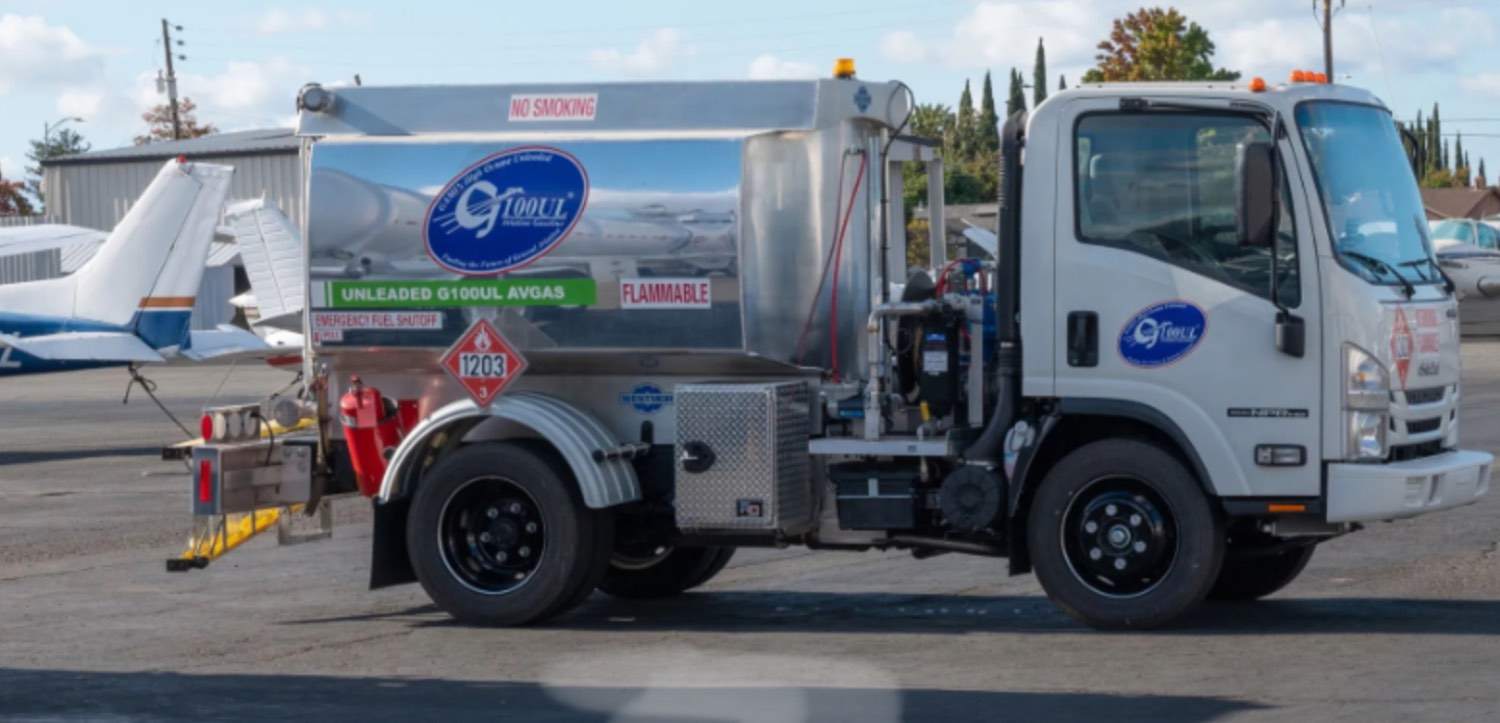

-
G100UL is available at Reid Hillview (RHV)
Shadrach replied to UteM20F's topic in Miscellaneous Aviation Talk
I know of people that have tried. Results are a mixed bag. The late great John Deakin had this to say about field reps from both companies. "Lycoming and TCM field tech reps seem to me to serve but two purposes. First, if the engine is running at all, no matter how badly, they must be able to look you right in the eye and keep a straight face and say, "Oh, that's normal." Second, if the engine has failed catastrophically, it is their job to find any scrap of evidence that will allow them to say: "Pilot abuse, not covered by warranty." I’ll never forget the Lycoming “Tech Rep” at the Arlington WA airshow somewhere around 20 years ago whose sole contribution to the discussion was literally screaming, “I wouldn’t recommend lean of peak to my worst enemy!” He said this over and over as if bombast and volume made his point. As with any rule, there are exceptions -- and I suspect the good field tech reps will mostly agree with the above." -
G100UL is available at Reid Hillview (RHV)
Shadrach replied to UteM20F's topic in Miscellaneous Aviation Talk
They could only deny claim (in the US) if the use of the unapproved item (fuel in this case) is determined to be the cause of the failure. Now, we all know that the what's is determined to be causal in a court of law and what is actually causal in the real world are not necessarily the same thing. If you were running G100U in a new engine and the main bearings failed due to an oil blockage due to contaminants introduced during assembly or a defective oil pump, the use of G100UL would not be grounds for denying the warranty claim. They might try to make a case for it, but that's a heavy lift. I personally think this has become political and I am deeply disappointed by the public statements made by several manufacturers. If you dig deeper, you will see that none of the manufacturers give a specific definition of approved fuel. That is likely because manufacturers are not in the business of approval. They are in the business of seeking approval. However, the FAA is in the business of approval and they have approved G100UL for use in all certified, spark ignition recips, via STC. Much of what is said in the previously mentioned aircraft and engine manufacturer statements is just legal noise and has no teeth. -
G100UL is available at Reid Hillview (RHV)
Shadrach replied to UteM20F's topic in Miscellaneous Aviation Talk
I was just teasing you a bit given my experience with the ingenuity of the people that populate the mountain states. I suppose I could’ve teased @Ibra about it, but it seemed more appropriate to aim at a fellow American… -
G100UL is available at Reid Hillview (RHV)
Shadrach replied to UteM20F's topic in Miscellaneous Aviation Talk
I fly an IO360 and the red belly of my plane is grey with exhaust residue from the exhaust pipe outlet to about where the spar carries through. -
Sorry, but those images are lousy. Try reposting some that are in focus. And limited to the specific area in question. Might help to light the area and turn off your phone’s flash. that being said, it looks like there may be a bulge between the spar and the cap. Hard to determine how bad from current images. If it is bulged, the wing will likely need to come apart. $$$


