

Elijah
-
Posts
52 -
Joined
-
Last visited
Content Type
Profiles
Forums
Blogs
Gallery
Downloads
Events
Store
Everything posted by Elijah
-
Just to follow up, I pulled the old regulator out and hooked it up to a variable bench power supply, with a tail light bulb on the field output. With the voltage set a tenth or so under the regulation point (14v), tapping the reg it on the bench I could get the bulb to go on and off. At that point I went ahead and ordered a new regulator. After installing that, everything has been working fine again. I think the pot that adjusts the set point in the old regulator is worn out, that seemed to be the component that was sensitive to tapping. I might have tried to fix it but needed something certain to fly back home a few days later... The old regulator was the original, an OECO 20082. It seems like the regulation is basically done with a comparator circuit. It turns the field fully on when the voltage drops below the set point, and fully off when it goes above. It's effectively a PWM control, with the frequency set by the alternator's response time. For mine it was going at around 20 hz at idle. I have not studied how the new one works but I'd imagine it's similar, just a higher frequency PWM control.
-
I would be interested in that, I'll PM you. I am going to go look through things today and hopefully I can find a wiring issue but if not, I'd love to have that on hand. Yeah I have actually had some luck fixing voltage regulators in the past. Of course not for certified aircraft but they all work similarly. This one seems to control field currently by PWM. I studied it a bit last time this happened but I could never get the problem to show up again. Of course now that I'm on a trip now it shows itself! At least it's very consistently failing now.
-
I just found this thread, this sounds exactly like what I'm seeing. I'm going to take a close look at the canon plug... https://mooneyspace.com/topic/47294-voltage-regulator-alternator-or…/page/2/#findComment-838077
-
I'm happy to hear that, I imagined it was all potted in plastic and nothing repairable. Maybe it can be fixed. I think I'll take it out tomorrow. I remember it's under the dash on the firewall and not real easy to get to.
-
On my flight to Wyoming today, the over voltage protection started tripping. This has happened in the past but so intermittently I could never pin down the problem. The alternator has been checked and seems fine, good brushes etc. So, I am thinking voltage regulator but I thought I'd see if anyone has experience with this or any other thoughts. What's happening now is within a minute of powering on the field breaker (sometimes immediately, sometimes a minute, kinda random) the charge current spikes and the voltage goes up to 14.8, 15 and then the OVP trips, the voltage light comes on, and the bus voltage returns to the battery resting voltage. Cycle the field breaker and it all repeats. The charge current can spike almost to 60a very briefly. It's gotta be the regulator right?
-

ADS-B for 1984 M20J with original equipment
Elijah replied to Beard's topic in Modern Mooney Discussion
I just went through this same calculation on my project last year - my conclusion was the Garmin GDL82. It has a built-in WAAS source and goes inline with your existing mode C transponder. I have an old KT-76 transponder. My thoughts were as follows: There are a bunch of relatively inexpensive ADSB-in solutions out there (stratus, stratux, sentry etc) and I'm happy with that. In the panel ADSB-in adds a lot of cost over these solutions and I am always flying with an ipad or phone anyway. The uAvionix skybeacon is the cheapest and easiest ADSB out solution, but I have had issues in other planes with their LED strobe making noise on the radio. It's out in the elements, plastic, and surely has limited life from that. The connection to the transponder is wireless and this makes the configuration a bit more fiddly to get it to reliably pickup your squawk code. It does support anonymous mode but you can only switch it from the app, while on the ground - also a bit fiddly. The garmin GDL-82 is about the same price as the skybeacon and requires more install work. But, it's very robust and I have no doubt it will last for many years. It's hardwired to the transponder and as such is always synced to the squawk code. You can switch in and out of anonymous mode at any time. I mounted the GPS antenna on the tail behind the baggage area and the GDL box is in the belly under the passenger seat. I bought the GDL-82 used for $1200 and am very happy with it. These are all "UAT" solutions and the only way to avoid your tail number going out on the air all the time. The other path you can take is a new transponder. As others have mentioned, the Garmin GTX-345 or Stratus ESG are popular. I considered both of those as well but given the cost and all the ADSB billing nonsense, the GDL-82 made the most sense to me. BTW after a few cross country trips, I will say that FlightAware's coverage of the UAT frequencies is not that great. Edit: just noticed you're in Canada. UATs are of no use for you there. The GTX-345 is the only transponder I'm aware of that has the required antenna diversity (antenna on top and bottom of the airplane). I think the uAvionix tailbeacon X would work as well.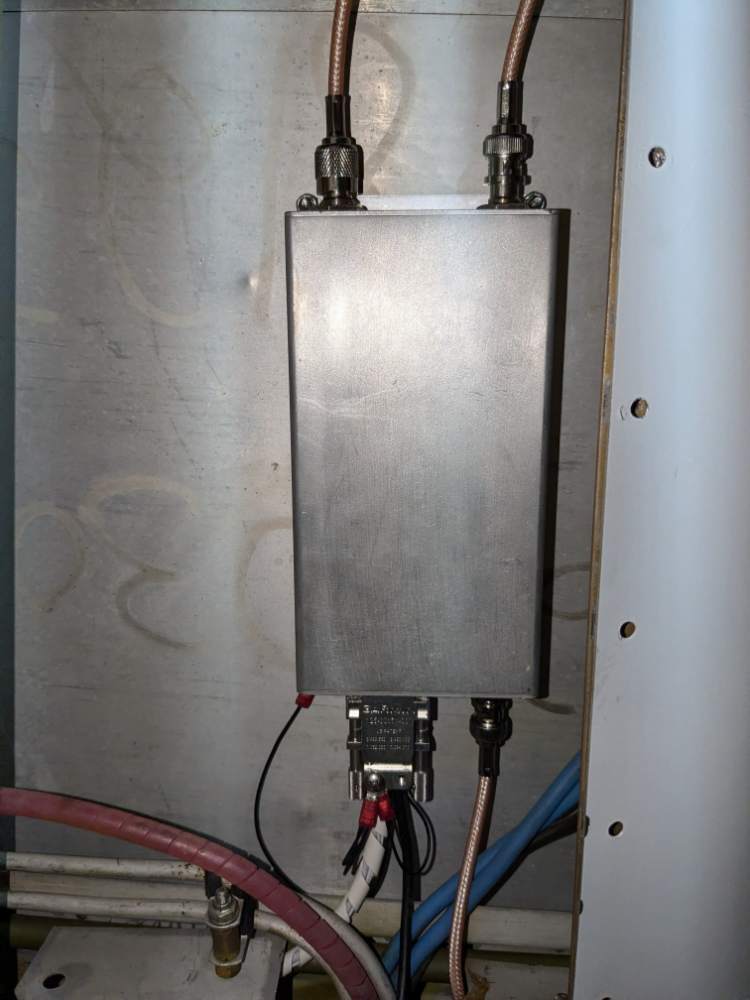
-
Thank you! Those are great, very helpful.
-
Got a picture of how you hooked this up for the cabin door? Would love to see....
-
New to Mooneys and fresh PPL, what does this switch do ?
Elijah replied to Souhail's topic in Modern Mooney Discussion
That transponder requires an altitude encoder so I'm sure you still have one in the panel somewhere. I also think those transponders can display the altitude the encoder is sending, I'd turn off the encoder switch, power everything up and see if the transponder still displays correct pressure altitude. Then you'll know if that switch is doing anything or not :-) -
That airport it not very far from here, I've flown over it before. It definitely sounds like a good place to avoid. During COVID, the conditions on the hualapai reservation were very similar to how it was in China (severely restricted freedom of movement) if that gives you another data point. I think I have enough tools onboard to have pulled the U joint from one of those trucks and nope'd on out of there. Grand canyon caverns is just down the highway and not on indian land. They are very friendly to airplanes and although the runway is dirt, it's in good condition and plenty large enough for a mooney.
-
Tis the season - Post up Headset sales, please!
Elijah replied to AJ88V's topic in Miscellaneous Aviation Talk
Do you recall what the "on sale" price was? I borrowed one from a friend awhile back and was impressed with these as well. Wouldn't mind picking one up at some point, probably the bluetooth version. -
Thanks guys for the help. It looks more like the A612 lens but according to the IPC from my serial number (-0301) it should be the A428 lens. I will reach out to Gallagher and see what he can find!
-
I'm looking for one of the plastic hemisphere covers that go over the strobe bulbs. I think this is the original strobe that was installed. I believe it's this - https://lasar.com/lights/lens-cover-202816 Does anyone know if you can still get these somewhere, or better yet a glass equivalent? The existing plastic ones have seen better days!
-
My friend did that part but I think it was basically getting a DAR to look at the airplane and write a report to the FAA saying yes, this airplane is actually repairable. The FAA then returned the salvaged data tag which was much worse for the wear. That worn out data tag went to mooney and they issued a new one with the same data on it. And after all the repairs were made, that same DAR inspected the airplane and issued a new standard airworthiness certificate.
-
It's almost exactly 5 years since that happened. I'm really sorry it sat there for so long, the sun really took its toll on everything. Whoever salvaged it for the insurance company took the radios and data plate, and that missing data plate caused no end of problems. That's why it was stuck there so long. Well that, plus the logistics of working on it when it was stuck in Winslow. It'd be interesting to see a few of the pics you took back then! Feel free to post here or PM me.
-
Well I am happy to say that after all that work, she's finally flying! Parked on the ramp in Kingman Flying over northern AZ looking north Departing KPHX Pretty much everything is working and there were no issues on the first flights. Of course "pretty much" means not everything The EGT gauge is intermittent, there was a loose connection between the selector switch and the meter, fixed that and it was good for a few flights but now it seems like maybe there is another loose connection in the selector switch. The right tank also has a weep along the bottom of the spar. I will need to open that tank and patch that, maybe a winter project. And, the century IIB autopilot only tracks the heading bug. No matter what you select on the heading box, only tracks the heading bug. But that's all relatively minor - it really does fly and it flies nice! The new windows are amazing to look out of, that's the most visible of all the work I did. I'm seeing 150 - 155 knots true around 8500 ft. That's also what flight aware showed on its fateful flight out to arizona from socal.


-
That's crazy and a real shame. $5 to $6 is probably average here in the US. The price difference is nearly all tax - are you saying you're not getting good value from that additional $8/gal?
-
Yep this is what I use, or fuel, whatever is handy at the time. Small pan full, soak a rag, wipe, rinse, repeat. Petro distillates by definition cut oil well and don't harm the aluminum. I do use gloves to protect the hands...
-
Help with part number for OAT probe in wing.
Elijah replied to Will.iam's topic in Modern Mooney Discussion
So I guess this worked for you? It's a thermistor? I have the same problem with my J... -
Sounds good to me. It's a shame how expensive new plastics are for these planes, and apparently for that you don't get a very good fit either. The plastics in my J have seen better days but after hearing the wait time and cost for aero comfort, I repaired the cracks with fiberglass and called it good enough. I'm sure these were originally shaped from molds like you're doing, how many different molds were there??? I mean how much variation was there between airplanes?
-
The fact that the other one is not bent to me suggests it pretty much has to be mis-rigging. Or, like TerryDubYa said someone pushed the gear up into the well while it was on jacks. When properly rigged, there's an arm near each gear leg that goes "over center" and at that point no matter what you hit or run into, it's not going to put any additional force on these pushrods.... it would be interesting to see a pic of the right main gear linkage (see pic) now when the gear is fully extended. Is the preload spring compressed at all?

-
I posted some pictures over here:
-
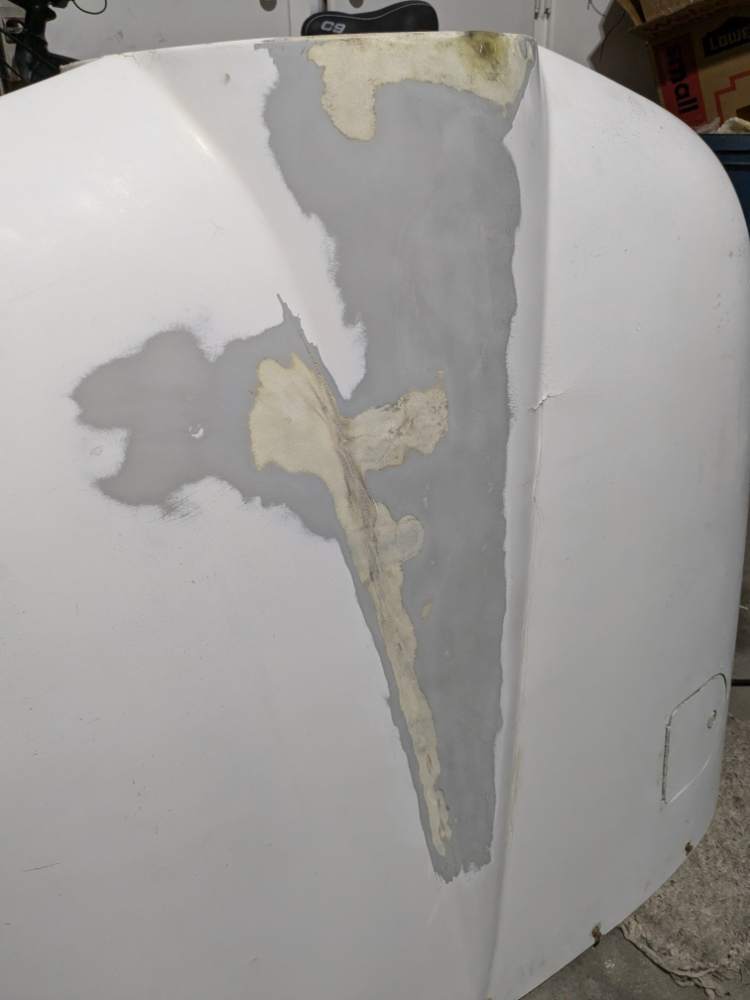
Time for an update. Got it all back together and weighed it - got 1778 lbs empty weight. It's pretty much ready to fly minus some paperwork. My I/A friend is working on paperwork and in the meanwhile I'm continuing to fix little cosmetic things. Most recent was the cowl. Lower cowl is in pretty good shape, but the top half had a crack up front near the spinner and lots of little cracks on the top surface. Seems this is a pretty common problem: Here's what the top looked like. Everywhere there were cracks, I sanded down the paint to glass. I scarfed out that darkened area and put a single layer of glass on top. Later on I sanded everywhere down to the gray primer - sorry forgot to take pics of that. Someone had glued a curved piece of aluminum tubing around the lip of the spinner. Obviously wasn't doing the job: So I ground all of that out and got down to clean glass, then put a couple layers of glass behind it. Once that was set, I scarfed out the front of the crack and layed multiple layers of glass in there as well. Each time I do glass, I paint on epoxy, then the glass and get it wetted out, then peel ply, then paper towel and finally some method of holding things tightly together. Usually clear packing tape but sometimes have to get a little creative. So that took care of the lip around the spinner. There were also spots around the air inlets that were delaminated and worn through: So using similar techniques, I cleaned it up down to clean glass and then built up layers of new glass. Didn't get a very good pic but this will give you an idea. Later on I scarfed in glass on the outside as well to make that lip square. Then I took care of the cracks along the top of the cowl. The glass wasn't really broken through but kind of flexible, with the epoxy kind of broken loose from the glass fibers. There were some old patches done over top of the stiffener channels but they had way too much resin in the glass and it was real stiff and breaking loose. I ground all that off carefully and got down to clean factory glass, then started laying new glass on top. I did one layer just over each stiffener, then two layers over the whole area: That pic only shows the start but anyway, after getting all the glass wetted out I used a simple vacuum bag setup to squeeze it all together. I wrote about the process in more detail here: But it worked very well, highly recommend this if you do a fiberglass repair to the cowl. I can't think of any other way to hold this much area tightly against the surface while squeezing out excess epoxy. I ended up with a very thin, light and stiff patch that is similar to the factory glass. Here is the finished result (disregard the painting overspray): I know two layers (3 over the stiffeners) doesn't sound like a ton but as far as I could tell, the original cowl is only 3 or 4 layers total so I figured a 50% increase in thickness is significant. I'll let you know how it holds up After that I sprayed the whole thing with primer to fill in the weave on the new glass. Sanded and got that all smooth, then paint: Now it's the nicest looking part of the plane I used Lumabase primer (sandable) and Limco single stage urethane paint. "single stage" meaning you don't need to put a clear coat on it - just mix with a hardener, thin and spray. I have used this on other aircraft projects (including the wheel wells on this mooney) and been impressed with how well it's held up over time. It's also easy to spray and get nice results (no orange peel). I get it from a local automotive paint store.


-
It's pretty much done, we're working on paperwork and I'm doing misc cosmetic stuff, like the upper cowl. I mean I don't know if an old airplane is ever "done" but it's ready to fly, let's put it that way! I should update my thread
- 64 replies
-
- 1
-

-
- carbon fiber
- fiberglass
- (and 2 more)
-
I recently did some fiberglass repairs to my top cowl. I added several layers of fiberglass cloth to strengthen the area around the "bump" on top the cowl which always cracks. Mine had a lot of cracks and the fiberglass was "flexible" aka broken in spots. I went with fiberglass for 2 reasons; 1 I had it on hand, and 2 I figure the rest of the cowl is fiberglass and has held up for nearly 50 years, so why reinvent the wheel. They just made it a little bit too thin on top, which a couple extra layers will fix. I have done fiberglass repairs before and my experience is over a large area with curves (like a cowl) it's hard to get the cloth to both lay flat AND get all the excess epoxy out. (can usually do one or the other but not both). As others have said, more is not better when it comes to the amount of epoxy in the fabric. So for those reasons I chose to buy the stuff to vacuum bag it - it was not expensive but I had some of the stuff on hand. I'll give you a quick list in case you want to do the same: Vacuum pump & AC gauge/manifold. I had this already from doing car AC systems but you can buy for a couple hundred or rent from autozone for free. These don't pump a lot of volume but I was able to get a roughly 24" x 20" area sealed up enough to pull plenty of vacuum. If you did a much larger area it might be harder to seal all that and you'd need a bigger capacity pump. 1/4" air hose and adapter to go from 1/4 NPT to 1/4 flare to adapt to gauge manifold, you can get these at local HW store. I got the hose from harbor freight. Vacuum film: https://www.aircraftspruce.com/catalog/pnpages/01-14805.php Vacuum port: https://www.aircraftspruce.com/pages/cm/vacuumbagging_valves/vbvacvalve2.php Breather material: https://www.aircraftspruce.com/catalog/cmpages/vb3450breather.php Release film (peel ply): https://www.aircraftspruce.com/catalog/cmpages/vb5201breather.php Sealant tape: https://www.aircraftspruce.com/catalog/cmpages/tape01-01602.php BTW the sealant tape is key, I doubt another type of tape would work so if you skimp on anything, don't skimp on that. Or the peel ply. I used the other half of the AC gauge manifold to bleed vacuum off as needed to pull about 15" of vacuum. I paint on the epoxy (I used aeropoxy), lay on a layer of cloth, get it all wetted out, then paint more epoxy, next layer of cloth, etc. Then the peel ply. Then the breather material. Then put the sealant tape down around the area (clean a strip with alcohol right before putting down the tape) and put the inside half of the vacuum port somewhere you have a flat spot. Finally the plastic film, push it down tightly all around onto the sealant, hook up the port and then start pulling vacuum. As it tightens up you'll hear any leaks and I was able to seal them up by just squeezing the tape down more. It's thick and rubbery and tries to "suck" into the cracks sealing leaks as the vacuum pulls down. Anyway, I was very happy with the results. It looks as good as the factory glass. Definitely worth the extra effort.
- 64 replies
-
- 3
-
-
- carbon fiber
- fiberglass
- (and 2 more)
