
Elijah
-
Posts
52 -
Joined
-
Last visited
Content Type
Profiles
Forums
Blogs
Gallery
Downloads
Events
Store
Everything posted by Elijah
-
I realized I am missing the rear seat belts (rear seat was out of the plane when I got it). I'll have to buy some either new or from a salvage place unless anyone here has some they want to get rid of? I see where they attach in the center but not sure how they attach on the sides? Probably bolt to the plates at the edge where the lower seat back attaches? (see pic). Any pics of a similar airplane would be appreciated. This is the non folding, bench seat.

-
Got all the windows in and I must say they look fantastic. Makes it a whole new airplane. I have the interior back in now as well and we're getting close to doing weight and balance. I put fiberglass patches on the back of the interior pieces where they were cracked and gave them a light coat of white paint. All antennas are mounted and all the belly skins are on. Starting to look like a flyable airplane again. I'm missing a couple of the quarter-turn, cam lock style fasteners for the cowl, I think a large one and a small one. Any suggestions on where to get new ones? I turned up sky bolt with a quick search, is that what people are using?


-
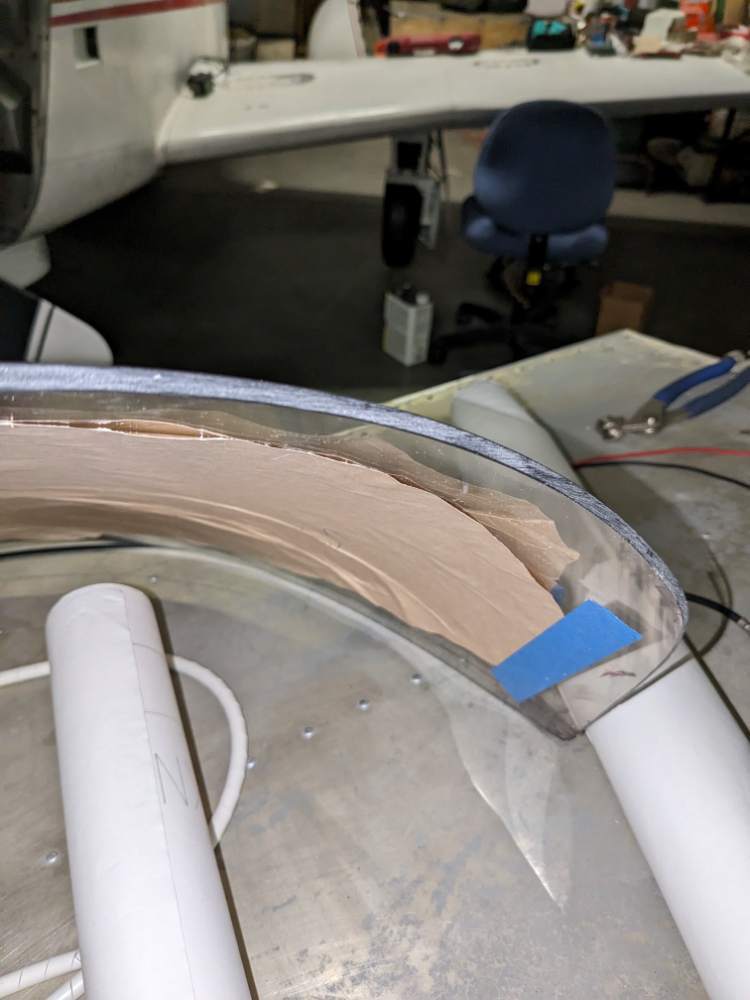
I have the two rear windows installed and the rest trimmed and ready to go. Windshield unsurprisingly took the longest to get right. It actually was fairly close as it came from great lakes, I don't think anywhere required more than 1/2" removed. I got it to fit and then took a little more off all around so there is some "wiggle room", hopefully avoiding any pressure points. I have been attempting to glue the windows roughly in the "middle" such that the edges are not against the metal frame anywhere. I did all the trimming with a pneumatic cutoff wheel and die grinder, and a small handheld belt sander to finish. And finally some hand work with finer grit to leave a nice smooth edge. (Last pic is as the belt sander leaves it prior to hand finish) The masking tape worked well to keep sealant where I wanted during the gluing process. Once the window was held in place from inside, I would wipe the excess sealant that squeezed out and then carefully remove the tape leaving a nice little bead along the edge. Next up I think I'll glue in the windshield, followed by the two front side windows.


-
Yep if you look close, the boost pump switch cover has already been replaced, by @AH-1 Cobra Pilot Another one just broke, I'm going to order more from him. They are excellent and the writing being laser etched should hold up well. He also printed me new louvers for the overhead air vents - need to try those out soon. I'm a radio geek and will have fun playing with it vs just a blank spot in the panel :-) It's pretty easy to rip stuff out later, putting it in is the hard part!
-
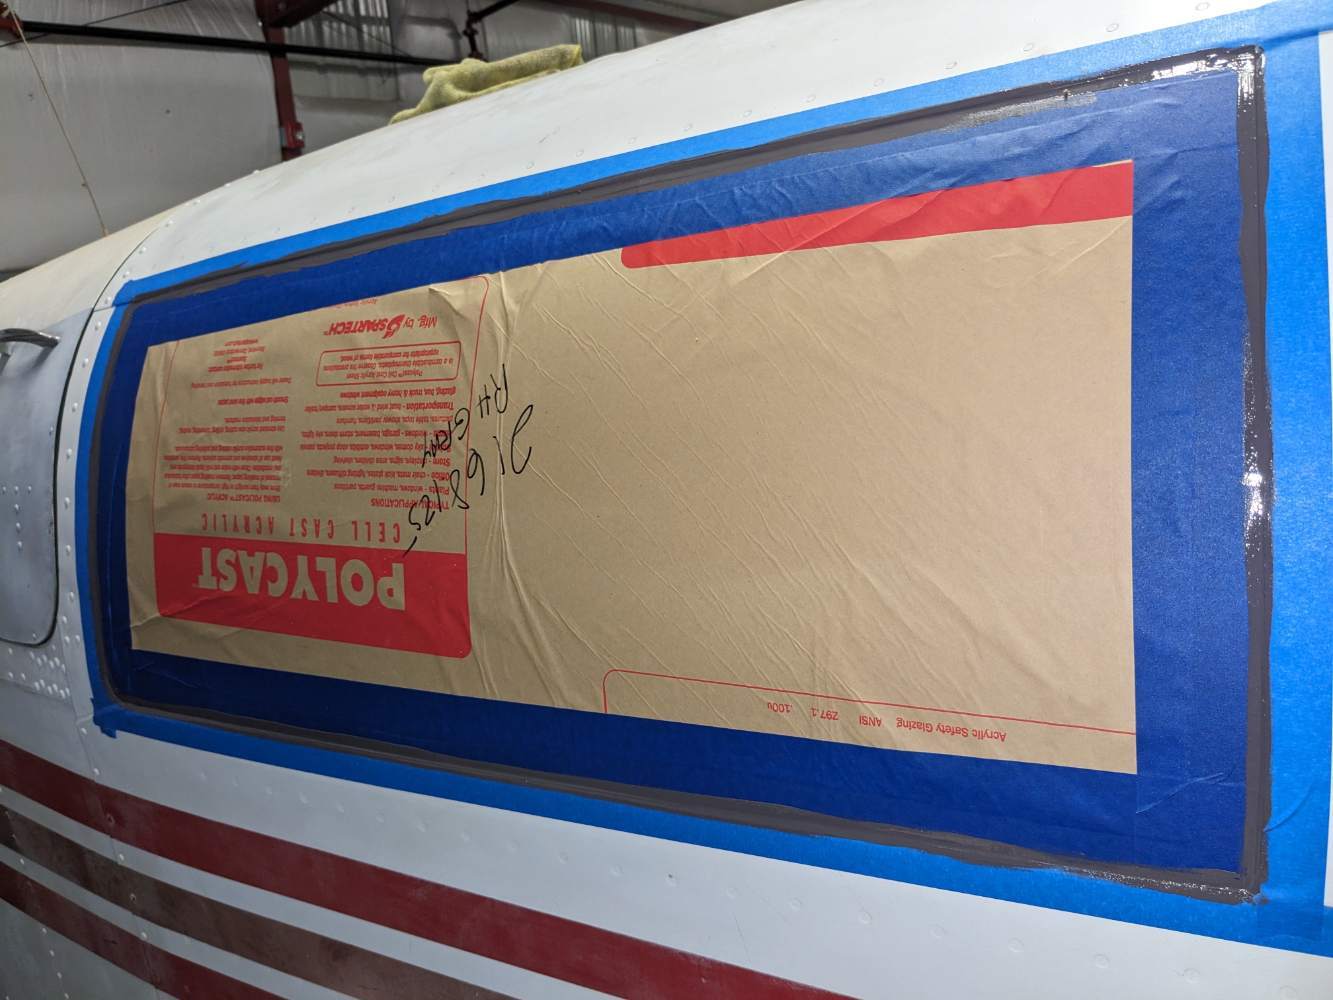
First window is trimmed and ready to glue in. I have painters tape right at the edge of where the window joins the fuse - I'm thinking this will keep any sealant that squeezes out from getting on the visible part of the window. I'll wipe off the extra and let it cure, then pull off the tape. Anyone else done this and have a better idea? I'm using cs3330, it's extremely sticky and the only thing I've found that really cuts it is MEK - which would definitely be a no on windows!

-
I just went through this with my 77 J project. I could take dimensions of my old skins but you really need your old skins to make an effective copy, they aren't just square and of course you need to match all the holes exactly. If you're just looking for an estimate of how much material to order, I bought 10 ft of 48" wide, .032 2024T3 from airpartsinc.com. That was plenty to make all new skins and I have a decent bit leftover. Repairing/fabbing the bulkheads that hold the skins is the hard part...
-
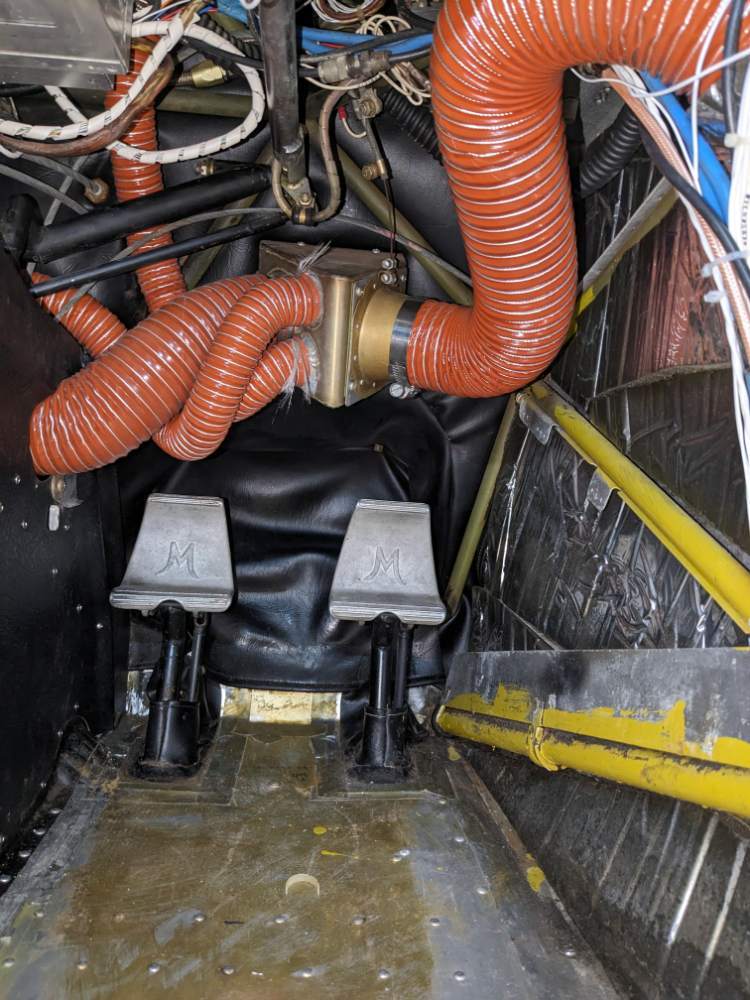
Finished running the new scat tubing tonight (minus two hose clamps). The old stuff had completely disintegrated.
-
That's a great idea, thanks! I need to post progress on here more often to get all you guys good ideas lol. I actually have a couple spare 170s, I should see if any of them look better. One reason why I kept the 170, spares are cheap or free.
-
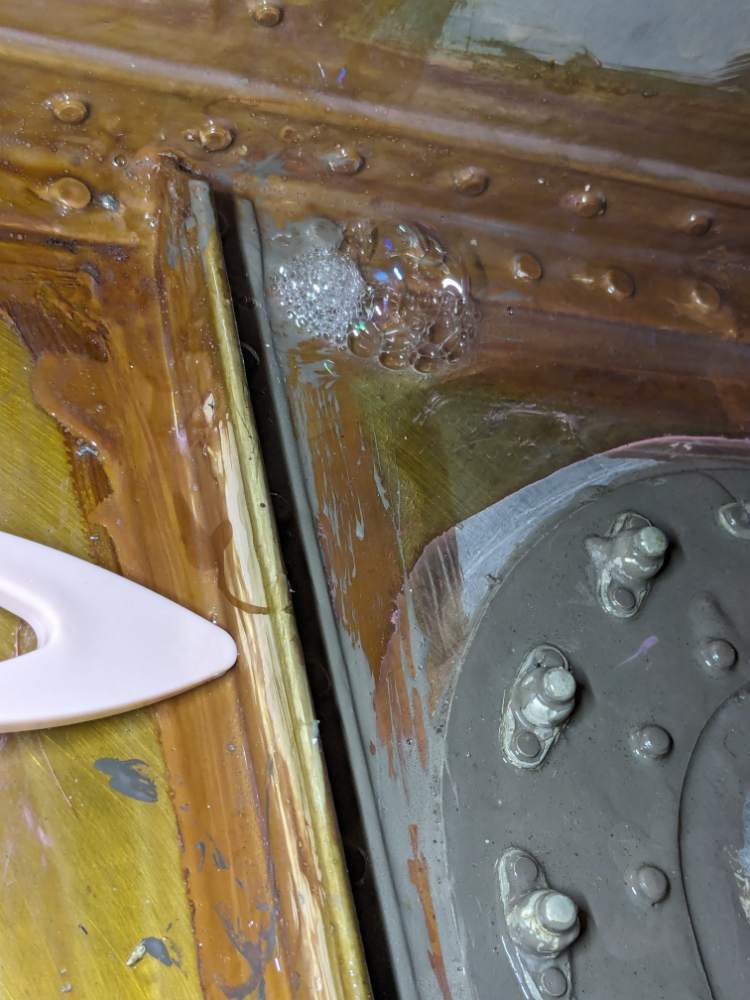
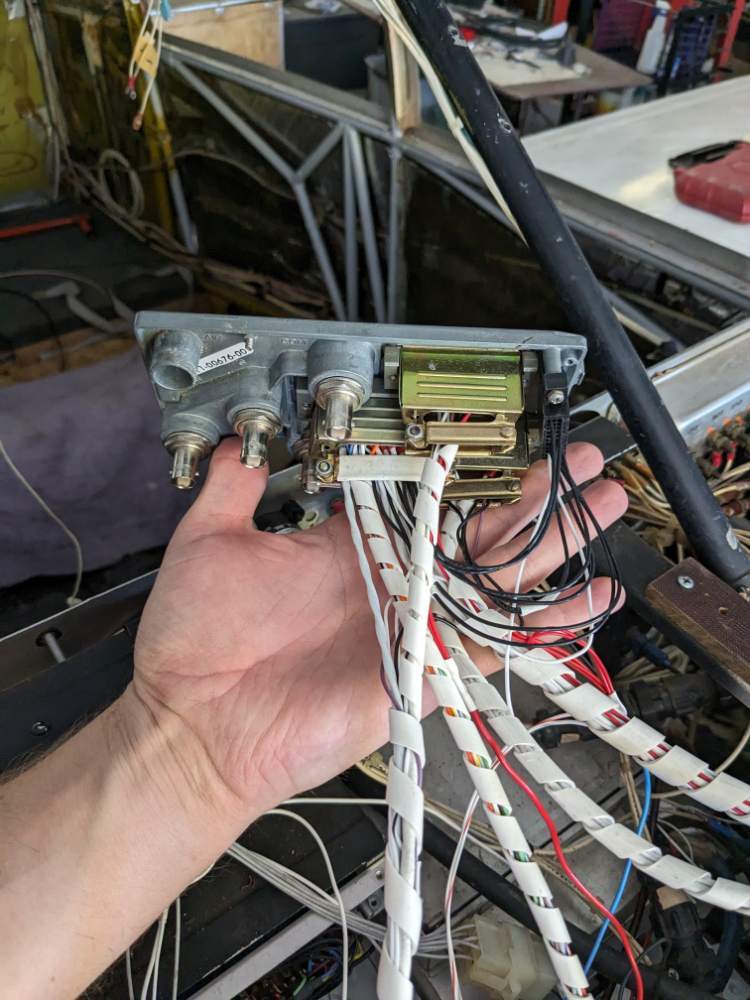
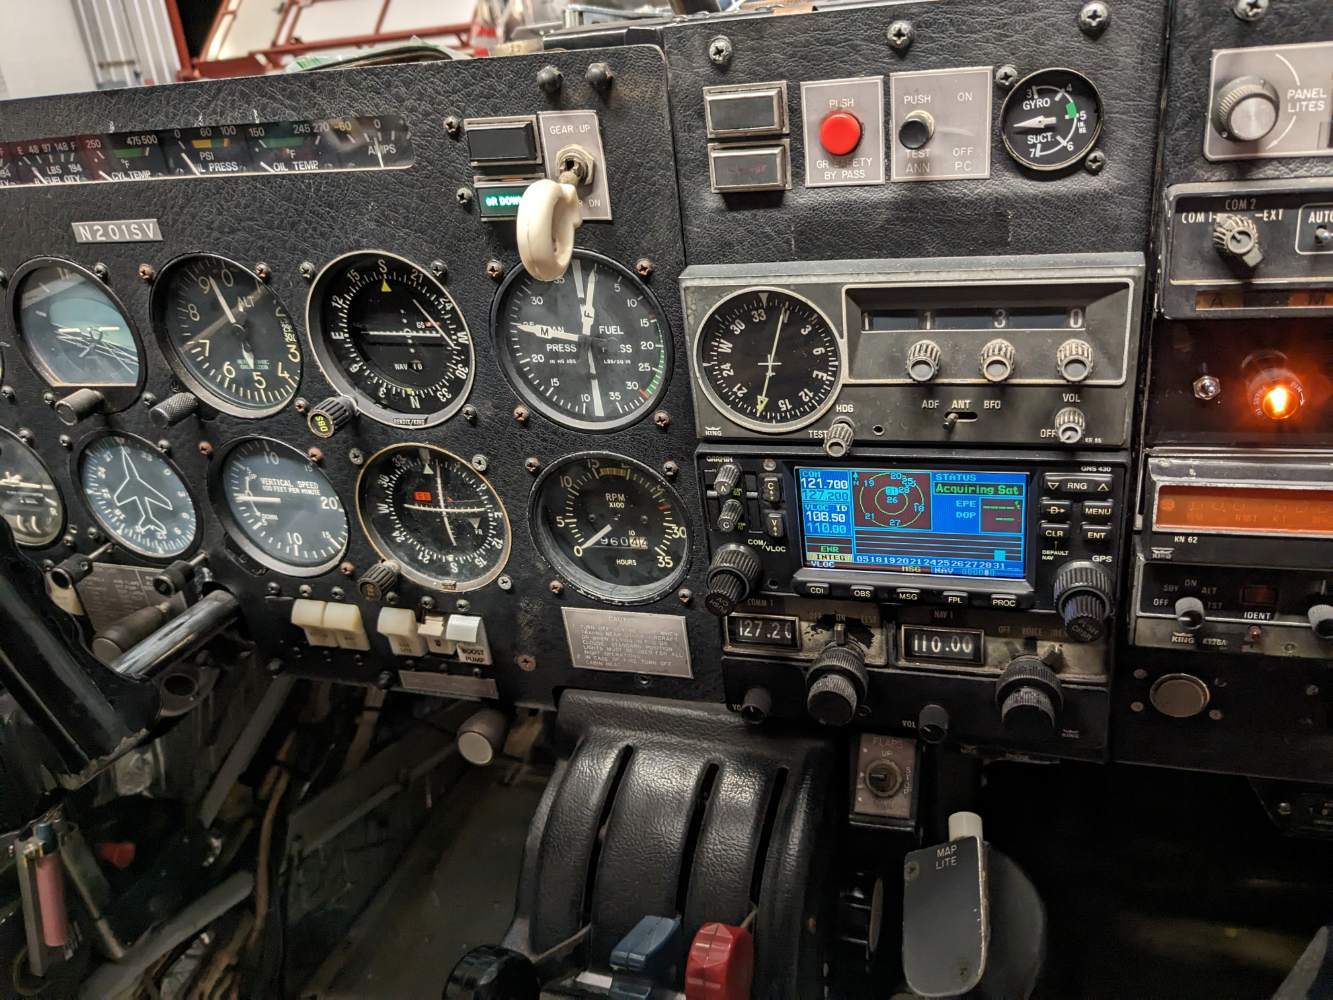
Haven't posted for awhile but the project has continued on and the end is in sight! At least the end of what I will call "phase 1", that is getting her airworthy again. Work has been focused on a few different areas: Finding & patching leaks in the left fuel tank, removing the old windows, and avionics. And all kinds of little stuff like replacing SCAT tubing, replacing/installing antennas, etc. I used Don Maxwell's shop vac and soap method to find the leaks and it worked very well. Stripped the old sealant down to metal around each leak, applied CS3204 and, once cured, CS3600 on top of that. Then re-checked for leaks and it looks good. We'll see how long it lasts, fingers crossed it will last awhile! I thought it's worth trying a simple fix before going all out with a complete strip and seal. I removed all the windows and windshield by slowly working a putty knife around each one to slice the old sealant. Then polygone, heat, and elbow grease to remove the remaining sealant from the aluminum in preparation for the new windows. I decided to mount the GDL82 under the passenger floorboards. I put the warning light and anonymous switch on a panel over the hole where the old Loran used to be. It's powered off of the existing transponder breaker. Since the windshield was out and I thought of how much easier it would be to do it now, I decided to replace one of the kx170 radios with a garmin 430. Got a deal on a non-waas version together with a KI209A indicator and spent the last couple weeks of evenings getting it wired up. There are a lot of connections on one of these babies, I know why avionics shops charge what they do for an install of something like this! I'm happy to report that is is working, at least the extent I can test it tucked back inside the hangar - only acquiring one or two satellites under a metal roof. And yes I left the ADF, the tubular structure behind the panel would not have allowed putting the 430 in that slot and I figured it will be fun to play with vs just a blanking plate there. Someday in phase 2 or 3, there will be a panel refresh but this will suit us for now and I think it's good bang for the buck. I have new windows in hand from great lakes aero. Once those are installed, the interior will go back in and she should be about ready to go!

-
Thanks! Thank you, I'm figuring out a lot of this as I go, with the help of good mentors! Interesting idea, it doesn't get kicked there too much? I am planning to put it under the floor on the passenger side at this point, I have everything apart anyway...
-
Got the interior out, starting on the window removal as well as some antenna work. Around the baggage area and above the hat rack area, there was ~1" thick black foam that has completely disintegrated. What - if anything - do people put in there in place of it, I guess it's just for sound dampening? The rest of the airplane has ~1/2" thick mylar backed foam insulation cut to fit between the various tubes, I believe that was installed when SBM20-208B was performed years ago. That foam is all in good condition.
-
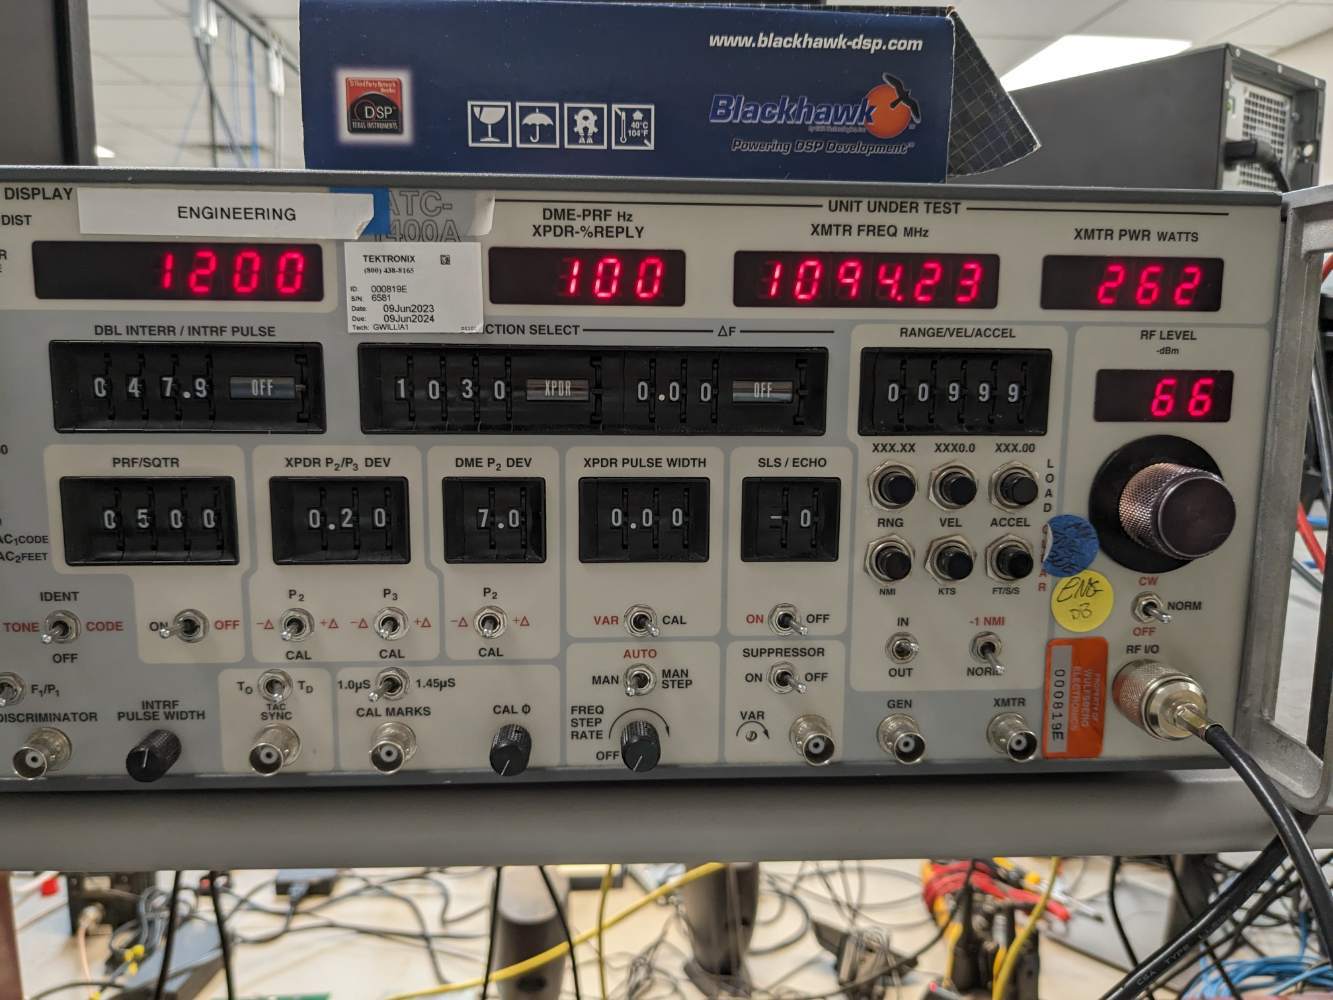
I actually came across a gdl 82 for a good deal so that is the ADSB route I'm going. My transponder was serviced in 2017 and I verified it still works - tx freq might need adjusted a bit but they can take care of that at the transponder cert. I'd love to see a pic of where your gdl 82 is mounted, the belly sounds like a reasonable idea. That would roughly be in line with the existing coax run.

-
The flap corners were also skinned up so I made replacements. Same for the inboard flap hinges. One side only the fairing was damaged, on the other side both the fairing and the arm needed replaced. I ordered them from Mooney through LASAR, however the pilot holes do not line up well at all with the mating parts. I learned you need to ask for no pilot holes, undrilled if you're planning on matching it to an existing part.


-
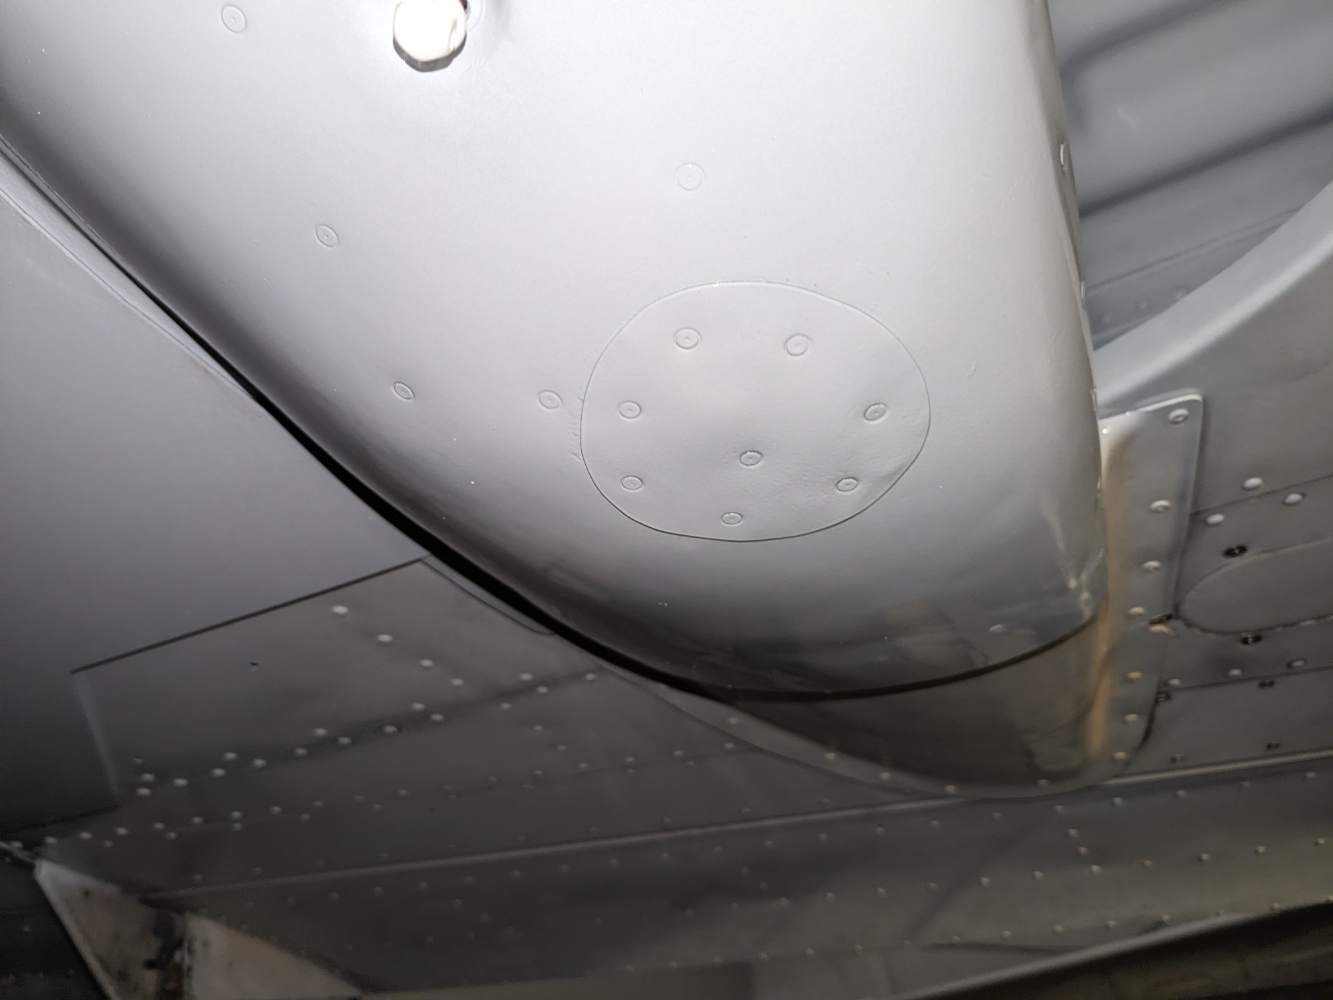
This was a fun side project, making a patch for the lower gear door, it was slightly skinned up from the fateful landing. I am pretty happy how well it came out, that's the first time I ever tried to make a compound curve in aluminum.


-
Good news, the wheel well cleanup and gear work is mostly complete. I had the gear legs powder coated and I stripped and painted the gear wells while they were out. A nasty job for sure and took a long time. However, it is done now and looks pretty nice. And most importantly, the gear legs and spar should be safe from any corrosion for awhile. I have all the belly skins ready to go and the two rear ones are riveted in place. I've made up new brake lines and went thru the calipers. Right now I'm trying to get the system bled. There's no fluid in the passenger side to put enough pressure on the shuttle valves to switch them over so I can push fluid up into that side. Gotta read up on the technique for that. Anyway, it's still moving forward albeit slowly!


-
That's a buffer, for polishing stuff :-) Unrelated project.
-
The washers worked pretty well. Got the gear leg off and cleaned up, see before and after pics. Now working on the wheel well, wow that is nasty. I think there were some attempted fuel tank repairs in here, there's some nasty gooey silicone like material squeezed into the joints around the spar. Lots of old dried on grease and dirt. What a mess. Any good tricks on cleaning these out? lol....


-
That's a good idea! I was gonna make the tool tonight but this sounds easier. Thanks!
-
I'm a ways from being finished but even at this point I think you have to value your time at "not much" to make any money doing this But I'm having fun, I work on computers all day and this hand work is kinda relaxing. I intend to keep it and fly it for my personal airplane - at least for the forseeable future. I have had some good trips in other people's mooneys and look forward to doing more of those. Latest challenge is getting the main gear out, I need the spring removal tool... I'll get them cleaned up and powder coated. I'm pretty sure it's the factory paint and it's not looking so good (lots of little rust spots). Probably should strip and paint the gear wells too while the gear is out, they need it bad. The more you look, the more work you find...
-
This curved one for the side was a little tricky, I bent it roughly on a sheet metal brake and then rolled it on an english wheel to smooth it out. It turned out pretty good.

-
The quick drain on the sump was leaking, that was the only significant oil leak I noticed on the engine. There was quite a bit of oil accumulated under the cowling and on all the belly and nose gear area. The gear up damage was not too bad, although this was actually it's 2nd gear up landing. It's a labor of love, I think it will be a nice plane eventually! I finished drilling the new skins last weekend, they're ready to go now.

-
Yep, a 345 would be great too if I can find one for a decent price. I have a stratus already so I'm not as concerned about the in part, although having that built into the panel is certainly convenient. I could see that beeing a challenge to get another antenna on the roof, it's got to be done though. I need to tear the interior apart anyway to replace the windows. I have all the logs, it was overhauled in 2009 and was running until the gear up incident, that was fall of 2019 I think. So, it sat for 3.5 years in winslow. We pulled it off and took it to a shop where they did the prop strike AD etc. It's got 250ish SMOH and ran nicely on the ferry flight. Once I get her airworthy I plan to put some hours on it and keep an eye on the filters/oil analysis.
-
I won't be spending a bunch on avionics, I don't mind steam gauges and I can't justify spending tens of thousands after which the airplane will still fly the exact same way :-) On ADSB, my thinking goes like this: a tailbeacon is around $2k, but the existing transponder is an old King KT76 and may need service in the near future. In which case, you might be money ahead to just buy a mode S transponder, probably around $3.5k and now you have only one box to maintain, relatively new, should give quite a few trouble free years. I actually have a tailbeacon on my cessna and it works fine but I have had to swap out the old Narco mode C. I also wonder how long it will last since it is out in the elements whenever you're out of the hangar. The GDL 82 is a nice solution, plus being a UAT you have the advantage of "anonymous" mode. Decisions, decisions.... :)
-
A great deal considering the alternatives, $700 for both doors shipped. Thanks AZ salvage! I still have a ways to go before it's flying but definitely a good step in the right direction! Appreciate the encouragement and suggestions above also!
-
Thanks a lot for that, I called him this morning and sound like I've got a set of doors! Real excited, and it's not too far away either. That's right, I guess they don't make the stock ones anymore. Was there a significant speed difference with the overlapping doors?