Nukemzzz
-
Posts
610 -
Joined
-
Last visited
Content Type
Profiles
Forums
Blogs
Gallery
Downloads
Events
Store
Everything posted by Nukemzzz
-
Something to remember is these planes were designed for a decent amount of fatigue stress safety margin with SLIDE RULES. It’s the technology that came not long after the abacus. Then it was test flown some number of times and didn’t crash and so they put the colors on the ASI. If you follow the guidelines, you are safe. If you don’t then all bets are off.
-
Each wing needs to carry around 1,250lbs static. It’s many times that in reality as turbulence multiplies this. You also need a fatigue margin and a safety factor on top of that. Standing 20 people on the wing is very much easier than having 10 people jump up and down on the wing many millions of times. Aluminum doesn’t have an endurance limit. No matter how low the load, aluminum will eventually fail unlike steel. I believe the main factor for Vne (Not the bottom of the yellow)is sometimes fluttering. At high speeds the tail can resonate and break up. My understanding of the bottom of the yellow arc is it represents the maximum safe maneuvering speed when unloaded. Above this speed, with no passengers, the plane can no longer stall with strong rising convection currents without exceeding the structural limits of the plane. In other words, in the yellow, extreme turbulence can damage the wing because the angle of attack of the convection can’t stall the wing before damage occurs (remember it’s not just a a single overload risk, it’s also fatigue). A stalled wing has less lift and thus load. In other words there are complex answers to your question. Lol
-
I live 1 mile from my airport in Columbus Indiana which is home of Mike Pence. He doesn’t visit much. The biggest issue I’ve had is when they shut down one of my favorite restaurants so he can eat.
-
Thanks for the replies. I have a lead on a local set. I’ll let you know if that doesn’t work out.
-
I might take you up on that. Where are you located? Thanks
-
Southern Indiana
-
We should have the engine installed in a few weeks, then we are going to go ahead and annual it. So....it will be time to check the gear torque soon. Let me know if you have a lead on these tools. Nothing on eBay at the moment. I see I can buy them from Lasar but I'm not sure it is worth over $300 with tax and shipping to use once a year.
-
Very interesting. I was just putting it back together in the same way that we took it apart. I haven't tightened anything yet. I need it there at least long enough to hang some lead batteries off the nose to push it back the maintenance hangar. lol
-
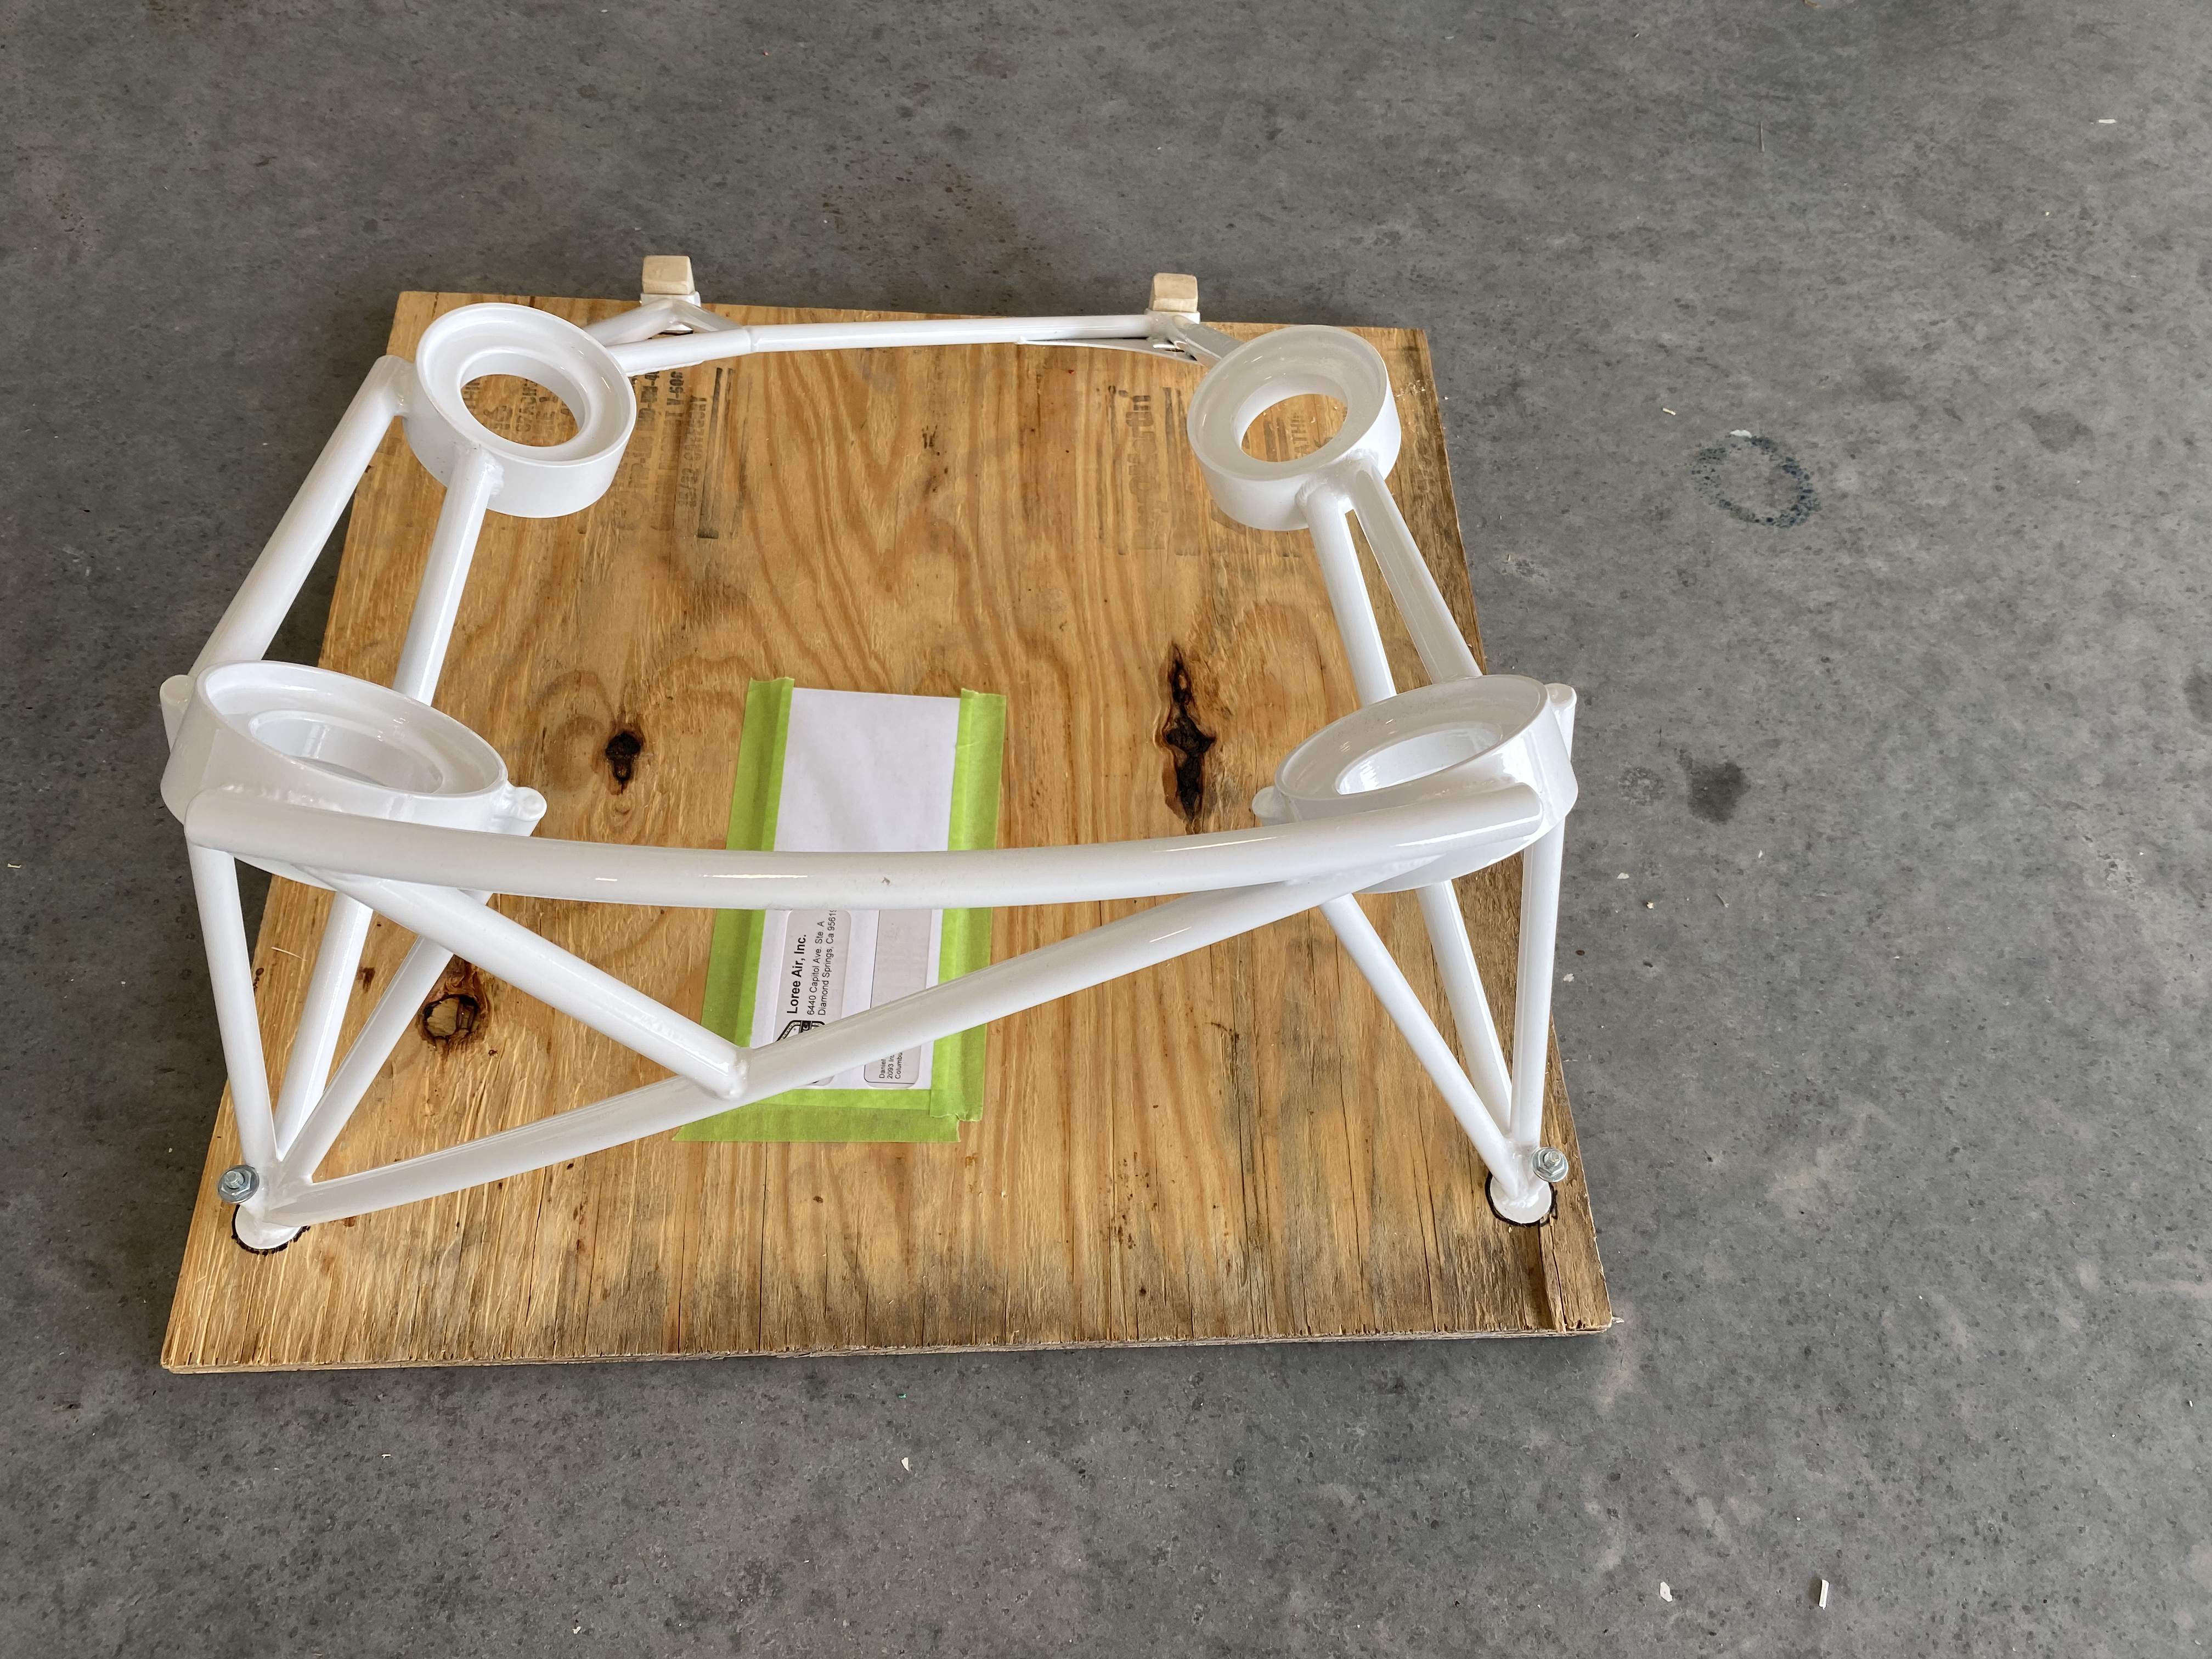
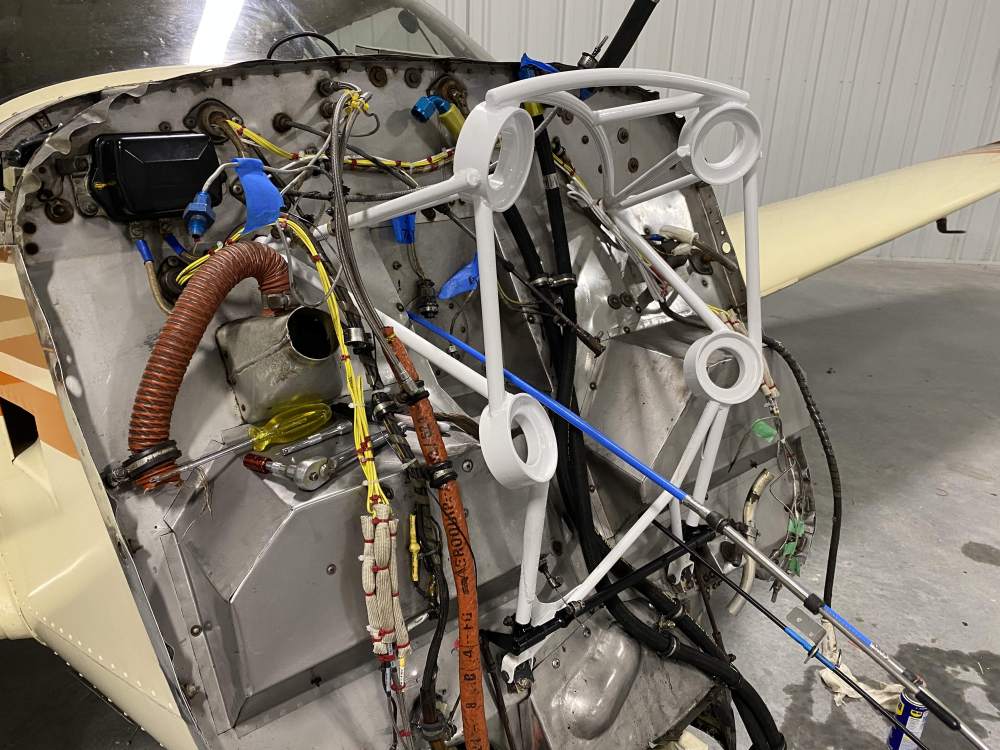
Follow up...Loree Air did a good job and they were very pleasant to work with.

-
Also... dumb question...how does one find exactly what Placards are supposed to be in a plane? Seems I should start with what the plane was shipped with...not sure where to find this.
-
Hate to revive an old post, but I have this exact same hub and prop combo on my 66' E. The Tach has a Red Arch between 2100 and 2350. Is there also supposed to be a placard somewhere? Is the conventional wisdom here that this Red zone still applies with my combo? Prop was installed new in 2005. IO-360-A1A engine.
-
Thanks! i might try removing the rest of the yellow film with Mr clean!
-
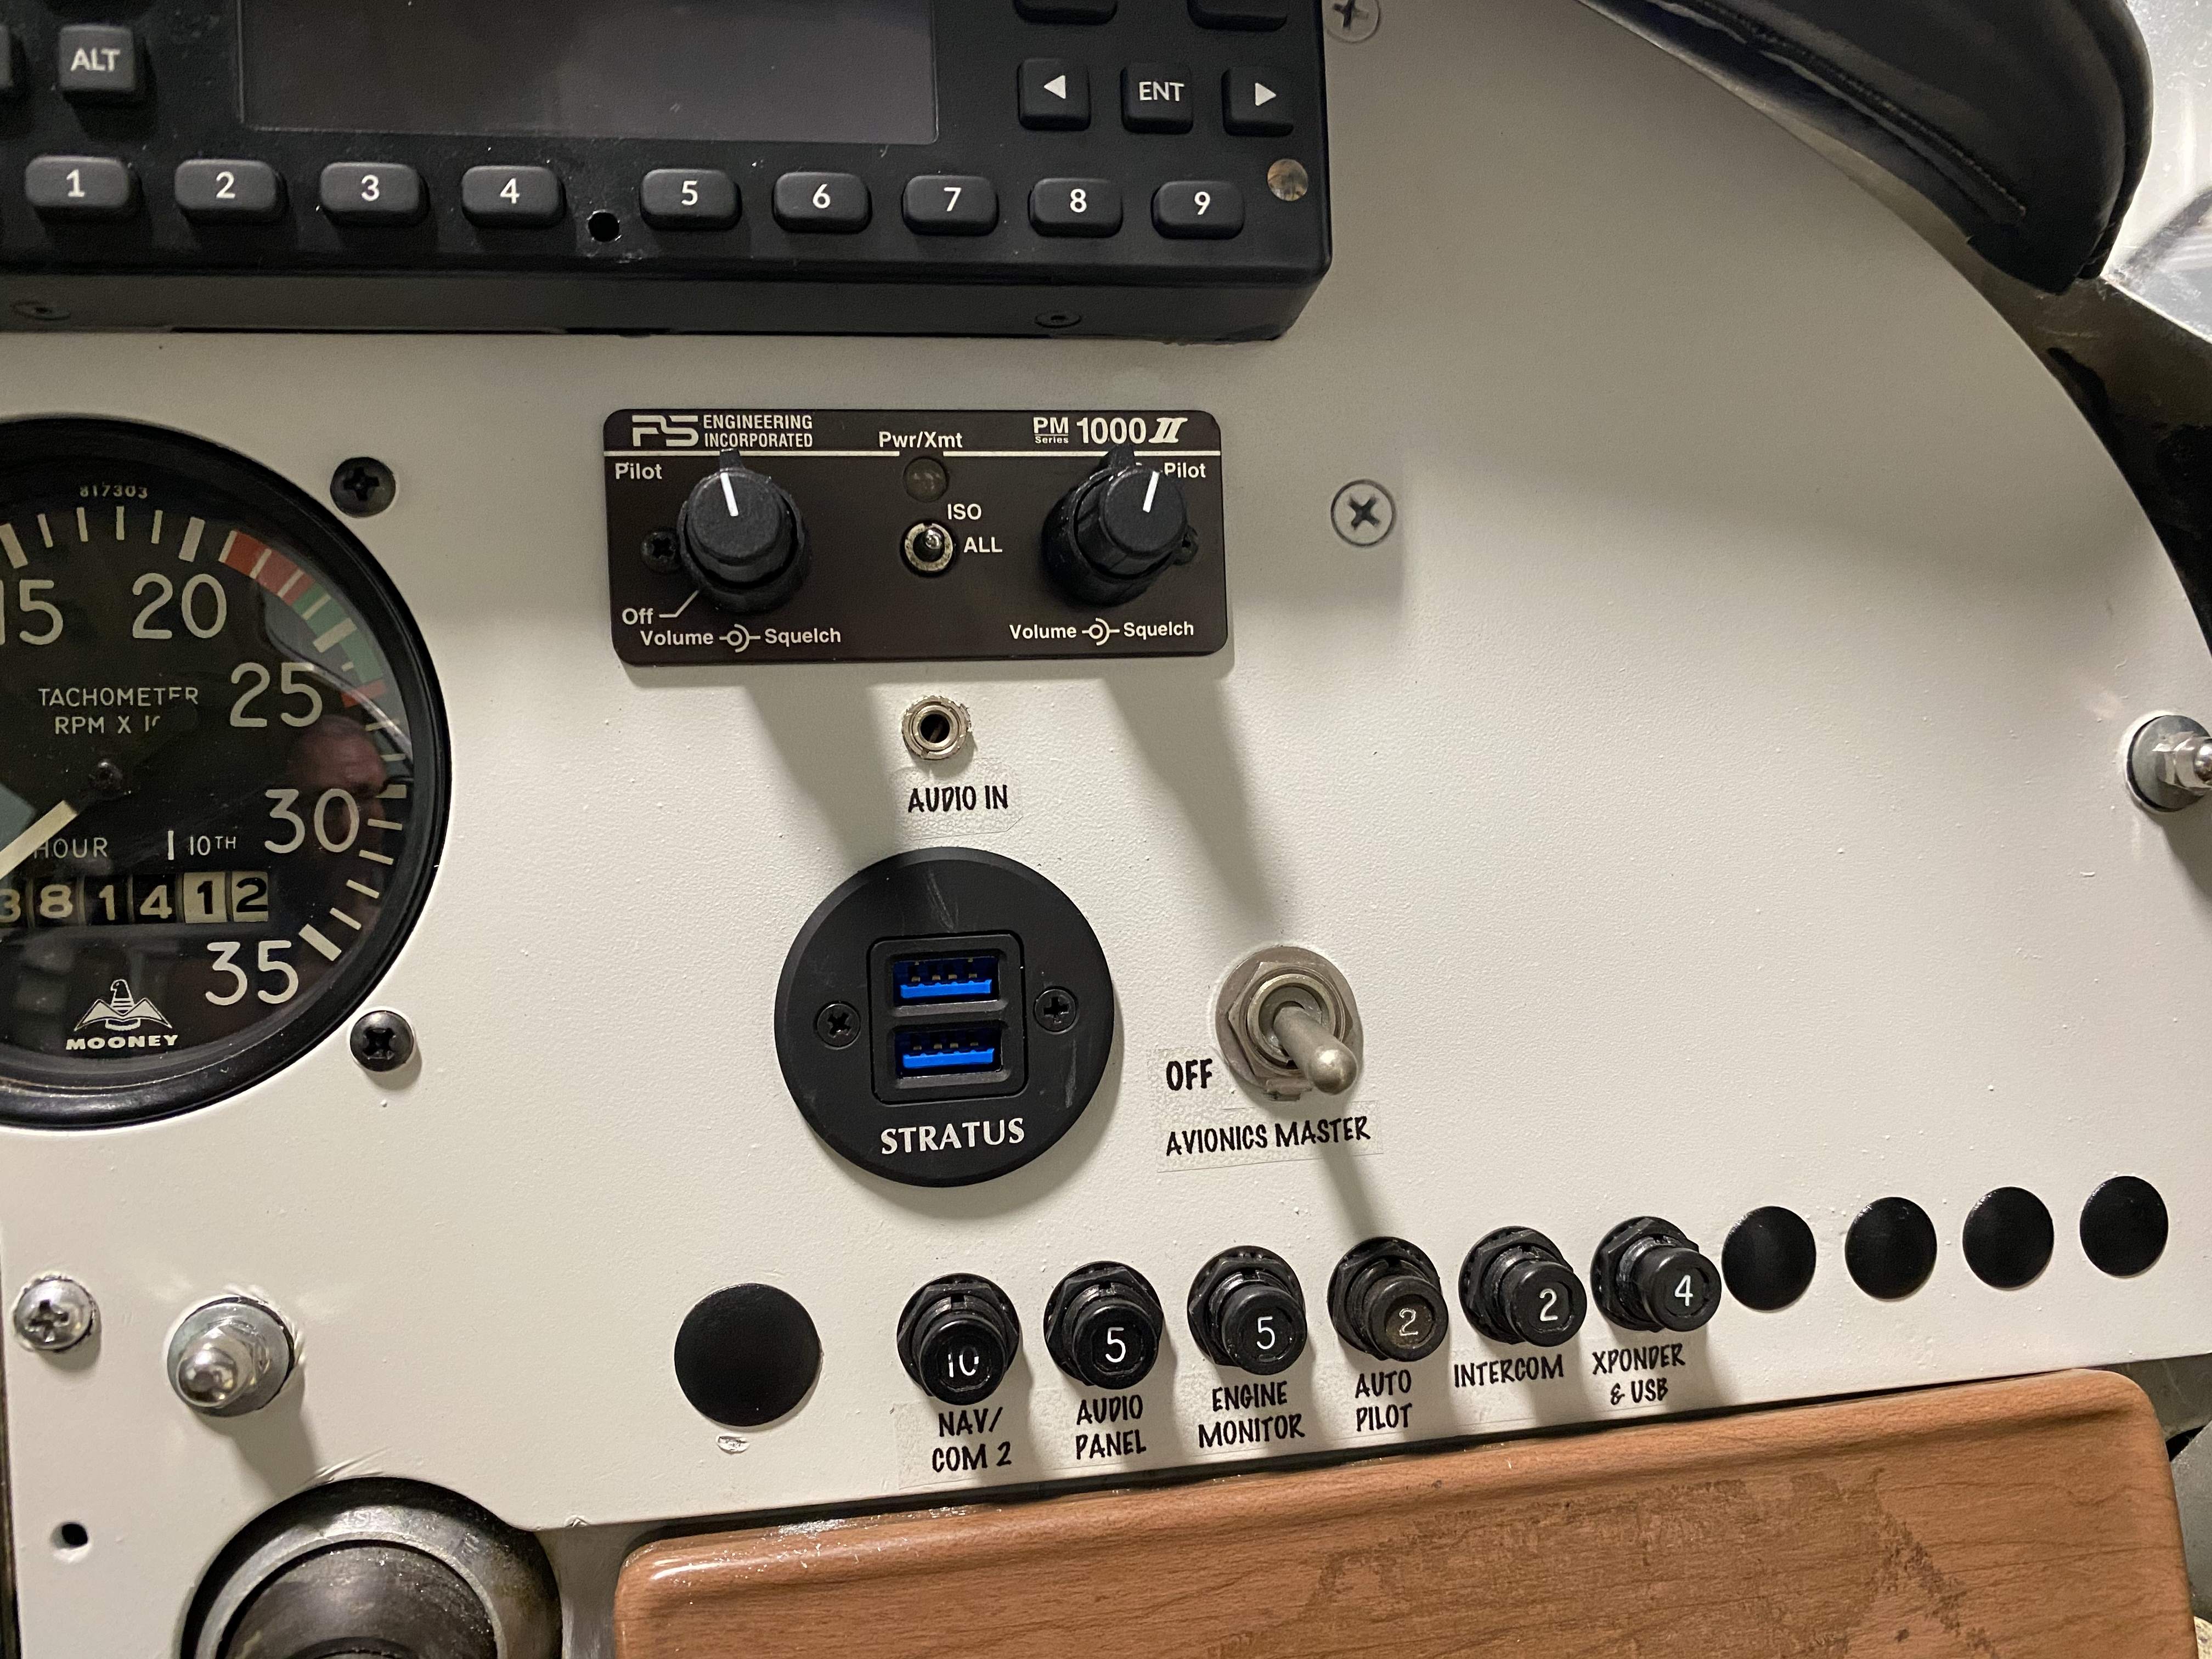
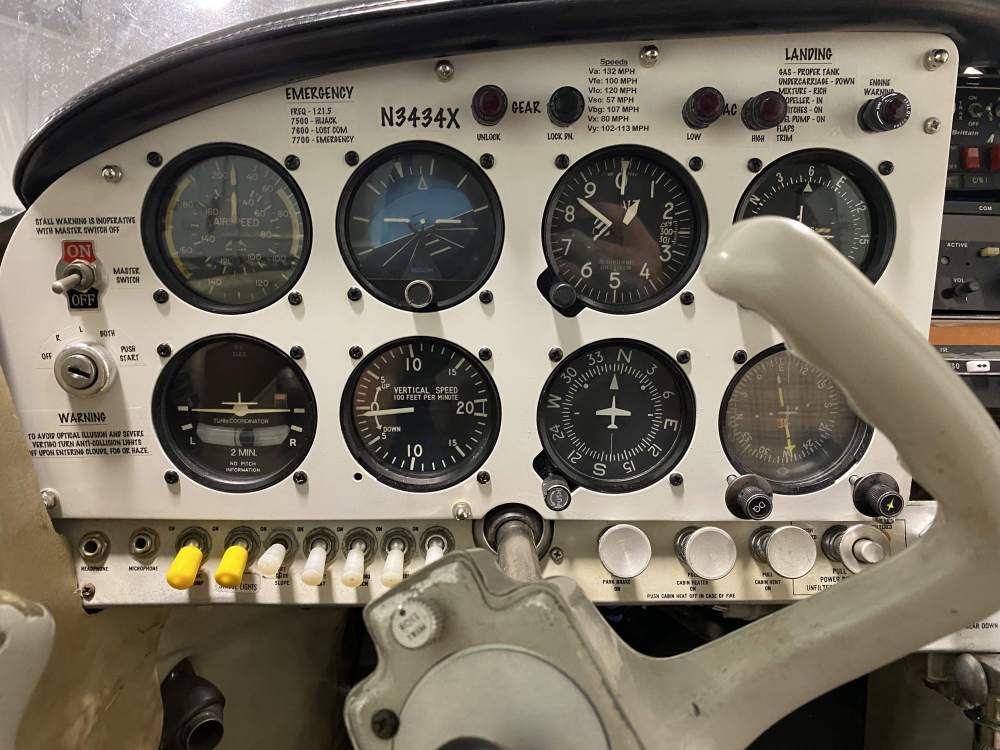
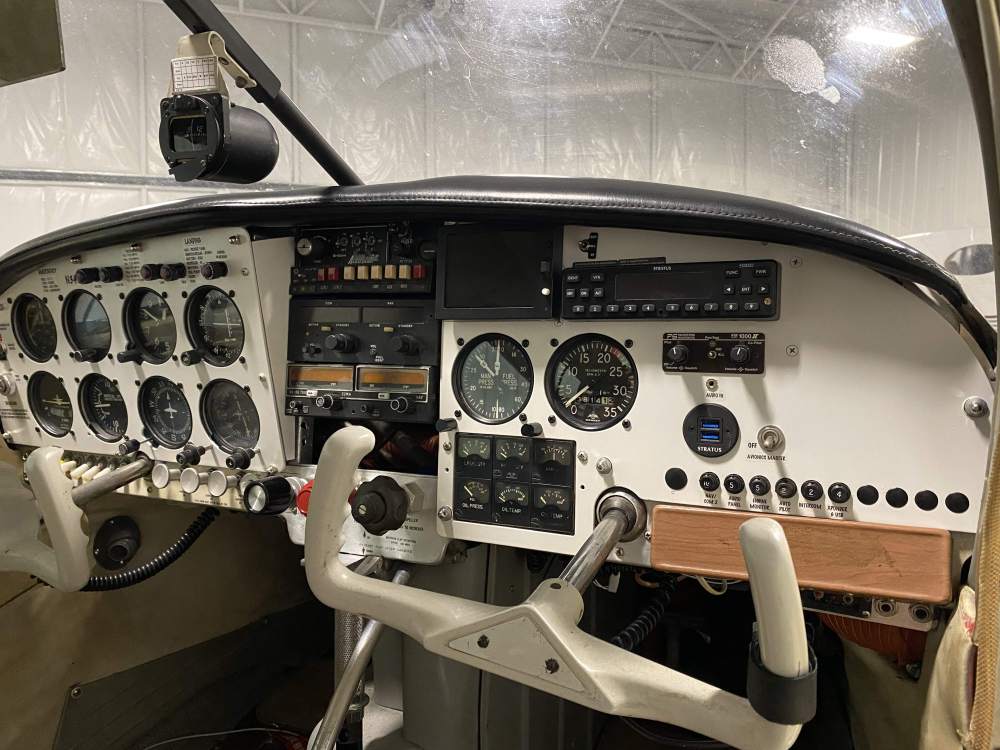
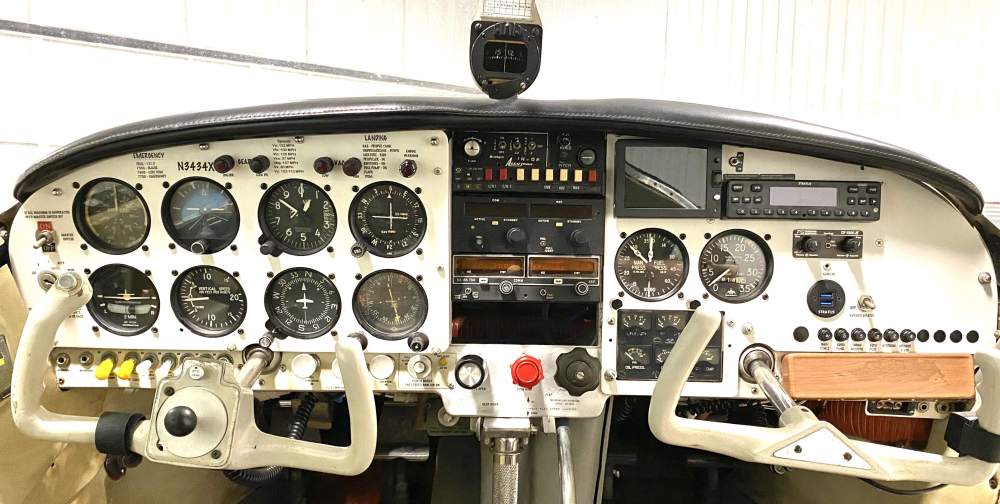
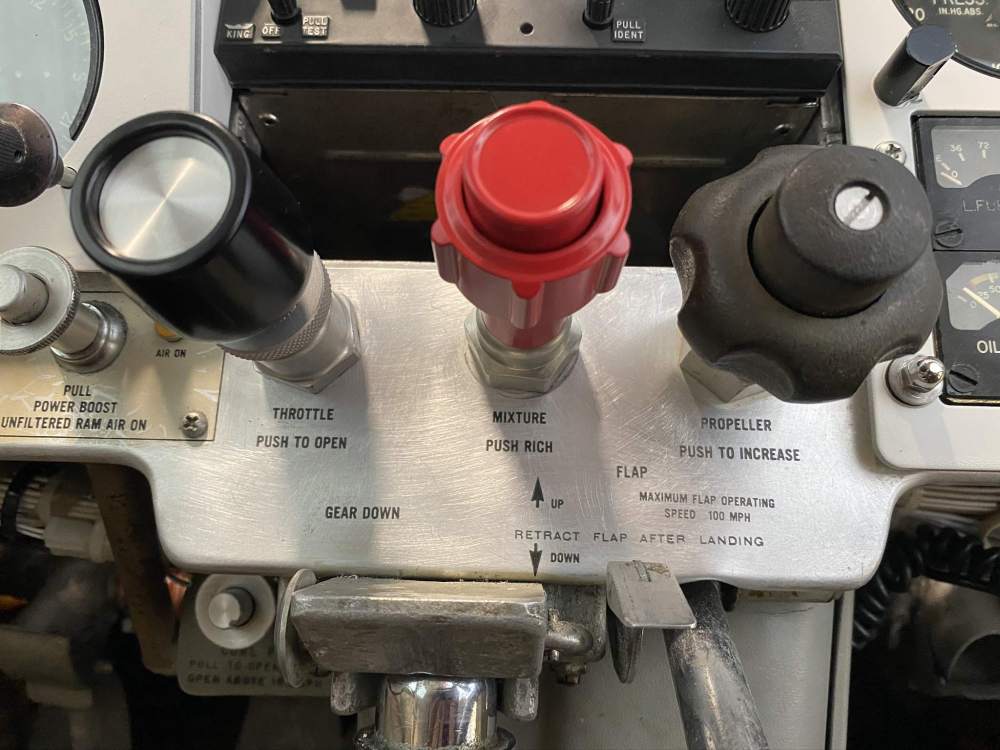
So the laser printed clear labels turned out good I think. Maybe with age they won’t do so well but it was pretty easy. Allowed me to use a custom font and look. I might stick a Mooney Logo on the far right. The vintage one of course! I think the panel is done now! Side note: thinking about installing a box below the KX155 to store reference cards and things I’ll need often or in a hurry.
-
By the way, Scotchbright removed the coating but left the labels. It does appear to be uncoated aluminum now but it looks much better.

-
System test went well. Lights are working. The led post lights on the primary gages are a bit bright but I think it will work. Wishing now I’d got those in Red.

-
The other issue is if I put the stock nut on the beauty nut doesn’t work anymore and the stock nut is ugly... lol This is because the new panel is thicker than the old.
-
The stock nut is a thin stamped part and, if I use it, it will destroy the paint in the area. What you see here now is the plastic beauty nut which I don't trust. Hoping I can order a good looking metal version somewhere. 66' E Model by the way.
-
M20E Pilot Panel.dxf View File Pilot panel dxf CAD File used for a 66' M20E. Submitter Nukemzzz Submitted 07/26/2020 Category Avionics
-
M20E CoPilot Panel.DXF View File Co-Pilot panel dxf CAD File used for a 66' M20E. Submitter Nukemzzz Submitted 07/26/2020 Category Avionics
-
Pilot Panel Rev 3.SLDPRT View File Pilot Panel Solid Works CAD File used for a 66' M20E. Submitter Nukemzzz Submitted 07/26/2020 Category Avionics
-
CoPilot Rev 2.SLDPRT View File Co-Pilot panel Solid Works CAD File used for a 66' M20E. Submitter Nukemzzz Submitted 07/26/2020 Category Avionics
-

How to “Use” Brittain Autopilot
Nukemzzz replied to Nukemzzz's topic in Vintage Mooneys (pre-J models)
Awesome sauce. So this explains why the pitot line is T’d with one line going back towards the tail. Ive been wondering what system beyond the airspeed gage would need this as an input. -
How to “Use” Brittain Autopilot
Nukemzzz replied to Nukemzzz's topic in Vintage Mooneys (pre-J models)
Thanks for the info. Not worried about a stall, just curious. Im still not clear on what the pitch pull does. Also, it seems to be a vacuum switch but hardly moves. -
Update: I went ahead and drilled it out to 3/4” and it just barely worked. The nut on the back side is unable to spin so you have to tighten by twisting the cabin side nut. But it fit. Just so others know in the future.
-
So I ordered new cables direct for my 66’ E and SN and after 7 weeks they finally showed up. Today installing them I was reminded of this conversation above because the throttle cable they sent requires a 3/4” hole when it is currently 1/2” I believe. I have a similar fastener interference risk as the OP however my bolt is actually flipped and so I have a little more clearance. Was just going to drill it out to 3/4” and hope it clears. Now I think I’m going to scribe a 3/4” circle intersecting the bottom of the old hole and then dremmel the hole out with the new centerline a little higher. Any update form OP? Did the 3/4” work for you?