

Nukemzzz
-
Posts
610 -
Joined
-
Last visited
Content Type
Profiles
Forums
Blogs
Gallery
Downloads
Events
Store
Everything posted by Nukemzzz
-
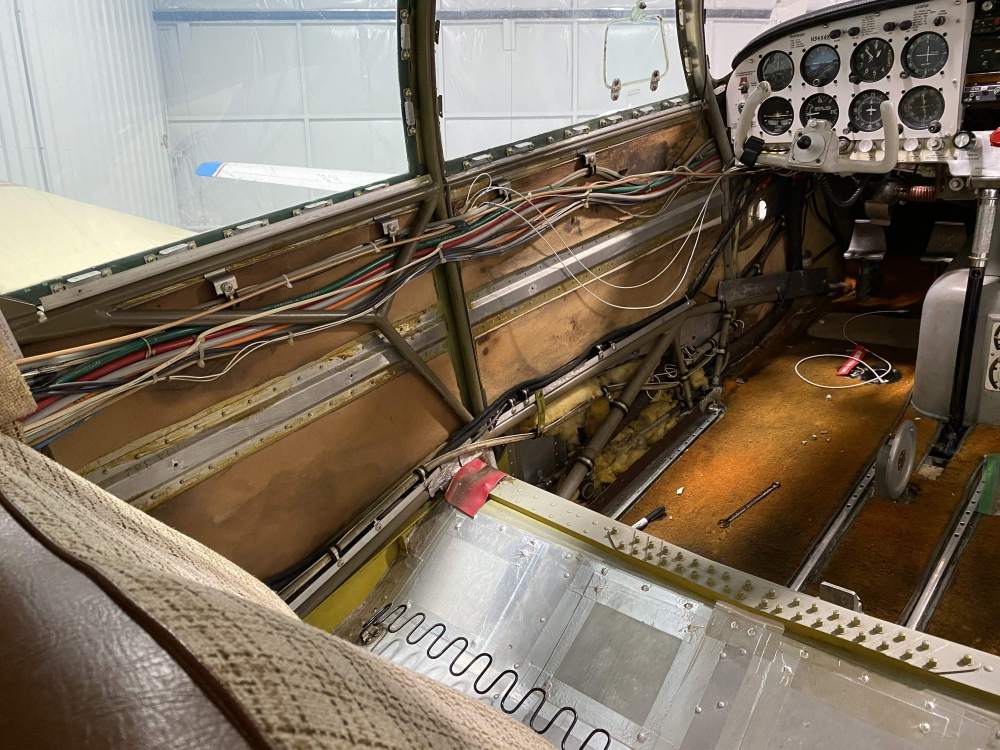
I need to move the E back to the maintenance hangar but it’s currently a tail dragger. Anyone have any good ways to hang weight off the motor mount? To get the plane here they rigged some plywood and straps to make a platform for lead batteries. However, it now has a new motor mount and I don’t want to jack up the new paint and risk tweaking any of the tubes on the way back. An obvious way to do this isn’t coming to mind.
-
When I bought my 66E I found a metal placard checklist in the hat rack area that appears to be attached to the old glove box lid. This hints my plane had an official checklist placard and I assume it can’t be changed or has to stay in the plane right?
-

Way too early, but IO-360 A1A is kaput
Nukemzzz replied to Moonbat's topic in Vintage Mooneys (pre-J models)
Mine wasn't actually an overhaul. The engine had 300hrs on it when the case cracked. Installed a new Superior case, new cam, DLC tappets (the cam and roller was fine, but didn't want my engine to look like OPs one day). Completed a previously missed AD on a gear. Installed an Oil Filter housing and filter. Then there is a long list of stuff that had to be replaced as part of the reassembly. Came in right at $14,000. America's Aircraft Engines. I'll tell you in about a month if the engine runs well I hope. lol -
Way too early, but IO-360 A1A is kaput
Nukemzzz replied to Moonbat's topic in Vintage Mooneys (pre-J models)
I'd recommend using DLC coated tappets with the overhaul. This is what i did with my A1A which is finally going back in the plane next week. -
My starting point was "it wasn't working and then it stopped" with no external influences like: someone jacking with it. Even given that, it could be the the inlet starts leaking and nobody notices, then months/years later the outlet fails and that's how you practically end up with both of them failed at the same time. This is the possibility I tried to raise at the end of my prior post but I maybe didn't explain it well. Though I can't imagine these teflon seats deciding to leak with normal use. They should be very robust. I think the weak point in this pump is the elastic seals/o-rings. Probably everything is fine until a seal wears-out or ages-out and leaks. Then the rebuild process introduces risk of handling damage and debris...then new issues arise. Surgery is risky...lol
-
Sure its possible. But a single cause failure is more likely than a two cause failure. The chance of rolling a 1 on a single dice throw is 1/6. The chance of rolling snake eyes on a dual dice throw is 1/36. The daily hazard rate for each of these 3 seats is probably closer to 1/10,000 so the chance of two failing on the same day is closer to 1/100 million which is getting closer to winning the lottery. So the only feasible way I can see both of them failing to cause this issue is if the Inlet started leaking first and then you lost pumping efficiency but didn't have a noticeable problem, and the at some point later the outlet started leaking as well. The chance of this?? no idea Sorry, I'm a Product Reliability Leader with a background in statistics so I love this kinda stuff. lol
-
If the inlet Teflon seat leaks then it takes more strokes to pump the flaps down because some of the fluid is returning to the supply reservoir. Flaps won’t leak back up though. If the outlet Teflon sear leaks the handle in the cabin will lift by itself as the flaps try to leak back up because the pumping chamber is back filling from the actuator. Unless the inlet is also leaking then the flaps won’t leak all the way back up. The flaps leaking back up is the cable actuated pressure relief check ball on the aluminum seat leaking unless you have an external fluid leak or the handle in the cabin is raising by itself as well. Replacing the Teflon seals won’t hurt, but need to stake the aluminum seat or it will likely still leak back up. Not that you need this info as the MSC has this in their capable hands. Just trying to keep this info out there for others.
-
Pro tip... don't spend a bunch of time fixing the door panel. It's only $250 from plane plastics for my plane and comes in 3-4 days with free shipping.
-
I see. They should know. You might need to get new ones made at a machine shop.
-
Check this post that made to explain how this system works and how to troubleshoot it. Hope this helps. https://mooneyspace.com/topic/33869-m20-hydraulic-pump-flap-diagram/page/4/
-
M20 Hydraulic Pump Flap Diagram
Nukemzzz replied to Nukemzzz's topic in Vintage Mooneys (pre-J models)
Late post follow up...you were right. The guy helping me adjust it under the plane while I actuated things gave up to early. I sent the pump to Don Maxwell. He put it on his test bench and reported nothing was wrong, he just adjusted it and it’s fine. So this missing mystery washer wasn’t needed and it’s likely an error in the parts manual. -
You don’t stake the Teflon seats. You stake the ball under the adjust screw. why do you think they are in bad shape?
-
Those pictures are oriented correctly on my iPhone, iPad, and MacBook by the way.
-
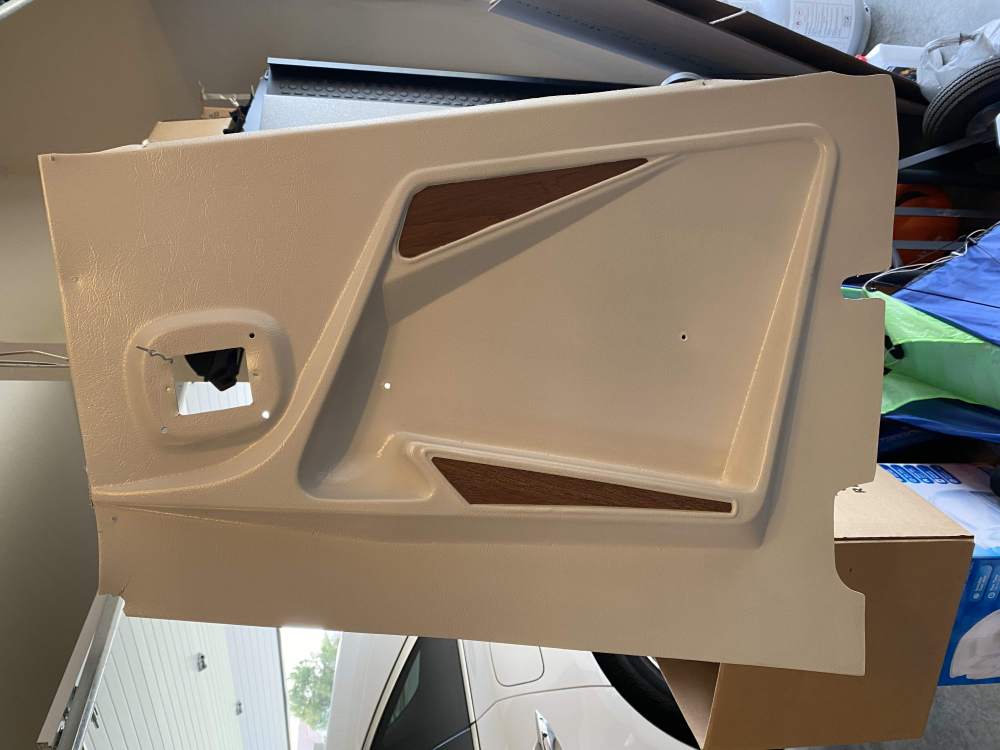
Today’s update... Painted the side wall plastic. Using krylon fusion. Also called Bruce about Revitalize for the lower main cabin. Says he might also have door plastic for me that might work. I also called airtex. Their sidewall kit with matching carpet is an option but then need to keep the lower foot well boxes. Either of these folks would seem to be selling me the same thing but Bruce likes to attach without screws using basically super Velcro and the lower foot box is gone. The lady at airtex didn’t think I could go to the floor with the lower wall. I could hear the uncertainty in her voice though. Not sure which way to go here. i think I’m going to put a placard over the ashtray hole with stuff I might need to remember. Or maybe it’s a better place to mount the iPhone. not sure Funny side story...I pulled the curtains from the back windows a while back and went to hand wash them. My wife says she’ll do it and puts them in the washer on delicate. They came out looking like ancient torn up mummy wrapping. Lol. The good news is she felt bad and sewed up some new ones!

-
I suspect you are right that a pro could fix it. Trying to avoid a long delay here though since we will start putting the engine back in this week. Just trying to make the interior less shameful really. lmao
-
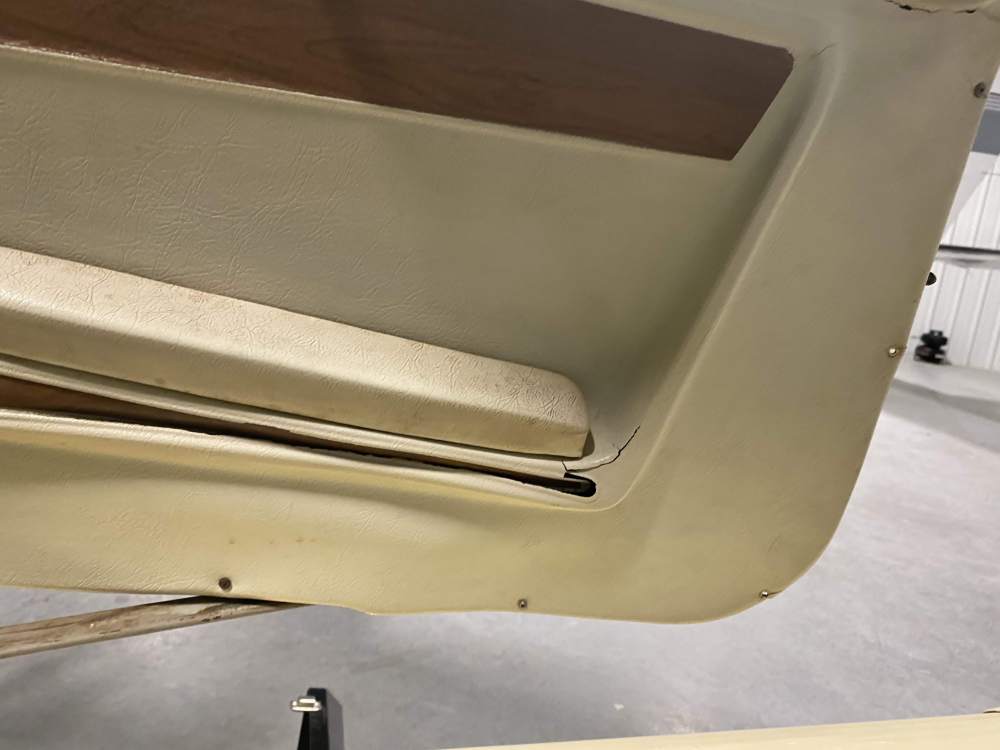
Thanks for the tips. The biggest issue is I see his how distorted/warped the plastic is in this area below the armrest. The region below the armrest has cracked and collapsed/warped under the weight of someone's heavy forearm. lol To fix it I'll need to first fix the warp with a heat gun somehow so it's the proper shape and then reinforce it and glue it back together. To fix it with a heat gun I think i need to be able to clamp things into the right shape so it cools correctly but this is a complex shape and i don't have any special jigs for this. Also, the top of the door panel has been covered with the same material used for the headliner with contact cement (falling off now). That section of the plastic panel is breaking off and I can't fix the plastic without removing this material. It will have to be recovered with something I think. Basically its a hot mess... I have this feeling that if I spend 20hrs trying to save it, I'll have a crummy looking result that won't last very long before it cracks again. But maybe this is the best path forward. Just feels like my time is better spent starting off fresh. Not sure yet.
-
I think the door panel is beyond repair. Someone already tried to fix the cracked armrest support. Cracks everywhere.


-
What should I put in place of the ashtray on the pilot side? Seems silly to put it back in but don’t want to deal will trying to fill and finish the hole to match. How about a pencil sharpener with a crank on it? Lol
-
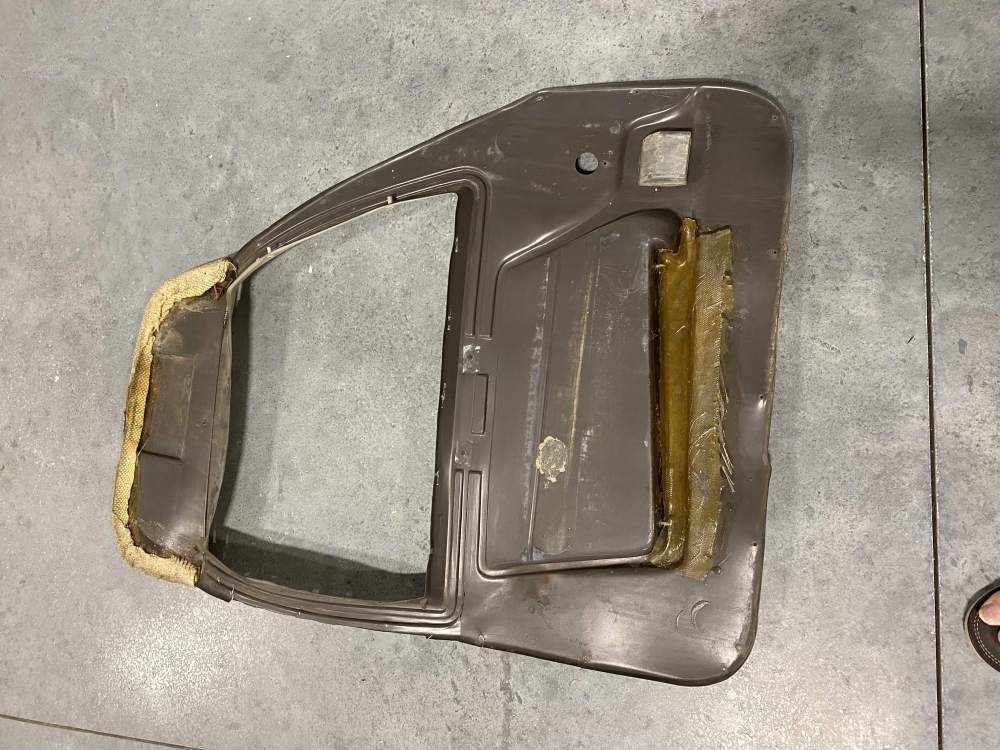
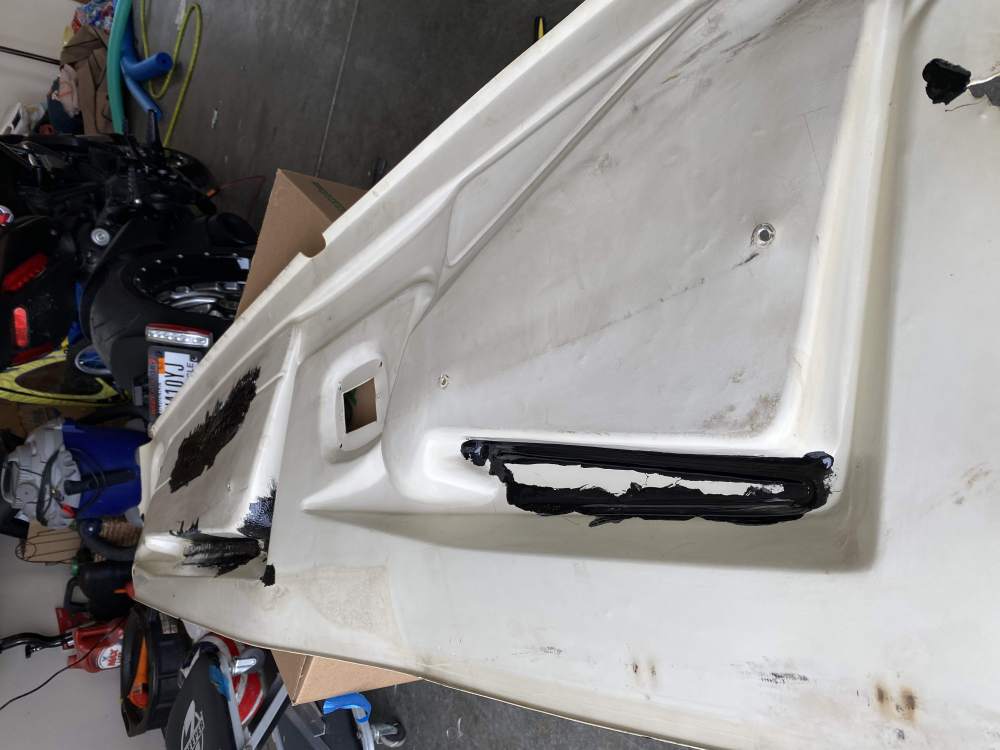
Using ABS cement which according to the label is ABS, MEK, and acetone. Taped the cracks on the inside. Laying some fiberglass behind the crack and coating with the cement. Wiggling the crack some to let some of the cement into the crack itself. Hope it holds. In some spots I’m putting cement even though there isn’t yet a crack hoping to help prevent one.

-
I’m referring to the pilot’s left hand armrest. It’s a good elbow anchor when holding the yoke steady during j-bar operation.
-
Thanks! I noticed that some of the remodels I’ve seen are missing the armrests. I’m having a hard time with this notion because it’s useful for stabilizing the yoke when retracting the gear.
-
I’ve made another mess. Looking for some advice... 1. The side walls I can clean and repaint. However there are significant cracks below the armrests that need to be repaired and reinforced. Suggestions on the best way to do this? On the window trim I used plastic epoxy and fiber tape on the inside. 2. If I get sidewalls from someplace like airtex does it include the parts in number 1 above? 3. The foot well inserts and rear vent outlets at the flow level need to be replaced. Thinking maybe Alan has some good ones? Or should I try and get new ones from somewhere like plane plastics? 4. What’s the latest on the best door seal? I need to remove and patch up the door panel and might as well put the right door seal in place while I’m at it right now there is foam door seal tape from someplace like Lowe’s on the cabin side. The insulation in the plane appears to have already been improved. Likely during SB inspection for tube corrosion under the window at some point. I think I’ll leave it alone. I’m going to try and leave the ceiling alone. It looks ok for now. The wing root under the seat looks brand new so that’s good news. No signs of tube corrosion either.


-
One factor not mentioned yet: people weighed less in the 60’s.
-
Yes, but it doesn’t hold a candle to the capabilities of today using our workstations and FEA analysis. They had a finite budget for limit testing as well.
-
Everything you are reading here is educated speculation and nothing more. Only the project engineers know the facts and those facts will be confidential. My speculation is that materials and analysis of material strength and design has improved. Thus the safety margin could be reduced. I think in the yellow region you CAN use some of these margins if the wind does the wrong things and the analysis tools of the day weren’t precise enough to make that region smaller. Remember these planes were designed in the Apollo days. The full backing of the US Government had just sent a man into space and the Saturn rocket had a computer that could complete hand calculator level of computations. The M20 was designed on manual drafting boards using slide rules and hand calculations.


