jcovington
-
Posts
126 -
Joined
-
Last visited
-
Days Won
3
Everything posted by jcovington
-
Just to add to Jake's comments. I have been chasing the same problem with my KAP150 for the past couple of years. Very random when the problem would show up but mostly during manual trim during takeoff. Some times during manual trim entering downwind. It would appear to get better when I removed the KC191 and cleaned the connectors but always returned. In researching how the trim system works I found that the KC191/192 monitors the manual trim system even when it isn't engaged (I was surprised). From the KC191 Maintenance/Overhaul Manual section 4.2.7: "The monitor is capable of detecting wrong way trim operation. The KC 191 incorporates a manual trim sensor which can sense the proper voltage level of the manual trim engage line. Thus, it can be used as a means of monitoring the manual trim speed which previously had to be separately checked by the pilot. In the event of failure in either the auto trim or manual trim systems, the trim engage signal to the KS179 trim servo is terminated, and a trim warning light flashes." The speed of the manual trim system is set based on the voltage generated by the pitch trim servo. This voltage is output from the trim servo on P1791 pin A (Manual Trim Voltage), goes to the Trim Arm switch, to P2 pin W on the KC191/192, through the Up/Down switches and back to the trim servo as a drive signal. Different aircraft configurations have different dash numbers that specify the voltage output. For my aircraft it is a KS 179 Pitch Trim Servo Part # 065-0052-03, Manual Trim Voltage: 11 +/- 1 VDC, Clutch Torque: 20 +/- 2 LBF-IN, Manual Trim Speed: 11.9 to 15.2 RPM. What this means is that the trim servo generates the manual trim voltage that goes through the engage switches and back to the trim servo to drive the servo at the correct speed. The KC191/192 senses the voltage and alarms if it is wrong or missing. Looking at the KC191 schematic I can't tell if it is looking for the proper voltage or just that the voltage is there. The signal goes through an op amp and then into a micro processor. I don't have the micro processor software available so I can't follow it any further. I have included a drawing I did of the KAP150 wiring in my aircraft that shows the connections. I found the BK installation manual hard to follow so I did drawing to better understand how everything is connected. So far to try to correct the problem I have replaced all the pins on the back of the KC191 connectors that have anything to do with manual trim and the manual trim switches. The first attempt was P1911 H and F (manual trim in and out pins). I still had the problem return. The second attempt a few weeks ago was the Manual Trim Voltage (P2-W), Trim Fdbk +Up (P2-X) and Trim Fdbk -Dn (P2-20) pins. I only have five hours on the plane since then so too early to tell but so far no problems. The next step is to check the voltage output from the trim servo to see if it is out of specs. If I still don't find anything I will take another shot at the trim switches even though they are only a few years old. That is probably a lot more detail than what you are looking for but this problem has been bugging me for a while. Jim KAP150 Schematic.pdf
-
The fuel pressure Omega part number is PX309-030GV for cable, PX319-030GV for mini DIN conection and PX329-030GV for twist-lock connection. See the attached catalog pages. I had to go look this up again since it has been a few years. I can't remember now for sure but I believe the pipe threads might need an adapter. Since the Mooney drawing 940183 says you can retrofit the OP and MAP for an M20M, M20R and M20S with Omega parts it doesn't seem much of a stretch to use Omega for fuel pressure. Maybe there is something different about fuel pressure other than the range but I couldn't see it comparing specs. Jim PX309-100mv.pdf Transducer Replacement.pdf
-
Dave The plugged vent hole will not cause the fuel pressure or oil pressure to read high. A plugged vent will cause a low/intermittent reading. A bad connection will cause either one to read full scale high so I would look for a broken wire or bad connection (as Rick @Junkman said). On my aircraft (1996 J) they use a lot of the AMP CPC connectors and that was what was installed for the fuel pressure and oil pressure transducers. The CPC connectors work OK but I have had several problems with them that wasn't obvious. The problem I see is that the pins lose connection and what they are connected to fails with an open circuit (high on oil and fuel pressure). I have examined the pins when this happened and have never found a visible problem. They all looked OK. I have gotten to the point where if I have a problem I just replace the pins. In the engine compartment I have spliced the wires on the fuel flow transducer, replaced the entire connector on the fuel/oil pressure transducer, spliced the wires on the right nav light and replaced the pins in the flap connector. I think you can see the trend here as these were all CPC connectors. If you are dealing with a mechanic that isn't comfortable with electronics you are probably better off removing the connector and butt splicing the wires. There is plenty of wire that if you ever need to replace the transducer you will still have enough. If the mechanic has the pins and crimper you can just replace the pins. There are only five pairs on the fuel/oil pressure transducers. One other note. There are two types of CPC connectors used. One with small pins (MIL-SPEC pins) and one with large pins (commercial specs). The problems I have seen are only on the large pin connectors. I have included the information on the CPC connectors. Of course, if you are near Huntsville, AL I can lend you the crimpers and pins. I keep them in the hangar. Jim CPC Amp Connectors.pdf
-
Here is what I have from my notes on my aircraft. I don't recall right now if I got this from the specs or measured it. Kulite Pressure Transducer Fuel Kulite P/N APT-153-1000-30PSIG Mfg Date 7/02 Serial No 6385-4-320 Excitation 10VDC Range 0-30PSIG Max Torque 75 in-lbs TSO-C47 Kulite Semiconductor Products Inc Leonia, NJ USA Wire color code: Red +EXC voltage (10.27 VDC) Black -EXC voltage White +SIG Green -SIG PSI mVolts 0 0.4 2 7.0 6 20.2 10 36.7 16 56.0 22 72.9 28 92.3 30 102.4 Aircraft wiring harness connector MS3474W10-6P Transducer harness connector MS3476W10-6S A - Shield B - Red C - Black D - White E - Green F - not used Now for the rest of the story and what I found from testing the unit. I had a problem with my Kulite fuel pressure and oil pressure transducers. They would work most of the time and fail occasionally in flight. The fuel transducer was far worse than the oil transducer. When I descended they would start working fine. It usually would happen when the plane was outside and there had been some rain around. I tried flushing the fuel line thinking it was dirt in the line. I checked all the wiring connections. I pulled the gauge cluster and transducer out of the plane, fabricated a test harness and ran the setup on the bench using air pressure for days without it having a problem. I ran my test setup for about a week continuous so well over 150 hours with no failure. I used heat and cold, banged the transducer on the bench and still couldn't get it to fail. I spoke with the Kulite people about the transducer but they couldn't provide much information as they said that the transducer was built to Mooney specs and Mooney owned the data. He said he couldn't provide any tech information but he could answer questions. Our conversation went something like: "OK. on pin one the signal is..." To his credit he answered all the questions and I got the information that I needed which is where the information above came from. He told me that the Kulite transducers had a MTBF of some large number I don't recall right now so really shouldn't fail over the life of the plane. He told me there had been a lot of unnecessary replacements of Kulite transducers. The problem went on for a couple of years. I ran the test setup a couple of times and everything always worked on the bench and would fail in the air. After a while it finally dawned to me that these transducers are gauge transducers with a vent hole. The Kulite transducers have their vent about mid way of the body just about where you would position the Adele clamp when mounting them. What I concluded was that the Adele clamp was partially restricting the vent hole. When there was sufficient moisture around the vent hole would be blocked enough that the transducer would not have a reference causing it to trend slowly to zero. I remounted both transducers several years ago making sure the vent holes were unobstructed and haven't had a problem since. Recently, after annual I had a fuel pressure problem and when I checked the clamps had been moved and the vent hole covered. Re-positioned the clamp and everything is working fine. My advice is to check the vent holes on the transducer before replacing it. If you decide to replace the transducer I have included a drawing from Mooney that someone posted on here years ago. It specs an Omega replacement unit for the MP and oil pressure. When I looked several years ago Omega had one that will work for fuel pressure. Sorry, I don't recall the part number as I didn't need to replace mine. Jim Transducer Replacement.pdf
-
The bulb part number is OSRAM 2721MF8 which is a 12V 1.2W bulb. Be sure to order the exact part number as some of the bulbs that cross to the OSRAM bulb have a slightly different base and won't fit. The bulbs were pretty hard to find in 2017 and I ended up ordering a box the last time I found them. The first time the bulb failed I contacted Mid-Continent and they sent me a bulb for free. I didn't try that the second time it failed as I had the part number. The easiest way to replace the bulb on a J model is to loosen the ASI screws and push the ASI back. At that point you can reach in and access the bulb through the ASI hole. It is is a 1/4 turn to remove and replace the bulb. It is fairly stiff to remove as the bulb is a friction fit and the contacts are made using small spring clips. I have used forceps in the past to get enough grip to remove the bulb. Don't try to loosen the screws and remove the clock. The screws have nuts on the back and are very hard to reach. Jim
-
Help with Garmin 530W and programming
jcovington replied to Greg Ellis's topic in Avionics/Panel Discussion
To enter the Frankston VOR (FZT) 334 radial 11 DME into Garmin Pilot it is FZT334011. I believe it is the same in the GNS530/430. I get a similar clearance when I fly from El Paso to Tucson. It took some head scratching to remember the first time since it is a fairly uncommon clearance. I asked Albuquerque center the reason for the VOR/radial/dme clearance and they said it was a requirement from Tucson approach. Jim -
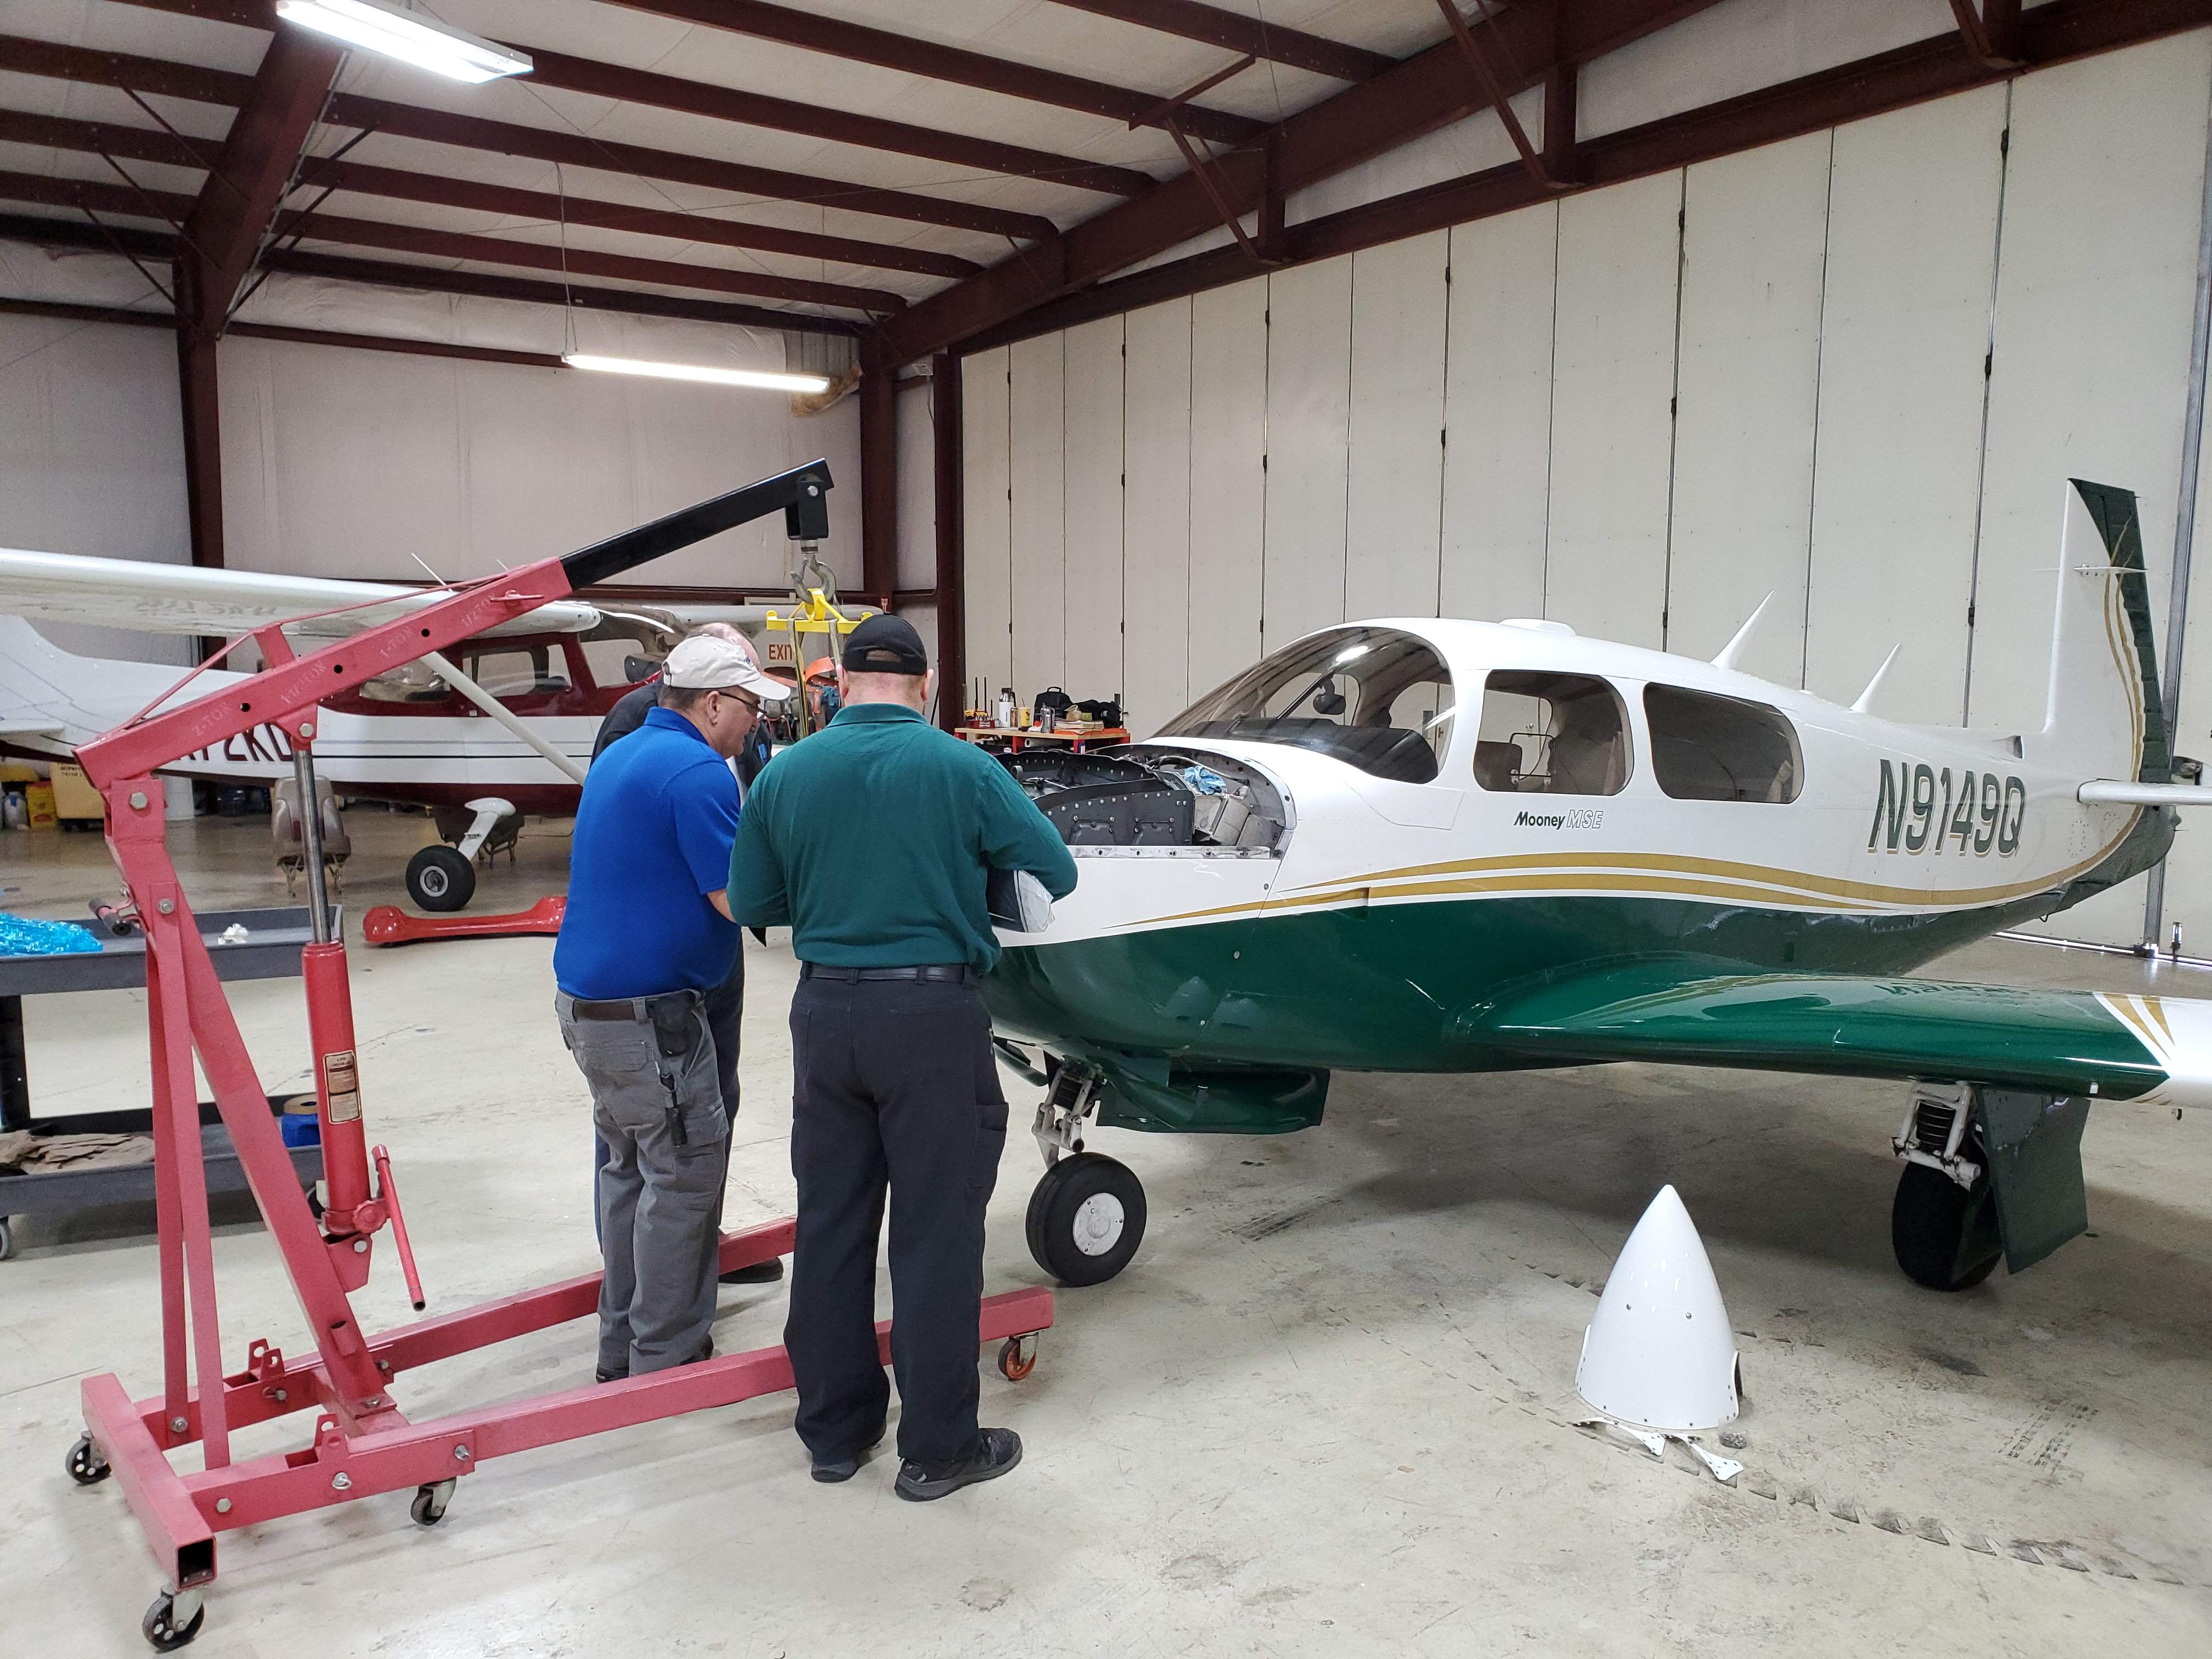
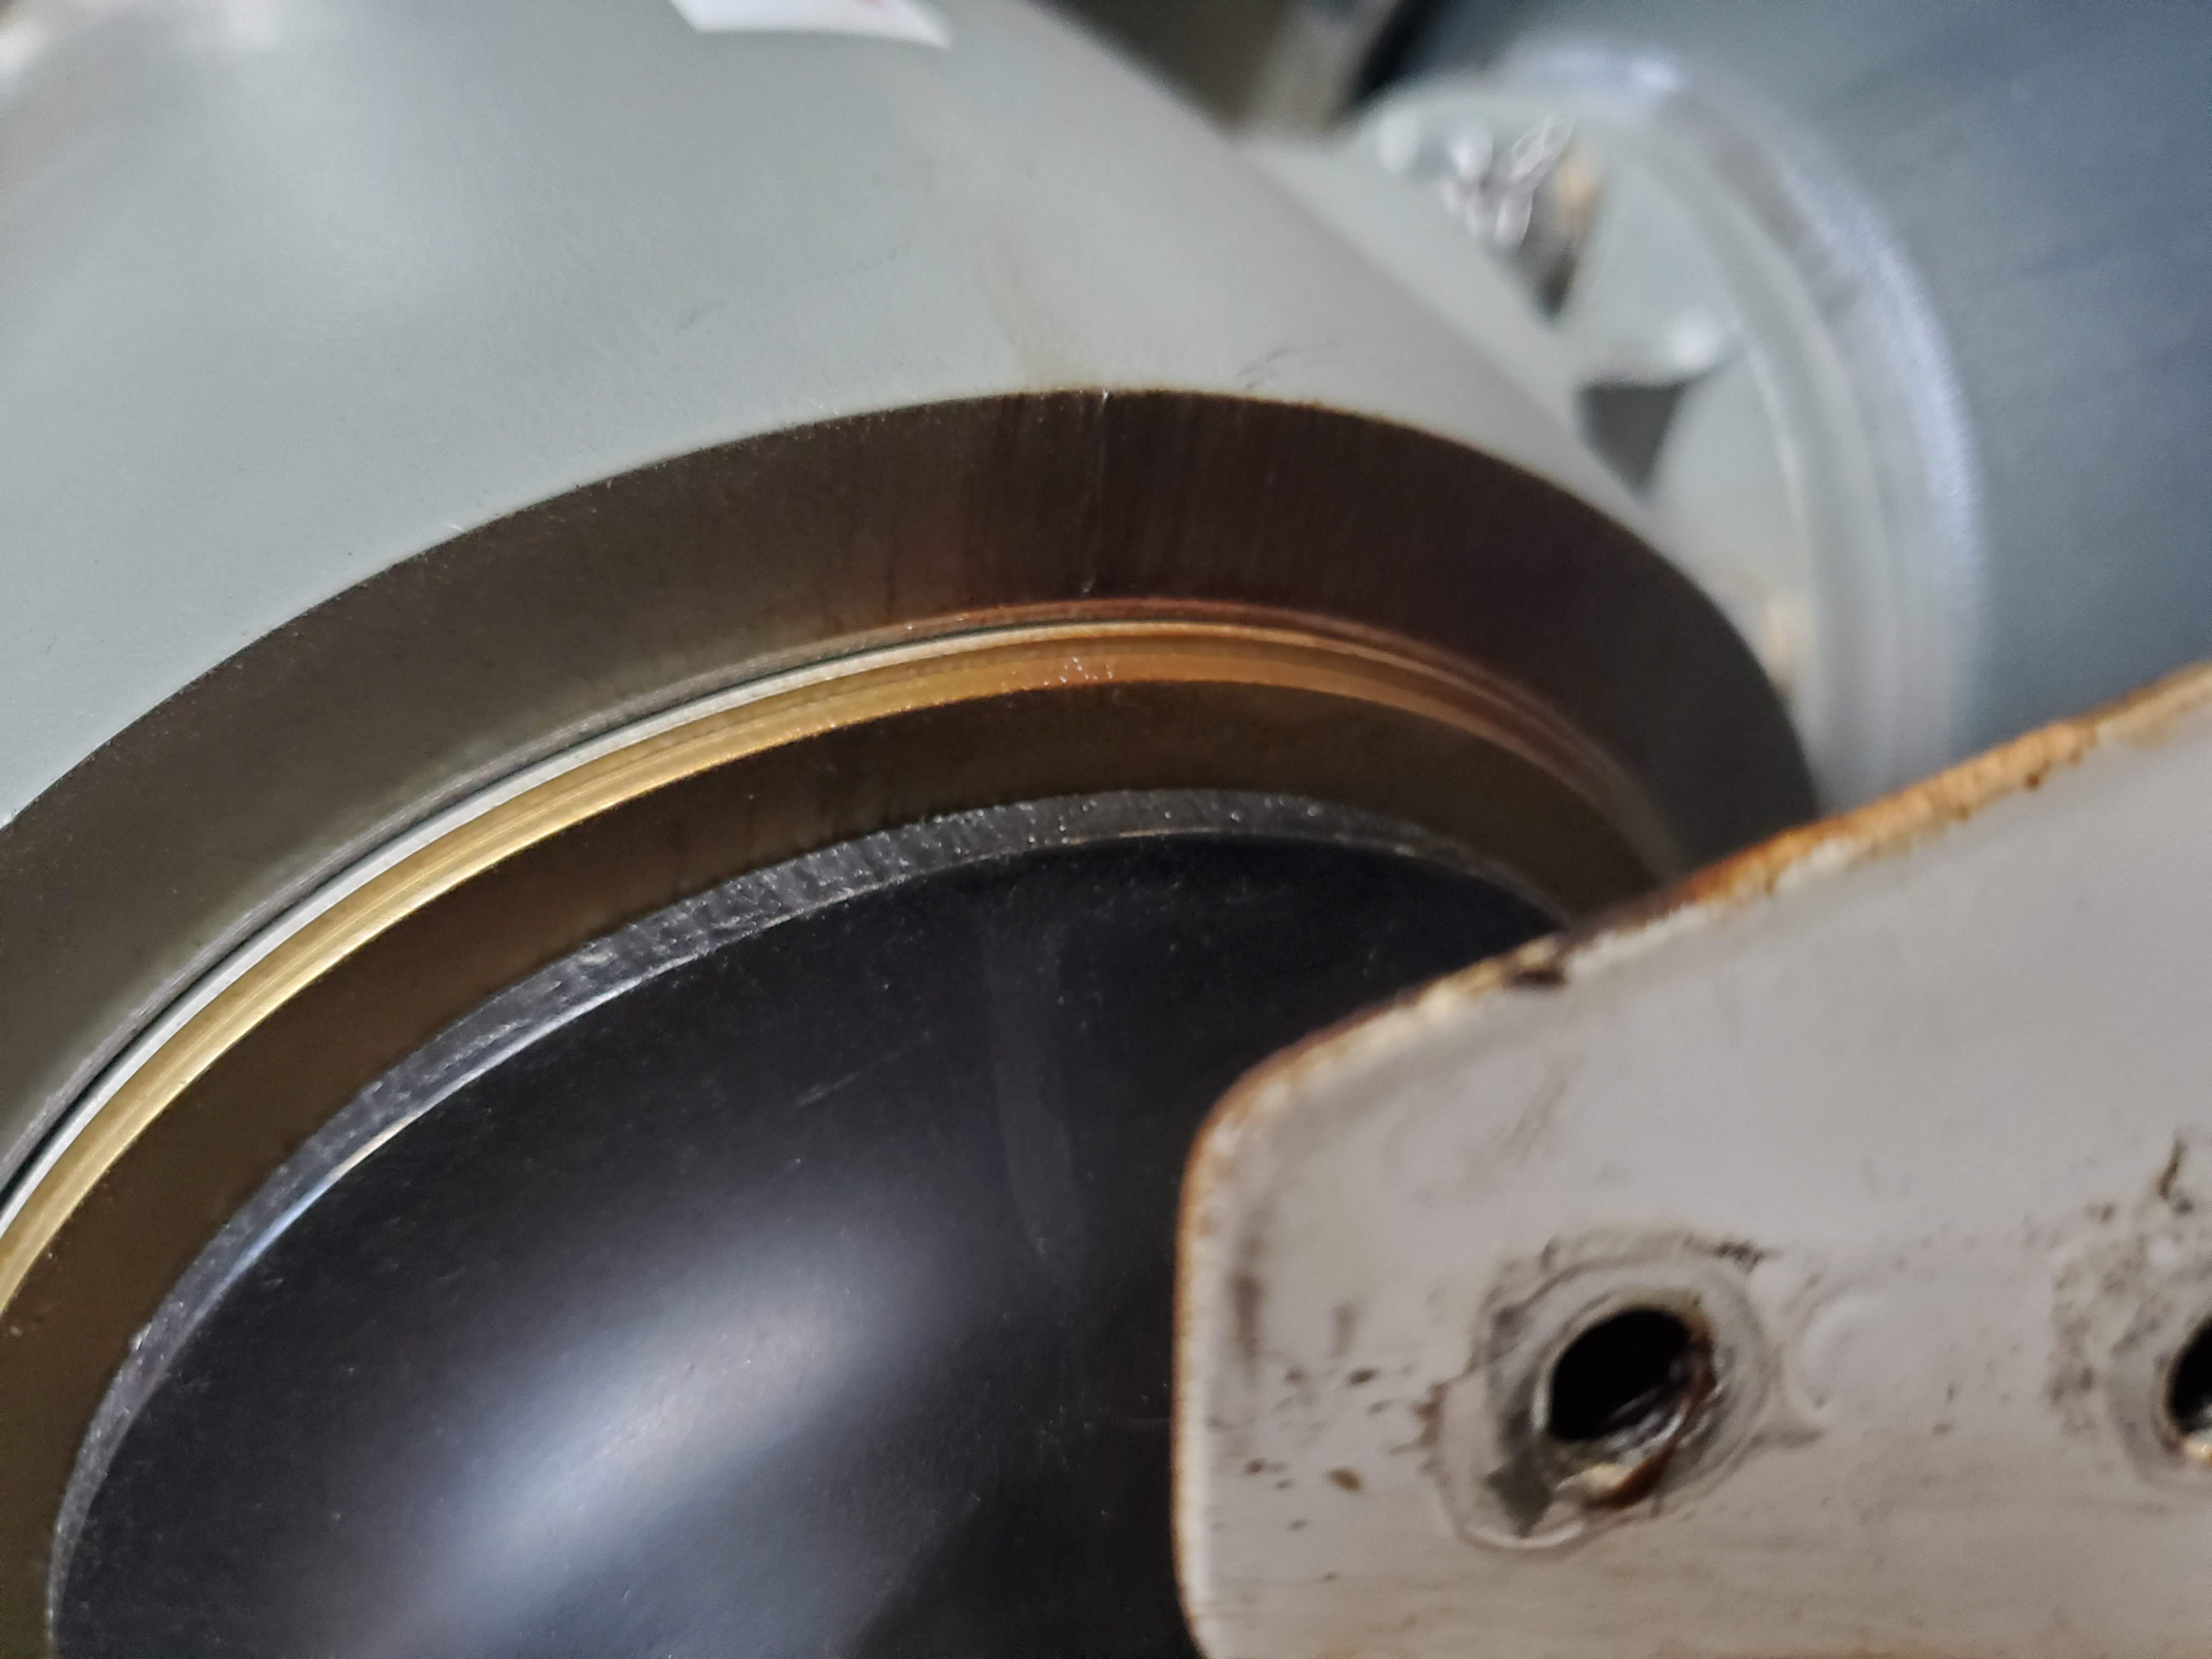
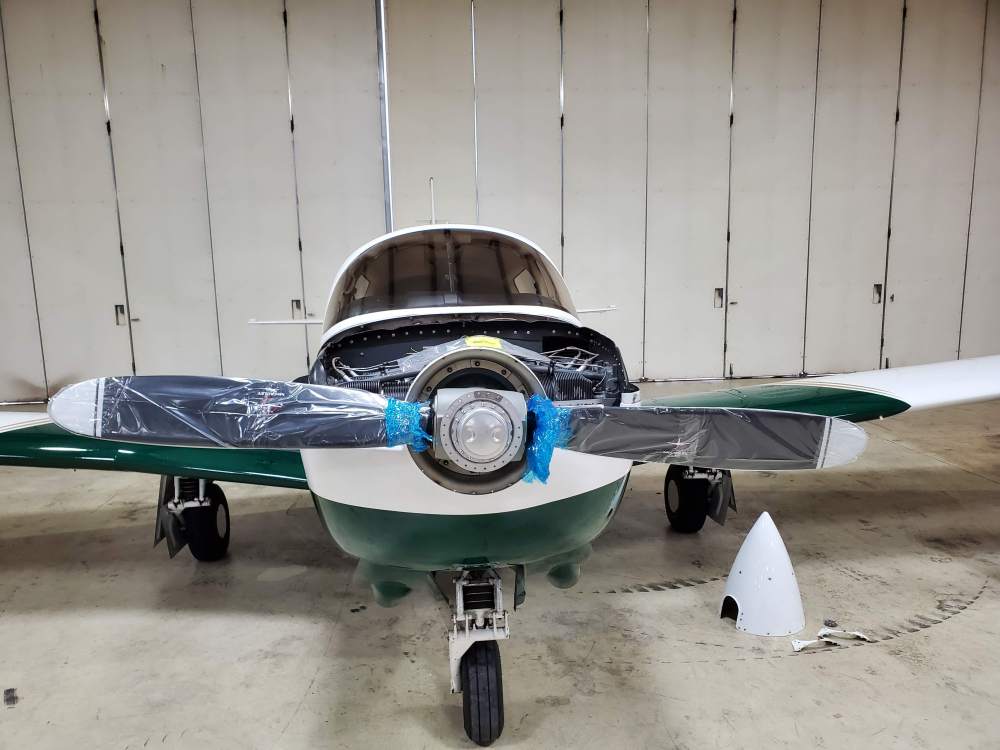
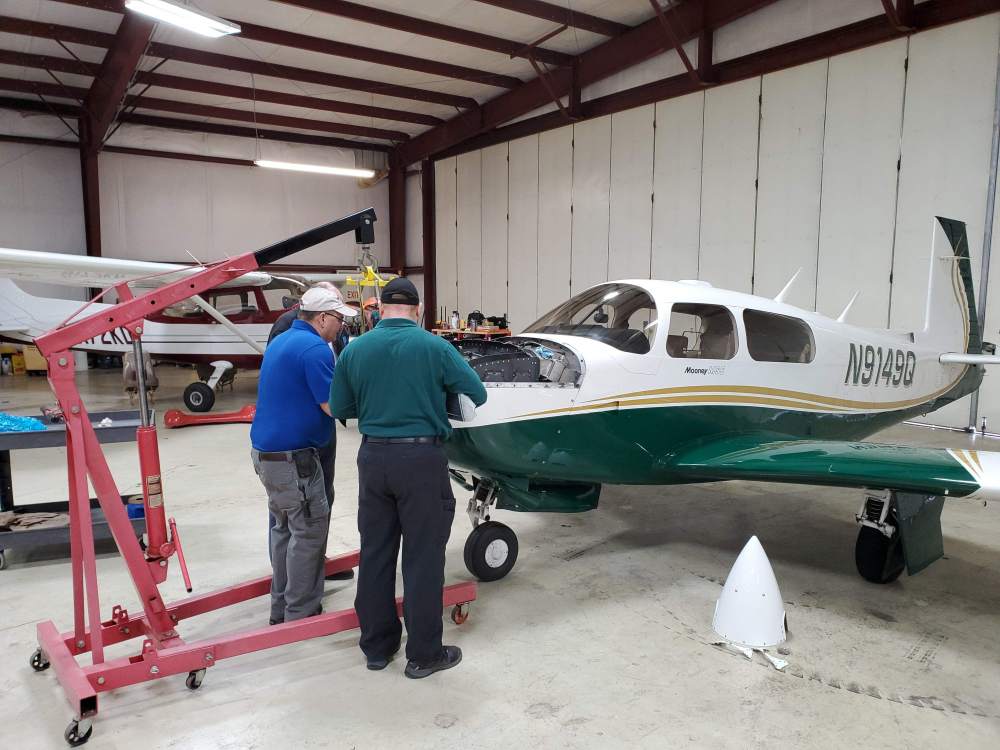
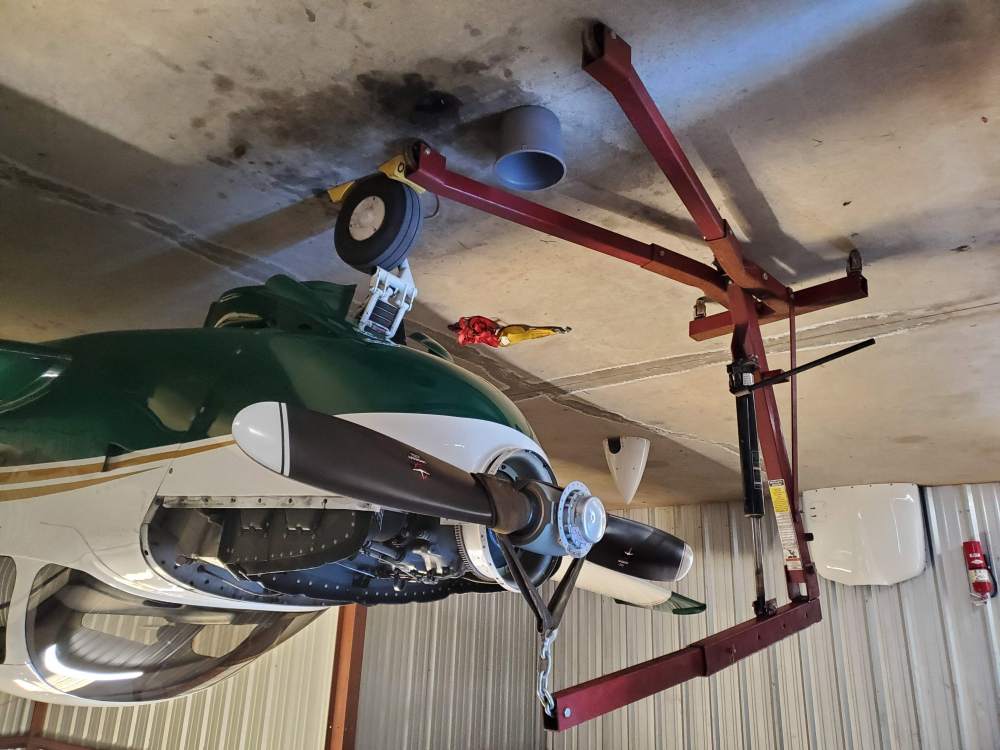
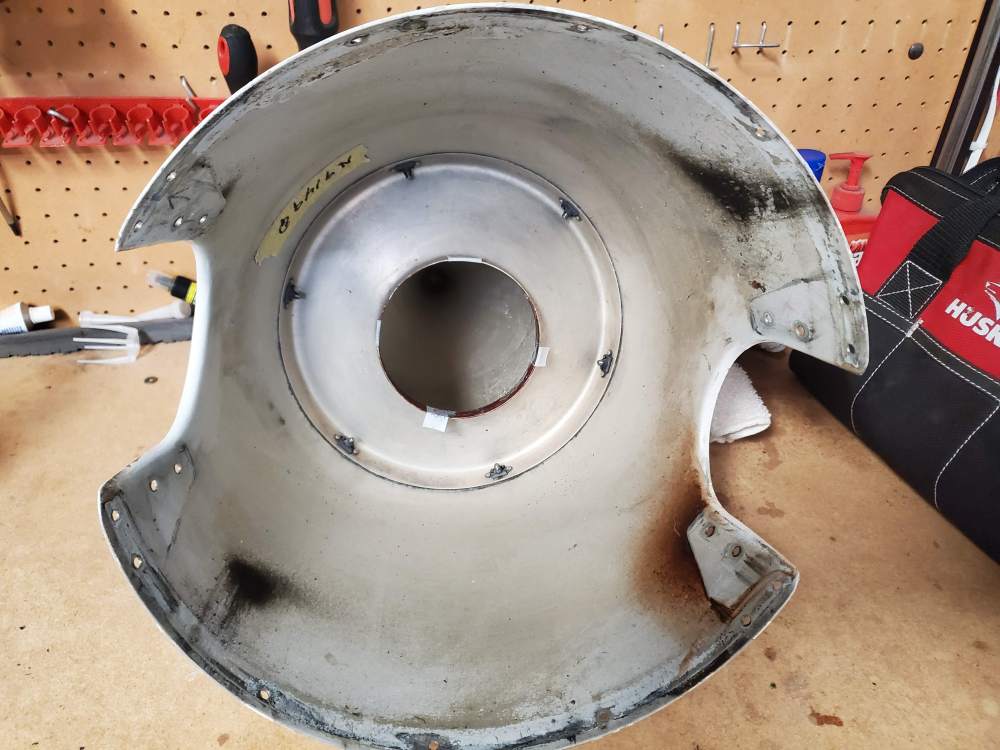
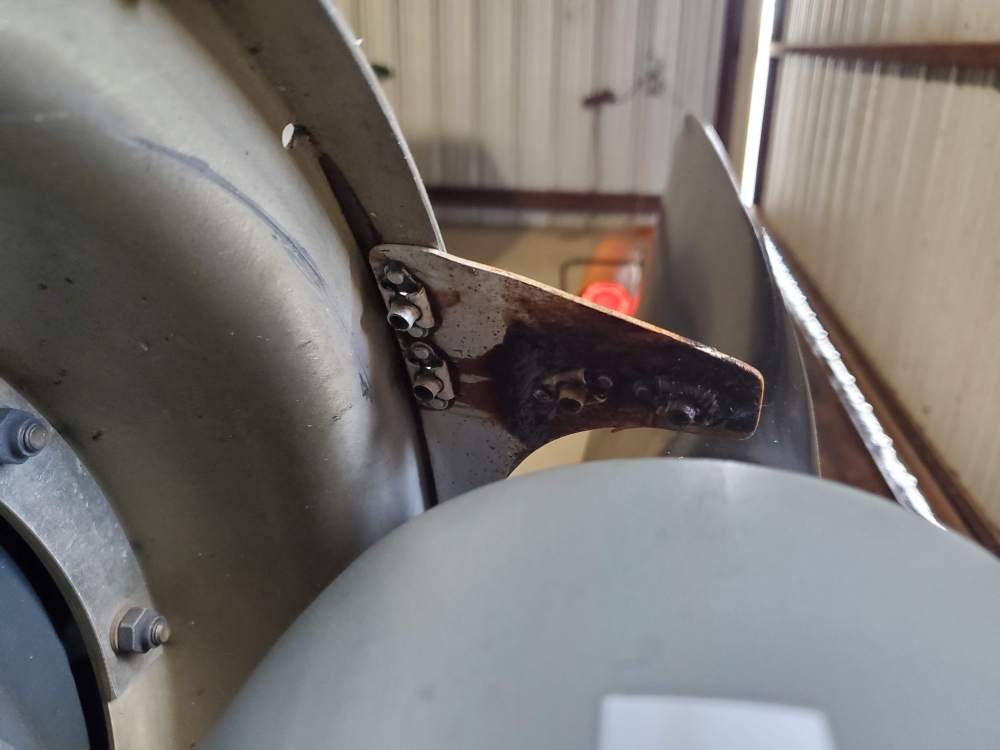
My wife and I left early on Monday morning for the 4.5 hour drive from Huntsville, AL to Wynne, AR. We arrived about 10:30 and met Cody at his shop. I expected to drop the prop off and come back a week later to pick it up. Cody surprised me by saying he had cleared the schedule for the day and would turn the prop around that day for us if we had the time. I was blown away. What outstanding customer service. Cody's guys unloaded the prop and took it to the back of the shop where it was disassembled. He was happy to have me watch the work which gave me a lot of confidence in what was going on. After about an hour long inspection of the prop Cody determined that it could be repaired. Cody was kind and kept his comments mostly to himself. I can say I was not impressed with the condition of the prop after being overhauled 190 hours previously. Lots of rust, stuck bearings, bearings that had run dry from lack of grease and very thinned out grease. Maybe that is what 190 hours of use does to a prop but I doubt it. Cody sent us to lunch and offered to let us watch the reassembly if we wanted. At 2:30 the prop was completed and we headed home. Made for a long day but I was so happy not to have to make another 9 hours round trip drive. Reminded me of why I would much rather fly than drive. Yesterday, the local mechanics remounted the prop. I was able to run up the engine and cycle the prop. Everything sounded and felt good. I will fly it this weekend when we get our two days of dry weather before the rains return to Alabama. I was impressed by the professionalism of @Cody Stallings and his team. They went above and beyond to get our prop fixed. Much appreciated. Jim
- 180 replies
-
- 12
-

-

-
Thanks. I couldn't get it to rotate. That does look better. Jim
-
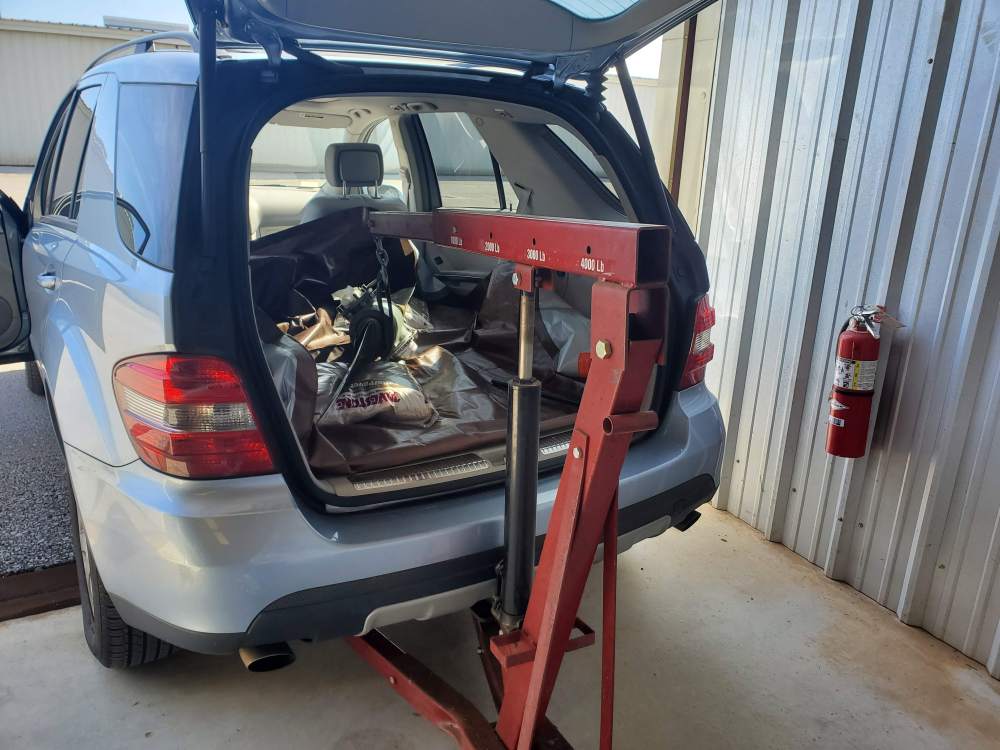
All ready for the trip to Cody on Monday.

-
A status update. After talking to Cody on Monday and Joey a couple of times this week I have decided to have Cody repair my prop. He believes that an incorrect oring or the wrong grease was used during the last repair. Today I spent the morning removing the prop.
-
Thanks. I'll give you a call Monday morning. Jim
-
Thanks for the report on the MT. I will take a look at them. Did your cruise speed stay the same? I assume you have better climb with the three blades. Jim
-
Thanks for the information. Unfortunately, neither entry from last year state the type of grease used. I have followed the discussion of the problems with AeroShell #6 becoming thin and leaking past the seals. I had wondered if that might be the cause of my seal leaks. What do you do about it once it starts? I am not anxious to throw away a perfectly good prop if this is the cause. At the same time I am not interested in resealing a prop every 10 months like I have done in the last three years. Jim
-
Joey told me three weeks on the Hartzell and four on the Macauley. I won't do annual until the end of March so both times are acceptable. Jim
-
The work has been performed by two different shops in two different parts of the country (Georgia and New Mexico). I thought the first time it was a bad shop. Now I think something is wrong with the prop hub. Maybe someone else could fix it, I don't know. I am not willing to bet another $2000 that they can. Jim
-
Interesting on the prices. The numbers Joey gave me yesterday the Hartzell was $500 more than the McCauley. I'll get him to confirm the numbers, I might have misunderstood. I like the idea of a hub that can be regreased. I wasn't aware of that feature. Joey seemed to like the Hartzell better. Sounds like I need some more clarification from him. Jim
-
Yeah, I am with you on the opening the thread again. I don't understand a prop requiring servicing four times in three years. It has been worked on by two different shops and yet still has a problem. When I was talking to Joey on Sunday night my wife was listening in. The conversation went something like this: Joey: "There are several options. We can get the prop resealed again". Wife: "Buy a new prop". Joey: "We can find a new hub and reuse the blades". Wife: "Buy a new prop". Joey: "We can buy a new prop.". Wife: "Buy a new prop". So I am shopping for a new prop . Right now I am not seeing a compelling reason to pick the Hartzell. The 10 or 12 additional pounds seems like a real minus. I plan to look at the W&B this weekend and call Joey with my decision on Monday. Jim
-
Thanks for letting me know. I wondered what you did with your prop. Do you recall what the weight difference was? I should probably do a W&B to be sure it isn't a problem for me. Jim
-
Agreed. I have heard good things about the MT except the lead time seems long. Jim
-
We do fly a lot of long distance so smoother and quieter would be an advantage. The extra weight doesn't concern me too much. Jim
-
Thanks. I am only considering the two blade prop. I have heard enough concerns about the 3 blade/4 cylinder to not be comfortable taking a chance on a three blade. Jim
-
Joey said that the Hartzell is about 10 pounds heavier. He mentioned that the McCauley may be slightly faster with less climb. I would probably pick more speed if I can but I am not sure I believe the claim. Jim
-
Thanks for the information. I haven't really had any objection to the McCauley prop up until now. It worked great for twelve years and has been a real problem for the past four years. Jim
-
Once again I find myself opening this thread to report I am again having prop issues. About a month ago, after one of our trips, I noticed some brown spots on the cowling and grease on one of the prop blades. Just to recap the prop was resealed in Feb 2017, resealed in Feb 2018, lost a snap ring in December 2018, had a loose blade in Feb 2019 and now slinging grease in Feb 2020. At least this time the prop lasted for about 190 hours before leaking again. After speaking with Joey Cole of Cole aviation I am shopping for a new prop. My options are McCauley to replace the current one I have or a Hartzelle HC-C2YR-1BFP. I saw the thread discussing replacing a prop damaged by a rock and it looks like the two props are similar in performance. Does anyone have any more information to share to help me make my decision? The good news is I still have about six weeks left before annual is due so I have some time to get the prop ordered to minimize the down time. Price is within $500 so pretty much a wash for cost. Availability is about the same. Jim


-
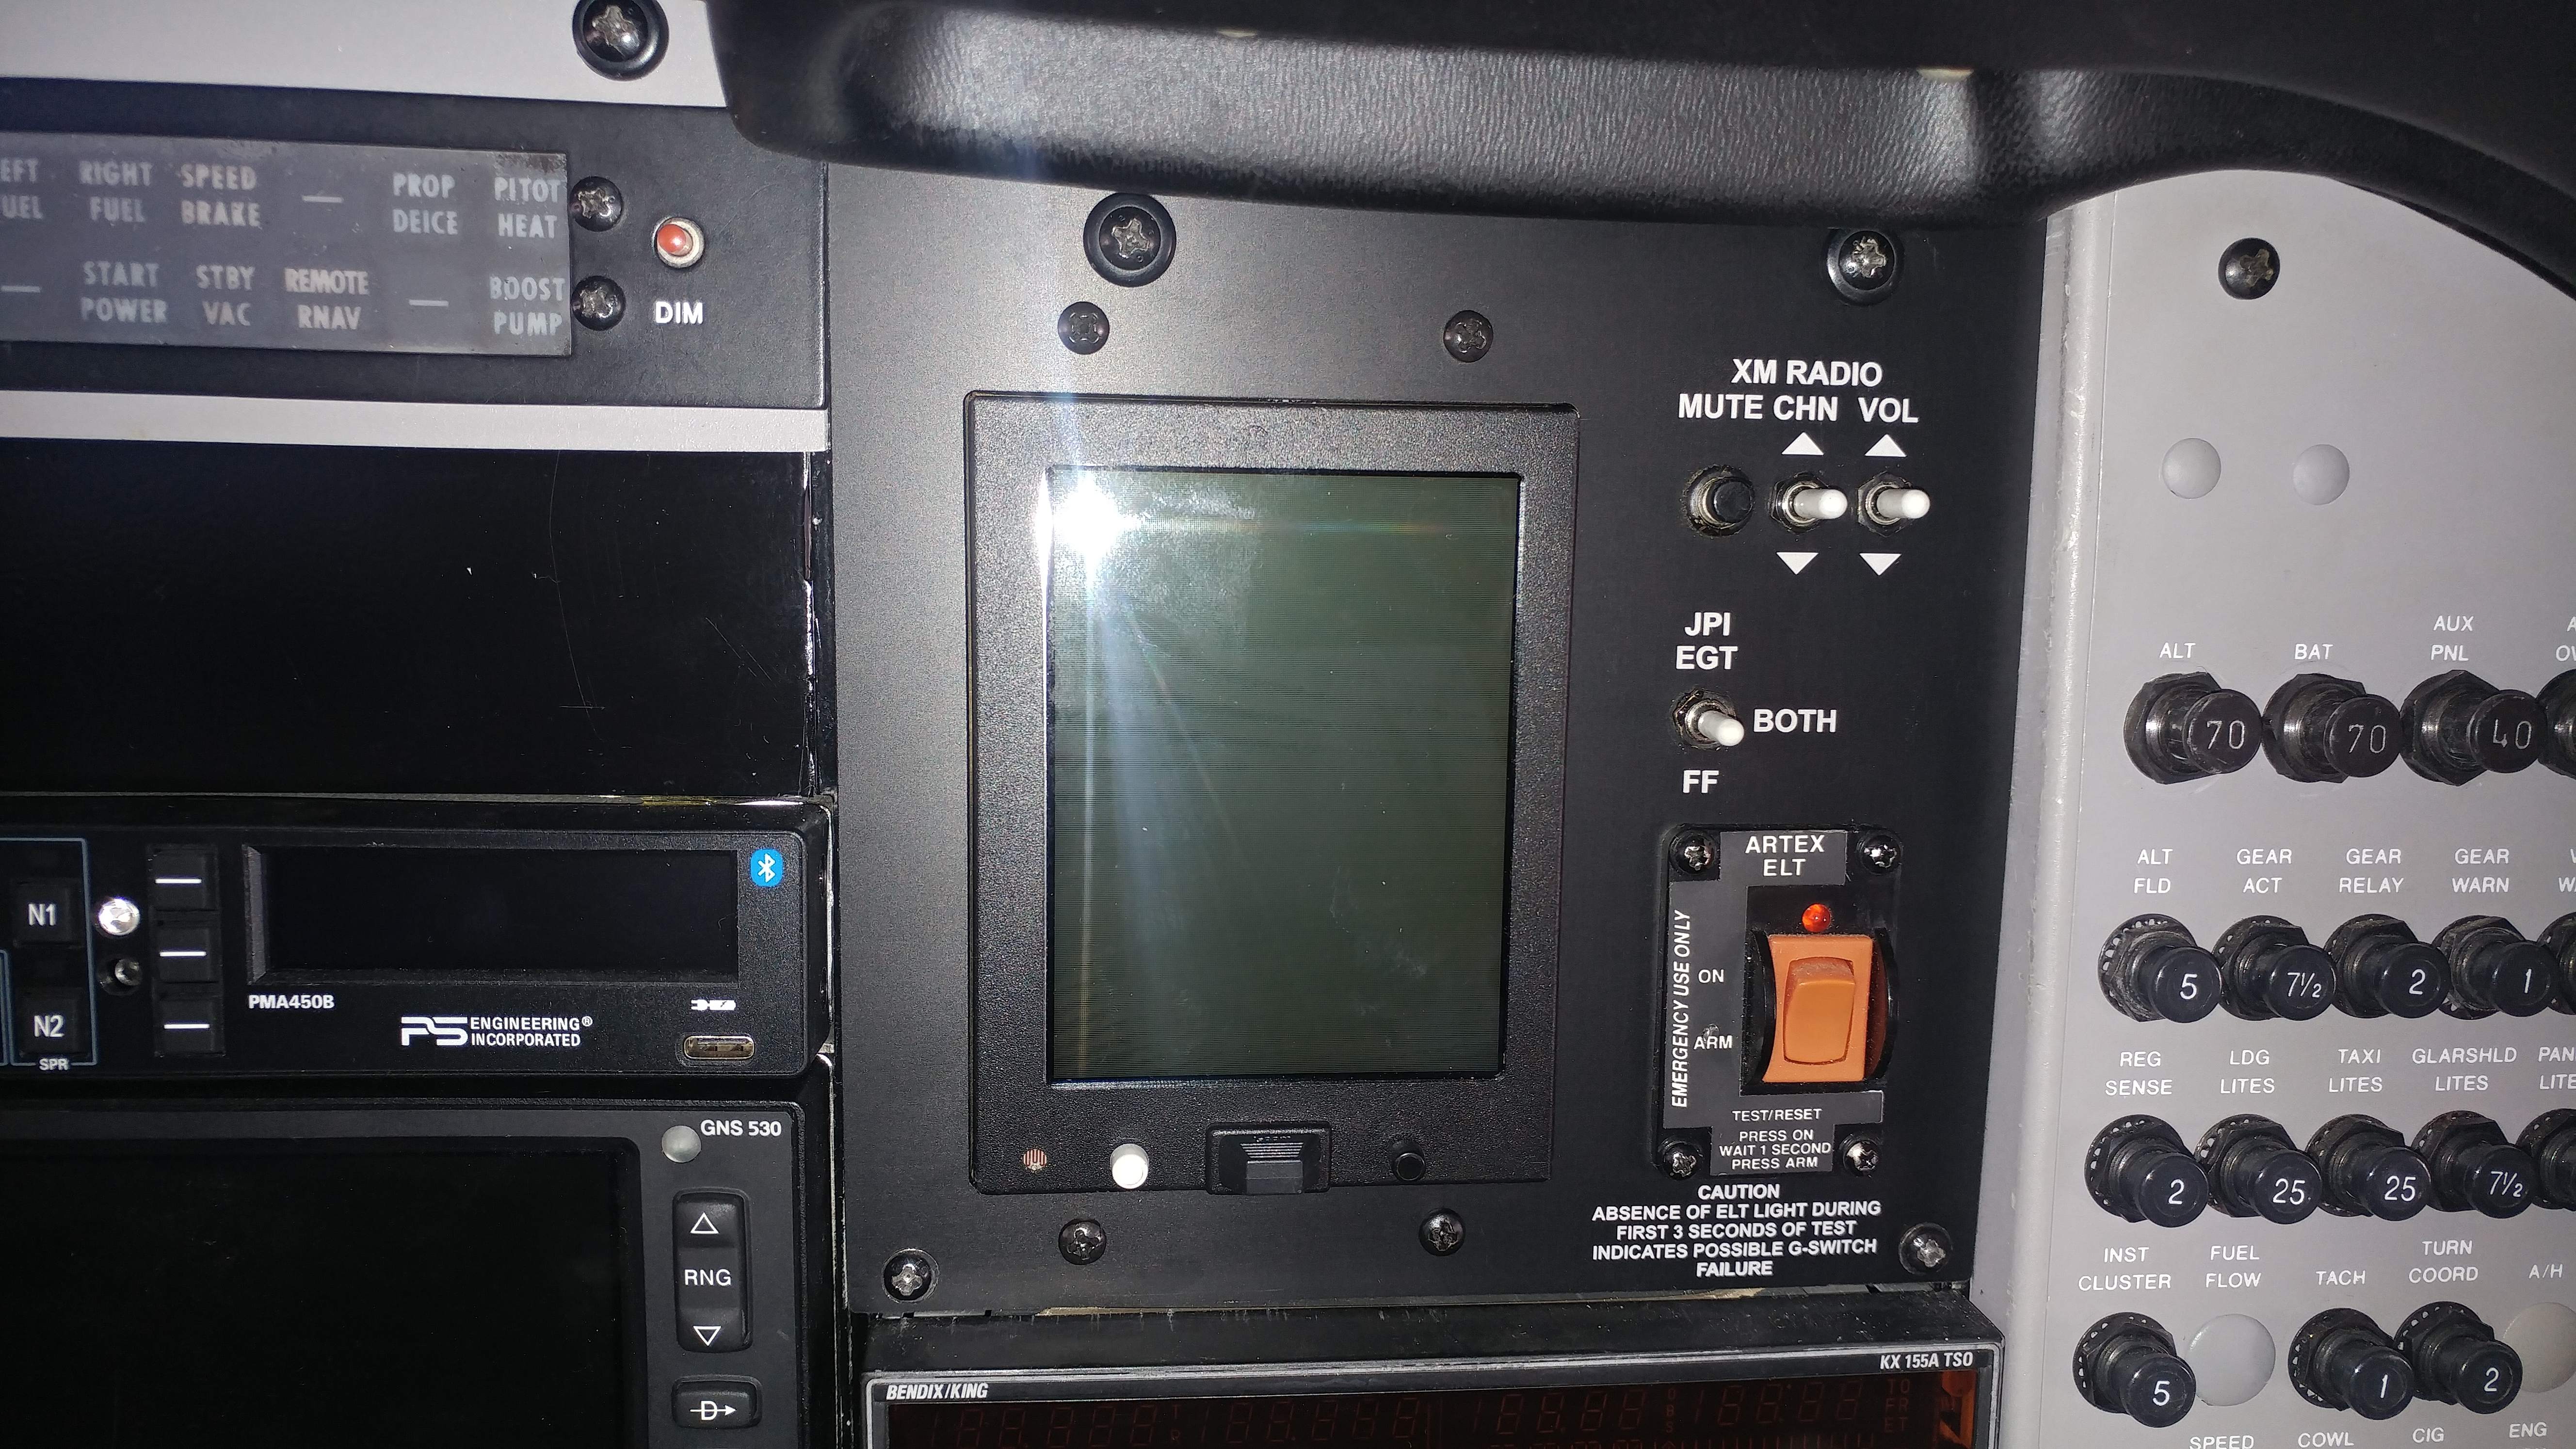
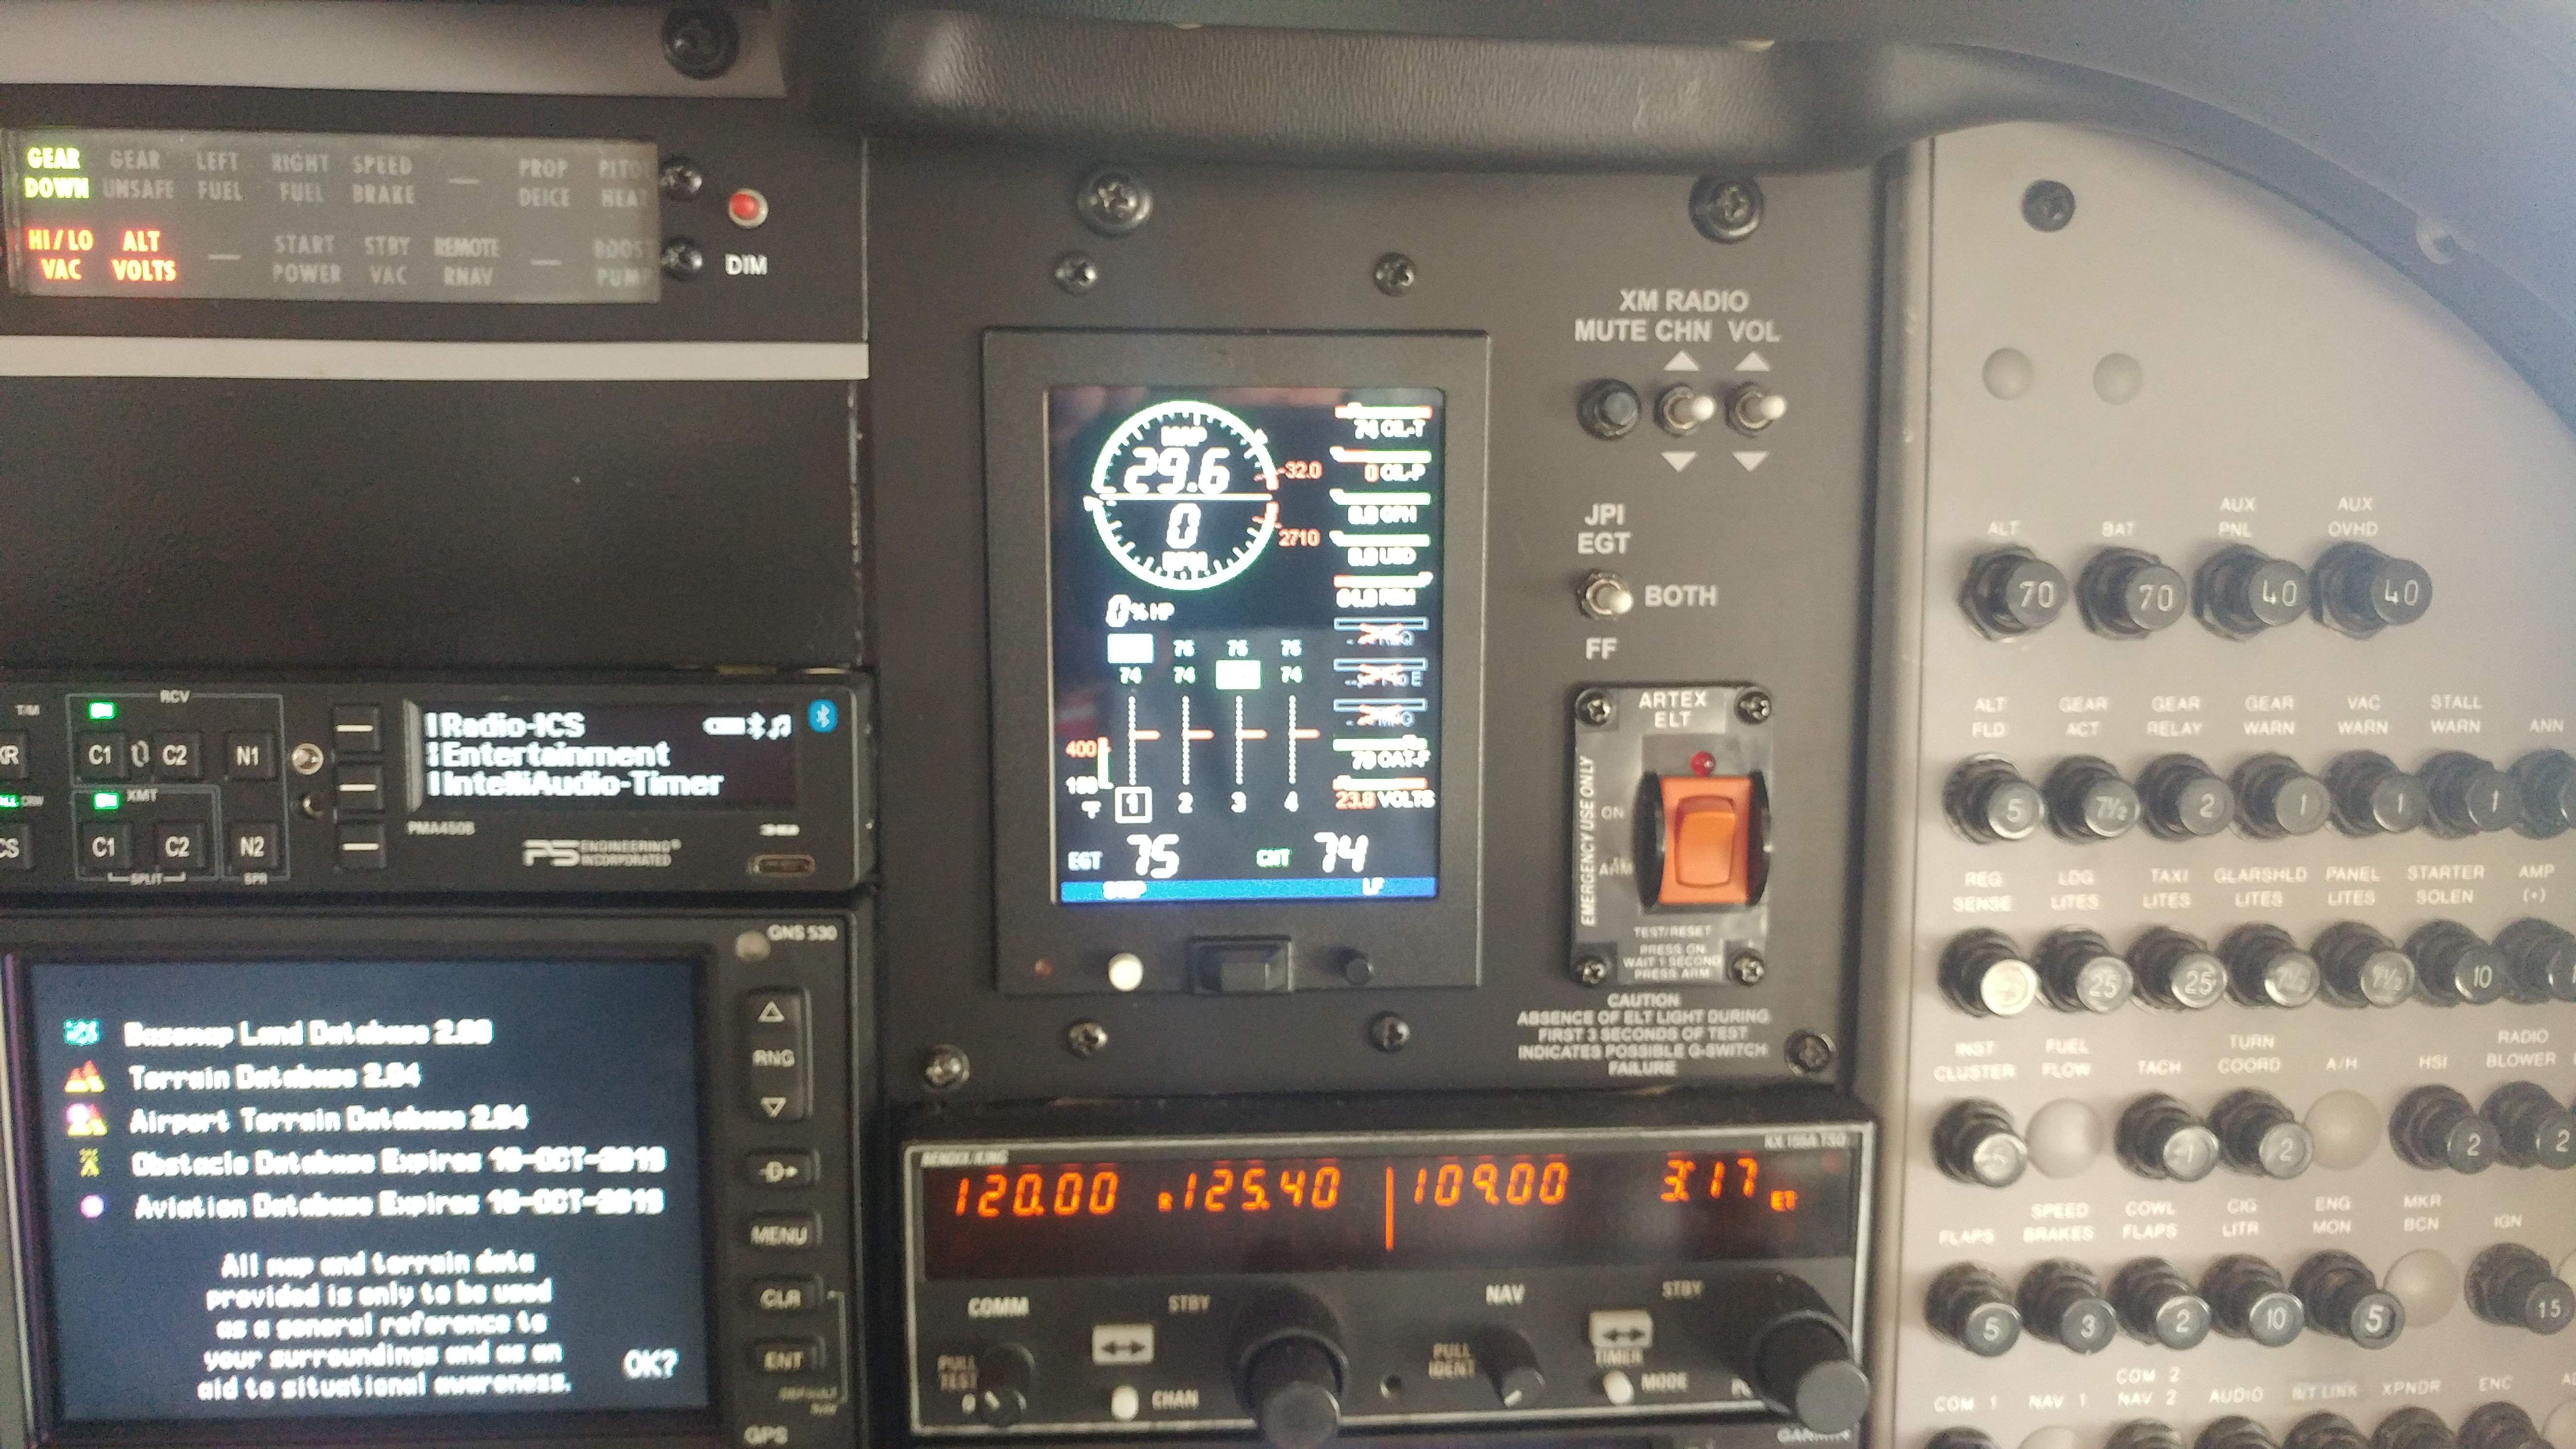
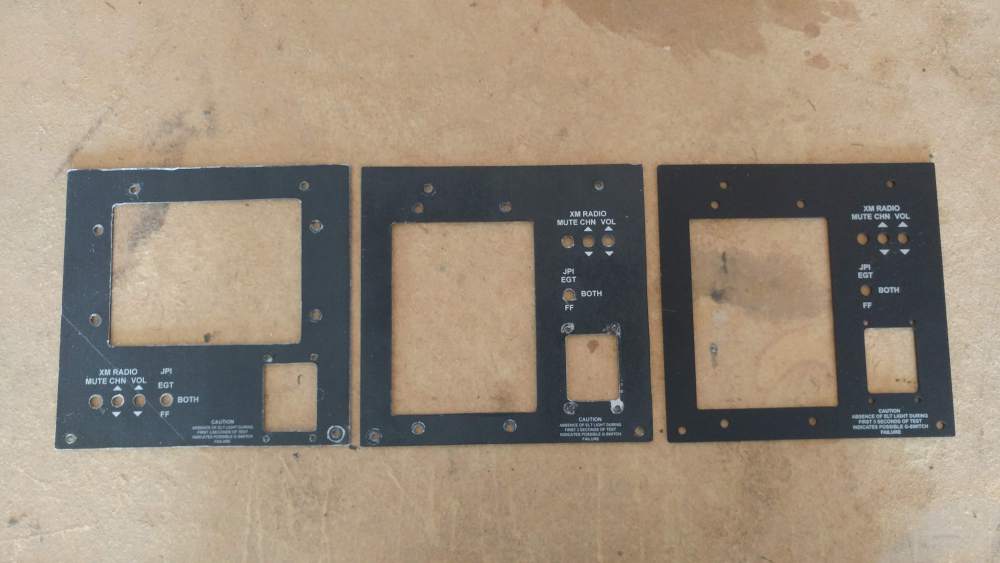
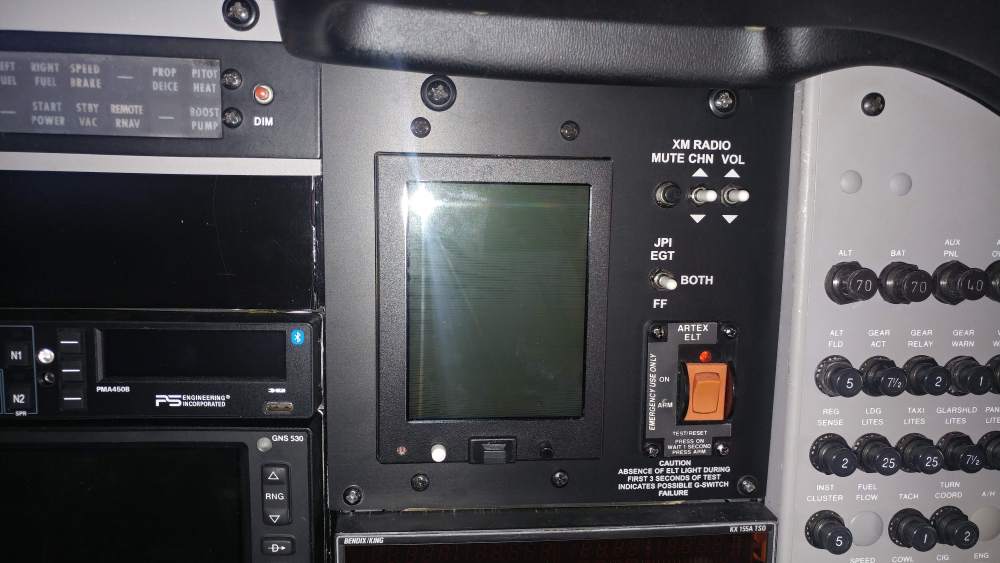
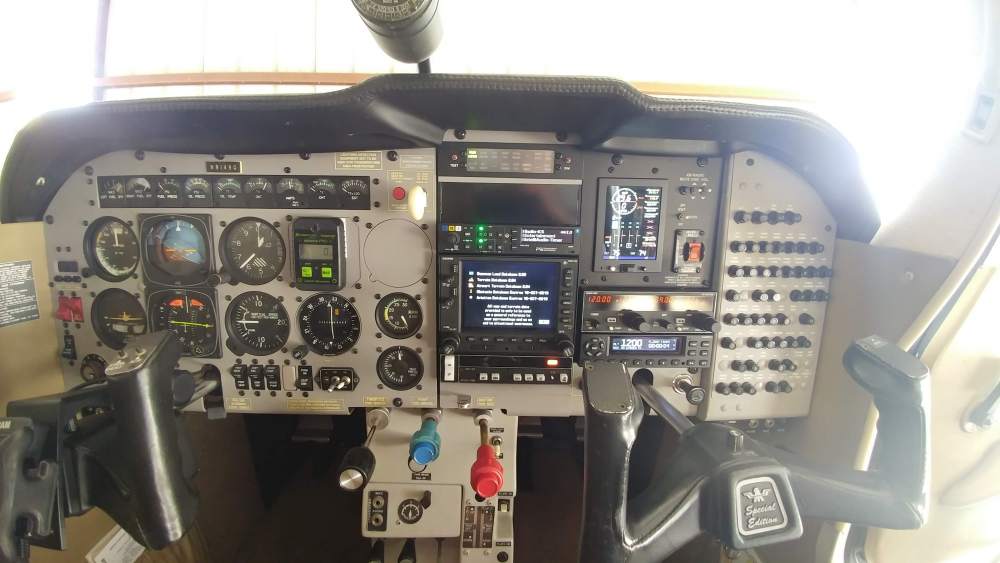
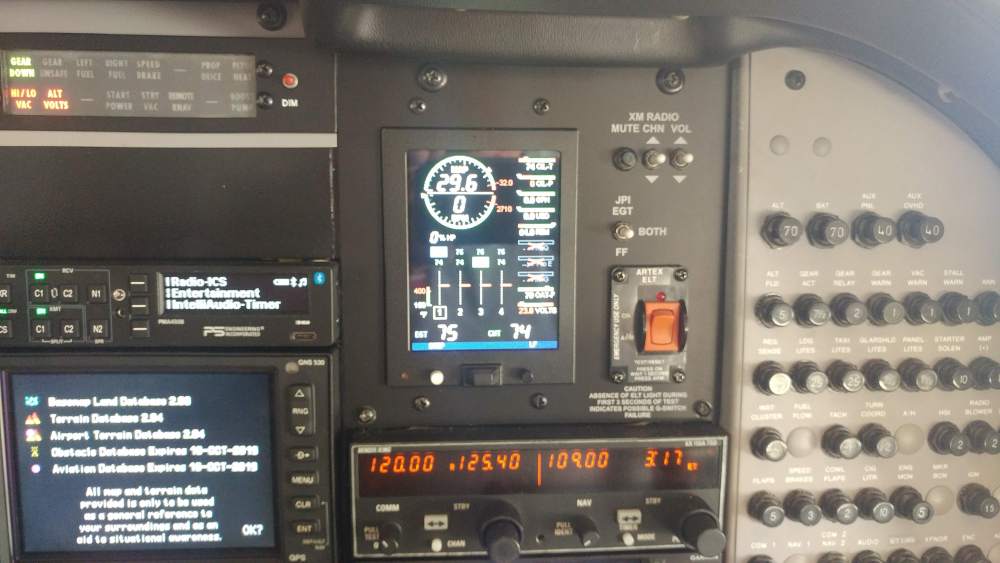
A few years ago I added a basic EDM 700 to our M20J. It was a tight fit but I was able to get it to fit above the right radio stack. I designed a subpanel and had Aircraft Specialty (http://www.aircraftspecialty.com/) cut and silkscreen the panel for the EDM (see first photo). Over the years I added more sensors to the EDM 700 and it served me well. Last year the EDM 700 screen started to dim at random times so I knew it was going to need servicing. I had never added fuel flow to the 700 as I had a Shadin Miniflow giving me fuel flow information. I considered sending the 700 back for repair and getting the fuel flow option added turning it into an 800. I considered removing the 700 and adding an EDM 900 to remove the primary ship's instruments. Ultimately I decided to remove the EDM 700 and the Shadin Miniflow. In its place I installed an EDM 830. My reasoning was that the EDM 700 screen is fairly small for the amount of information to display and I didn't want to put more money into it. I decided against the EDM 900 as I wanted to keep the ship's instruments. I haven't had very many problems with them and I wanted the redundancy. I realize that the EDM 830 isn't primary but if I am on an out island in the Bahamas I will use it to get back to some place the primary can be repaired. When I had the GTX345 installed a couple of years ago I had the DME and ADF radios removed from the right radio stack giving me a couple more inches to work with for the larger EDM 830. I experimented with a horizontal layout for the EDM 830 (left panel in second picture) and didn't like that as well as the vertical orientation (middle panel in second photo). After living with the vertical orientation for a few months I had Aircraft Specialty cut a final panel (right panel in second photo). I received the final panel yesterday and installed it this morning. I am very happy with the final results. The technique that Aircraft Specialty uses now is an anodized finish with laser etching. A clear coat over silkscreening can crack where the screws are tighten. The anodized panels don't have this problem. The colors are more limited it anodizing but since I wanted black it worked out great for me. The final photos show everything installed.

- 1 reply
-
- 3
-