dmevans
-
Posts
90 -
Joined
-
Last visited
2 Followers


Recent Profile Visitors
2,646 profile views


dmevans's Achievements
")


-

Saying hello, just moved near KLUK
dmevans replied to catchman86's topic in Vintage Mooneys (pre-J models)
I just ferried a Mooney from California to Maryland last week. I overnighted in KLUK. I wish I would have seen this sooner!! -
Perfect!! This is exactly what I was looking for! Thanks so much!
-
Thanks. I don’t have the springs on my plane, or I would have matched them. I have the threaded rods, and was thinking this is a much better solution. Thanks.
-
What size springs or P/n?
-
Good evening everyone, I want to first take this opportunity to apologize for not communicating the status of the rigging boards with everyone on here. As JSNO mentioned above, a few individuals (not on Mooneyspace) have an issue with what I am doing. As many of you know, I am an FAA Employee and cannot risk my job due to an ethics violation and/or an aviation safety related issue. This thing has escalated to a level I never imagined. I felt that I was using my skills to help everyone out and it turned out that there are people that seem to think what I am doing could "potentially" create more harm than good. For now, I am going to postpone work on this, until I find an alternate method to move forward. It's absolutely ridiculous in my opinion, but I will keep you posted.
-
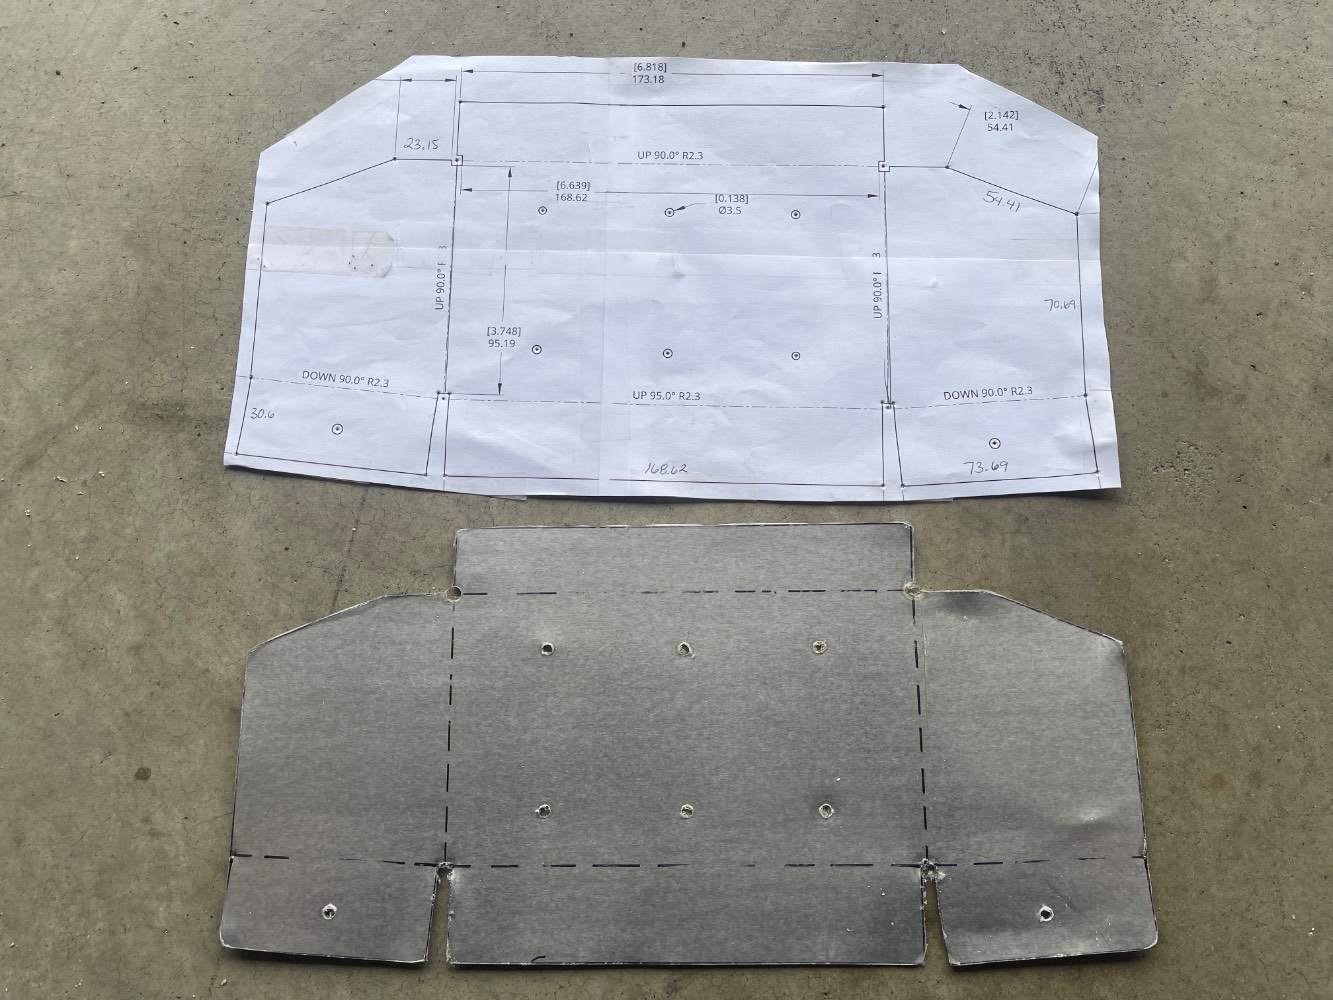
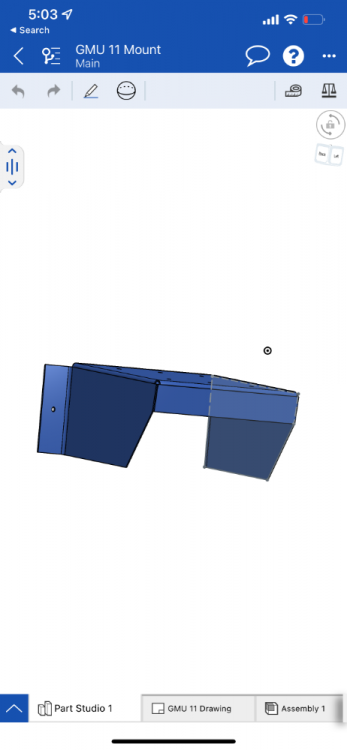
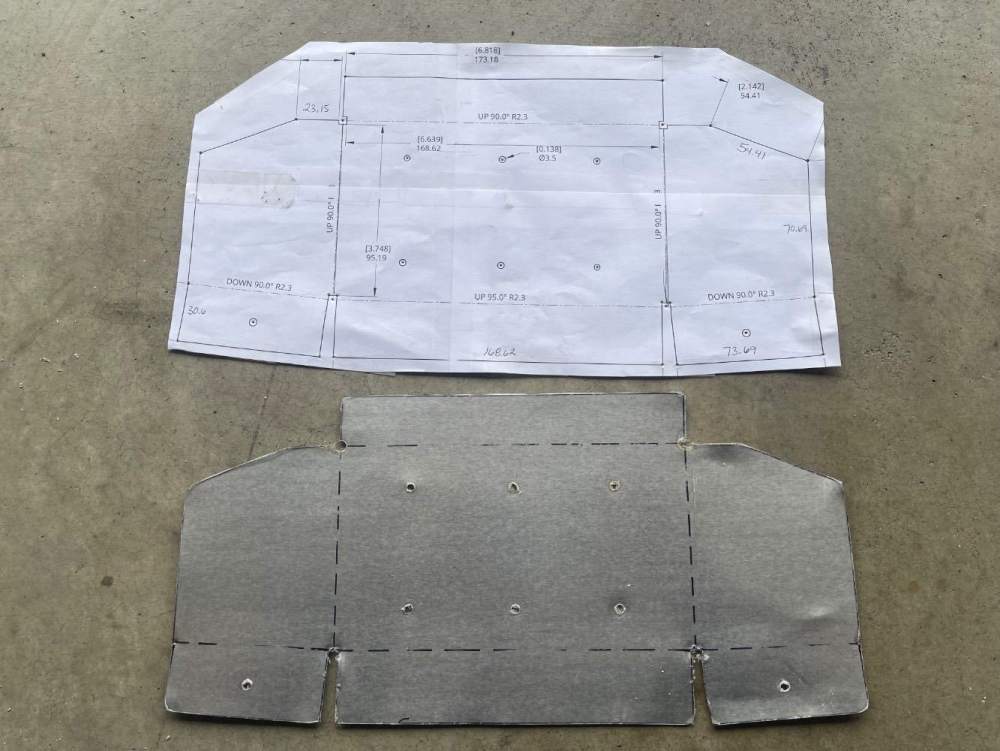
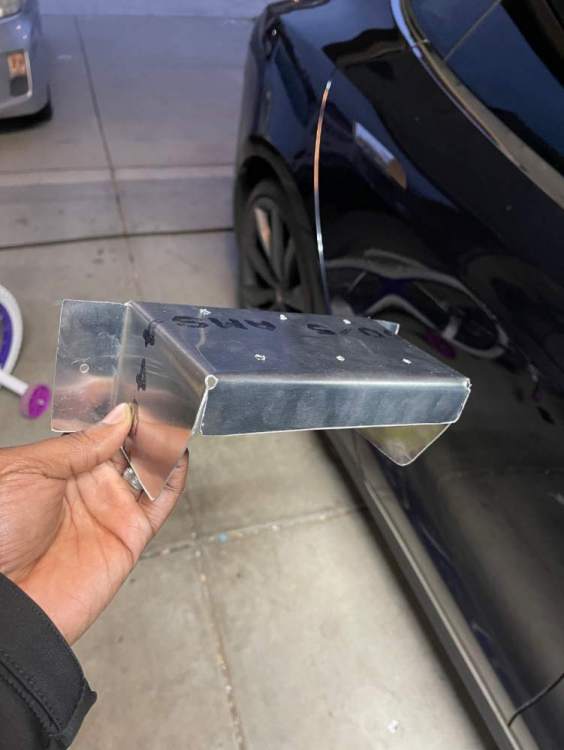
Yes it is!! I didn’t have access to a box/pan sheet metal brake, so I had to limit various dimensions so I could make it work. Your product is awesome! If you had it available for sale earlier, I would have purchased yours in a heartbeat!
-
I saw your design from a post a while back… I threw it in CAD and started bending. Yours looks a lot nicer than mine.
-
Great question. I’m still prototyping and testing different materials. As soon as I have a final number, I’ll be sure to let you all know. So far the product is superior than the factory boards. The cost will be significantly cheaper as well.
-
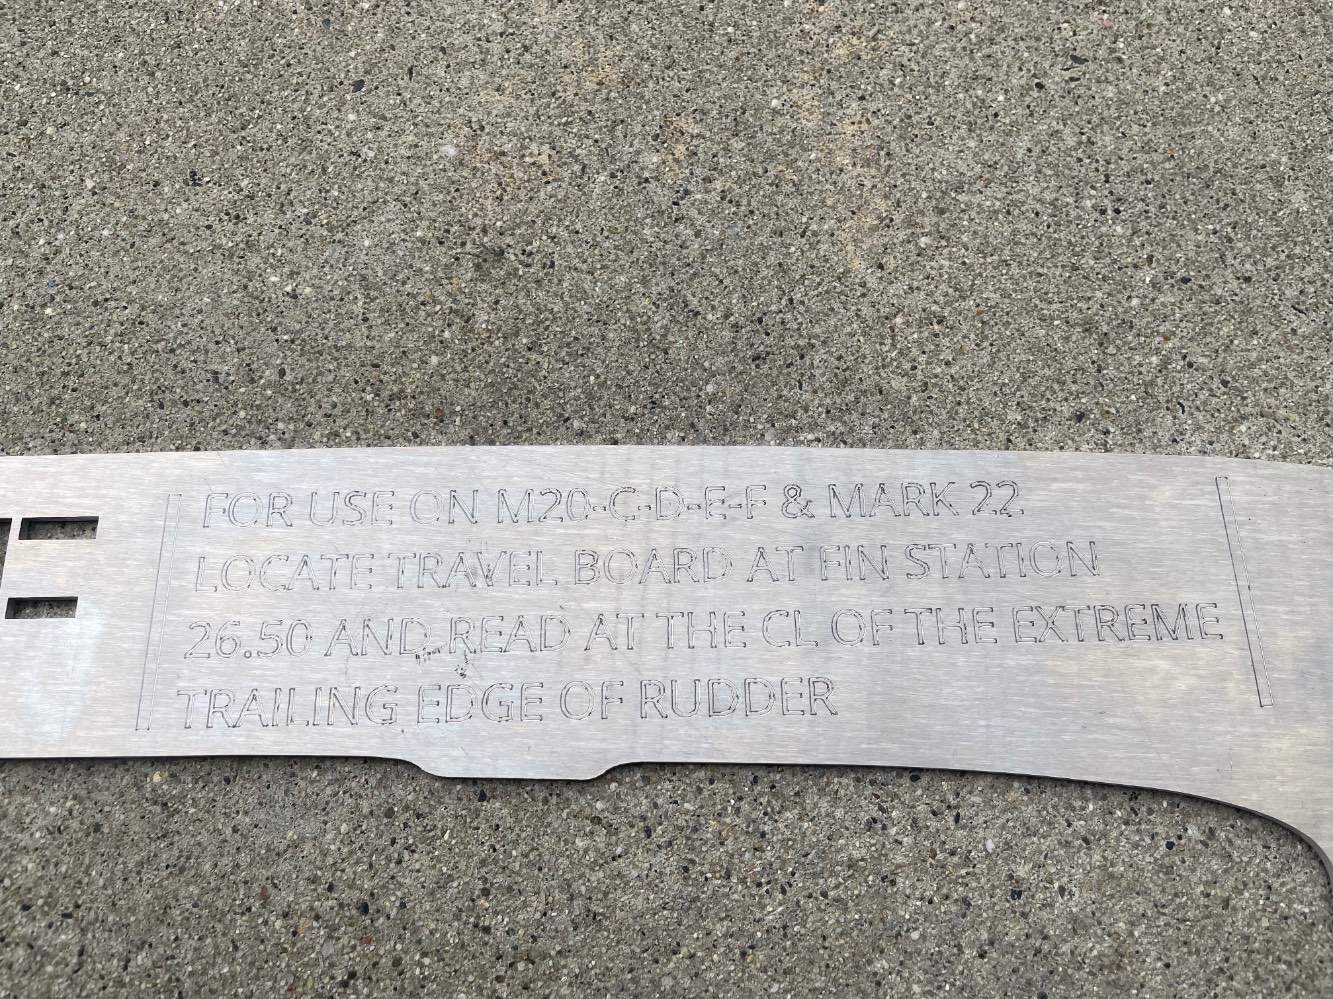
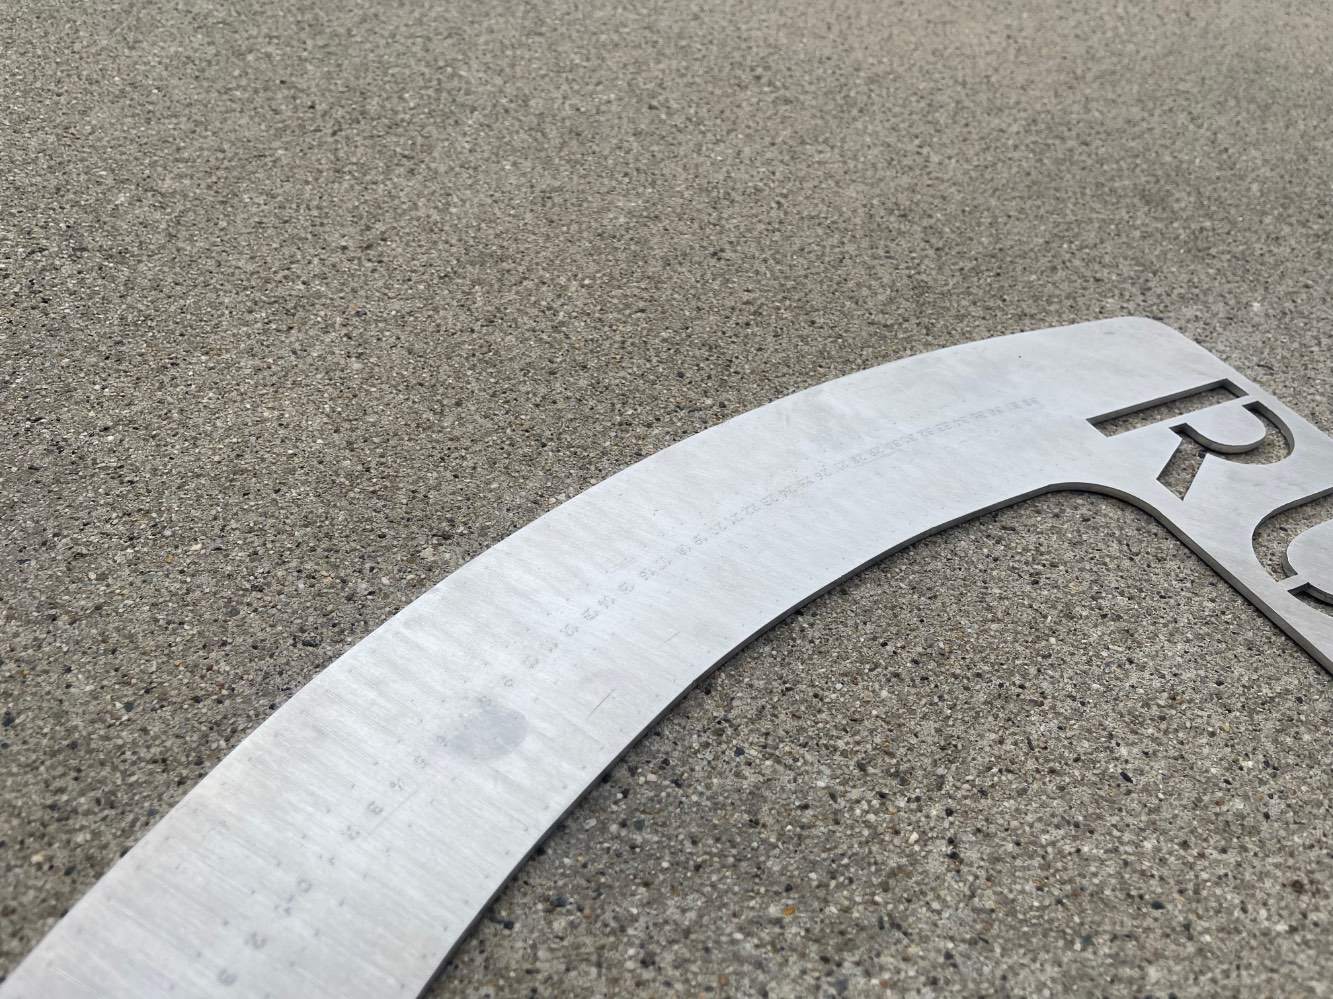
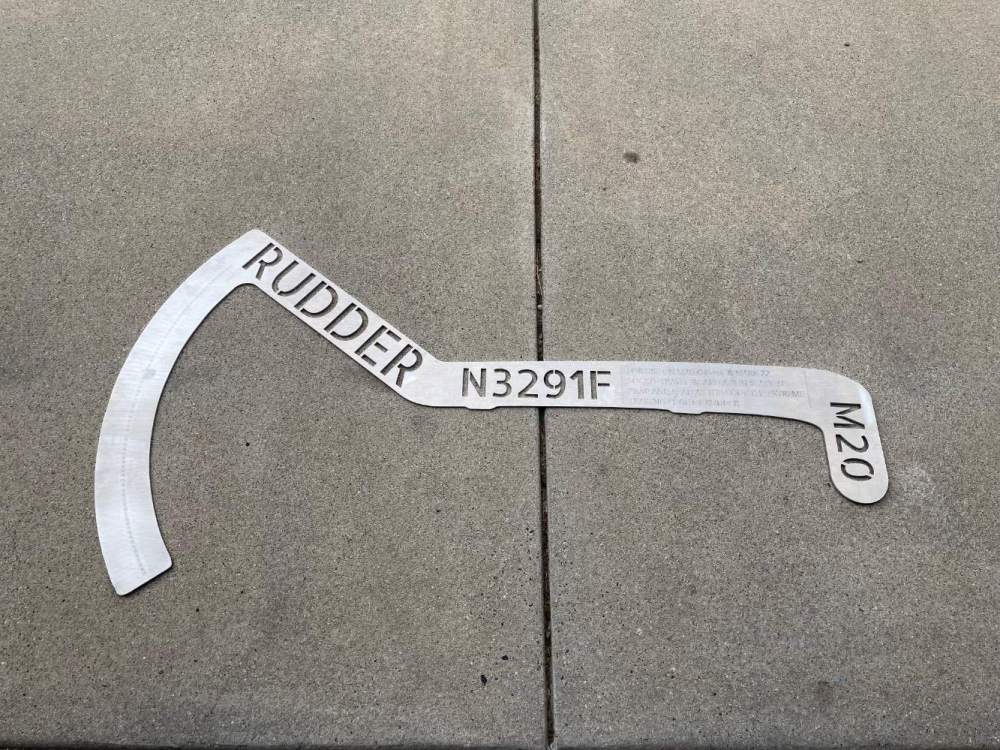
Sorry for not updating the thread on my progress. I’ve been extremely busy lately, but I was able to throw a rudder board prototype on the laser cutter. I’m not a fan of the etching of the scales. I will most likely end up machining the scales in after anodizing. Here are a few pics from the prototype. I should hopefully have all of the boards finished within the upcoming months. Safe flying guys!

-
Hey Everyone, Just an update. I’m currently on vacation and I’ll be back working on this project in a few weeks. I will post updates and pictures when I get the first batch from the machine shop. Hopefully I can get a set out for everyone that’s made a request! -Derek
-
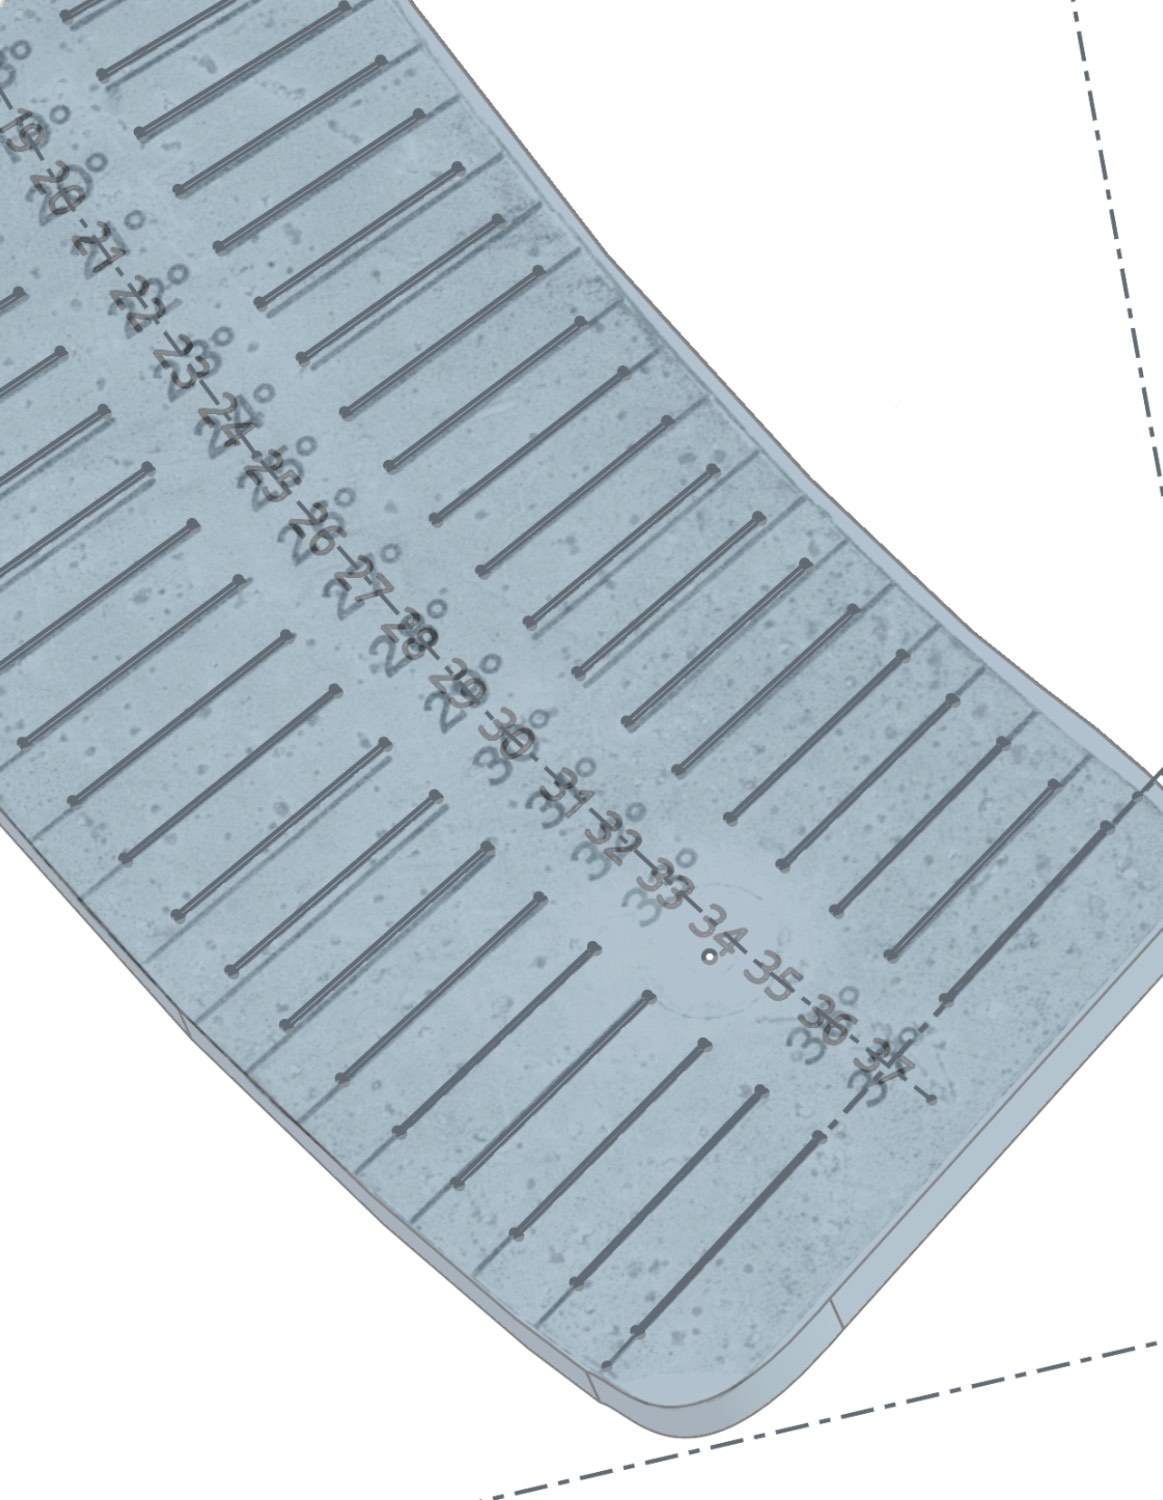
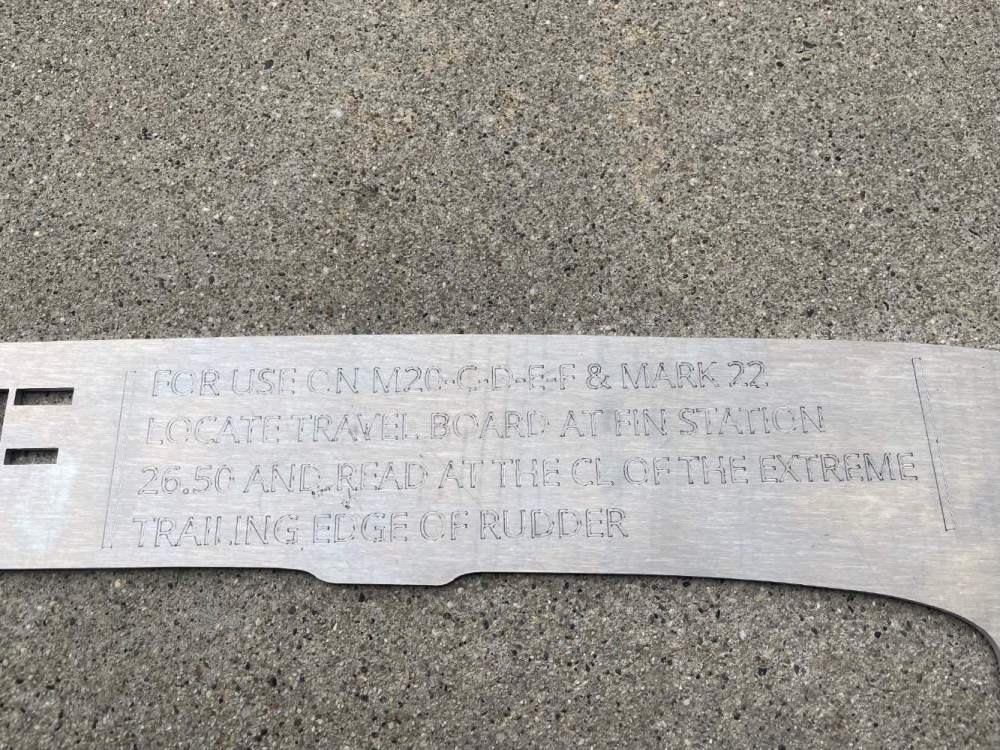
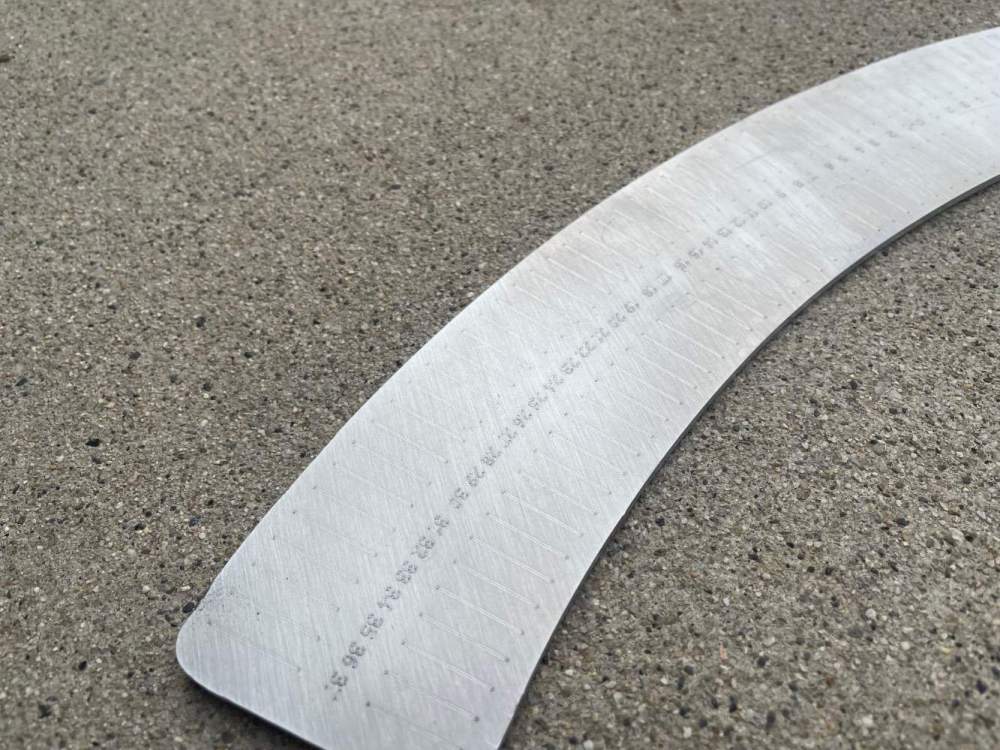
Clarence, Great point! The boards were made from a tracing of the boards and 1:1 scan of the scales. Each board was verified with measurements at 7-9 points to validate accuracy within .020”. The scales seem to have been marked by hand from the factory. On the original boards, you can actually see inconsistencies in the distance between degree marks. The degree marks of the original scales were actually validated in my CAD software and proved to be inconsistent. I have attached a shot of the original factory scales scan in CAD that were used to make the new scales. You can actually see where the scales match at 38 degrees towards the bottom and begin to deviate around 31 degrees and come back into tolerance around 28 degrees. I am also making a bracket that will allow the scales to be suction cupped to the top of the wing in 3 locations so they can stay in place while adjustments are made.

-
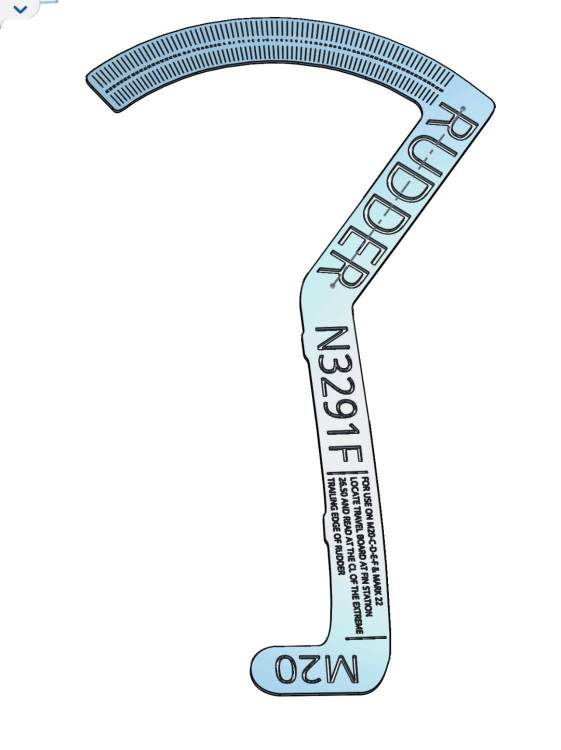
I am in the process of making a set of rigging boards… Here is the rudder board complete. These will be made out of aluminum. The factory scales can sometimes be pretty far off. Up to 3/4 of a degree off!
-
The keys showed some signs of wear. Those were replaced. Also the intake valve had some very very light wear marks where the keys were not seating as designed. I am sending the cylinder out for overhaul this fall.
-
Precisely! There were 2 number 9’s!


-
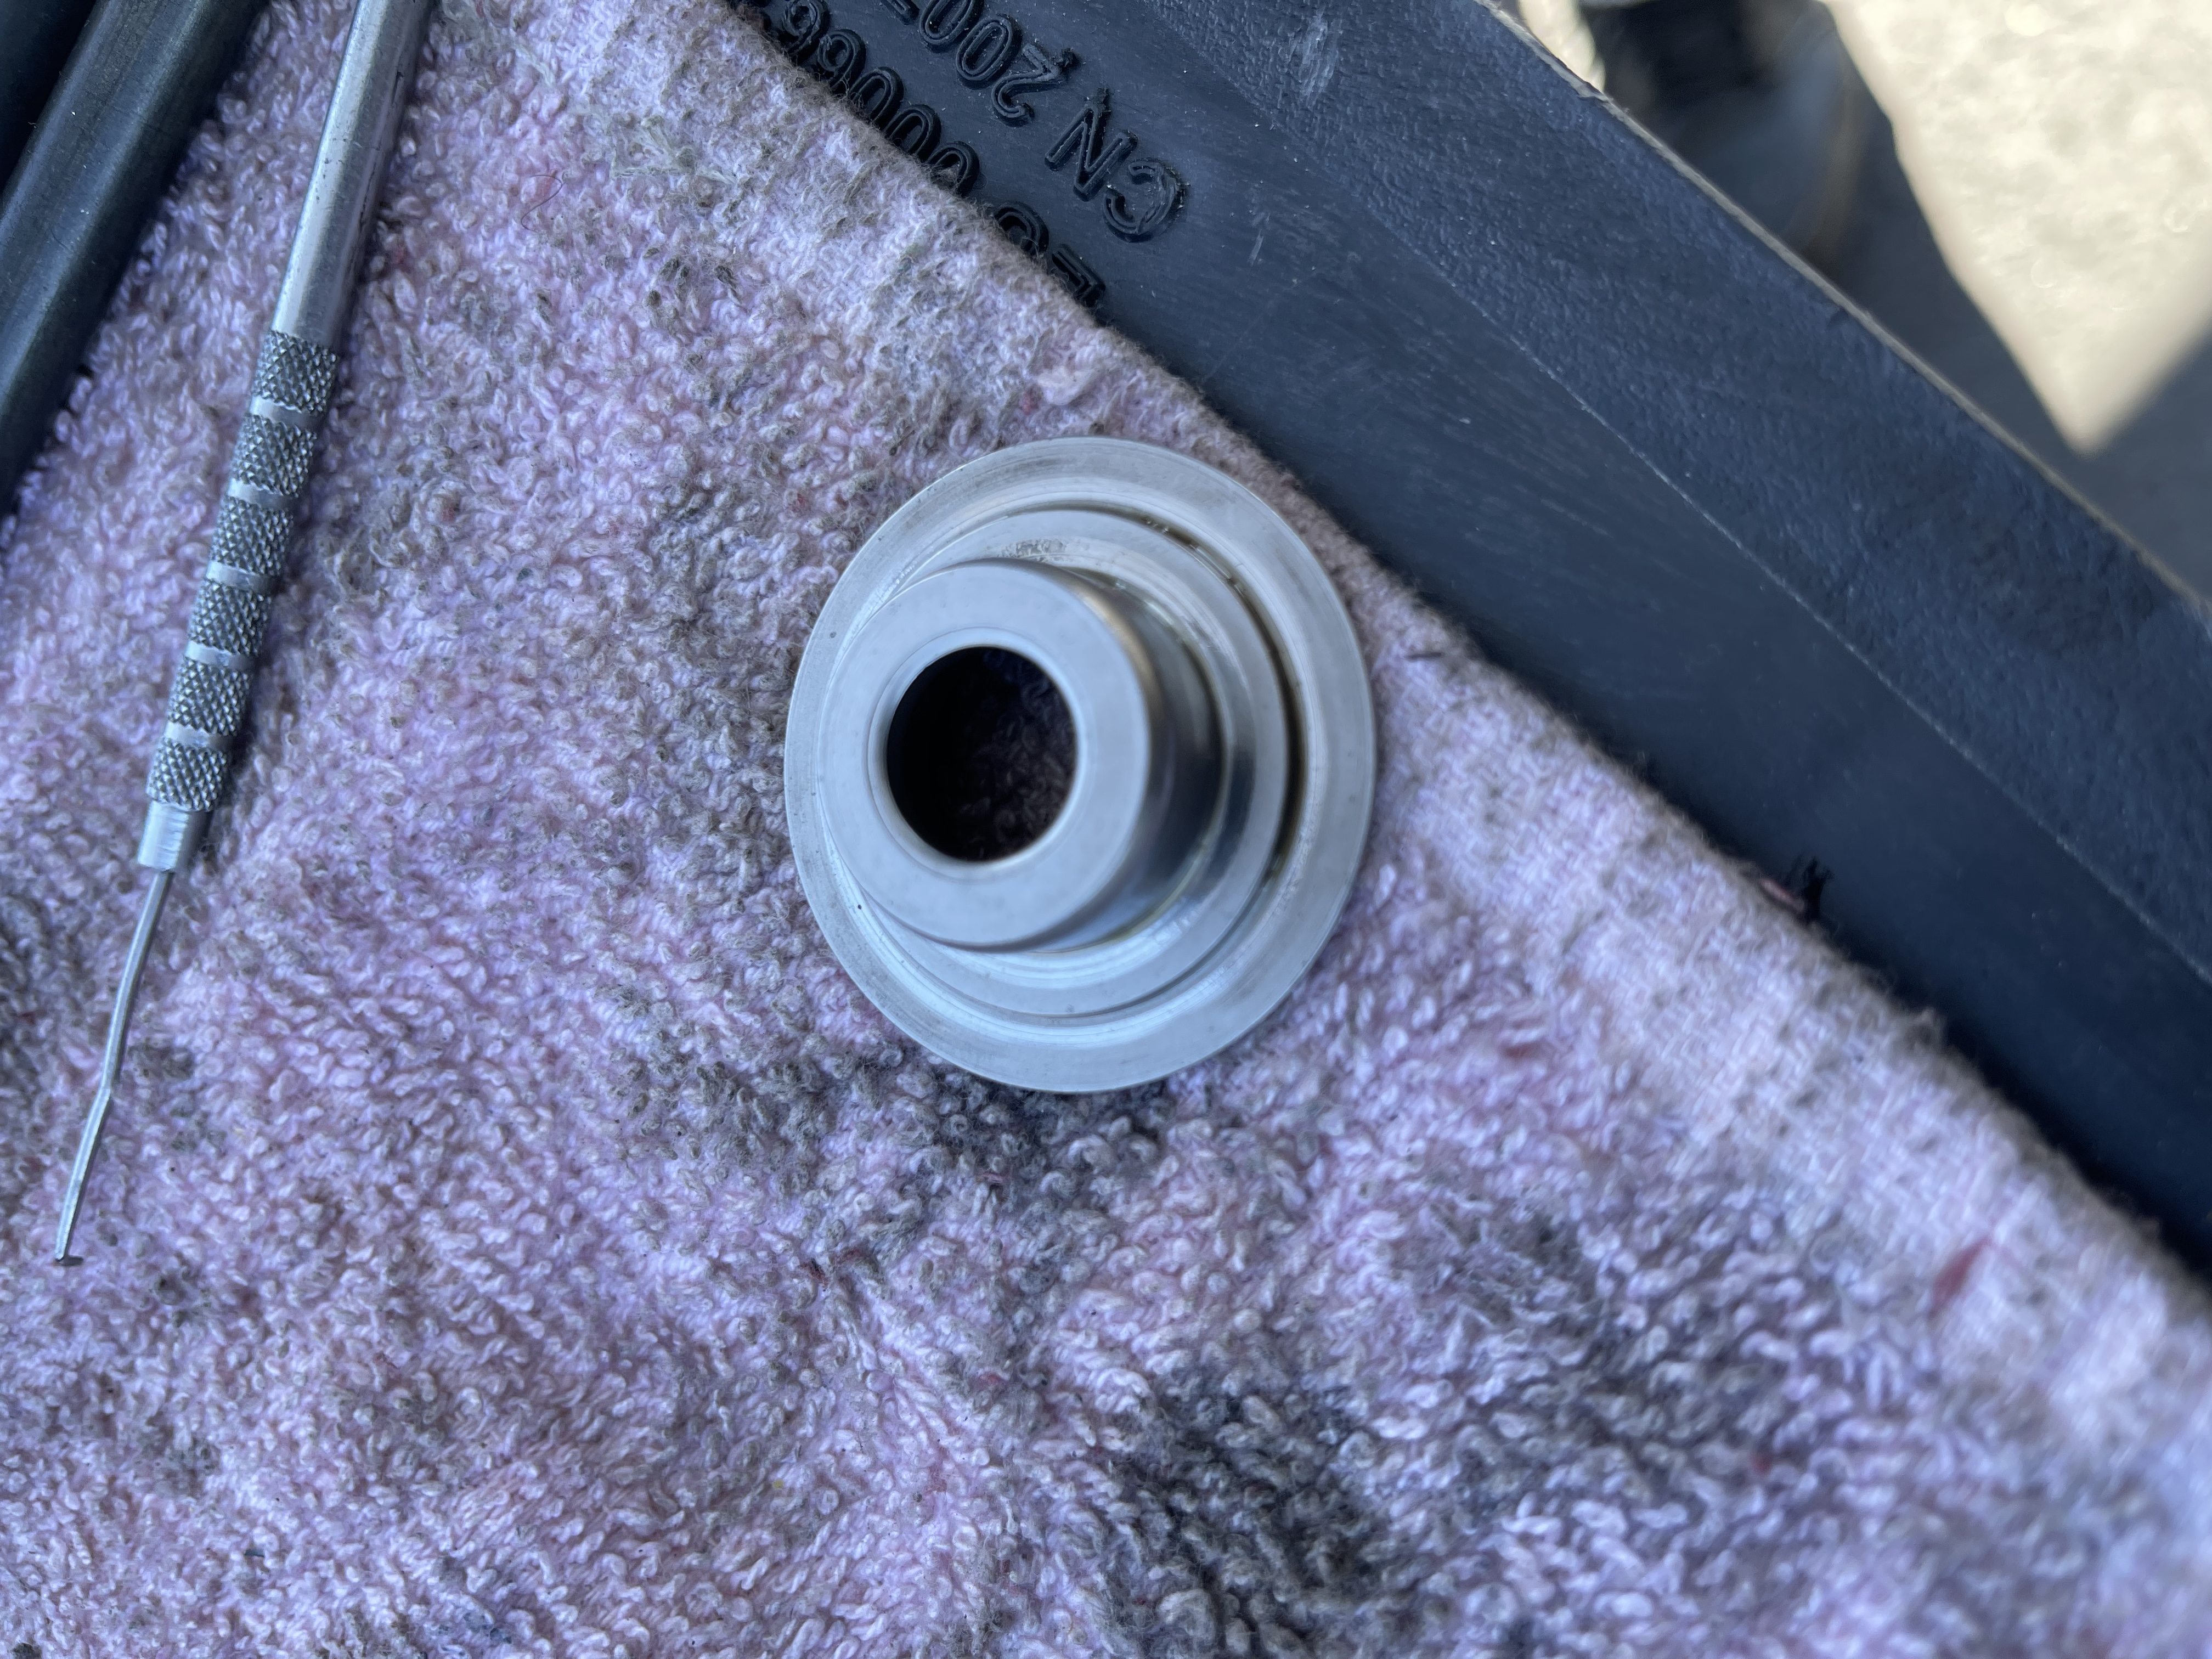
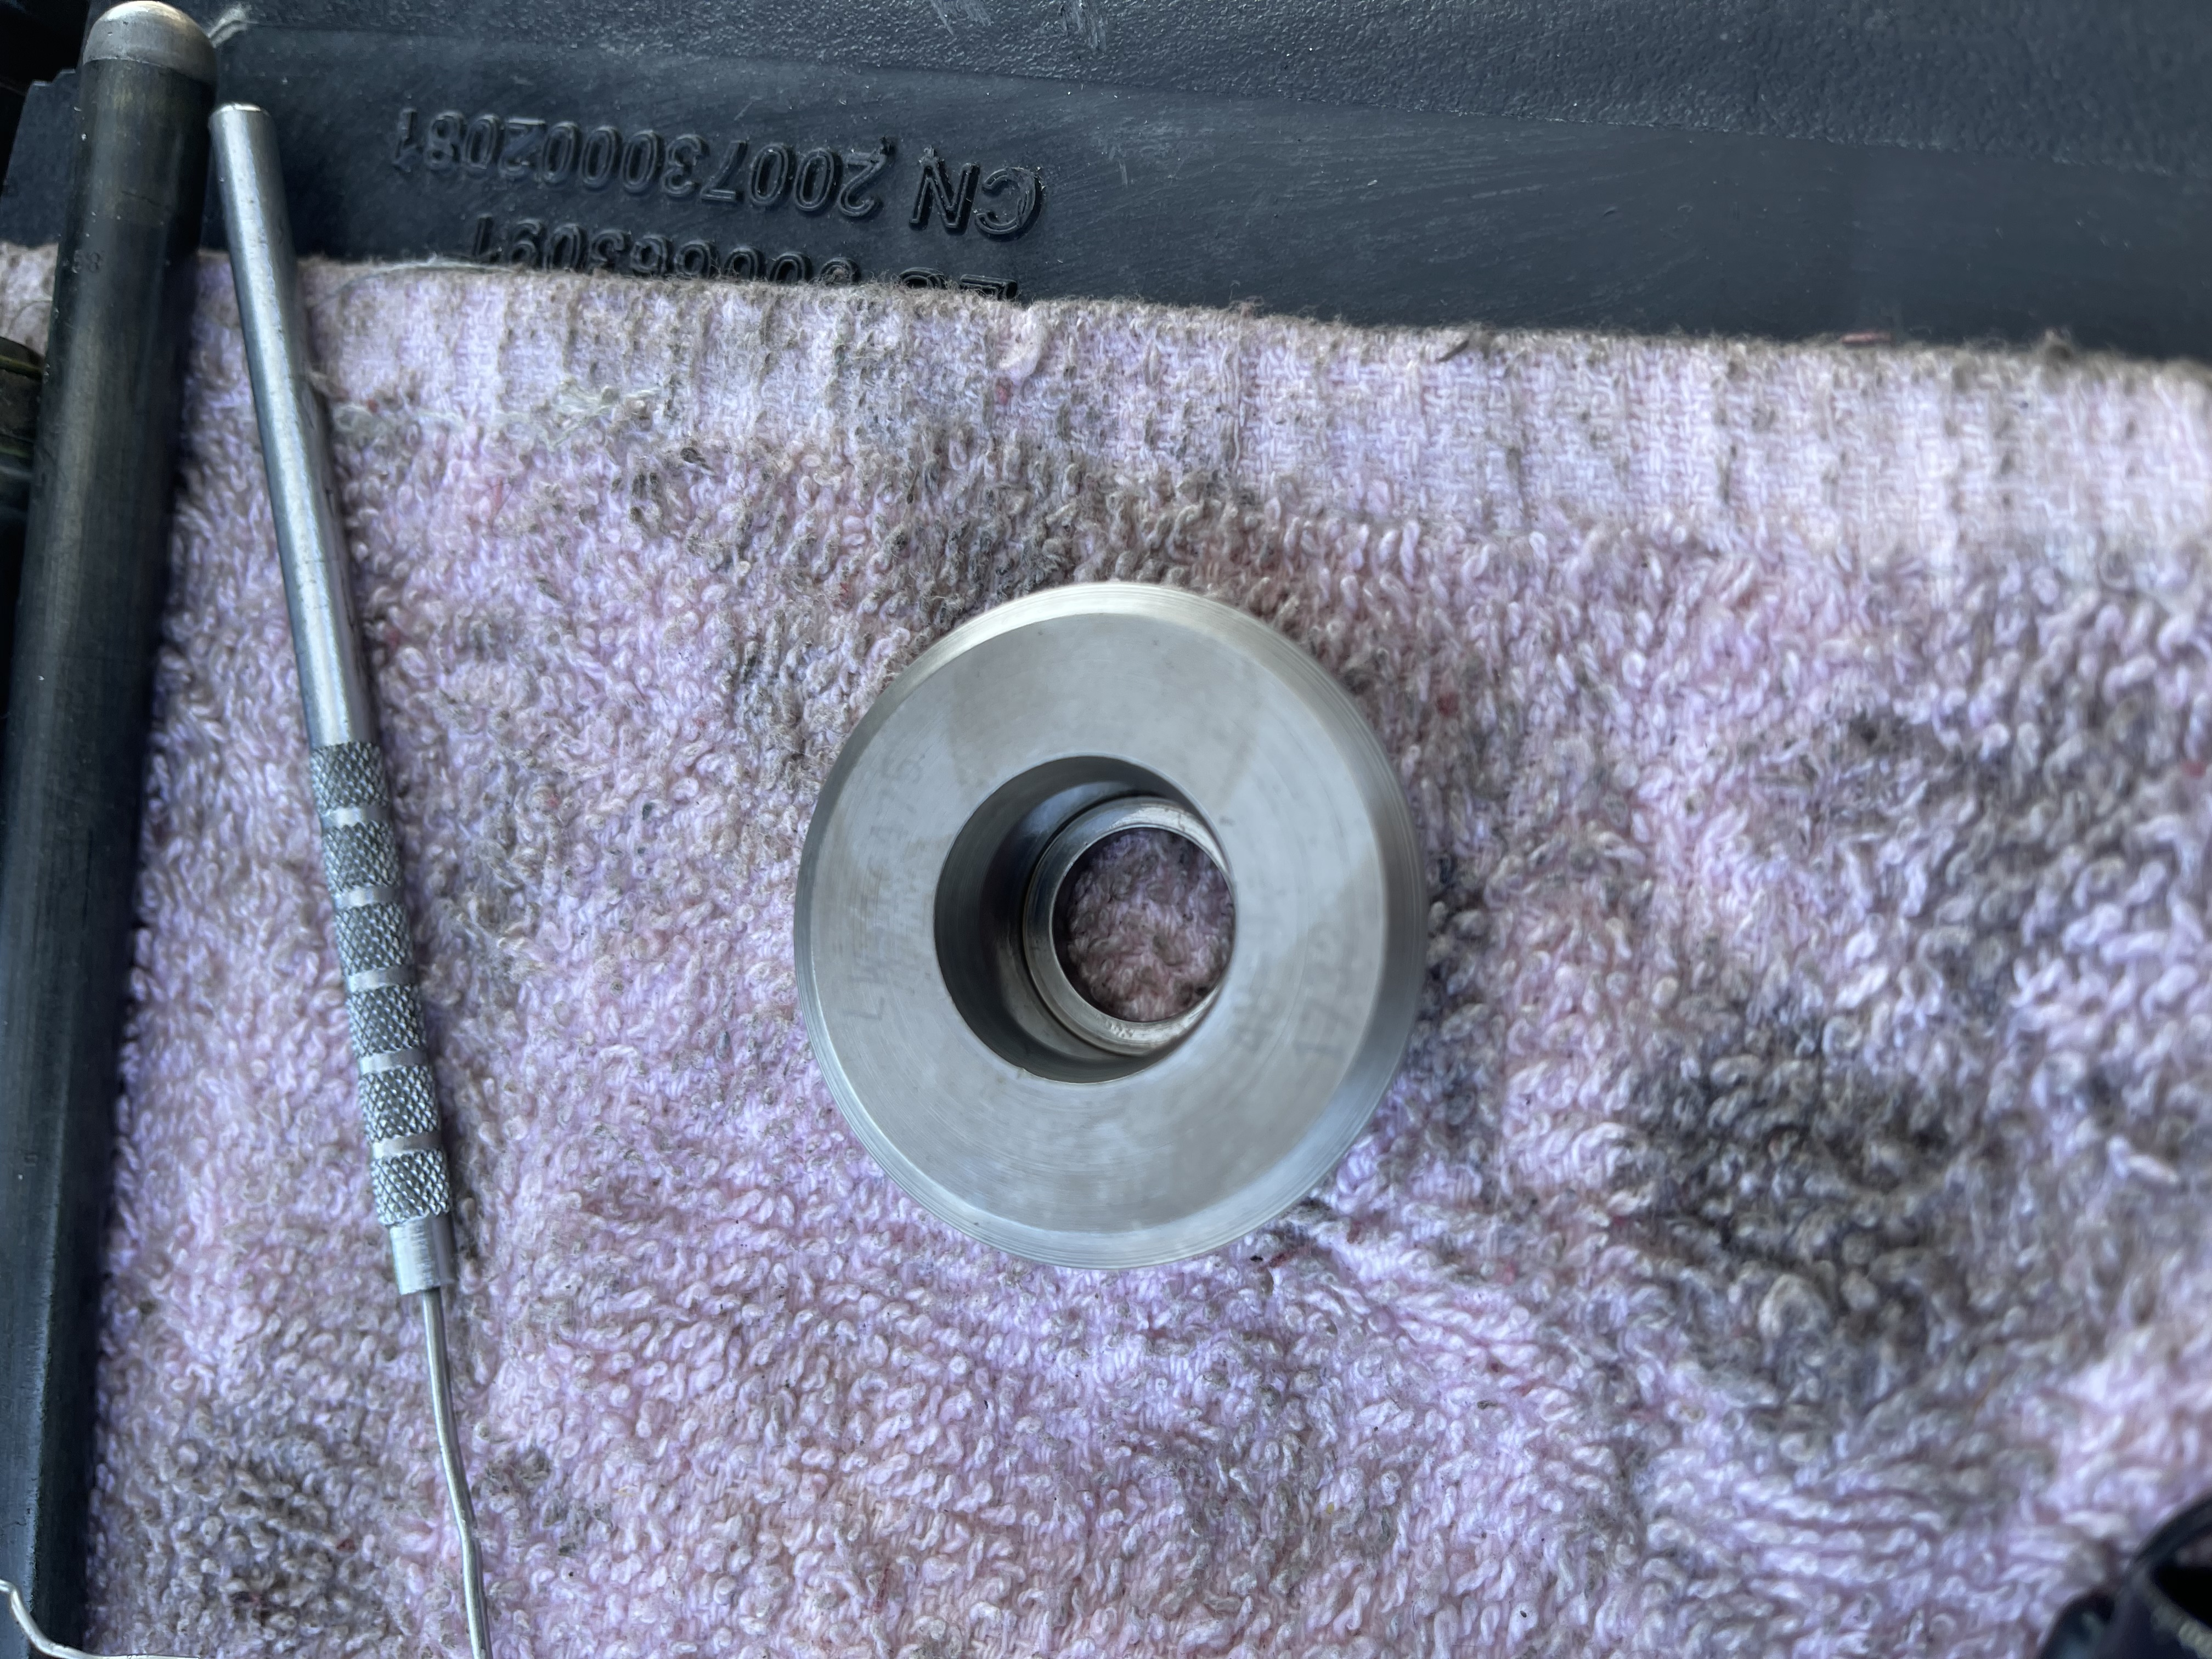
Okay here’s the verdict! I removed all of the valve springs on cylinders 2 and 4. When everything was laid out on my work table everything appeared to be normal. There were no cracked or weak springs and no signs of abnormal wear. When I went to reinstall all of the springs is where things started to get interesting. When I installed the intake valve spring on cylinder 4, I noticed there was a huge gap (2-3mm) between the intake valve keys. It appears that whomever overhauled the cylinders used an upper EXHAUST valve seat on the INTAKE valve. The center diameter of the exhaust valve seat is much larger than the intake seat. This caused the valve keys to jump around freely and cause excessive play in the intake portion of the valve train. I installed the new intake valve seat and the engine is quiet and smooth. Thank you guys for all of the help and insightful replies!