47U
-
Posts
827 -
Joined
-
Last visited
-
Days Won
1
Content Type
Profiles
Forums
Blogs
Gallery
Downloads
Media Demo
Events
Status Replies posted by 47U
-
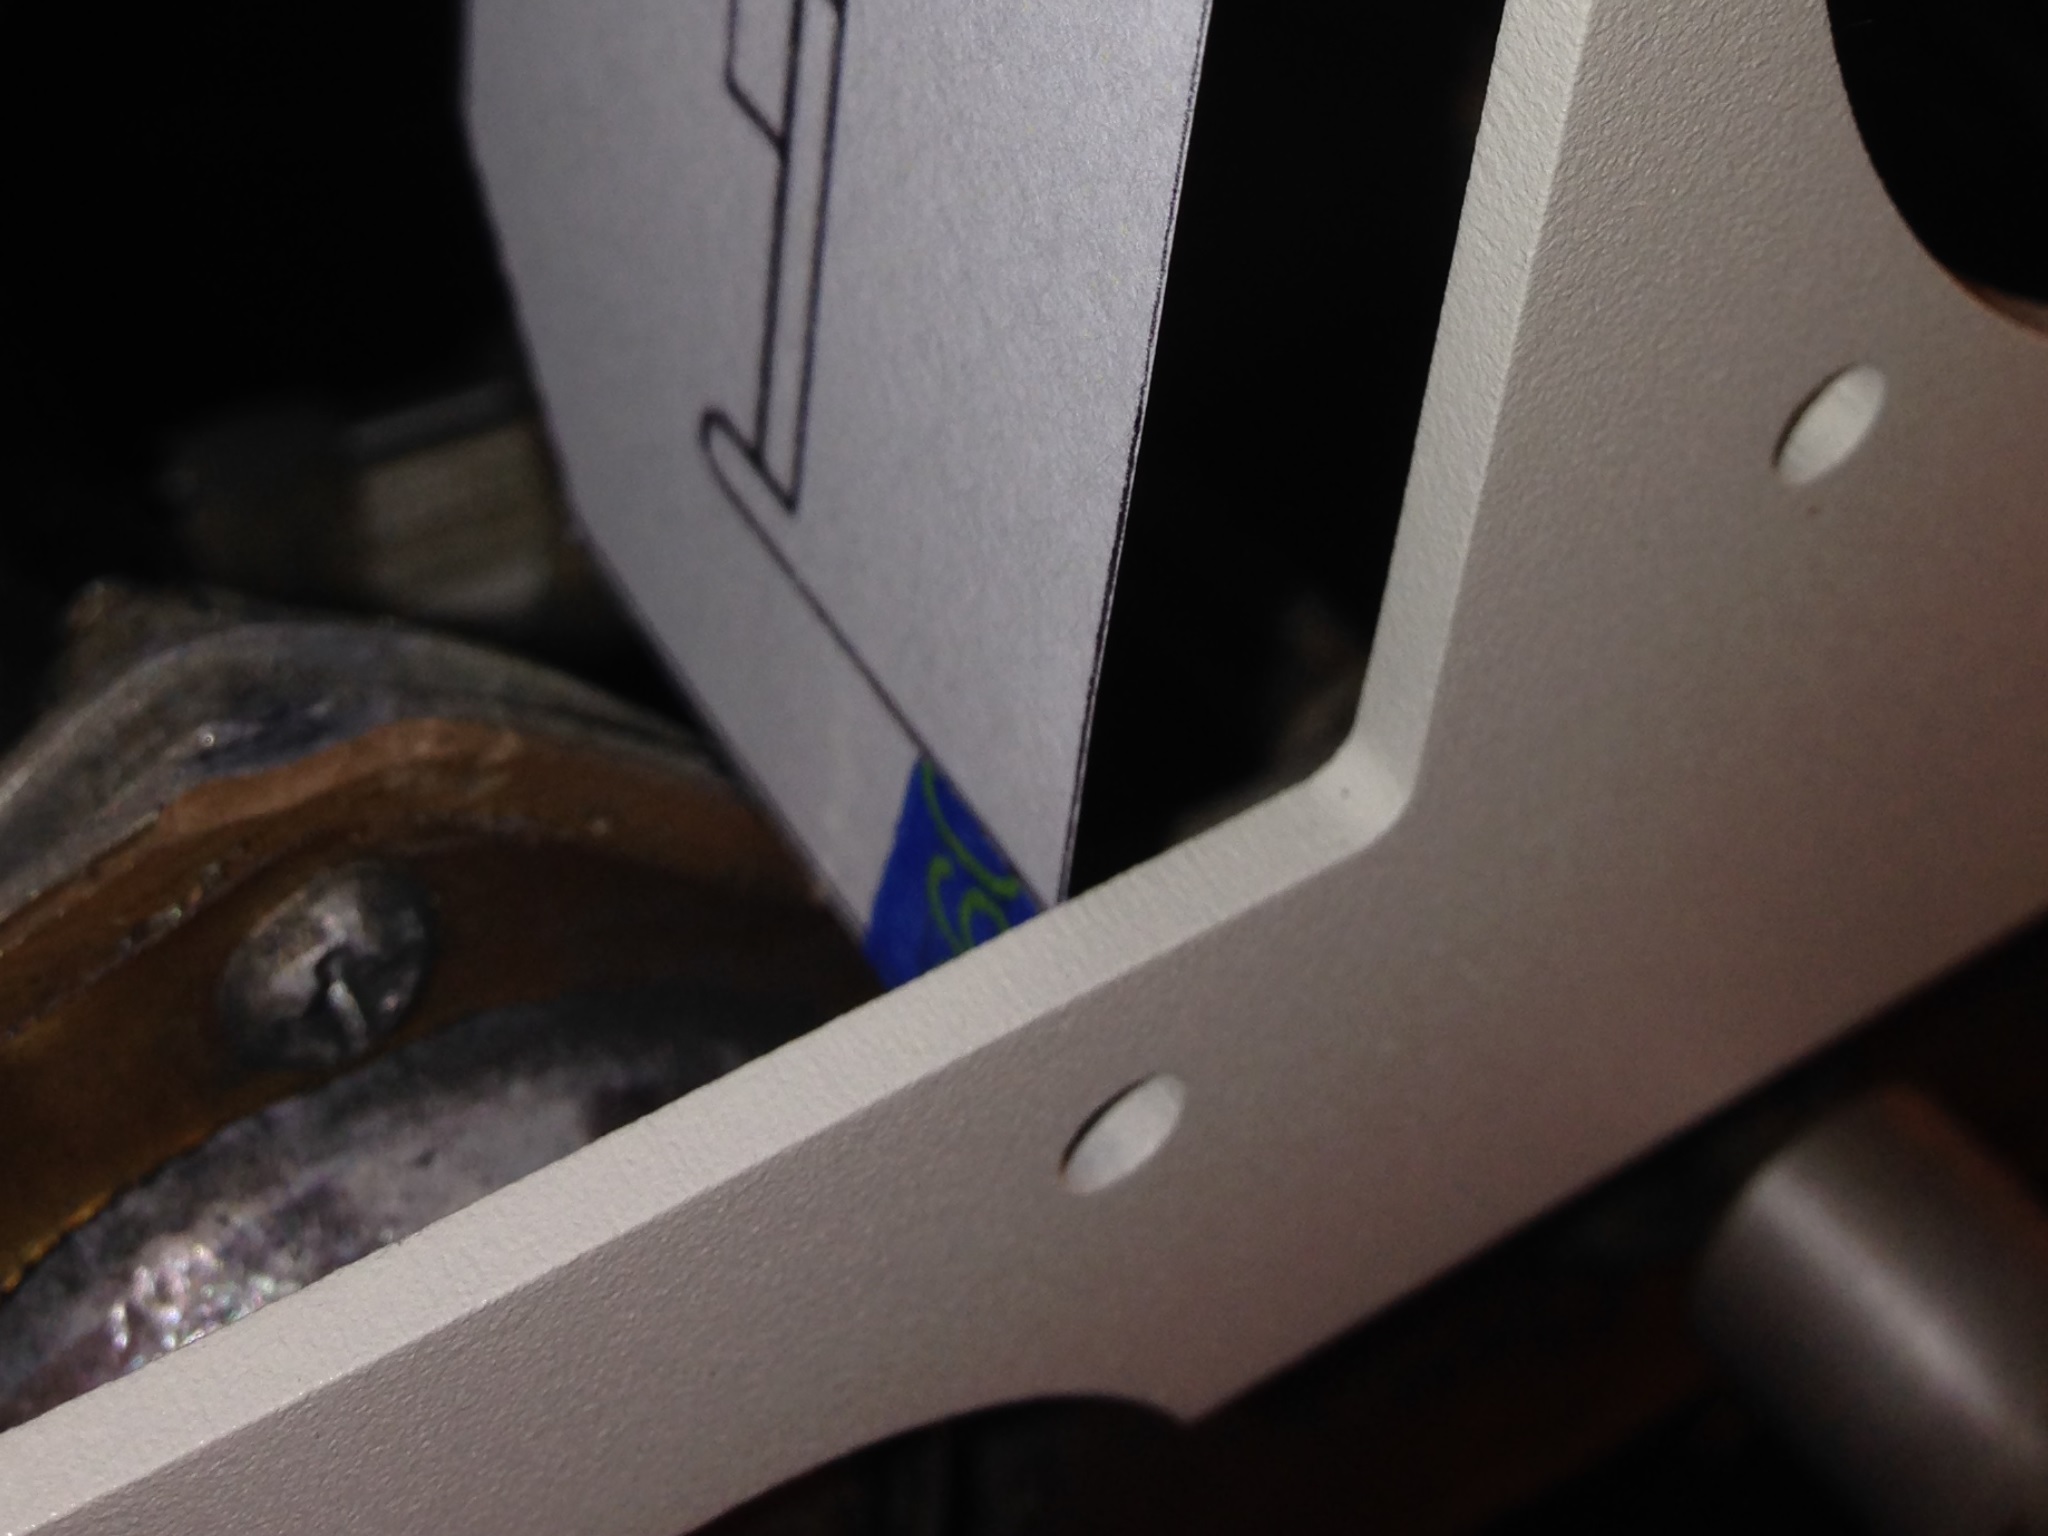
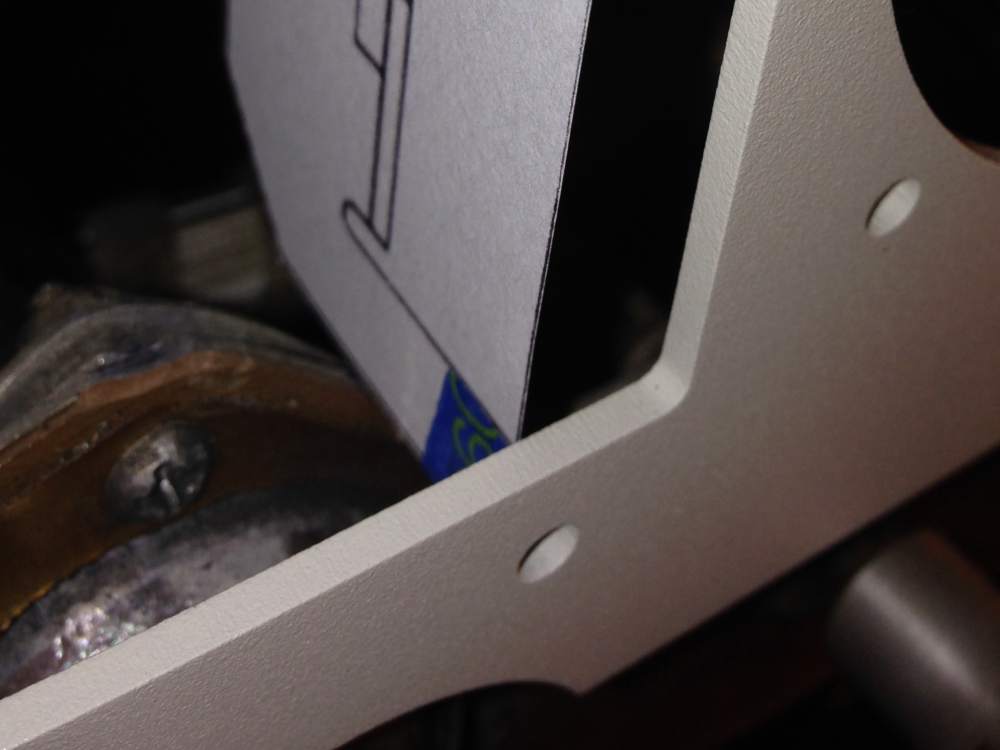
Igor_U, Yes, Aspen flush mount. The Aspen cutout dimensions are in their install manual, available online. I ended up recutting the panel shown in the thread picture. The Aspen component that would go in the bottom hole (of an Aspen upper/lower two-hole surface mount) is much smaller diameter than a standard 3 1/8" instrument so there's no yoke tube interference, but I found the Aspen flush mount bracket was too close to the yoke phenolic ball mount and I didn't like it. (I cut out a template from card stock.) It wasn't touching, but I couldn't pass a credit card between the Aspen mount rail and the ball assembly. So I moved the Aspen up in the panel about 1/4", recut the panel, and now it's fine. Beware that powder coating might decrease the cutout dimensions slightly and cause an interference fit. I had a buddy do the CAD changes and should have increased the dimensions a thousandth or two. Same for the round instruments... laser cutting is very precise. Everything fit pretty tight after powder coating whereas it was perfect before. I probably should have masked off the holes to keep them clean metal.
-
Igor,
Design done in mm? Hmmm. I didn't think so, but we did this a couple years ago so I'm not sure. I think your 8-hole plan will work out fine, even with room for the clock. Like you said, dimensions off the .pdf will keep you on track. I moved my clock up above the radio stack where the old ARC autopilot control head used to be. Or, that's the plan, as soon as I cut out the panel and mount some nut plates.
The only substructure issue (in my opinion) is the radio stack rail.. Yes, I probably should have tried to squeeze everything left a little more. But, looking at the pics, there's not much left to move left too. None of the rest of the sub-panel is airframe-structural, they're only to mount the instrument panel isolators. And, I could have moved the top row down some and save a 1/4" of trimming the subpanel. No, my panel isn't on my profile... I haven't finished my Aspen install (after two years, I know) as I got sidetracked with family issues, work issues, other airframe issues, you name it. I'm trying to work up the nerve to call TGH and ask them how long the backlog is for avionics installations. As soon as I finish the annual. I've been telling my IA "two or three weeks from now" for about a year. I did get my medical back... some progress. I'll have to go rent something for a flight review. Ugh.
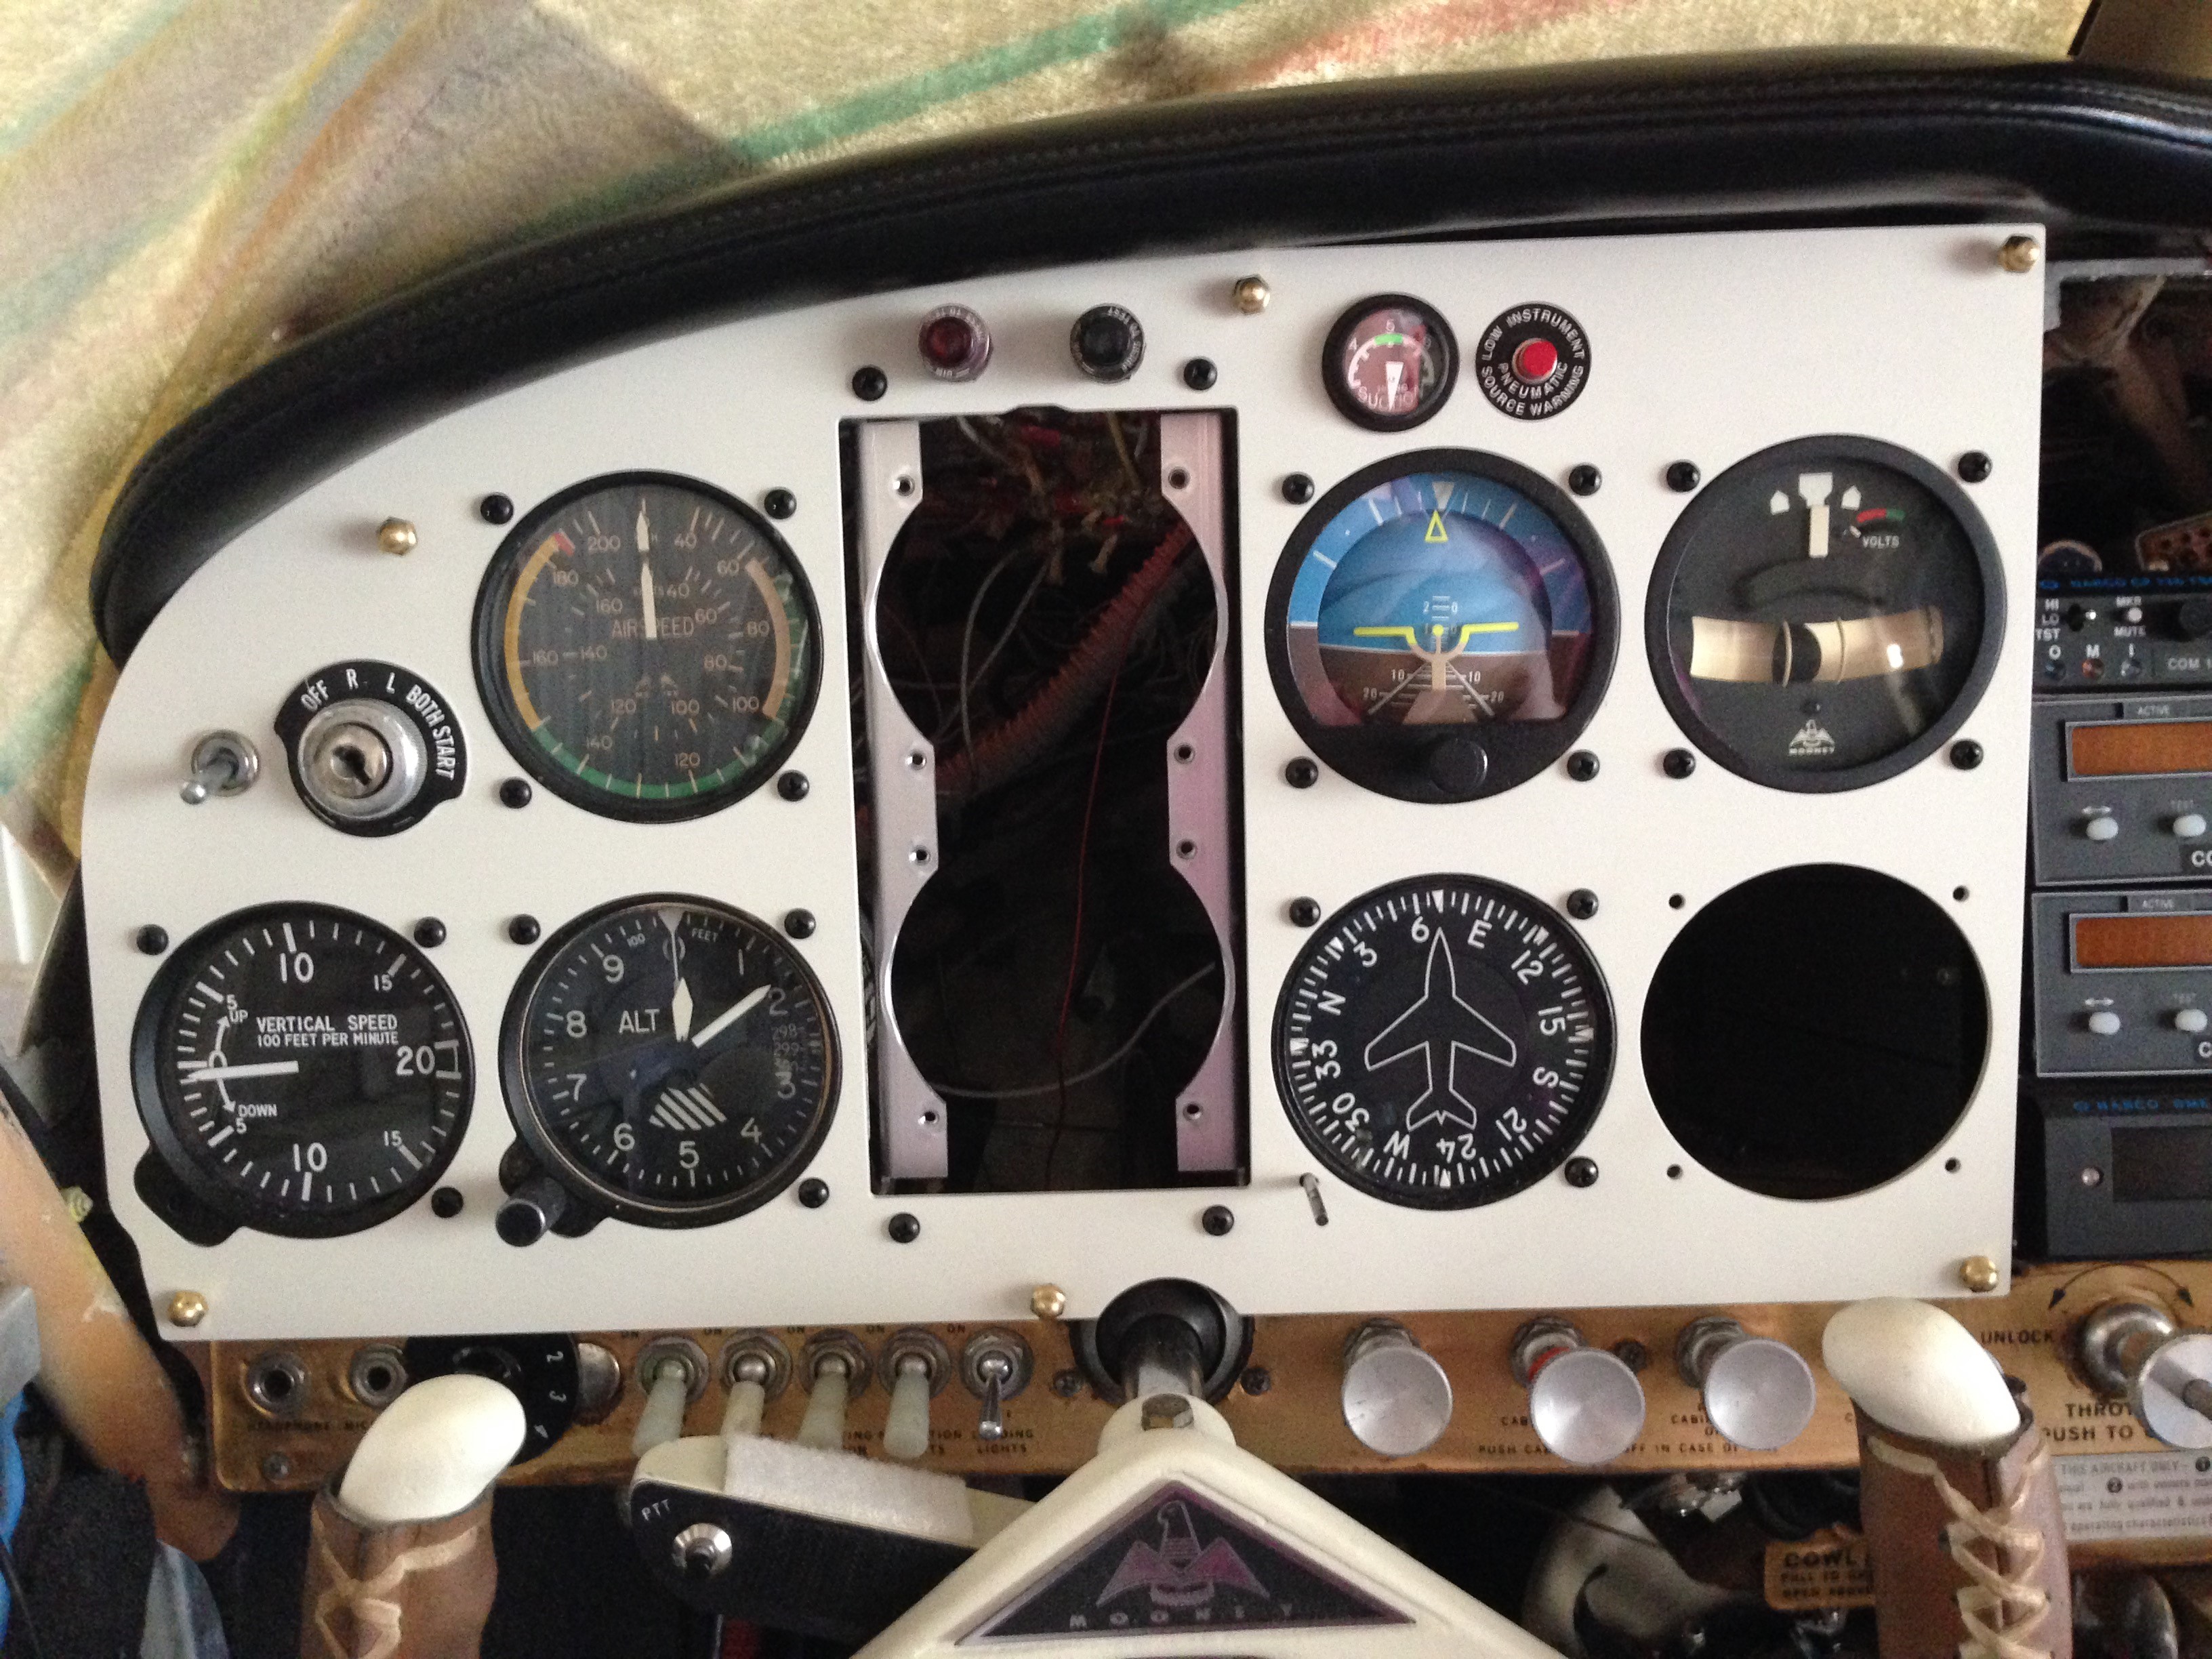
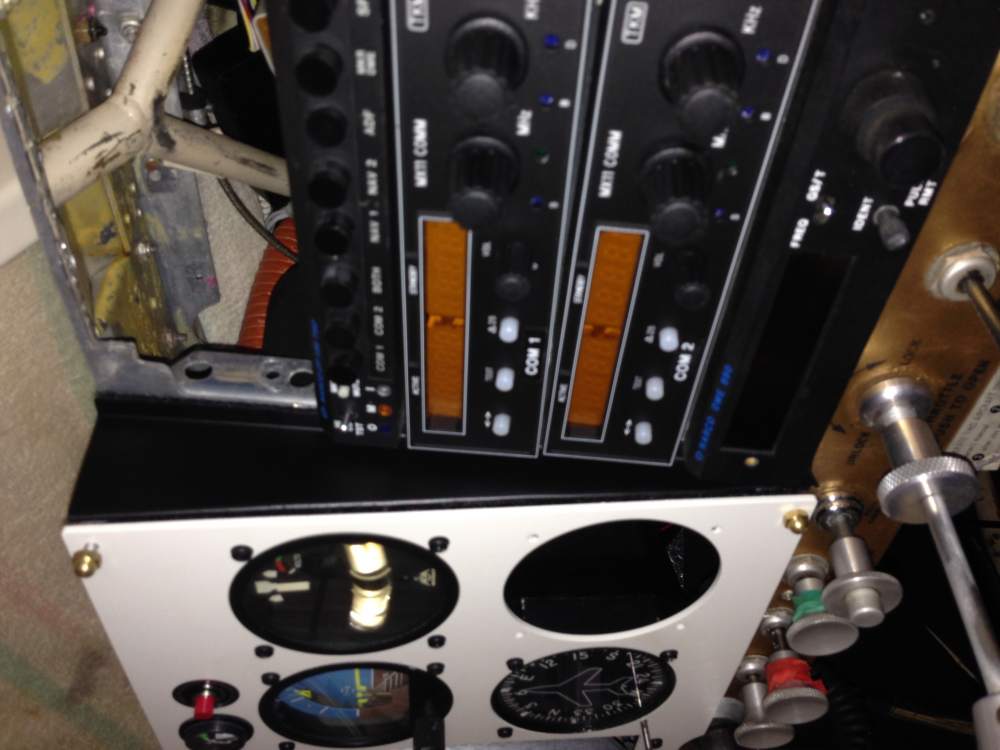
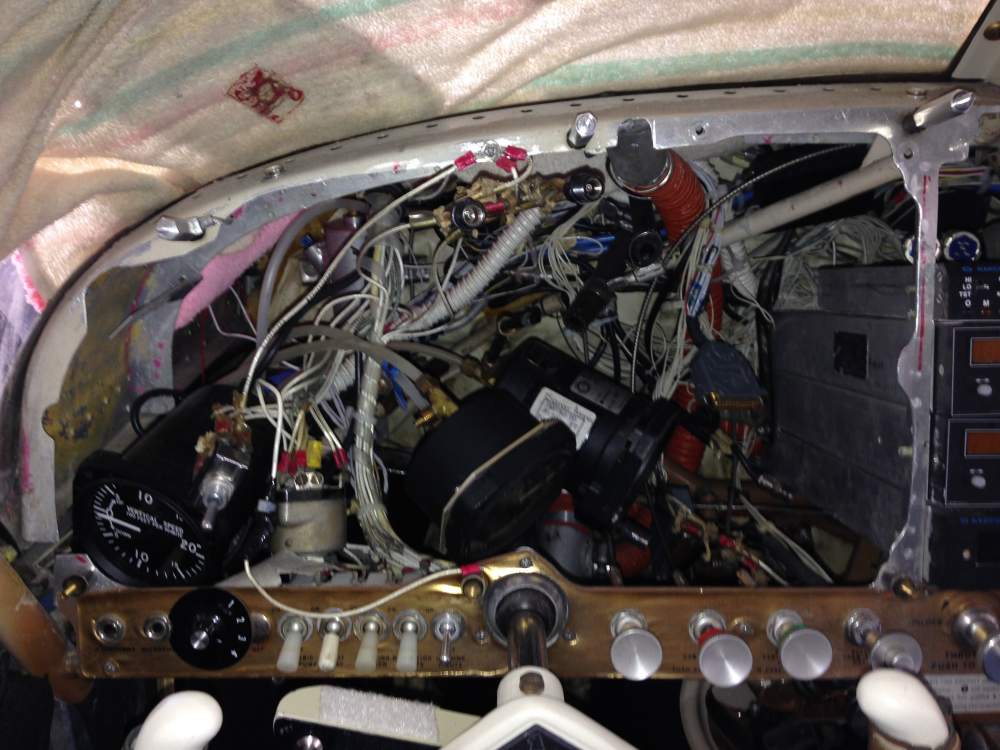
I had been surfing for some professional looking labels but hadn't settled on anything yet. It'll be the plain old label maker for now. See pics... this is about where I am right now. I'm almost done relocating comm antennas so I can put the Aspen RSM and GPS antenna where the comm antennas used to be. We'll get there...

-
-
Igor_U, Yes, Aspen flush mount. The Aspen cutout dimensions are in their install manual, available online. I ended up recutting the panel shown in the thread picture. The Aspen component that would go in the bottom hole (of an Aspen upper/lower two-hole surface mount) is much smaller diameter than a standard 3 1/8" instrument so there's no yoke tube interference, but I found the Aspen flush mount bracket was too close to the yoke phenolic ball mount and I didn't like it. (I cut out a template from card stock.) It wasn't touching, but I couldn't pass a credit card between the Aspen mount rail and the ball assembly. So I moved the Aspen up in the panel about 1/4", recut the panel, and now it's fine. Beware that powder coating might decrease the cutout dimensions slightly and cause an interference fit. I had a buddy do the CAD changes and should have increased the dimensions a thousandth or two. Same for the round instruments... laser cutting is very precise. Everything fit pretty tight after powder coating whereas it was perfect before. I probably should have masked off the holes to keep them clean metal.
-
Igor,
Sorry for the late reply... I had trouble locating my file, but think I found it. I can't open the .dxf on my work computer so can't be sure, but the file date matches what should be the one I ended up using. If you check the dimensions with the .pdf, they should match. And if you're just looking for the panel outline dimensions, these should work fine.
Since you're an aerospace engineer, please don't take affront to my lessons learned... if I had to do it over... I hate (as my Dad used to put it, "turning out scrap."
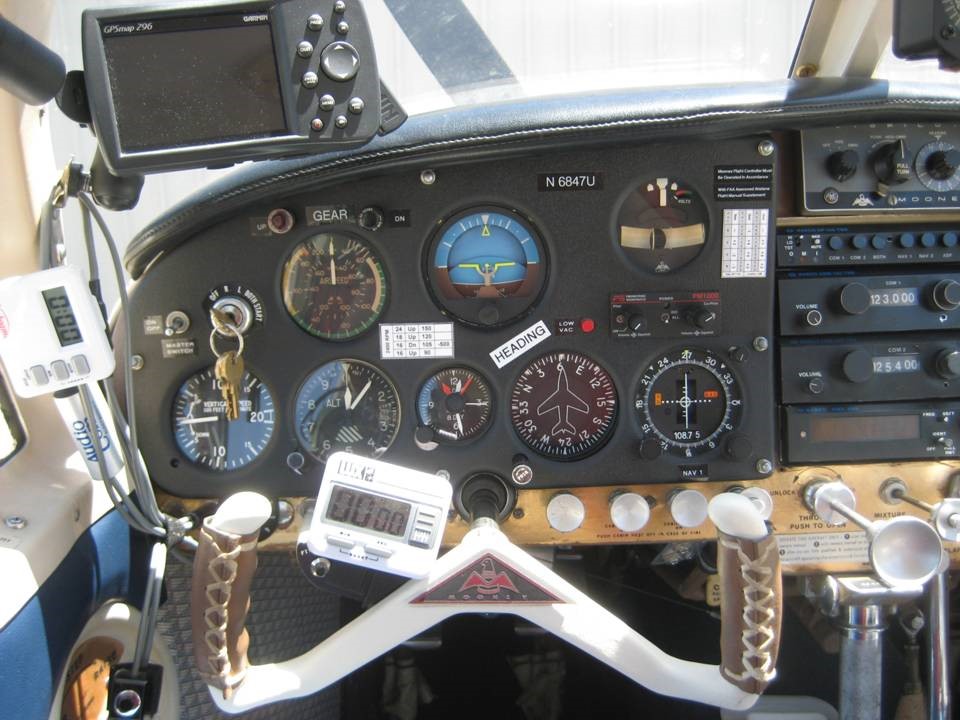
The origination of this .dxf is from the CAD guy LASAR was using a few years ago. It was the 9-hole version which my buddy modified to the accept the Aspen (which we already discussed). The 9-hole version requires some sub-panel trimming. I'm not sure if my inserting the Aspen widened the round instruments spread, but there was a lot (A LOT) of sub panel trimming to accept the instruments. Left, right, and top all were trimmed. If I had to do it over, I'd resize the VSI (lower left) to a 2" instrument and move everything left with a little more spacing. I didn't reconfigure the panel to a traditional 6-pack config... I'd already finished my IFR with the shotgun panel so decided to just leave the pitot-static instruments in their original orientation. (The Aspen install requires a backup horizon so it wouldn't be a standard 6-pack layout anyway.) Of some concern, I had to trim some of the radio stack (left) rail on the panel right side. I'm comfortable with the remaining to mount the new stack, but I wouldn't impose my decision on you, or others. I'm the A&P signing off the panel swap in the logbook (minor mod) and I showed it all to my IA and he was good with it. I'm not sure how big the G-5 is dimensionally so don't know if you'll run into that problem or not.
Dan at LASAR sells an install kit... I think it was $30 or $35. It's got new shock mounts, standoffs, hardware, and the gap filler for the panel right side.
If I left something out or if you have any questions, please don't hesitate. I'll try to be more timely.
Thomas
-