Grant_Waite
Supporter-
Posts
216 -
Joined
-
Last visited
Content Type
Profiles
Forums
Blogs
Gallery
Downloads
Events
Store
Everything posted by Grant_Waite
-
I bought this Eco Flow Wave 2 for my Mooney when I had it, it worked decently well but I no longer have a need for it without the plane. These portable types of standalone a/c are mainly advertised toward campers or small spaces. This would work great if you’re into camping and have a solar panel setup. It has the ability to heat and cool. I put it in the baggage area and had the hose run up along the back seats and hang down just behind the pilot seat. It feels great in the summer when it’s blowing on you but it doesn’t exactly cool down the whole plane by any means. I saw a 20° differential from ambient on the cool mode. I used a small tuberware container for condensation. You don’t want to run it on the ground if you’re working in the plane, because it’ll produce way too much water for the ac tank to hold and it’ll make a mess. Ground running for normal taxi, run up, takeoff is just fine I found. Florida has to be the worst case scenario for it. It’s quite large and weighs 50lbs so shipping is possible but is possible. I’m sure it’d be close to a hundred bucks. I have all the original accessories and box for it.
-
-
PSA for anyone coming to Tampa area
Grant_Waite replied to Grant_Waite's topic in General Mooney Talk
Yeah it’s a luxury to have that option these days. For a lot of us, we are forced into having to go elsewhere which is the worst thing unless you have a very good relationship with the shop. I always found that unless I was present, the work would take twice as long to get done. -
PSA for anyone coming to Tampa area
Grant_Waite replied to Grant_Waite's topic in General Mooney Talk
If they were smart, they’d come to you. I’d kill to have a shop like yours in my area -
PSA for anyone coming to Tampa area
Grant_Waite replied to Grant_Waite's topic in General Mooney Talk
Everything began to shift after HCAA “acquired” what was then Vandenberg for $4.8 million back in 1985. At first, there seemed to be some support for growth and development, but over the years—especially as new generations of career government staff cycled in—the direction changed. Historical details are difficult to find, but the turning point appeared to be when Skyport took over and the current HCAA leadership came on the scene. Since then, the decline has been gradual but steady. Many of you know Hawk, who originally started his paint shop at Tampa Executive. Over the years, the airport hosted a number of maintenance operations, but one by one they left as bureaucracy tightened its grip. Running a maintenance shop is challenging enough when dealing with the FAA; add in an overreaching FBO manager and an ambitious county administrator, and the environment becomes anti business and ga fast. -
PSA for anyone coming to Tampa area
Grant_Waite replied to Grant_Waite's topic in General Mooney Talk
So for my mobile mechanic, it’s 500-600 a month for the policy. This new hangar use policy is something that’s going to add to the cost thus lead him to increase rates. He’s currently 40 dollars less than competitors because he doesn’t have a shop overhead. I know the shop on field is about 160 plus an hour but their rent is something like 10k plus for a 70x40ft shared space. I’m not sure if they steal some or any of the revenue produced for any mechanic on field but I wouldn’t be surprised if they did. -
PSA for anyone coming to Tampa area
Grant_Waite replied to Grant_Waite's topic in General Mooney Talk
I do appreciate it Mike, anyone with some say would go a long way. It’s can be frustrating enough trying to deal with Mooney for simple requests as I’ve found out. Add on this airport nonsense and it’s a drain. I wasn’t planning on coming although I did transfer my registration from last year. I’m trying to work out when I’m going to fly the plane to the potential buyers since I can’t keep waiting on approvals for a basic bank loan checklist to be done at home. -
PSA for anyone coming to Tampa area
Grant_Waite replied to Grant_Waite's topic in General Mooney Talk
Dear Mike, I concur with your perspective; however, it is evident that individuals or entities without significant influence or consistent business contributions are often treated differently. This is an unfortunate reality. While I could advocate passionately for the airport community as a whole, my voice alone carries limited weight. I encourage others to join me over time in voicing their concerns and advocating for their rights and needs as tenants. My intention is not to discourage attendance at the airport or the summit. Rather, I aim to provide transparency about the operational dynamics here, based on my firsthand experience as a local resident and tenant. It is easier for misinformation to spread when individuals are not based here or familiar with the local context. -
PSA for anyone coming to Tampa area
Grant_Waite replied to Grant_Waite's topic in General Mooney Talk
They will trespass or ban you. They did ban someone from ever entering all 4 airports but he’s the type of guy that probably shouldn’t have been there. Not the greatest mechanically. I saw him change the engine of a 140 in the middle of the night in one of the shade hangars. He’s the only one though who has ever operated in such a careless manner. After that whole debacle, they deactivated the gate key entry pads. We all had to give them every bit of information besides our ss number to get these newer lanyard type cards that open the gates. People have still supposedly reported items stolen. If they’d just have an overnight security patrol, they could easily eliminate that issue. The HCSO hangar is by me and they do patrol randomly on a utv at night when it’s slow but it not their primary priority. -
Since the Mooney Summit is approaching, I want to give everyone a heads-up about recent changes affecting all Hillsborough County Aviation Authority (HCAA) run airports: KTPA, KTPF, KVDF, and KPCM. The county has implemented a new rule requiring any outside mechanic or service provider to submit an application to Hillsborough County for approval before being granted access to airport facilities. This will and already has negatively impacted the tenants of Tampa Exec. At Tampa Exec in particular, there is only one on-field mechanic. I’ve relied on a trusted mobile mechanic—formerly the manager of one of the local flight school shops—for most of my maintenance. However, under the new policy, any mechanic must now carry a $1 million dollar liability insurance policy as well as specific hangar liability coverage to even be considered for access. This restriction can cause significant problems. For example, tonight I noticed a Baron that had returned this Friday to the field. Unfortunately, it looks to have suffered a nose gear collapse on landing, damaging both engines and props. In that situation, the owner has no real options: he’s limited to the one on-field shop, which is already overwhelmed, and bringing in outside help has become so tedious who the hell would want to work with the FBO. This policy applies across all four HCAA airports. Two of them (KTPF and KPCM) are managed by Atlas Aviation, which although I don’t love, seems to be a bit more pro GA than Skyport, the FBO that currently runs Tampa Exec. Many tenants were hoping Atlas would take over Tampa Exec, but Skyport somehow won the contract for a second time. The impact on tenants has been overwhelmingly negative. The one existing mechanic on the field opened his shop only a few years ago and is very capable, but his space is shared with the largest flight school on the airport. With limited capacity, the workload ratio is easily one mechanic to 200 tenants. The county has restricted all maintenance activity to that single hangar, preventing new shops from opening. They have built one new bulk hangar and are planning to build another. Space is not an issue, it’s them not caring or willing to put the effort forth to keep GA going. They have yet to build any new shade or enclosed hangars in over a decade. They’ve sure as hell have been doing construction non stop for the last 4 years, mainly to benefit the high dollar jets coming in. That leaves mobile mechanics, like the one I’ve used, as the only practical alternative. He currently works for a large avionics and maintenance company but started his own mobile business with hopes of eventually opening a dedicated GA shop. He’d like to open a shop for airframe and avionics work, but despite months of requests, the FBO has refused to provide him even a small space. The opportunity for growth at KVDF is obvious to everyone except the FBO and county, who continue to push policies that work against GA. I’d hate for someone visiting Tampa to find themselves stranded over a minor maintenance issue, unable to get timely help. Aviation is supposed to be enjoyable, but dealing with an airport system that feels anti-GA and anti-business takes much of that enjoyment away. Finally, a word of advice: avoid the $7/gal avgas at the HCAA airports. Instead, stop at KZPH, just 15 minutes from KTPF, where fuel is closer to $5/gal and the atmosphere is much more welcoming.
-
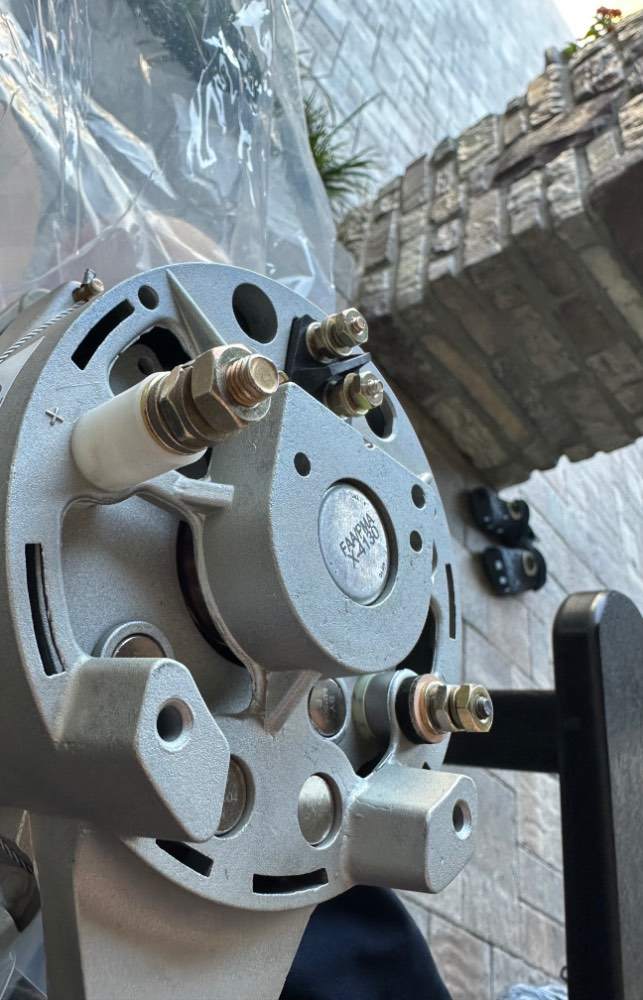
Thank you all for the replies and input. I did read Vance’s post and thought his situation was exactly what happened to me. A simple mistake but can cause a big headache. I find it odd that some alternators have a designated ground post and others have no marking of a ground post like mine. I guess some alternators ground through the case like mine and some have a post for it. The hole for the screw is just to the right of where that aux pole was so if you’re not paying attention I guess it could happen. I don’t remember but I want to say my old alternator didn’t have a post where it said aux on the back, it was just blank. My plane doesn’t use it so it wouldn’t make sense to have it there anyway. When they overhauled it they obviously put one on it not knowing what plane it was. as I didn’t give them that information. That’s my theory as to how this happened and just carelessness. The mechanic is mobile so it’s convenient to have him and the other A&P do most of my work. They are both very competent but competent people make mistakes. We see that in high profile aviation accidents all the time. The situation will be corrected one way or another and it’s not going to be on my dime if the shop doesn’t want to warranty something that wasn’t their doing. Just still highly frustrating and yes, I probably should have just got brushes and called it good. I figured it being 12yrs old, it could use the extra tlc.
-
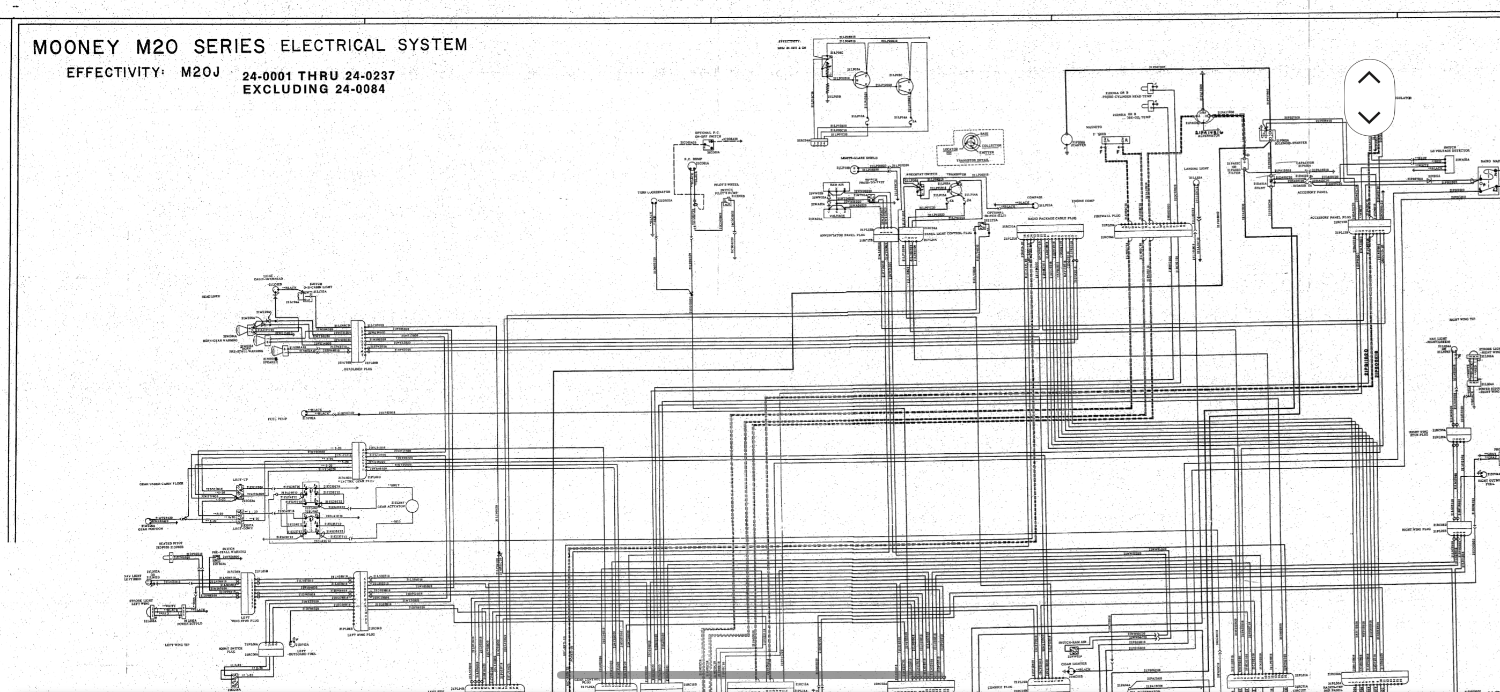
It only shows 2 wires off the alternator but mine has like 5 different ones albeit one is a jumper. One says plus and looks like a 2 maybe for F2 idk.With everything else I’ve always been able to find an install manual but I couldn’t find anything for the alternator. Every mechanic makes mistakes eventually. At least this one was on the smaller scale of them. Good mechanics are hard to find unless you are your own.
-
Yeah I should have just bought some brushes used in the car world and called it good. I’ve never heard of a car having issues but planes seem to have issues all the time.
-
So my frustration continues with a never ending aog issue. Got my old alternator overhauled back this week. Brushes were shot in the old one. Went to the airport today since the mechanic was installing it. Went to start up the plane and it didn’t work, the alt circuit breaker popped and a burning smell came. No smoke just the smell. The smell was coming from the newly overhauled alternator. I believe my mechanic made an honest mistake. My old alternator didn’t have a post for aux and this one does. It also doesn’t have any clear label of a ground. Just a positive one and aux with F1 and F2 obviously. You can see where I’m going with this maybe. In looking at the pictures of the old wiring, he mistakenly put all 3 of the grounding wires or whatever 3 wires on the aux pole. I believe my newly overhauled alternator got fried in the process you can visibly see and smell it around the aux pole. I don’t understand alternator wiring or any of that but has anyone else had this happen? I’ll attach a picture of the old alternator and how it was wired… it was grounded using a screw, I don’t believe it was engraved - at all. The old ground was just to the right of where the aux pole is. THE ALTERNATOR I GOT BACK IS MY OLD ONE, NOT AN EXCHANGE. Kinda pissed a bit but what can I do. Alternator is covered under a 1yr warranty but I’m not going to tell the shop… yeah I think my mechanic fucked it up. Let me know what y’all think or what I should do. Hopefully the shop will cover it under warranty and pay the shipping there and back. I’ve circled where the old ground was and where I think he should have grounded them but didn’t.
-
I’ll report back when I have time to take a look and how I go about fixing it
-
The engine was overhauled in 2019 by Zephyr so I’m not sure if the price of the overhaul included an overhaul exchange alternator or not. I called the previous owner and he and I both agree that nothing was changed out when the oh was done. He wasn’t the type to cheap out on things like an alternator. I spoke with 2 shops they said it could be possible that the brushes could be going bad and sometimes they make contact and sometimes they don’t. Luckily I have a personal relationship with my mechanic so I don’t have to worry about certain things like most.
-
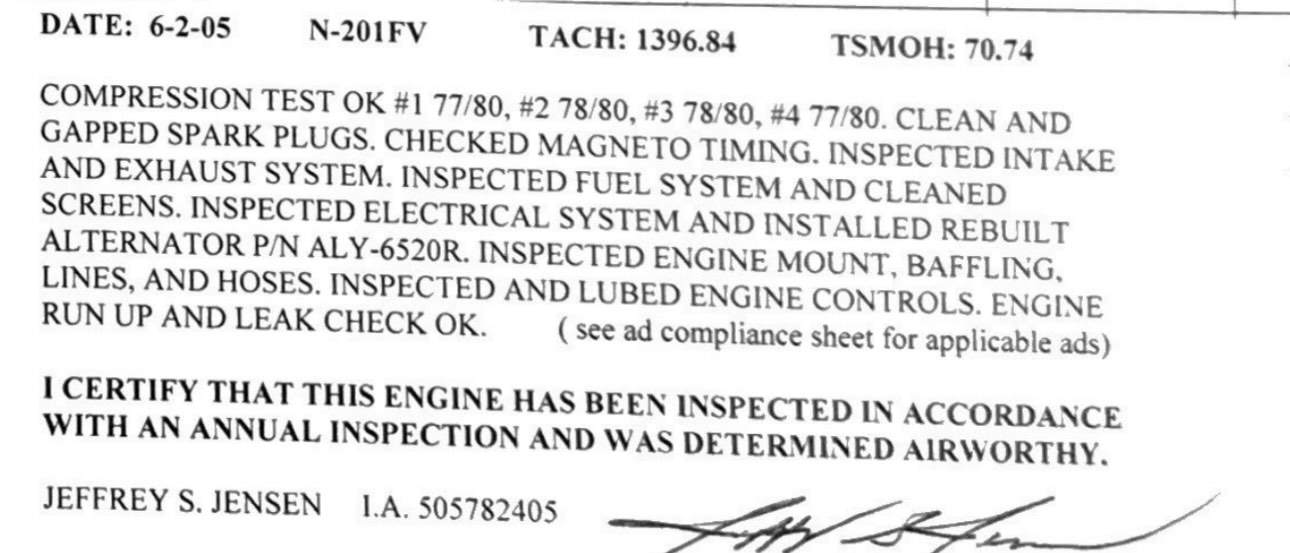
I just looked at that chart seems intimidating to me but I’m sure any competent mechanic is capable. The time and money to troubleshoot though could be close to 630 in labor right? 130hr for my mechanic. To get to all these spots and test them, or is it not that long of a job. I searched the logs and found that in 05 the I’m assuming current alternator was installed. That would mean it has roughly 1764hrs on it which mostly has been in the horrid environment that Florida is.
-
That’s the weird thing nothing was broke off and noticeable loose. I could move one of the wires but it would rotate the whole ring connector with the wire. The nut on it was quite snug.
-
Went to fly last Thursday and couldn’t get the plane to stop showing a noticeable discharge. Didn’t matter if the avionics were on or off or at higher power settings. I did one lap in the pattern and watched my Jpi show a dip from 11.8V to 11.5V after I put gear up. I decided at that point something wasn’t right and came right back around to land. Fast forward today I installed my new Concorde xc battery, thinking it was the 3yr old Gill battery and to no avail the same issue. Fast forward to me taking the cowling off and looking at the alternator and touching the wires to check if they were loose and it works again after a few starts. I held a razor blade to the face of the alternator and it has magnetism and there’s voltage going to field wire with the master on and engine off. None of the wires looked bad, or were noticeably loose. I moved and touched everyone… they were all tight. I couldn’t find in the logbooks when that alternator was last overhauled or repaired. I plan to fly Saturday and do a few touch and goes to see if the shock from landing moves something loose or whatever could have been causing the issue. My mechanic will look at it Monday but I was honestly ready to send the alternator off for OH. Aero Accessories said it’s 630bucks which isn’t bad but I don’t want to spend it if I don’t have to. Should I still send it off to be OH if my mechanic can’t find anything? I obviously did something to make it work so it has to be at the wires going to the alternator or the plastic pieces that holds the field wires inside the alternator.
-
Good, it should work just as well for me then. For whatever reason gill does not seem anywhere close to the quality of Concorde. I’ll be curious to see if the plane turns over faster. It wasn’t slow to begin with just wouldn’t hold a charge. Alternator might be due for overhaul if the battery doesn’t work. Loose wire could be an issue but I’ll start with the most obvious. Surprised the gill lastest 3 years with the long inactivity it would sit before I bought the plane.
-
Funny, I just pulled my gill sealed battery today because it seems to not hold a charge anymore. Bought a Concorde xc hopefully it’ll last more than 3 years in Florida. I didn’t keep the other battery on a minder but the previous owner did. I fly typically 1-3x a week so use shouldn’t have been a factor.
-
-
Probably so but my plane doesn’t have tks anyways. I’m too chicken to even get close to ice, not sure having tks would make me feel otherwise. Luckily ice isn’t a big deal down south.
-
Yes, I did with the original head unit that controls it. The servo runs about 800bucks which is ridiculous considering how simple and cheap the parts inside are. Luckily I didn’t have to buy a new one since I already had it. It was still way cheaper than possibly having to buy a replacement rudder. And now I get the benefit of the trim working. Just hope it stays working for awhile.
-
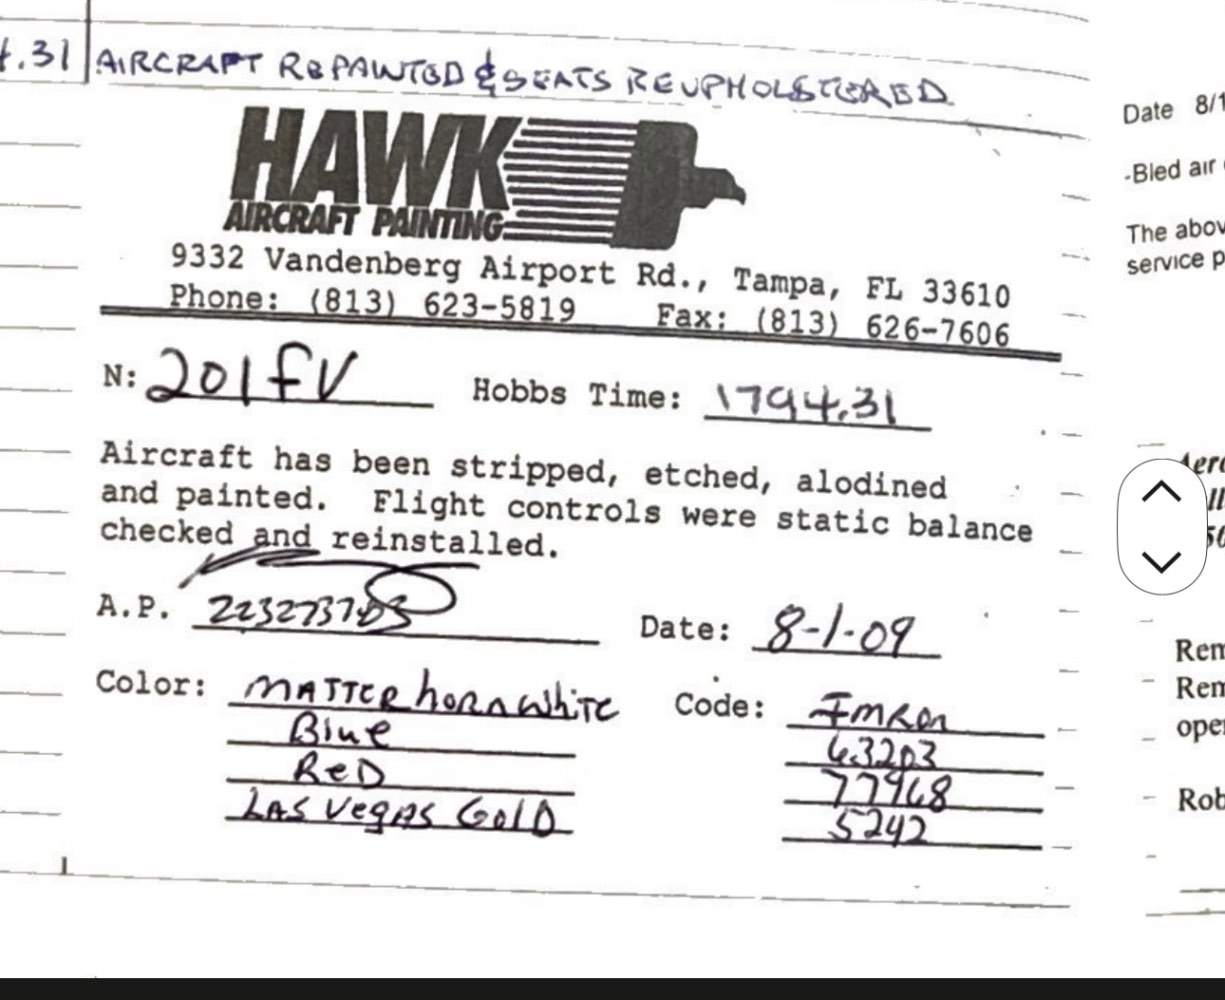
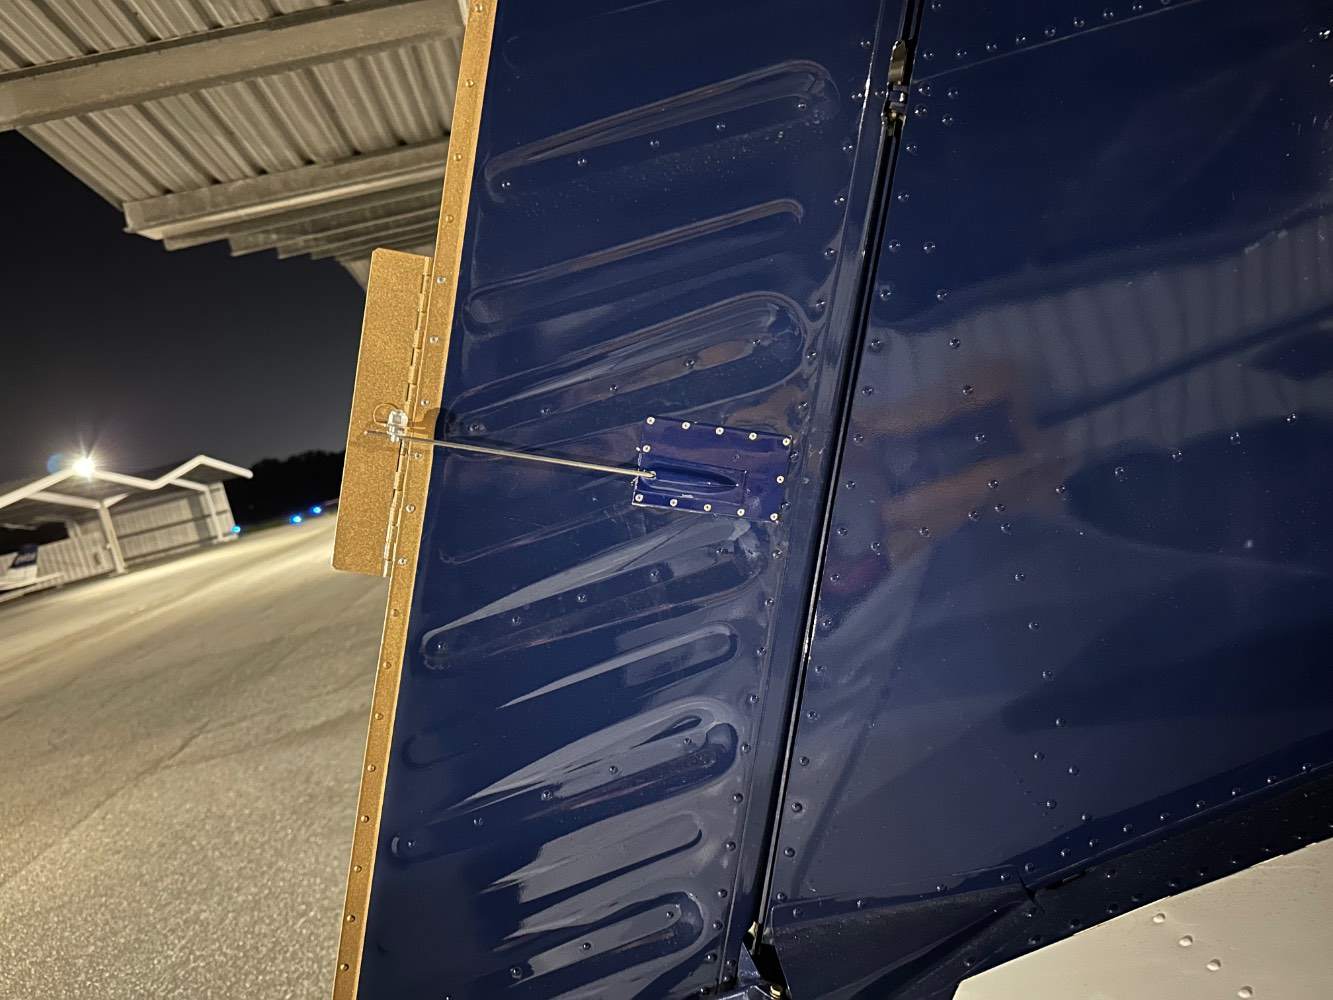
I finally got the rudder trim back installed Monday and it’s been great ever since. I can make it fly coordinated at any phase with no pressure on the pedals. I haven’t had the rudder rigging or a balance check done. I put everything back the way it was for the last 14 years so I don’t see a need to check anything. It was painted in 2010 with the rudder trim attached so it should have been balance checked then. It’s nice to finally have the damn thing working after over a year. It helped having the avionics guy be mobile because I was dreading having to take it to a shop and pay that premium. Having the ability to trim the rudder and then not, really makes you never want to fly without it again.


