DJ67
-
Posts
20 -
Joined
-
Last visited
Content Type
Profiles
Forums
Blogs
Gallery
Downloads
Events
Store
Everything posted by DJ67
-
I am in annual now and have one of these. But my gear is J-bar, so I would be the motor, and I don't recall any jamming while deploying the gear.
-
Hartzell HC-C2YK -1BF / F7666A-2 Prop B hub 7000.00 10 SMOH
DJ67 replied to Alan Fox's topic in Avionics / Parts Classifieds
Did this one already sell? -
Narco NCS-812 Nav/Comm problems?
DJ67 replied to ragedracer1977's topic in Avionics/Panel Discussion
It looks like you have the install manual. I have an operation manual for IDME-891 and it does refer to the upper right On/Off switch and "DME L.E.D. Display Dimmer Control". I have a IDME-895 connected to an NCS-812. I dropped out of flying for while after buying my M20F so I never got to try out all the features of this instrument, so I was shocked to learn about having MB and DME in the indicator. Looking for an Operation manual for it as well as the Install manual. Doug -
Just bought a 1966 M20E - tips
DJ67 replied to moonlighting7's topic in Vintage Mooneys (pre-J models)
Purty Bird! Easy on the eyes and nice panel too. I let my '67 M20F (same engine) sit too long and the cam (which is up in the air above the oil) got pitted. That requires a tear down. Mech says upwards of 10-15k to IRAN and you don't get to claim 0 SMOH when it's done, unless you put the rest of the new part$ in. Your pre-buy mech can pull one jug which is the only way to see 1/2 of the cam. Two jugs and you can see it all. Operation - 1. Obey the book on landing - too hot and the nose and mains will teeter-totter until the prop strikes. 2. I love the J-bar. Over the fence I like to reach for the yoke with my left hand and the J-bar with my right. If the right hand comes back empty, use it to shove in the throttle, go up, and figure out what's going on. CFI - FYI my insurance says "Make and Model" for the CFI. Doug -
Well I had no problem getting the baffle off of #3 so he agreed to pull #2 and #3. He was hoping to pull jugs from the same side. Now I understand why, because the wrist pins are easier to remove. Anyway, he pulled #3 and turned out we didn't need to pull #2. I'll start a new thread about pitting on the cam lobes. Ugggh.
-
I think you hit the nail on the head. I've been pondering that very question, and now you've up and answered it. Doug
-
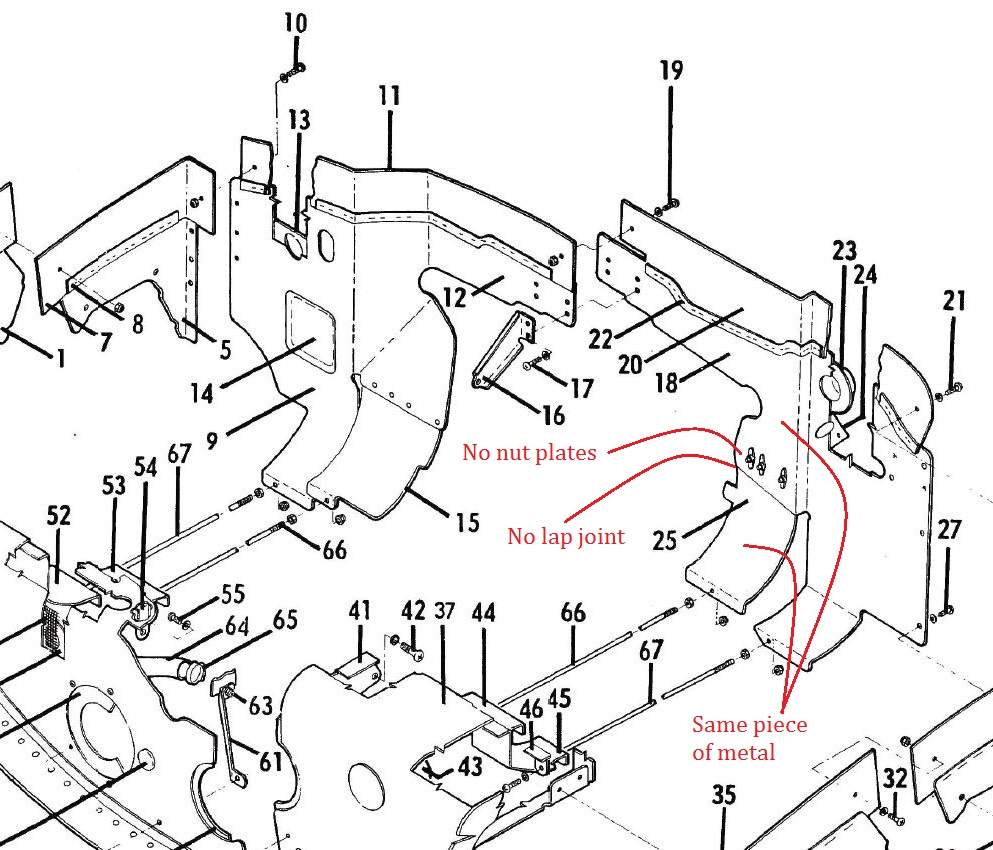
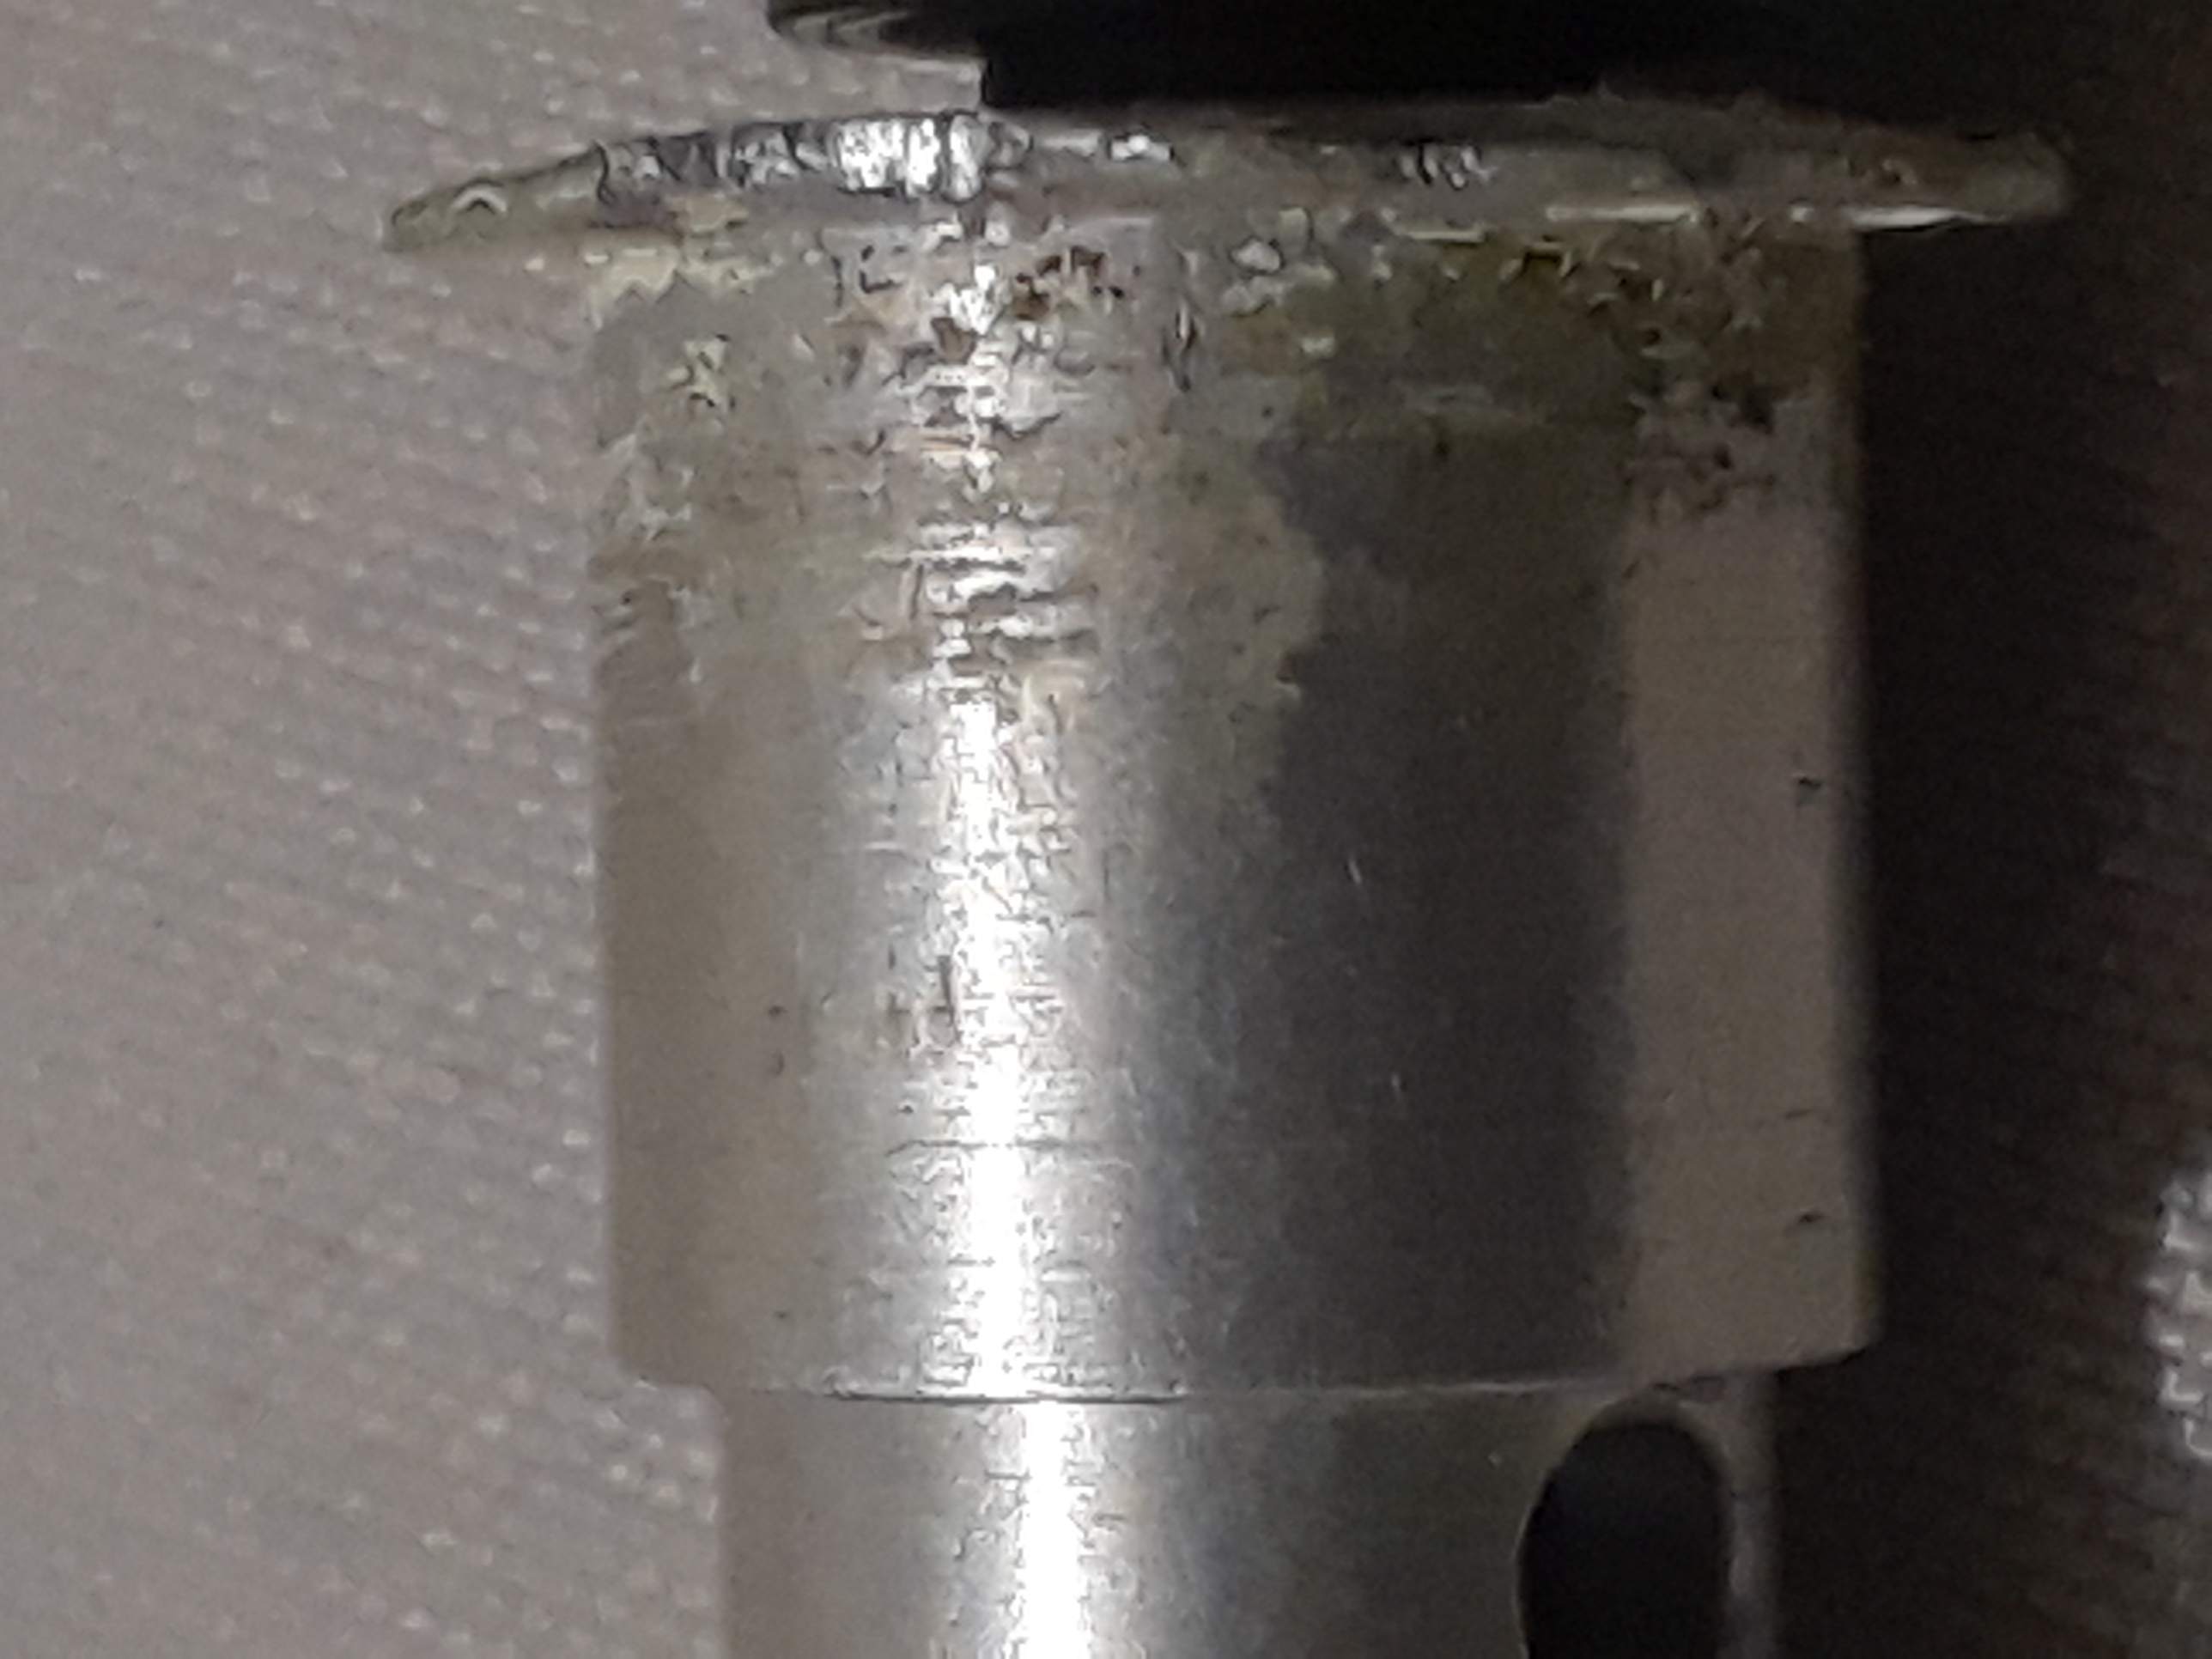
Thanks for the picture, its a clear view that I wish I had before I started. As you say ... one piece. Somebody made this with the engine off and took a shortcut in that area. I'll talk to mech about cutting and splicing with a doubler when he gets back (he's gone to some sort of gathering in Wisconsin). It's my aircraft so I'm free to get it fixed up to conform to OEM. Actually, I wish he could cut out an area above the upper left mount that has multiple stop drilled cracks, and then rivet in a patch (or just make a whole new baffle). To get the baffle out, I think we may only need to move about 1/2 inch forward of the mounts to get enough clearance. Thanks again for the pic. Doug
-
I didn't realize I could do that. I'm normally on a PC so I'll look into that! Thanks, Doug
-
I have seen photos and diagrams that show pathways between fore and aft sections of the case. If the #2 jug removed and the hands-on inspection came out okay, I would accept a borescope snaked in for a visual of the aft lobes. If that looks good enough for the mechanic then I guess I would take his word for it, but if he was uncertain then I would pay him to pull the next jug and then we would know for sure. Then if it passes, I can quit worrying and go fly.
-
I updated the diagram. In my case it's all one piece of metal. It's not made to the drawing so there is no joint to separate the parts.
-
If it still looks good, I wouldn’t pull the rear just to look. I'm having that debate with myself all the time. My mech borescoped the cylinders and seeing no rust said "I'd just go fly it and check for metal in the oil filter every few hours." But what if I do that and it starts making metal? Could that damage the prop governor or anything else? Doug
-
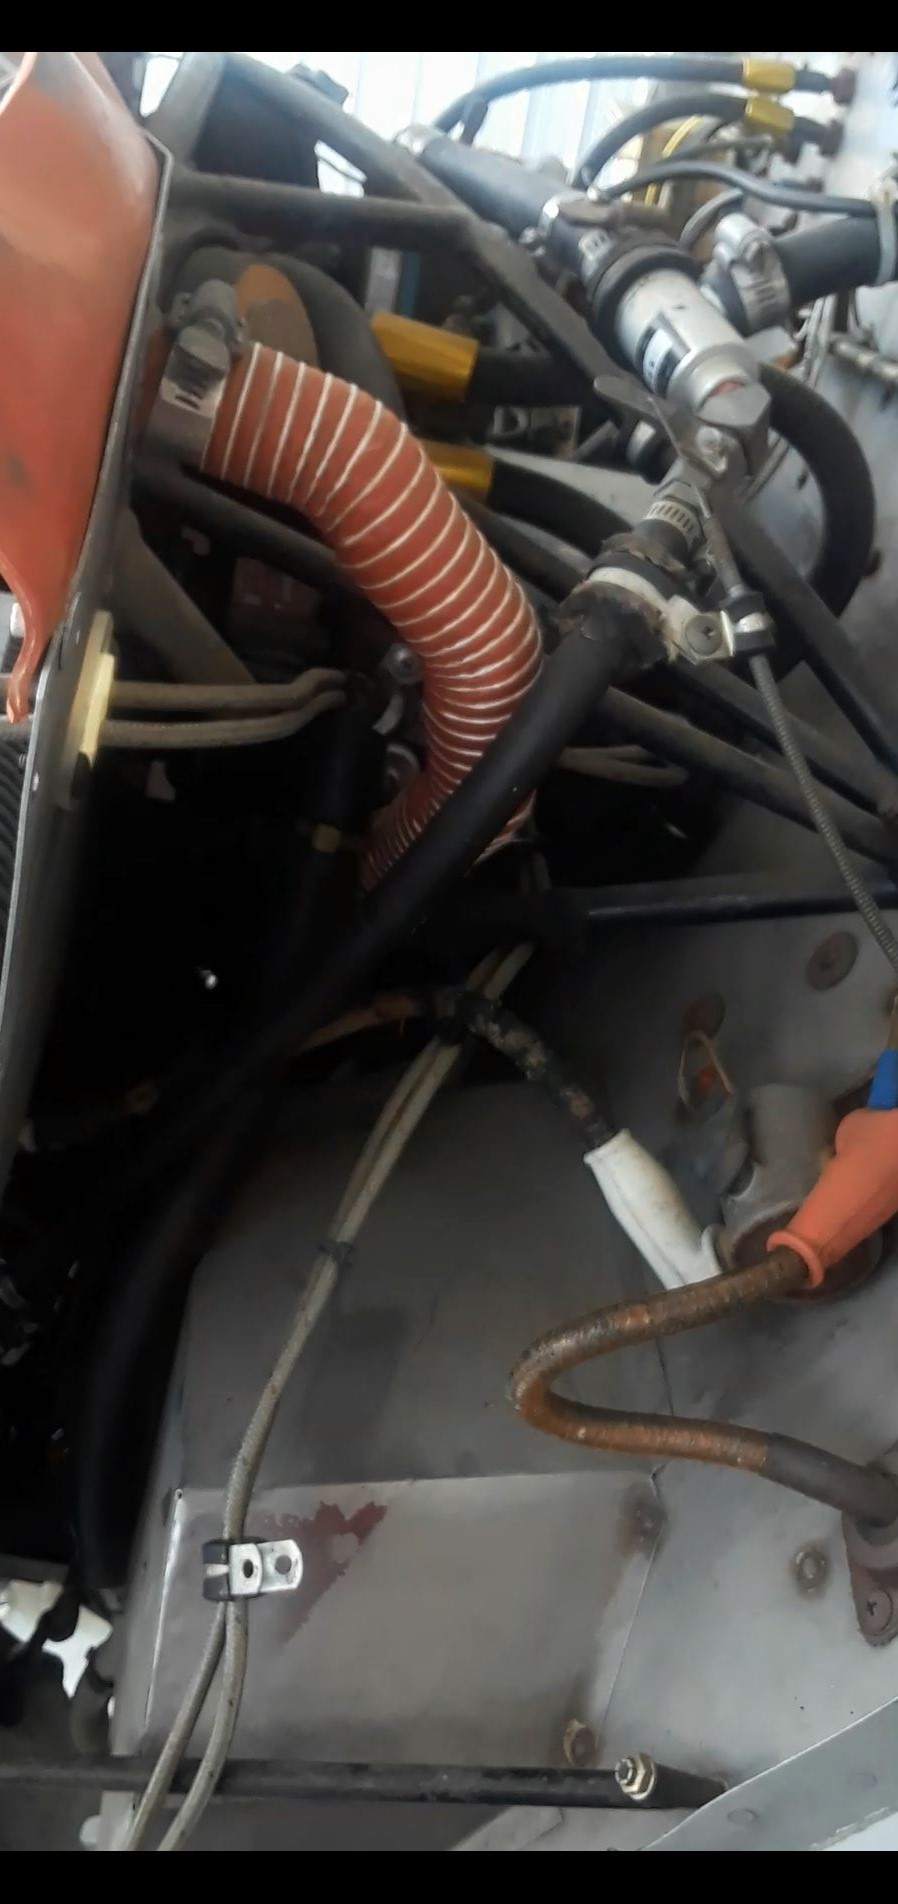
I'll look closer next chance I get, but something discouraged me from trying to slide it down ... probably all sorts of accessories, and a vent pipe that hangs down like a barb. I think you are correct about everything else. In the diagram, part 25 is the one that's stopping me. It looks like it would have to be bent flat in order to move up past the inboard fins or out past larger outboard fins. I bet the OEM part had a detachable part 25, which is shown with three nut plates just above it. Mine is solid in that area, no nut plates, no overlap joint. So I'm betting that this baffle was hand made while the engine was off of the airframe. I thought about pulling #3 instead of #4 but I can see the same interference with part 15. It is a separate piece, but it's also riveted, and I would likely need a lot of WD40 to get those rivets off. Doug

-
1967 m20f, 200 horsepower Lycoming Airplane set unused too long so my mechanic needs to inspect the camshaft by pulling jugs 2&4. I have removed the cowling and attempting to remove the baffles. The baffle behind number 4 cylinder is wedged between the engine mount tubing framework and the number 4 jug. I can't see anymore pieces that I could disassemble and I can't find anything in the Mooney parts manual that says I should. Is there any trick to getting this baffle out short of unbolting the motor mounts and swinging the engine forward about an inch to allow that baffle plate to come out? Thanks, Doug
-
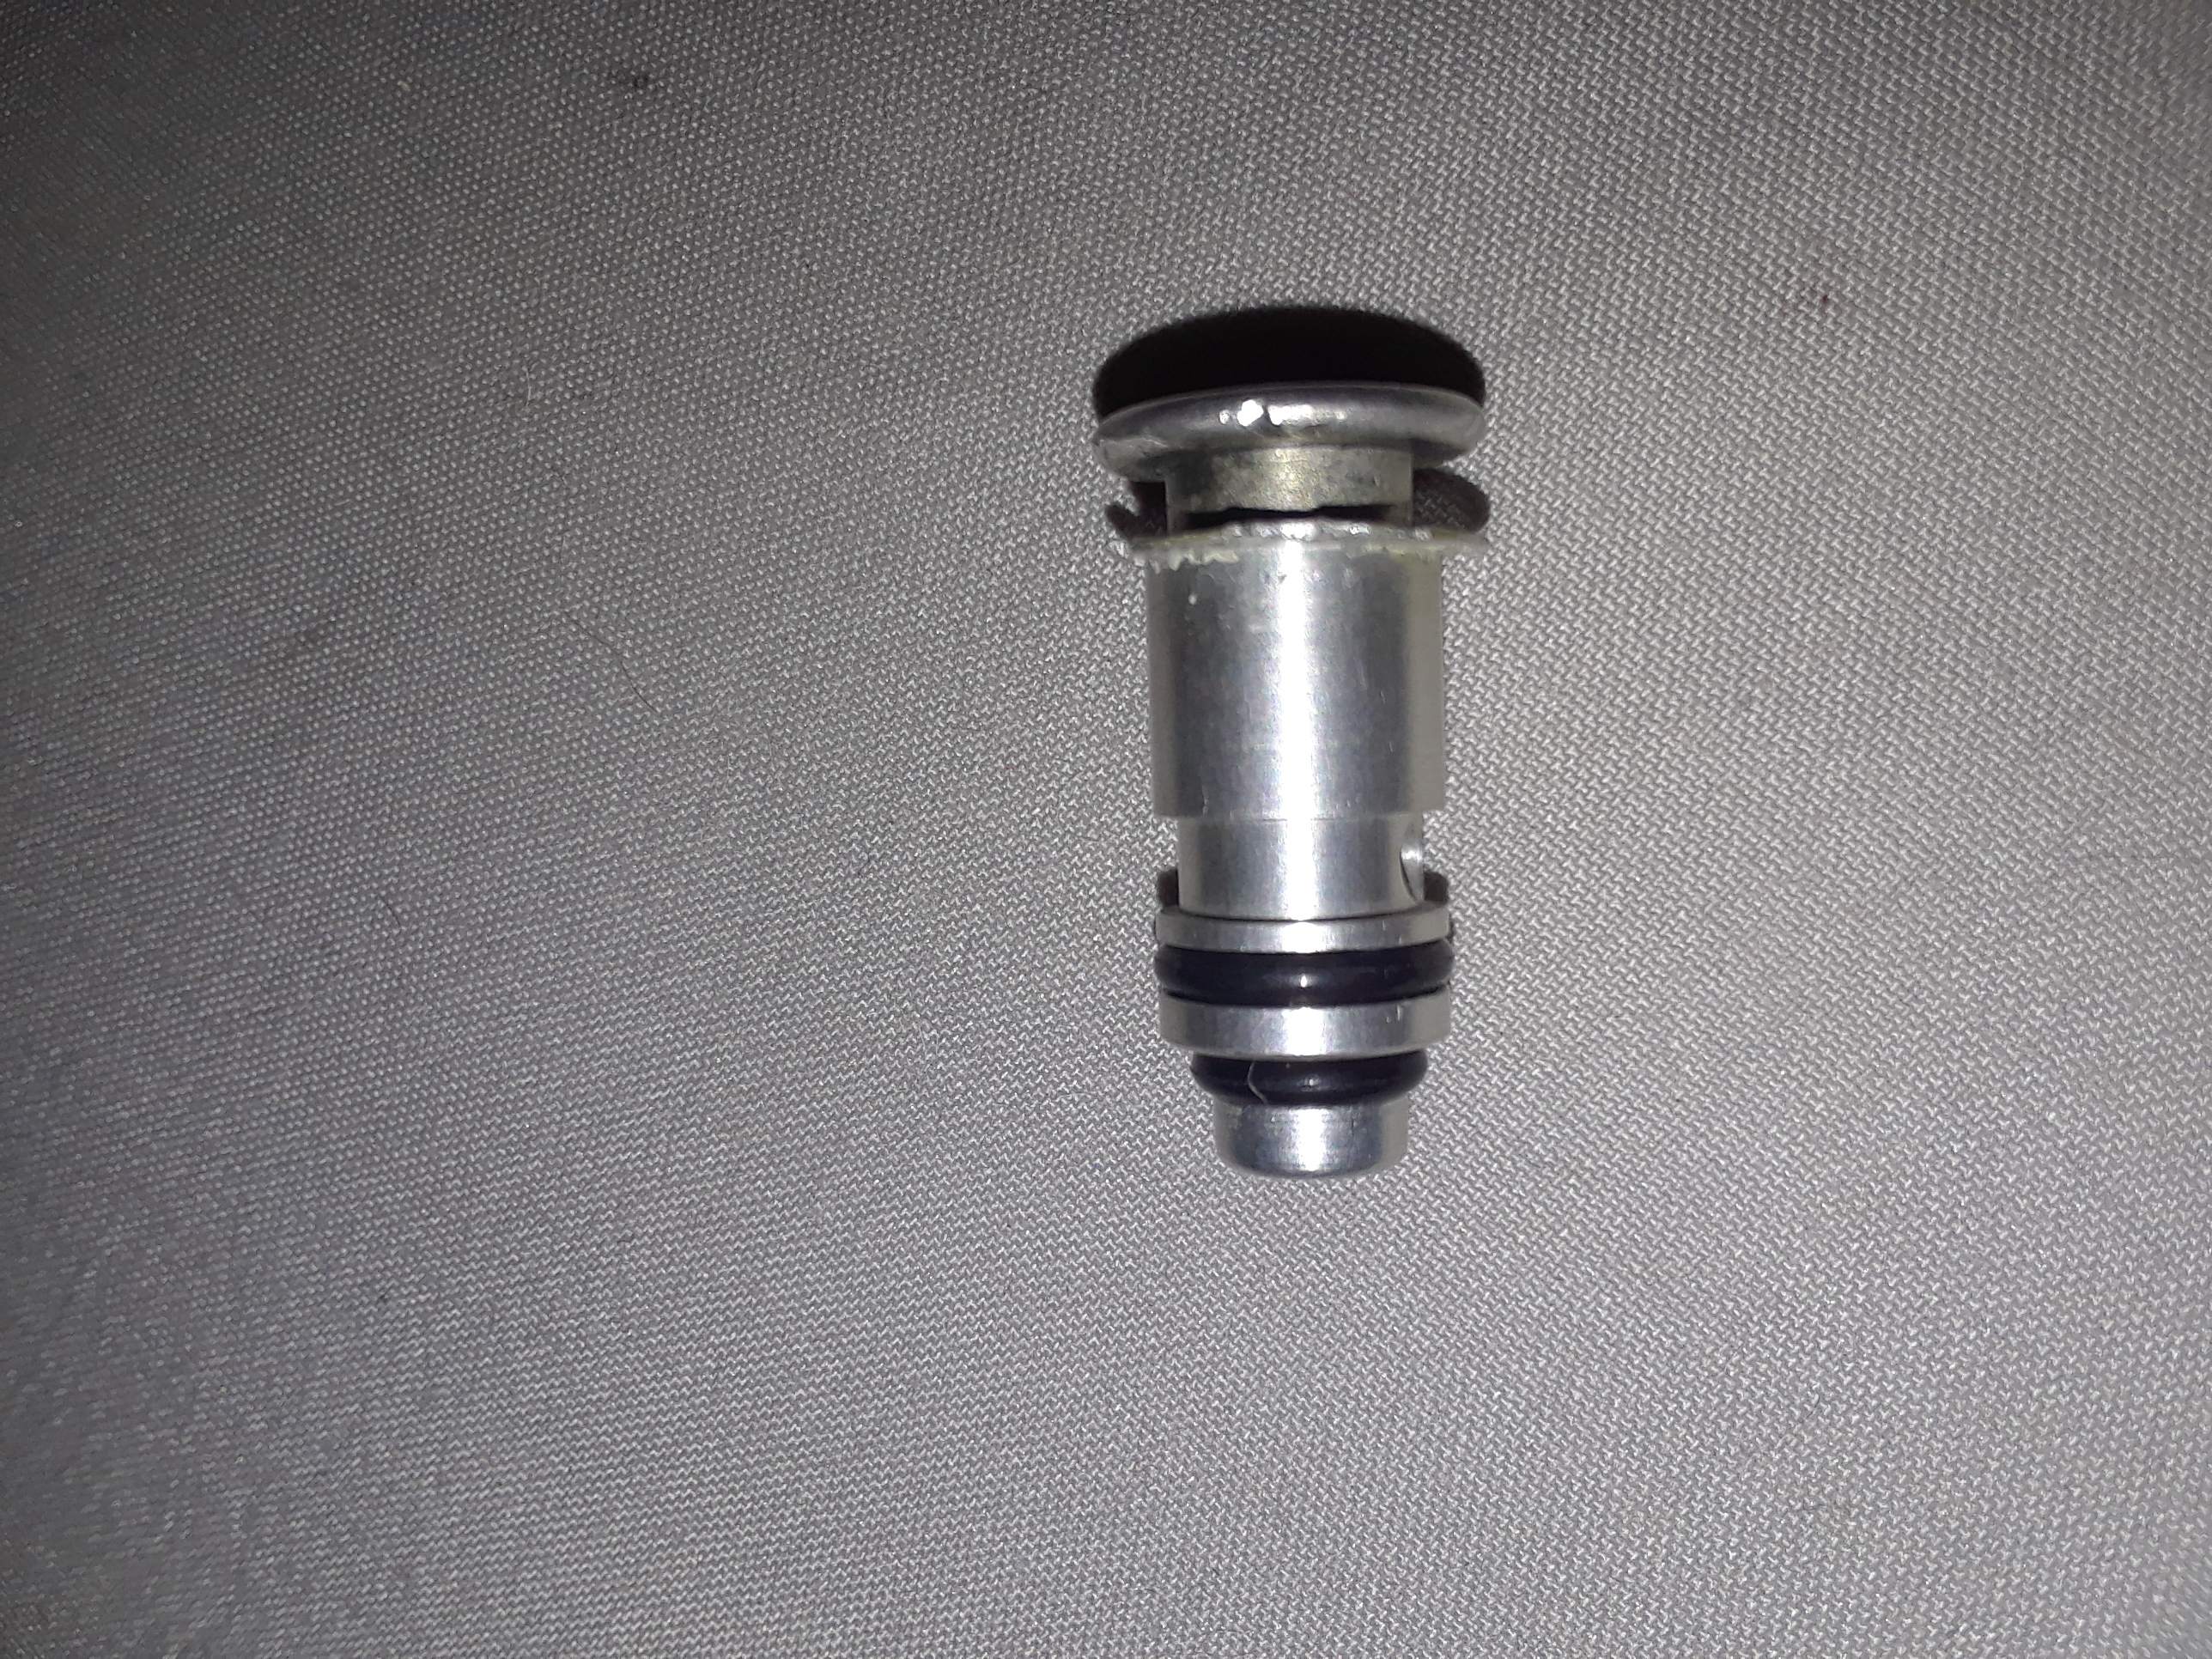
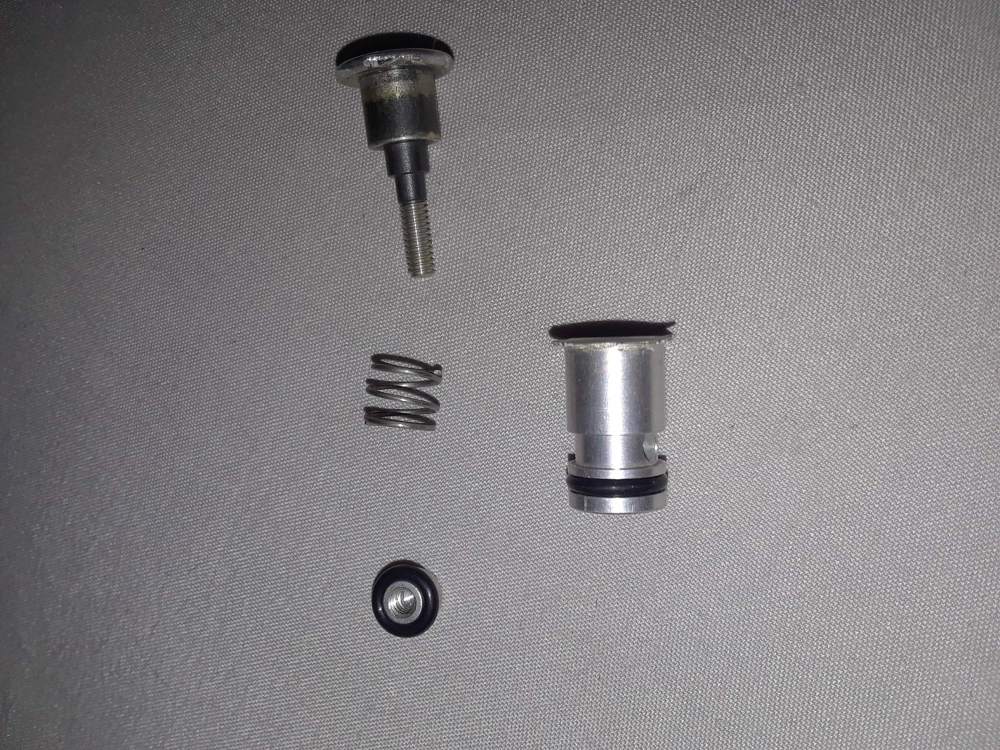
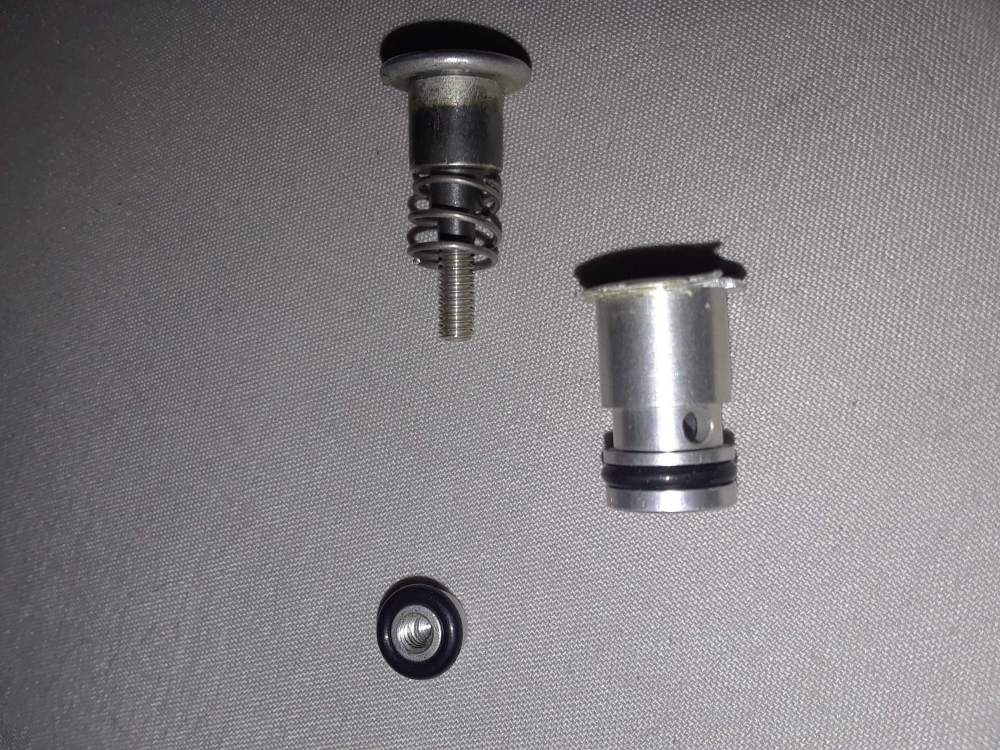
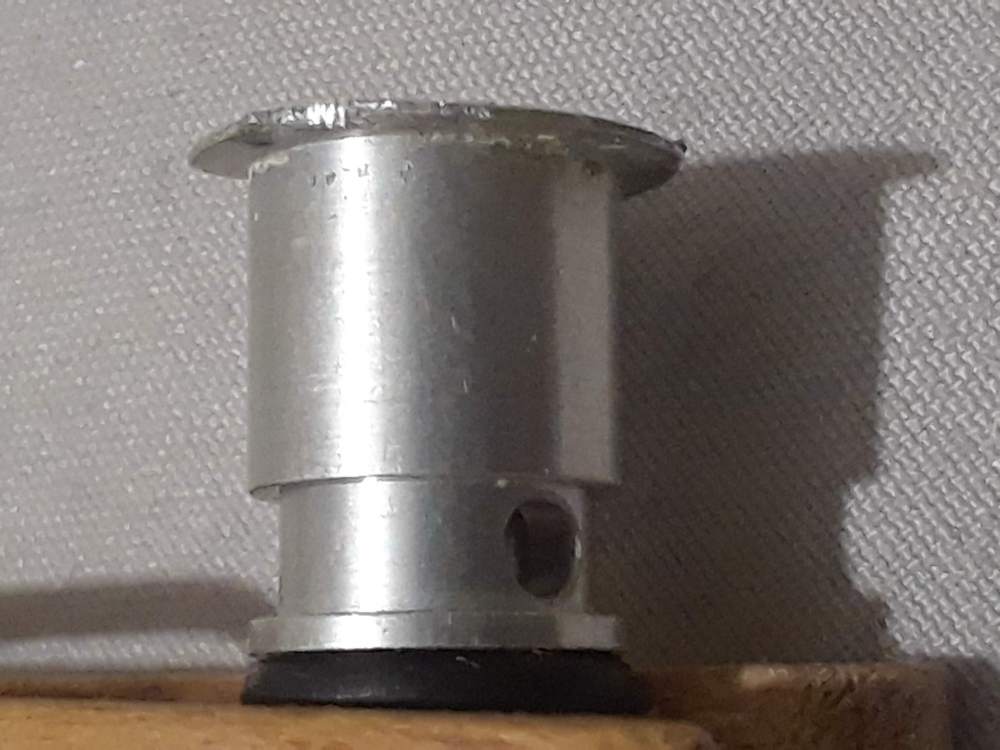
Well I got it back in. Had a wooden kitchen spoon, and the handle had the exact OD to burnish the valve housing in the yoke. So I feel like the corrosion is gone inside there now. The unit slides in okay then acts like it has a detent at the bottom. I can pull it with my finger and thumbnail, but it's really hard to get it started. Now that I look at the picture I posted before, with the PTT on the left, I think I can get a rubber band on the handle part and then slide it up onto the button when I want to be my own wing leveler. I might try it with the PTT cord under the rubber band. It would be cleaner to remove the PTT and put two rubber bands (2nd one is a spare), and then re-install the PTT.
-
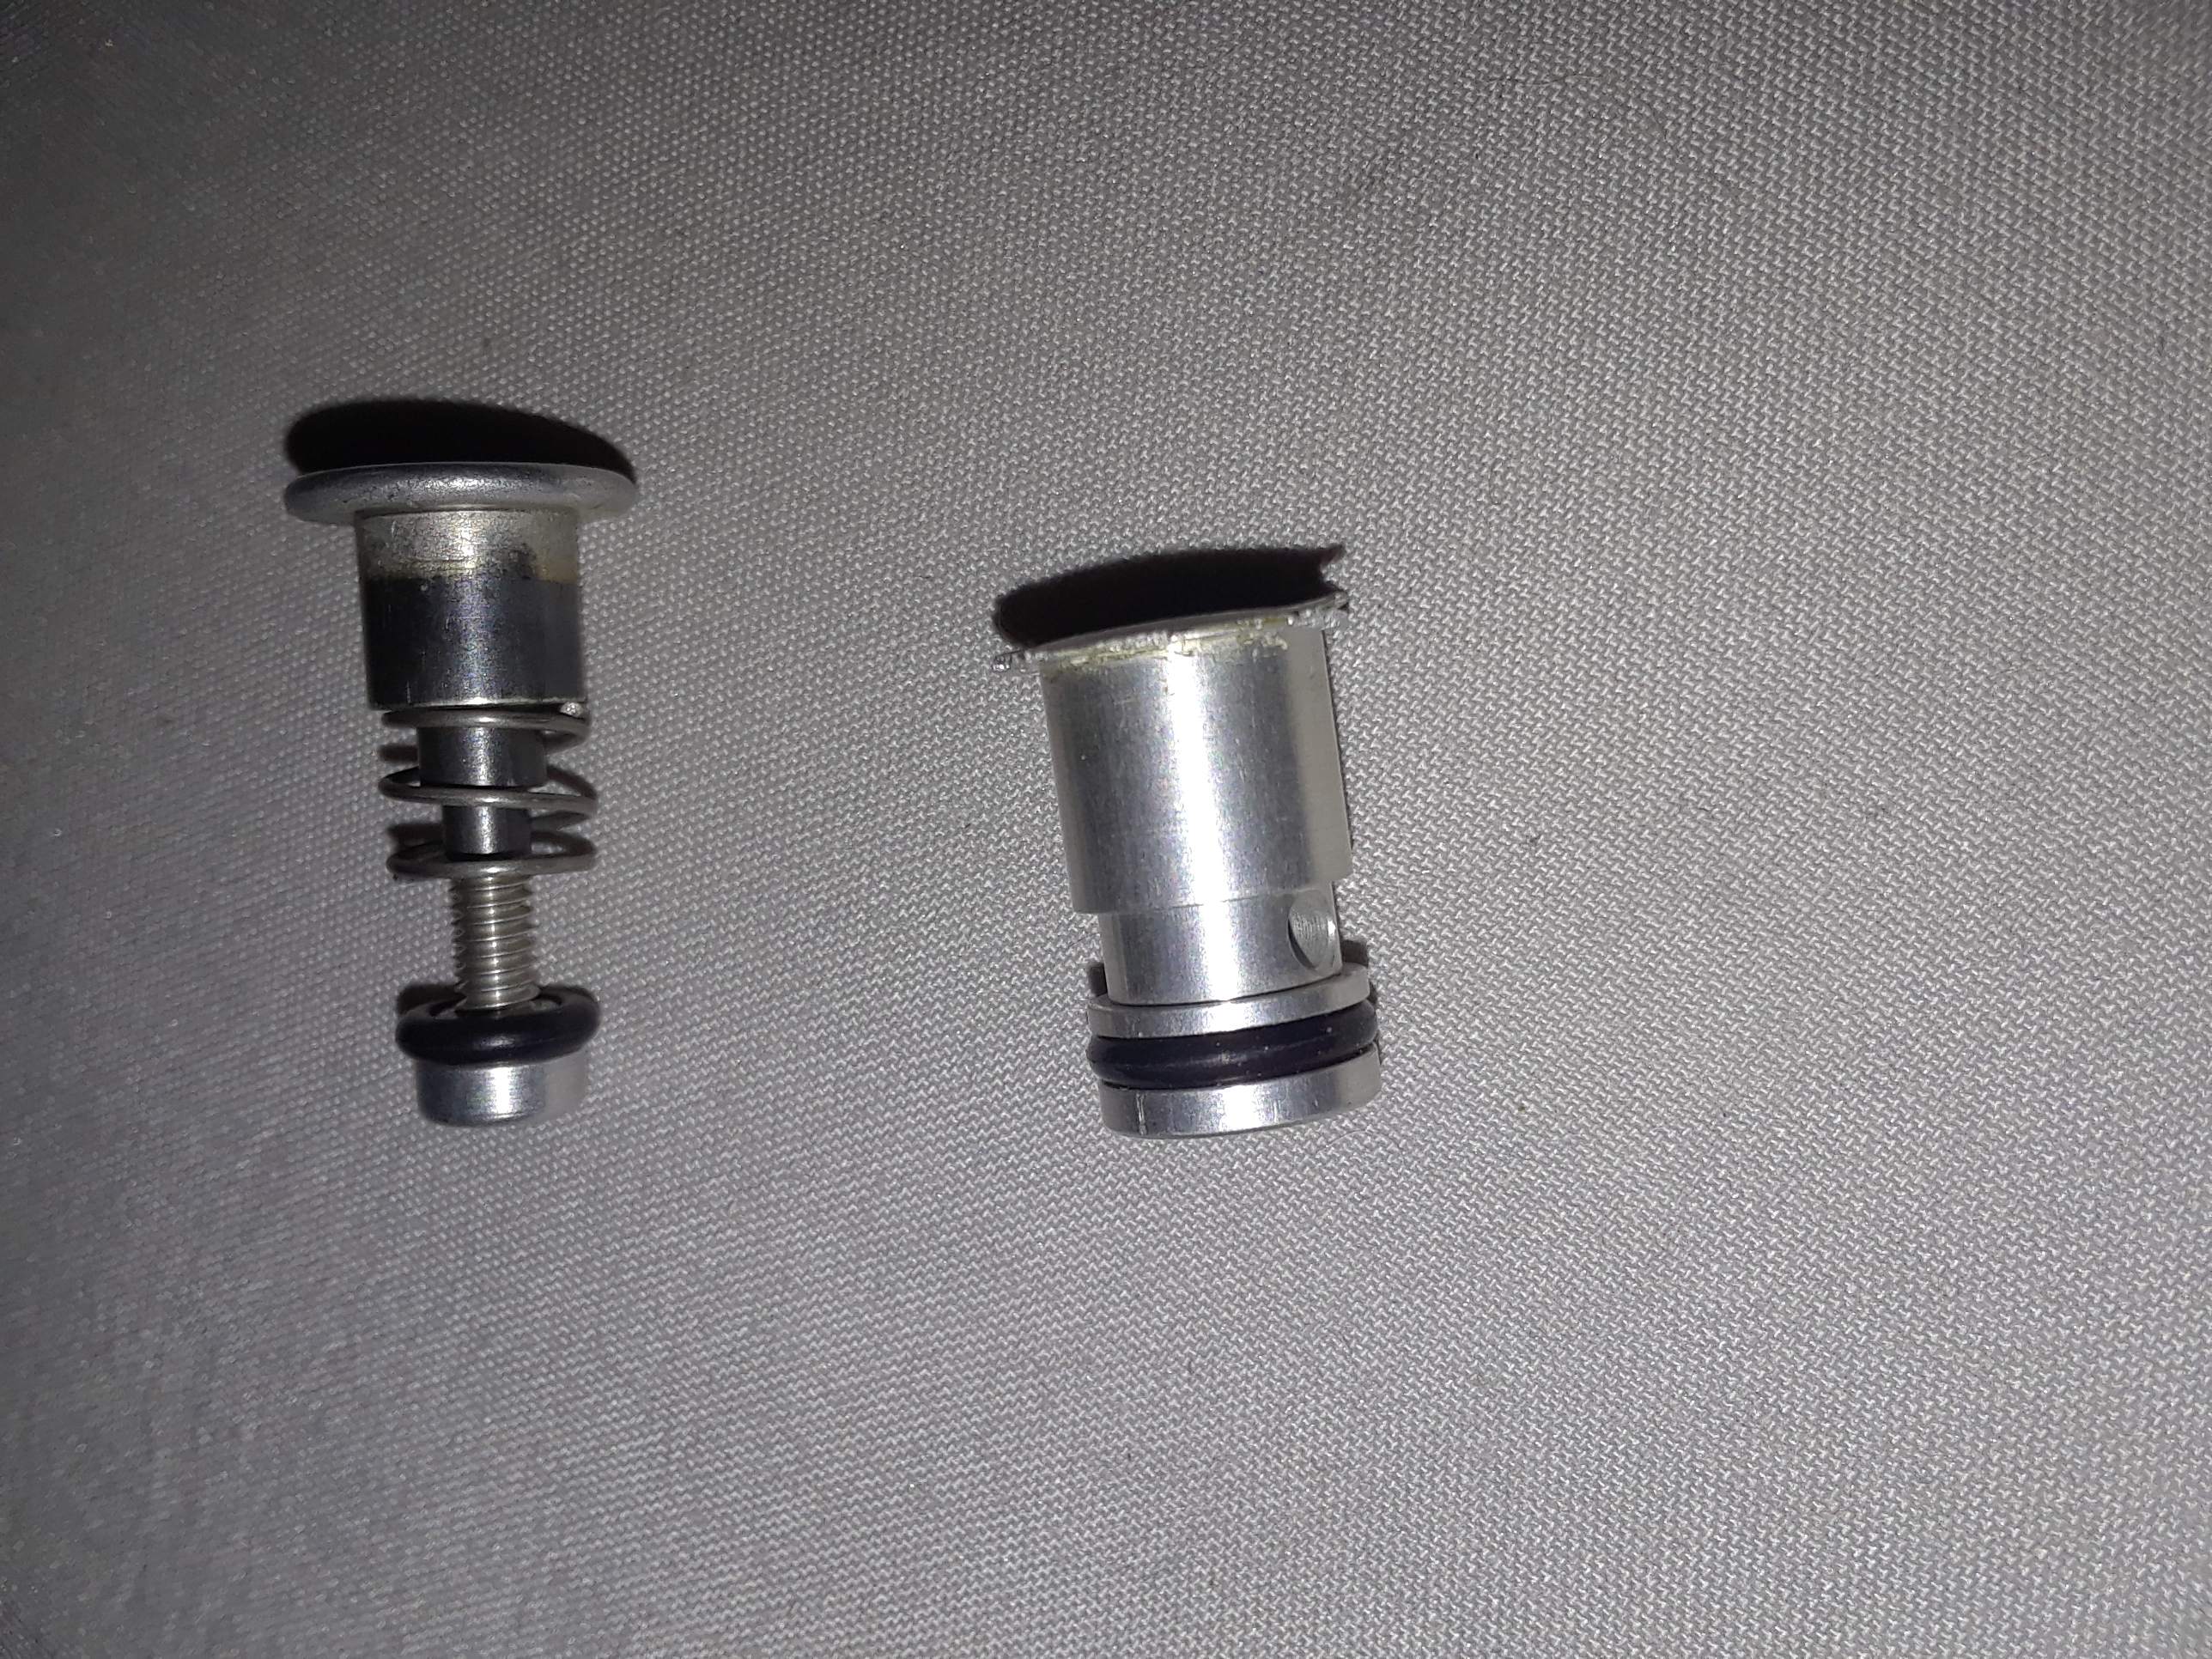
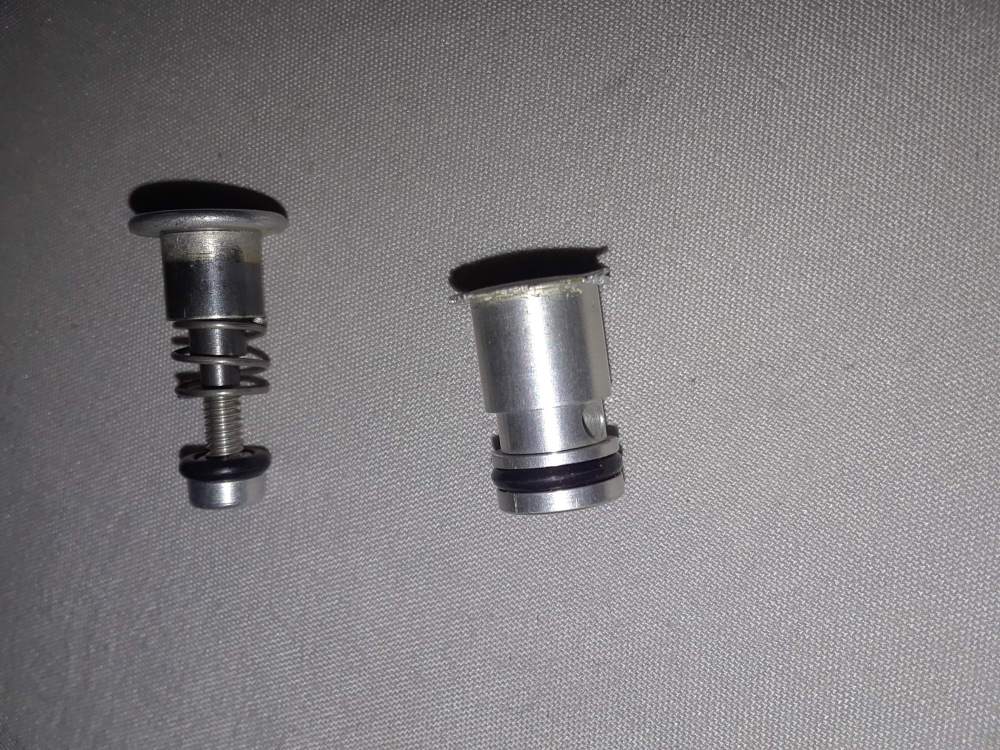
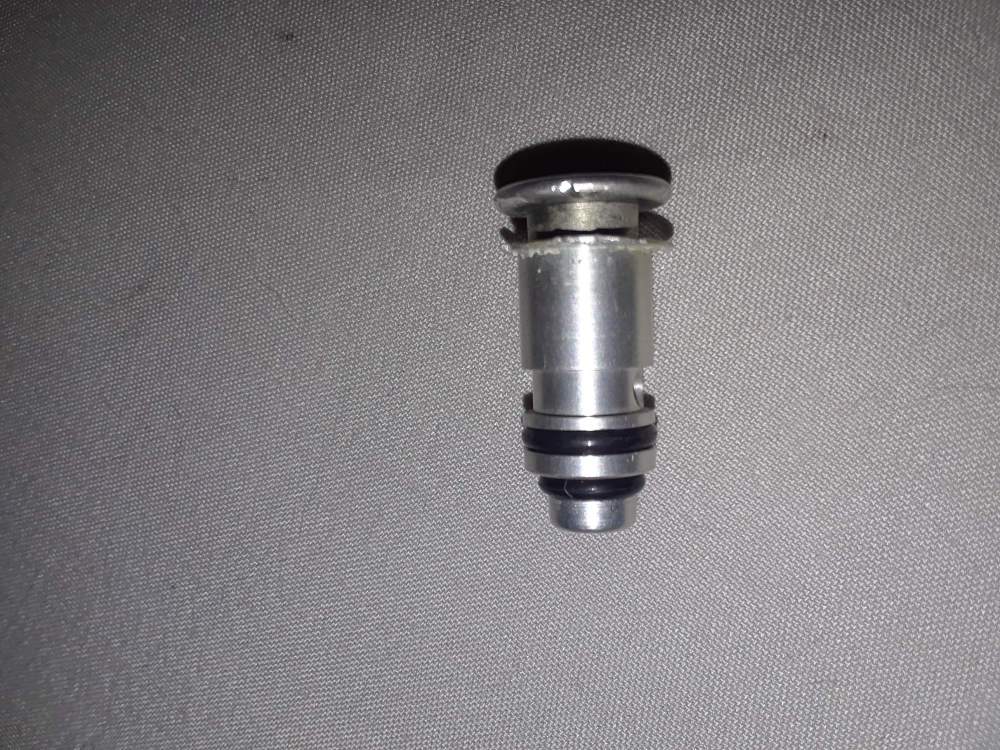
I hadn't realized that the bottom of the assembly was a nut! I managed to get the whole thing out and cleaned up the corrosion that made it so hard to remove in the first place. Already fitted new o-rings and ready to see if it slides back in. I'm a tad concerned that the hole in the yoke is still corroded, so I'm planning a way to clean that too. Thanks for the tip. Doug
-
Success! Removing the PTT bracket gave me better access for prying. I had earlier tried to separate the button from the housing and in the process lifted the housing a bit. So I found myself prying the razor thin housing flange, and breaking some of it away. Should have remembered to follow your advice about prying between the button and the yoke casting. Anyway, the problem was corrosion between the button housing and the yoke. I got it off with my thumbnail, so I can't wait to see if it slides back in where it was. Thanks for the tips. Doug

-
I wondered about that too, and I might give that a try today.
-
It sounds like I could service the O-ring by taking the whole assembly out of the horn. I thought about trying to dissolve it in place but was concerned about contaminating the Vac system. So what's the trick for getting the whole assembly out? Thanks, Doug
-
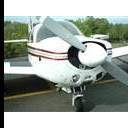
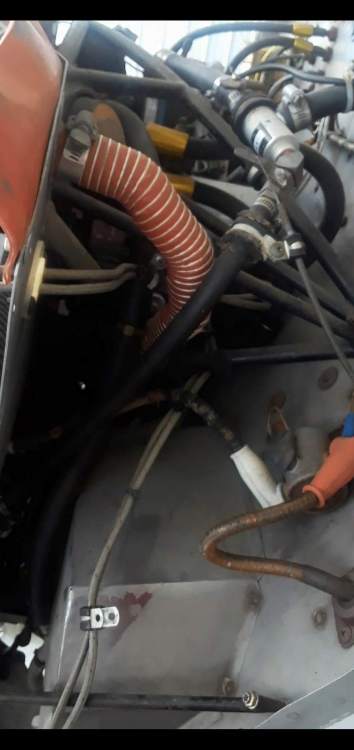
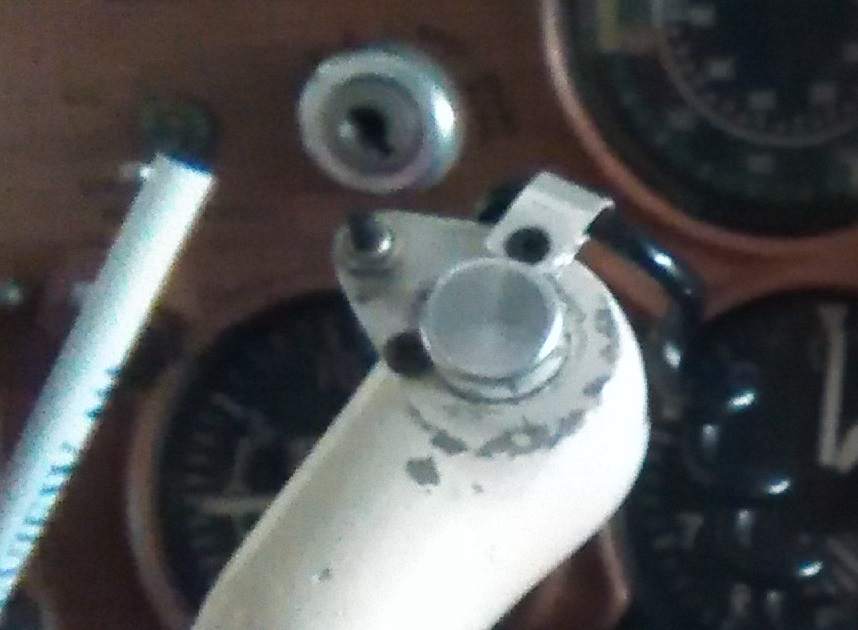
Once upon a time, in a decade far, far, away I was a 1/5th partner in a 1966 M20E. I was taught (right or wrong) to pull the button out and stow it in the ashtray during non-PC operations. Being a non-smoker, this made perfect sense to me. Before posting, I read (all of) a thread on Mooneyspace about the little guy, and actually started thinking about where I might scrounge up a film canister, or would a pill bottle do the job. But then I remembered that I have a PTT mounted adjacent to the button (see pic). I also like the idea of the rubber band, and I've got to admit ... broccoli had got to be cheaper than lobster, which also comes with a big honkin' rubber band installed. Another option that wasn't discussed ... you can move the clock to the copilot seat pocket and unplug the tubing ... maybe for VFR. But getting back to my post ... I have never been able to remove the button since I bought the airplane. I'm concerned that the o-ring had hardened and won't compress enough to let the button come out. I can use 1 thru 5 above to disable but I wonder if the o-ring is really solidified and is going to someday fail to seal, and disable the system full-time. Thanks everybody! Doug
-
1967 M20F has a PC button that works but if I try to pull it out to disable PC, it won't come out. Is it possible that the O-ring has become petrified?