

MooneyAcolyte
-
Posts
78 -
Joined
-
Last visited
-
Days Won
2
MooneyAcolyte's Achievements
")


-

Legal to Fly a J-Model without Wheel Covers?
MooneyAcolyte replied to MooneyAcolyte's topic in General Mooney Talk
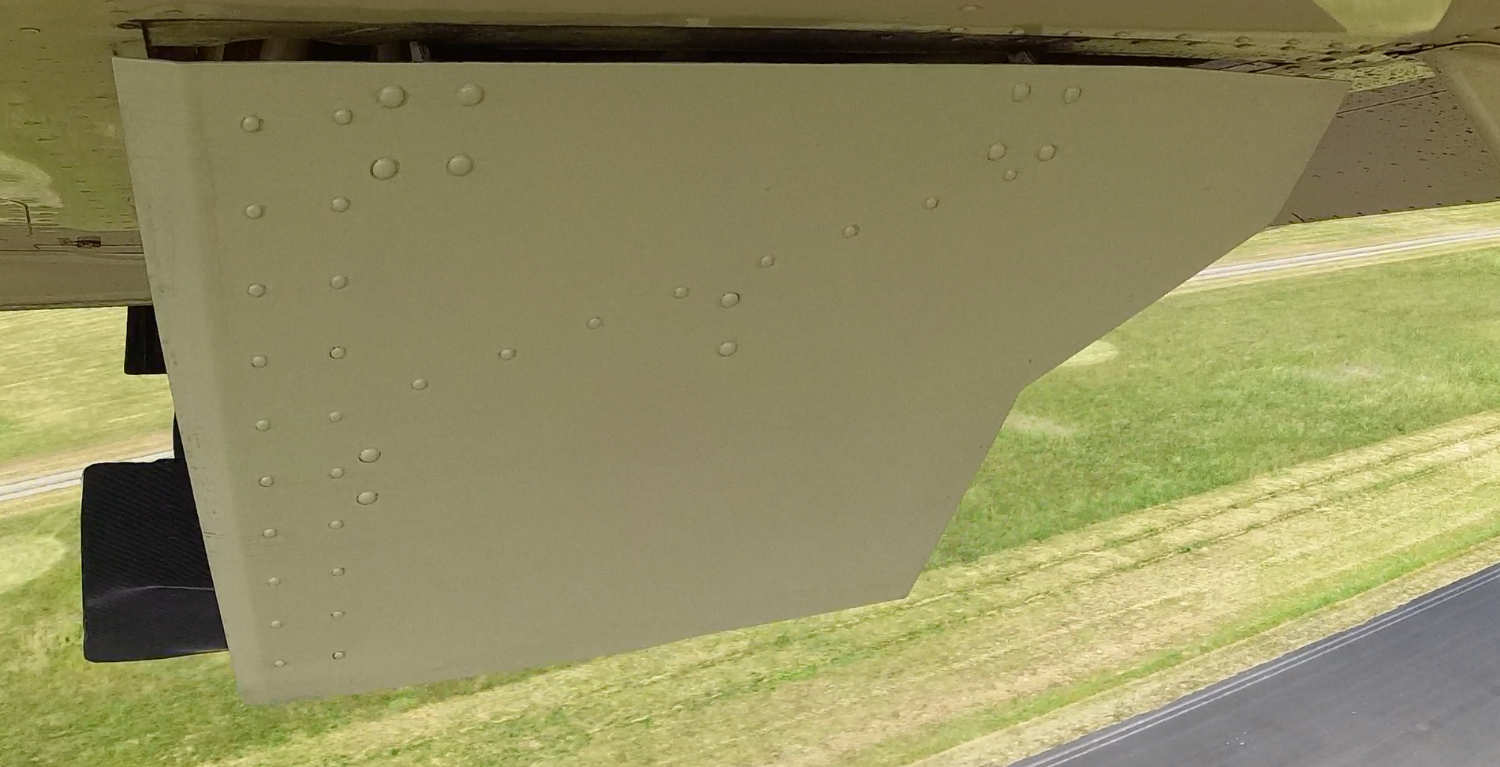
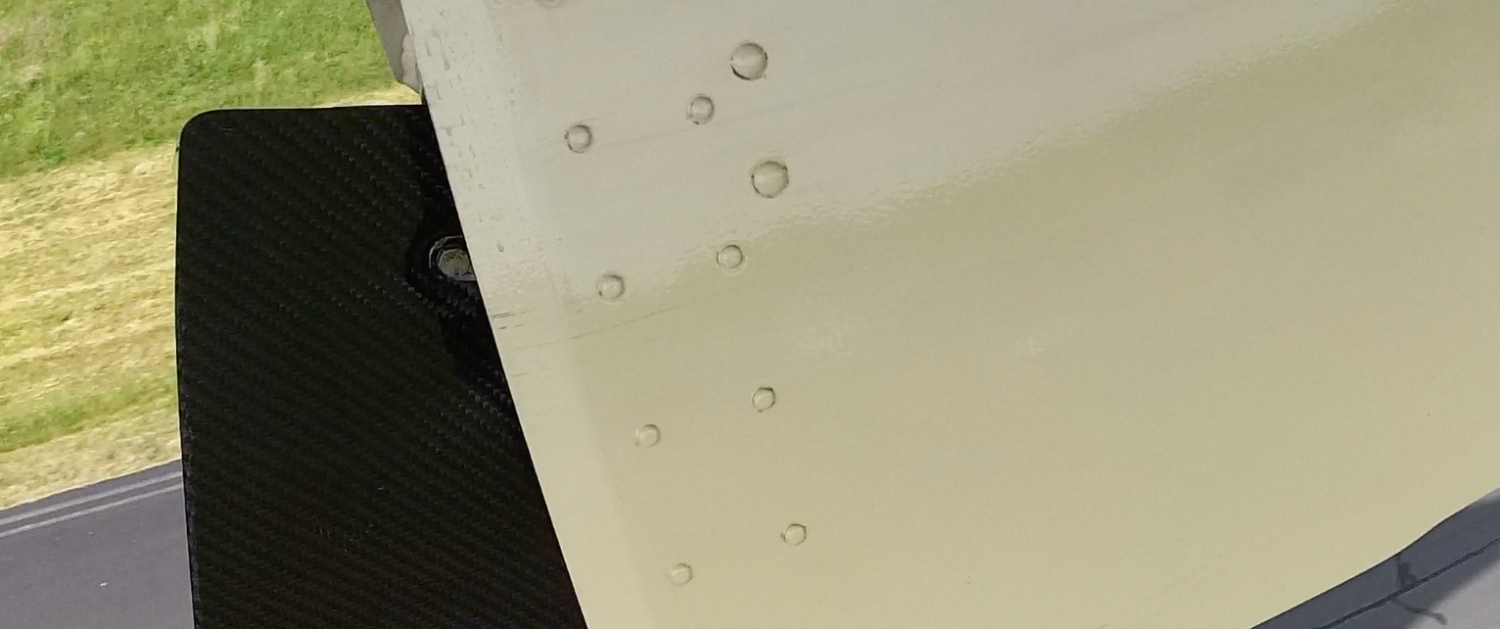
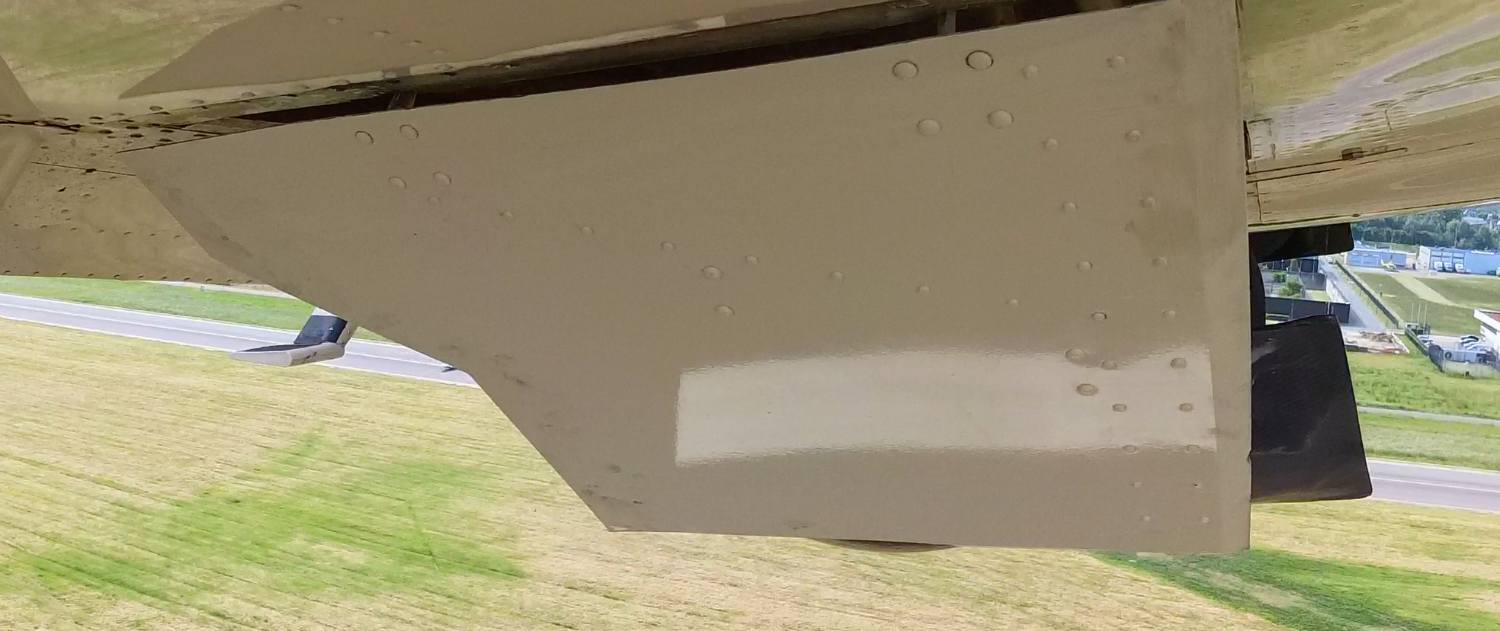
So, this is my final post on this topic. Today, I took the fitted carbon fibre wheel covers (officially "mid gear doors") for a test flight and found them to perform exactly like the originals - only they look pretty. I attach pictures of extended, half retracted, and retracted configuration during climb and cruise for the port and starboard sides. Thank you all for the valuable insights. In particular, the risk of galvanic corrosion was one that I otherwise would have overlooked. In general: if you find it acceptable in your regulatory framework (like it is in EASA PART-ML), don't be shy to go for owner-manufactured parts. I did spend more than the $1400 I would have paid to replace my ONE cracked one with a 3rd-party part, but now I have two and they are quite nice. 'nuf said, here're the pictures.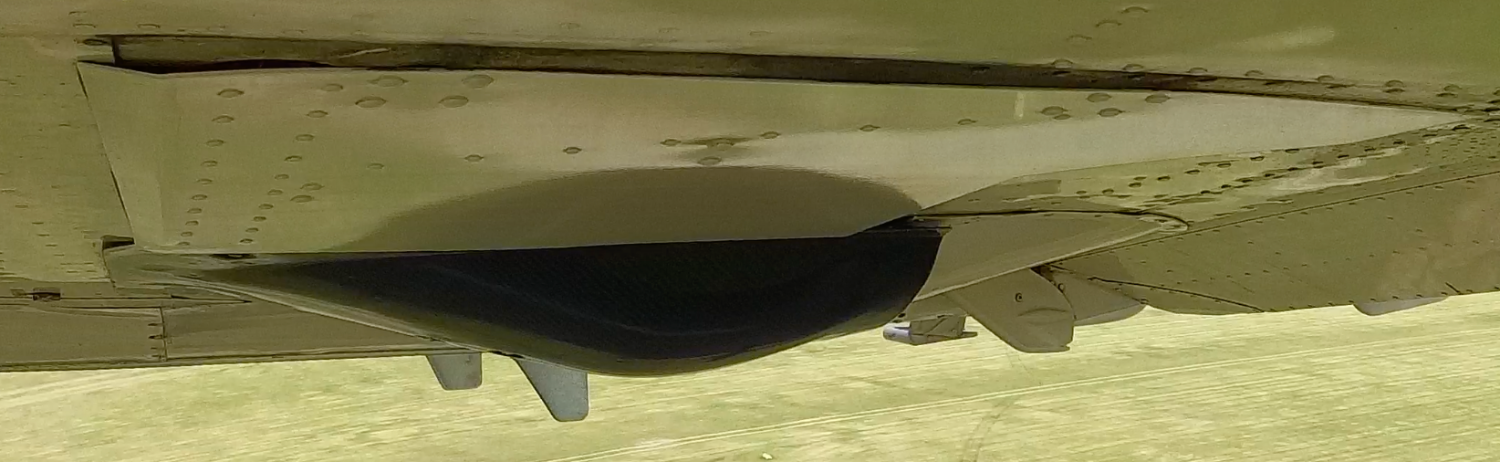


-
Legal to Fly a J-Model without Wheel Covers?
MooneyAcolyte replied to MooneyAcolyte's topic in General Mooney Talk
Fit check successful. Sent from my iPhone using Tapatalk -
Legal to Fly a J-Model without Wheel Covers?
MooneyAcolyte replied to MooneyAcolyte's topic in General Mooney Talk
Alright, the first part is done (starboard, before finishing, see pictures). Quality-wise, I am now about 90% there (some minor cosmetic flaws in the weave on the visible side and some "dry" spots on the edges, ~1mm misalignment of the inner and outer part). Tomorrow, I'll make a fit-check on the airplane, but am not very confident. Here's what I've learned: 1.) 4 layers of 250g/m^2 for each side (inner and outer) = 8 layers total is too thick (~2-3 mm) to mimic the aluminium sheet metal part, so I have to reduce to 4 layers total 2.) Even small misalignment when bonding the inner and outer shell leads to undesirable distortions of the final part. I will make a better run with these lessons learned. It takes a bit longer, but I am confident, it is worth it.

-
Legal to Fly a J-Model without Wheel Covers?
MooneyAcolyte replied to MooneyAcolyte's topic in General Mooney Talk
Thanks for sharing your thoughts. I am now convinced that I underestimated the chafe-problem. So, here is my approach: the contact areas will ALL get an extra resin layer, I will clear-coat the whole part, AND I will add anti-chafe teflon tape. If all goes well, I will be able to install the carbon covers before the summer. I will report here on any galvanic corrosion problems that show up before the end of the year. In general, I am very grateful for the community discussion here, which can only help to improve the product. My next report will be on the quality of the port-side outer shell after resin infusion. -
Legal to Fly a J-Model without Wheel Covers?
MooneyAcolyte replied to MooneyAcolyte's topic in General Mooney Talk
Thanks, A64pilot. I‘ve been thinking about this and there is an excellent video on the topic by the people who build the DarkArrow: Since the wheel covers are bolted on with steel bolts, all I’ll have to do is making sure no metal-carbon contact exists where the holes are drilled. That can be done by an extra layer of resin. Sent from my iPhone using Tapatalk -
Legal to Fly a J-Model without Wheel Covers?
MooneyAcolyte replied to MooneyAcolyte's topic in General Mooney Talk
The resin infusion method is MUCH Better. I get a part (inner shell port) that is "good enough". I'm about 80% there quality-wise, so I will continue to try to improve. Four mistakes were made: 1.) A small leak in the vacuum bag went undetected, the peel ply had wrinkles, the first carbon layer was inconsistently glued down on the mould, loose fibres were left below the first layer. Next up: outer shell port - with lessons learned.
-
Legal to Fly a J-Model without Wheel Covers?
MooneyAcolyte replied to MooneyAcolyte's topic in General Mooney Talk
Good point. Version 1.0 (two glued parts) will certainly as close as possible to the original, except for the material. For a one-piece some design work and stiffness calculations will be needed. I agree that it might be easier to produce and maintain. Sent from my iPhone using Tapatalk -
Legal to Fly a J-Model without Wheel Covers?
MooneyAcolyte replied to MooneyAcolyte's topic in General Mooney Talk
Thanks. There are some “dry spots” where the resin didn’t make it. That’s either a consequence of the low temperature in my workshop (-5degC), or of the wet lay-up with hoover vacuum process I used. I presume the latter, so next I’ll try resin infusion under full vacuum. Now that you mentioned it, I might try salvaging the part by flattening down the dry spots and adding resin post-factum. It’s not a structural part after all. Sent from my iPhone using Tapatalk -
Legal to Fly a J-Model without Wheel Covers?
MooneyAcolyte replied to MooneyAcolyte's topic in General Mooney Talk
The first part (top) came out of the mould (bottom) - not good enough. Have to move to resin infusion.
-
Legal to Fly a J-Model without Wheel Covers?
MooneyAcolyte replied to MooneyAcolyte's topic in General Mooney Talk
Thanks, I‘m doing my best. Will keep everyone posted. Sent from my iPhone using Tapatalk -
Legal to Fly a J-Model without Wheel Covers?
MooneyAcolyte replied to MooneyAcolyte's topic in General Mooney Talk
The two moulds for the starboard side are done, but need cleaning and finishing. Next up: moulds for the port side.
-
Legal to Fly a J-Model without Wheel Covers?
MooneyAcolyte replied to MooneyAcolyte's topic in General Mooney Talk
First gel coat went on the starboard cover to make the mould surface.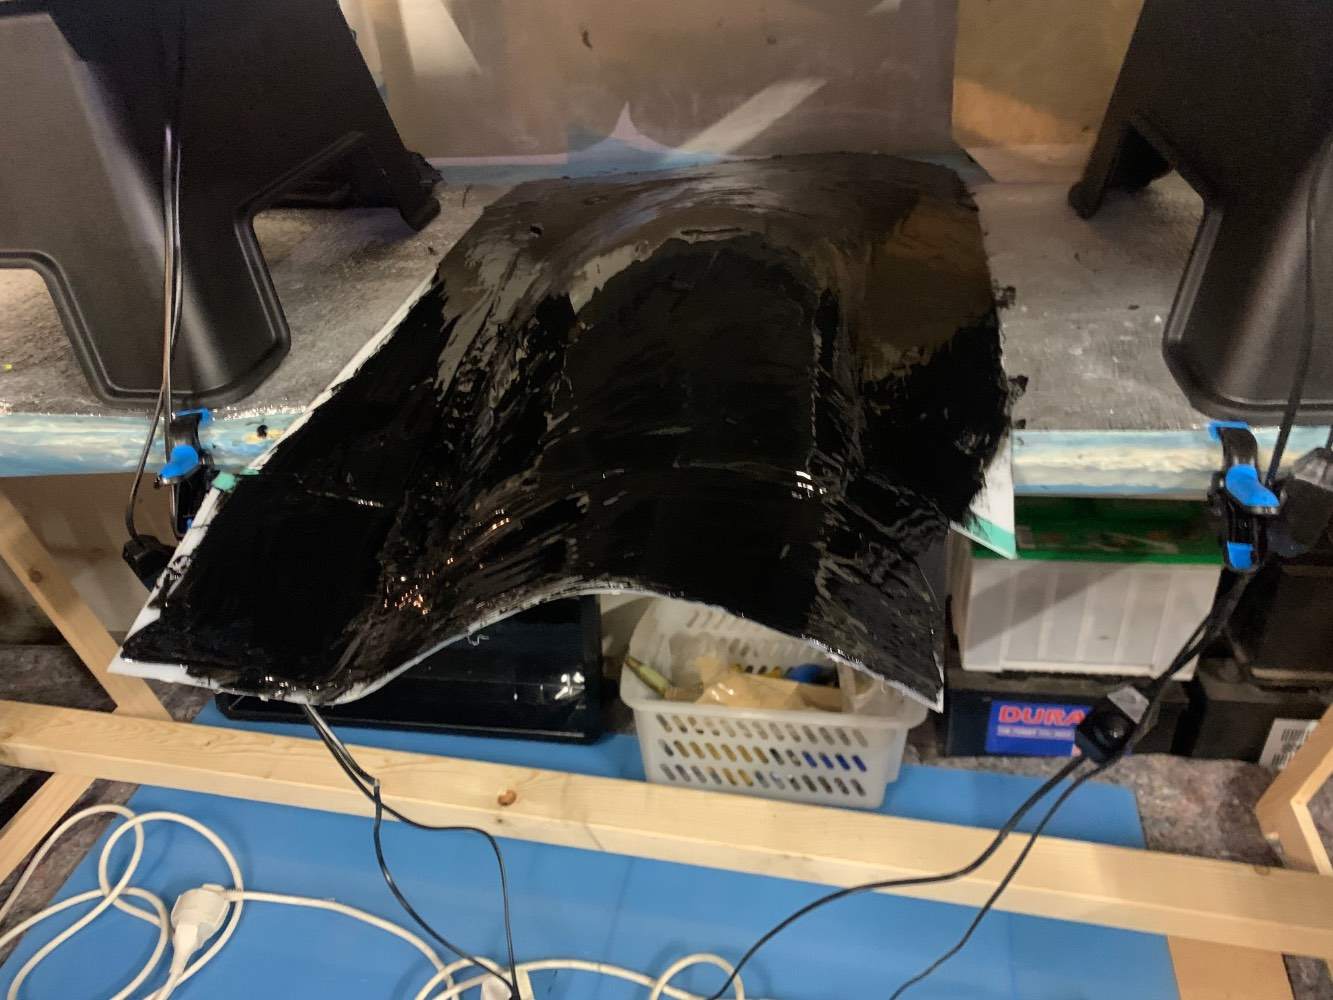
-
Legal to Fly a J-Model without Wheel Covers?
MooneyAcolyte replied to MooneyAcolyte's topic in General Mooney Talk
Making two a side is exactly the plan. I plan 4 carbon fibre layers for each "side" to get the thickness right. Then, I trim the inside and bond it - for a total of 8 layers - at exactly the same surfaces as where the original part is riveted. I still have to decide on the vacuum bagging approach (low or high vacuum). In my experience, 70 - 80% of the work is in making the moulds. Since I have to make 4 (inside, outside times left and right), that mike take a while. I have experimented with a prototype (car fuel port lid) that was very similar and that worked splendidly. I'll keep you posted. -
Legal to Fly a J-Model without Wheel Covers?
MooneyAcolyte replied to MooneyAcolyte's topic in General Mooney Talk
I have started making the moulds.

