DJ67 Posted July 16, 2019 Report Share Posted July 16, 2019 1967 m20f, 200 horsepower Lycoming Airplane set unused too long so my mechanic needs to inspect the camshaft by pulling jugs 2&4. I have removed the cowling and attempting to remove the baffles. The baffle behind number 4 cylinder is wedged between the engine mount tubing framework and the number 4 jug. I can't see anymore pieces that I could disassemble and I can't find anything in the Mooney parts manual that says I should. Is there any trick to getting this baffle out short of unbolting the motor mounts and swinging the engine forward about an inch to allow that baffle plate to come out? Thanks, Doug Quote Link to comment Share on other sites More sharing options...
N201MKTurbo Posted July 16, 2019 Report Share Posted July 16, 2019 A picture would be good. Most baffles that old have been modified somewhat from stock over the years. It has been a while, but you might be able to slide it down after you have the intake and exhaust off. I'm pretty sure you can get it off without undoing the engine mount. Quote Link to comment Share on other sites More sharing options...
DJ67 Posted July 16, 2019 Author Report Share Posted July 16, 2019 (edited) 7 hours ago, N201MKTurbo said: A picture would be good. Most baffles that old have been modified somewhat from stock over the years. It has been a while, but you might be able to slide it down after you have the intake and exhaust off. I'm pretty sure you can get it off without undoing the engine mount. I'll look closer next chance I get, but something discouraged me from trying to slide it down ... probably all sorts of accessories, and a vent pipe that hangs down like a barb. I think you are correct about everything else. In the diagram, part 25 is the one that's stopping me. It looks like it would have to be bent flat in order to move up past the inboard fins or out past larger outboard fins. I bet the OEM part had a detachable part 25, which is shown with three nut plates just above it. Mine is solid in that area, no nut plates, no overlap joint. So I'm betting that this baffle was hand made while the engine was off of the airframe. I thought about pulling #3 instead of #4 but I can see the same interference with part 15. It is a separate piece, but it's also riveted, and I would likely need a lot of WD40 to get those rivets off. Doug Edited July 17, 2019 by DJ67 Quote Link to comment Share on other sites More sharing options...
MB65E Posted July 16, 2019 Report Share Posted July 16, 2019 I installed mine on the engine prior to installing to the engine mount. I’m sure it can be done, just depends. Pre- purchase? Or just a look see? Pull the front cylinder and see what it looks like. If it’s bad, you won’t need to pull the rear cylinder. If it still looks good, I wouldn’t pull the rear just to look. -Matt Quote Link to comment Share on other sites More sharing options...
DJ67 Posted July 16, 2019 Author Report Share Posted July 16, 2019 If it still looks good, I wouldn’t pull the rear just to look. I'm having that debate with myself all the time. My mech borescoped the cylinders and seeing no rust said "I'd just go fly it and check for metal in the oil filter every few hours." But what if I do that and it starts making metal? Could that damage the prop governor or anything else? Doug Quote Link to comment Share on other sites More sharing options...
ArtVandelay Posted July 16, 2019 Report Share Posted July 16, 2019 Pull the front cylinder and see what it looks like. If it’s bad, you won’t need to pull the rear cylinder. If it still looks good, I wouldn’t pull the rear just to look. -Matt In my case, only 3&4 intake lobe was bad, maybe you can use borescope with 1 cylinder off to check entire cam?Tom Quote Link to comment Share on other sites More sharing options...
N201MKTurbo Posted July 16, 2019 Report Share Posted July 16, 2019 After looking at the diagram it is coming back. If you unscrew the curved piece, you can force it out the top. You will scratch it up some, but it will, come out. You have to bend the outboard curved piece towards straight, but it will spring back. Quote Link to comment Share on other sites More sharing options...
DJ67 Posted July 17, 2019 Author Report Share Posted July 17, 2019 1 hour ago, N201MKTurbo said: After looking at the diagram it is coming back. If you unscrew the curved piece, you can force it out the top. You will scratch it up some, but it will, come out. You have to bend the outboard curved piece towards straight, but it will spring back. I updated the diagram. In my case it's all one piece of metal. It's not made to the drawing so there is no joint to separate the parts. Quote Link to comment Share on other sites More sharing options...
N201MKTurbo Posted July 17, 2019 Report Share Posted July 17, 2019 1 minute ago, DJ67 said: I updated the diagram. In my case it's all one piece of metal. It's not made to the drawing so there is no joint to separate the parts. Bummer Quote Link to comment Share on other sites More sharing options...
DJ67 Posted July 17, 2019 Author Report Share Posted July 17, 2019 2 hours ago, ArtVandelay said: In my case, only 3&4 intake lobe was bad, maybe you can use borescope with 1 cylinder off to check entire cam? I have seen photos and diagrams that show pathways between fore and aft sections of the case. If the #2 jug removed and the hands-on inspection came out okay, I would accept a borescope snaked in for a visual of the aft lobes. If that looks good enough for the mechanic then I guess I would take his word for it, but if he was uncertain then I would pay him to pull the next jug and then we would know for sure. Then if it passes, I can quit worrying and go fly. Quote Link to comment Share on other sites More sharing options...
carusoam Posted July 17, 2019 Report Share Posted July 17, 2019 DJ, Find a way to update your ship’s data next to your avatar... (depending on your viewing device, aka tiny phone, you may not be familiar with the power you have at your fingertips...) You have a better chance of somebody coming along and knowing what you have... The detail that you are discussing could be specific down to the year of construction... Best regards, -a- Quote Link to comment Share on other sites More sharing options...
DJ67 Posted July 17, 2019 Author Report Share Posted July 17, 2019 13 hours ago, carusoam said: Find a way to update your ship’s data next to your avatar... (depending on your viewing device, I didn't realize I could do that. I'm normally on a PC so I'll look into that! Thanks, Doug Quote Link to comment Share on other sites More sharing options...
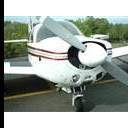
Shadrach Posted July 17, 2019 Report Share Posted July 17, 2019 (edited) On 7/16/2019 at 9:06 PM, DJ67 said: I updated the diagram. In my case it's all one piece of metal. It's not made to the drawing so there is no joint to separate the parts. Are you saying the rear sheet of baffle material is one piece? I can’t imagine why someone would do that. No matter. Consult with your mechanic and ensure that he’s comfortable with sheet-metal work. If so, you can cut the baffle in the vicinity of the case split. Your mechanic can fabricate a doubler that will join them together with screws for reinstallation. If this is part of a pre-buy on someone else’s airplane, you're much more limited. With an engine hoist you may be able to till the engine forward and away from the upper mounts in such a way as to remove the rear baffle seal that surround the accessory case. I’ve inserted an image of the rear view of the IO360 from my 67F Edited July 18, 2019 by Shadrach 1 Quote Link to comment Share on other sites More sharing options...
DJ67 Posted July 17, 2019 Author Report Share Posted July 17, 2019 4 hours ago, Shadrach said: Are you saying the rear sheet of baffle material is one piece? I can’t imagine why someone would do that. No matter. Consult with your mechanic and ensure that he’s comfortable with sheet-metal work. If so, you can cut the baffle in the vicinity of the case split. Your mechanic can fabricate a doubler that will join them together with screws for reinstallation. If this is part of a pre-buy on someone else’s airplane, you're much more limited. With an engine hoist you may be able to till the engine forward and away from the upper mounts in such a way as to remove the rear baffle seal that surround the accessory case. I’ve inserted an image of rear view of the IO360 from my 67F Thanks for the picture, its a clear view that I wish I had before I started. As you say ... one piece. Somebody made this with the engine off and took a shortcut in that area. I'll talk to mech about cutting and splicing with a doubler when he gets back (he's gone to some sort of gathering in Wisconsin). It's my aircraft so I'm free to get it fixed up to conform to OEM. Actually, I wish he could cut out an area above the upper left mount that has multiple stop drilled cracks, and then rivet in a patch (or just make a whole new baffle). To get the baffle out, I think we may only need to move about 1/2 inch forward of the mounts to get enough clearance. Thanks again for the pic. Doug 1 Quote Link to comment Share on other sites More sharing options...
Shadrach Posted July 18, 2019 Report Share Posted July 18, 2019 4 hours ago, DJ67 said: (he's gone to some sort of gathering in Wisconsin). 1 Quote Link to comment Share on other sites More sharing options...
67 m20F chump Posted July 18, 2019 Report Share Posted July 18, 2019 I have a 67 too. My rear baffle is as you describe. I’m trying to make new metal baffles for the same reason (cracks). The old baffle has more gap behind the innermost part of the cylinder than should be there too. Quote Link to comment Share on other sites More sharing options...
Yetti Posted July 18, 2019 Report Share Posted July 18, 2019 You don't need to pull the rear baffle to pull the #3 cylinder. Just the side. Don't need to pull the front baffle for that matter. Quote Link to comment Share on other sites More sharing options...
Tcraft938 Posted July 18, 2019 Report Share Posted July 18, 2019 I wish someone would design a composite clamshell type doghouse like many homebuilt have. Much better directing of air and easier on/off. They would probably cost $10,000 though, $9,000 to get it approved. Quote Link to comment Share on other sites More sharing options...
DJ67 Posted July 18, 2019 Author Report Share Posted July 18, 2019 2 hours ago, Yetti said: You don't need to pull the rear baffle to pull the #3 cylinder. Just the side. Don't need to pull the front baffle for that matter. I think you hit the nail on the head. I've been pondering that very question, and now you've up and answered it. Doug Quote Link to comment Share on other sites More sharing options...
Yetti Posted July 18, 2019 Report Share Posted July 18, 2019 You don't need to pull the cylinder to see if things are bad. That is what a compression test is for. Spend your money getting the valve guides reamed. Wobble test etc. Quote Link to comment Share on other sites More sharing options...
Shadrach Posted July 18, 2019 Report Share Posted July 18, 2019 (edited) 12 hours ago, DJ67 said: I think you hit the nail on the head. I've been pondering that very question, and now you've up and answered it. Doug You will have a challenging time pulling a cylinder with the rear baffle seal in place. Odds that you get frustrated and bend or break something increase a great deal. You can measure the cam lift, but that only tells you the cam lift. The failure mode starts with the cam follower. As it degrades it stops rotating and then the cam lobe begins to spall. The up shot is that a wiped cam never caused an engine to catastrophically fail...just a slow degradation in performance with metal showing at oil change. Edited July 19, 2019 by Shadrach Spelling 1 Quote Link to comment Share on other sites More sharing options...
Andy95W Posted July 19, 2019 Report Share Posted July 19, 2019 14 hours ago, Tcraft938 said: I wish someone would design a composite clamshell type doghouse like many homebuilt have. Much better directing of air and easier on/off. They would probably cost $10,000 though, $9,000 to get it approved. David @Sabremech did exactly this, got it approved, and it costs a lot less than $10,000. 1 Quote Link to comment Share on other sites More sharing options...
DJ67 Posted August 2, 2019 Author Report Share Posted August 2, 2019 Well I had no problem getting the baffle off of #3 so he agreed to pull #2 and #3. He was hoping to pull jugs from the same side. Now I understand why, because the wrist pins are easier to remove. Anyway, he pulled #3 and turned out we didn't need to pull #2. I'll start a new thread about pitting on the cam lobes. Ugggh. Quote Link to comment Share on other sites More sharing options...
Recommended Posts
Join the conversation
You can post now and register later. If you have an account, sign in now to post with your account.