bradp Posted July 28, 2016 Author Report Share Posted July 28, 2016 Got the windows installed last night. Got sealant on my shorts - that's never coming out. Got it in my hair. Isopropyl alcohol was useful for that. When I have a moment I'll compose a more detailed post about things I learned during the install. Plastic painting about half way done. Brandon I may take you up on your contact. I tacked a couple of fabric samples in a pleated binding. Looks pretty good. I'm going to do the floor mats and see if I like it enough to do the remainder of the interior or to send it out to have it surged. I'm eager to get back in the air so I may run the material and get it surged later (single seam and no damage to carpeting with the vinyl / leather / micro suede fabrics). Almost done, somehow. 1 Quote Link to comment Share on other sites More sharing options...
flyboy0681 Posted July 28, 2016 Report Share Posted July 28, 2016 Curious why you didn't go for a vent on the new door window. We had one installed this week during the annual. Quote Link to comment Share on other sites More sharing options...
bradp Posted July 31, 2016 Author Report Share Posted July 31, 2016 You know it never occurred to me that this pax side was an option until just now. In retrospect a good idea. Quote Link to comment Share on other sites More sharing options...
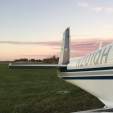
flyboy0681 Posted July 31, 2016 Report Share Posted July 31, 2016 6 minutes ago, bradp said: You know it never occurred to me that this pax side was an option until just now. In retrospect a good idea. I'll post a picture of it when I get the plane back. Quote Link to comment Share on other sites More sharing options...
bradp Posted August 6, 2016 Author Report Share Posted August 6, 2016 More progress today, thanks to my family who helped install interior panels with me. All the painting and restoration of the old royalite is complete. Came out pretty nicely. I put together the front headliner piece with a piece of new speaker material. I decided to purchase a vintage sewing machine like @Yetti did, and used microsuede to create a binding for the carpet. The vintage singer sewing machine will see carpet with the proper needle and a little coaxing. It should do leather no problem (winter project). I used ABS backing instead of the old foam for the vertical carpet panels. For areas of the carpet that weren't bound and are hidden under another trim piece, I used a hot melt glue gun to secure the backing to prevent fraying. My lovely Mrs once again crawled in the baggage compartment to help me install the hat rack and baggage compartment carpeting. Went in pretty nicely. Hopefully I'll be done in a day or two with the interior install. Then punch list and likely a full day of cleaning up. Enjoy. -B 1 Quote Link to comment Share on other sites More sharing options...
Yetti Posted August 6, 2016 Report Share Posted August 6, 2016 Looking good. You are going to have a nice plane when you are finished. I found the Singer titanium needles in the multi pack to run the smoothest. Walley world should have them depending on how urbanized they are. I think I broke about 5 for the whole project. I bought the binding for the carpet, maybe one day I will pull it out and do the edges. Our Walley world is still rural so it has a pretty good crafts/sewing and gun department. For putting the carpet back in, I just used 2" black velcro down the center and some 1" white velcro in strategic places around the edges and it has not budged. Again Walley world for a supplier. Maybe Homer Dan. Quote Link to comment Share on other sites More sharing options...
jetdriven Posted August 6, 2016 Report Share Posted August 6, 2016 Snaps from the boat store do really well. We never could get Velcro to keep the carpet in place, especially in front of the passenger seat. Quote Link to comment Share on other sites More sharing options...
ArtVandelay Posted August 6, 2016 Report Share Posted August 6, 2016 What is SOP for interior removal at annual? Fo the pull everything, or just enough to inspect whatever they are required to inspect? Quote Link to comment Share on other sites More sharing options...
flyboy0681 Posted August 6, 2016 Report Share Posted August 6, 2016 On 7/31/2016 at 1:41 PM, flyboy0681 said: I'll post a picture of it when I get the plane back. Picture of new door window with vent. 1 Quote Link to comment Share on other sites More sharing options...
LANCECASPER Posted August 6, 2016 Report Share Posted August 6, 2016 Now all you need is a Kool Scoop. I've had one of these on every Mooney I've owned - works great during taxi. http://www.aircraftspruce.com/catalog/appages/koolscoop.php?clickkey=4323 Quote Link to comment Share on other sites More sharing options...
flyboy0681 Posted August 6, 2016 Report Share Posted August 6, 2016 Just now, LANCECASPER said: Now all you need is a Kool Scoop. I've had one of these on every Mooney I've owned - works great during taxi. http://www.aircraftspruce.com/catalog/appages/koolscoop.php?clickkey=4323 I am not quite sure how much this would benefit the front passenger because the vent is set much further back than the one on the pilot side. The person in the back would probably benefit more, but it's rare that anybody is back there. Quote Link to comment Share on other sites More sharing options...
Yetti Posted August 6, 2016 Report Share Posted August 6, 2016 SOP in Texas is land, pull the mixture a bit, reach over and pop the door open. 3 Quote Link to comment Share on other sites More sharing options...
StinkBug Posted August 7, 2016 Report Share Posted August 7, 2016 7 hours ago, LANCECASPER said: Now all you need is a Kool Scoop. I've had one of these on every Mooney I've owned - works great during taxi. http://www.aircraftspruce.com/catalog/appages/koolscoop.php?clickkey=4323 Best addition I've made to my plane yet. Quote Link to comment Share on other sites More sharing options...
kpaul Posted August 7, 2016 Report Share Posted August 7, 2016 Just now, StinkBug said: Best addition I've made to my plane yet. +1, it makes all the difference during ground ops. Quote Link to comment Share on other sites More sharing options...
bradp Posted February 22, 2017 Author Report Share Posted February 22, 2017 Got back to this project after a long hiatus. The past 6 months we've been flying around without the leather decorative items. Finally made some today. I reused the metal backings, and fashioned new backings from ABS sheet that i purchased at the auto upholstery supply shop. I used a layer of 1/4 inch foam and a second layer of headliner foam, then came the glue. The method used is that by the famous YouTube auto interior guy Checaflo (Cesar). Sometimes I watch his videos just to relax. But I'm weird like that 2 Quote Link to comment Share on other sites More sharing options...
bradp Posted February 25, 2017 Author Report Share Posted February 25, 2017 Here are the pieces installed. Now I'm working on the arm rests - but my sewing machine is at the shop right now getting tuned up and will be for "at least a couple of weeks." I'm not sure if it's coming back. It looked like Davey Jones' locker in there. Now I'm trying to decide whether I want to: A) get seats from aero comfort or airtex get hides and new confor foam and have the local auto upholstery guy do it C) Get a walking foot machine and do it myself. I probably have gathered the skills to be able to do C) but now comes the time vs enjoyment calculus. Sent from my iPhone using Tapatalk Quote Link to comment Share on other sites More sharing options...
Andy95W Posted February 25, 2017 Report Share Posted February 25, 2017 11 minutes ago, bradp said: I probably have gathered the skills to be able to do C) but now comes the time vs enjoyment calculus. I feel the exact same way. I could re-do a seat with no problem and have it look really good. The problem is it won't match the next seat or the back bench seat when I'm done. Quote Link to comment Share on other sites More sharing options...
FBCK Posted February 25, 2017 Report Share Posted February 25, 2017 Did you glue the trim pieces onto the door and if so what kind of glue? Quote Link to comment Share on other sites More sharing options...
bradp Posted February 25, 2017 Author Report Share Posted February 25, 2017 I tied to keep it as modular as possible to facilitate removal for inspection. I got rid of the old metal fasteners. I was going to put GM style plastic interior fasteners in there, but wanted to try something else in the mean time. For now I have them in with 3M dual lock. It seems to adhere well and really "snaps" in. For the back ones I need to shape the plastic backing with a heat gun to get them to form to the complex shape of the interior panel. I'll post again and let you all know how it goes / is holding up. Sent from my iPhone using Tapatalk Quote Link to comment Share on other sites More sharing options...
bradp Posted March 8, 2017 Author Report Share Posted March 8, 2017 Making arm rests now. I got my little sewing machine back from the repair man and it's ripping through everything in a good way. Learning some more about upholster techniques...I'm watching many Checaflo videos and it's taking me a number of tries to get things looking right. Seems to be an exacting science, this leather work. 1/8 off and it has wrinkles and looks horrible. Remake the pattern and it looks perfect. Hats off to hector and those guys that get it perfect the first time. But this is fun for me and relaxing - so if it takes me a solid year that's okay. Armrest cover ready for installation. I need a slightly warmer and drier day to be able to glue it down outdoors. Below is the test run for the top (French stitch) that will go on the face of the glareshield. I've repaired, prepped (sanded and cleaned) the glareshield to be able to accept the glue that will bond the leather to the plastic. One thing I'm wondering is whether to use 1/4 foam between the leather and the plastic to give the leather a little "bounce" and I've decided against as the foam is more likely to be damaged by heat and then pull away. The actual glareshield will be done in black leather with a black stitch. This was just scrap I had left over. 2 Quote Link to comment Share on other sites More sharing options...
Yetti Posted March 8, 2017 Report Share Posted March 8, 2017 Nice going.... I've been thinking about my glareshield. I don't think I would put foam in there. Too much chance of bad gluing happening. Two layers of leather could work, but then would it fit back on the plane. I was playing around with something other than black leather say a nice khaki. Way too much glare. I could see where shiny black could create glare. Suede would work well, but be a nightmare to keep clean. I have the added fun of the warning lights being in the leading edge. French stitch would land just at the wrong place. And then there are the panel lights... to replace with LED or keep the working 1970s technology. I should quit and just order some black leather and get on with it. Quote Link to comment Share on other sites More sharing options...
Yetti Posted March 8, 2017 Report Share Posted March 8, 2017 Oh an there is pull the carpet and put the edge seam on..... Quote Link to comment Share on other sites More sharing options...
Oldguy Posted March 8, 2017 Report Share Posted March 8, 2017 (edited) 5 hours ago, Yetti said: Nice going.... I've been thinking about my glareshield. I don't think I would put foam in there. Too much chance of bad gluing happening. Two layers of leather could work, but then would it fit back on the plane. I was playing around with something other than black leather say a nice khaki. Way too much glare. I could see where shiny black could create glare. Suede would work well, but be a nightmare to keep clean. I have the added fun of the warning lights being in the leading edge. French stitch would land just at the wrong place. And then there are the panel lights... to replace with LED or keep the working 1970s technology. I should quit and just order some black leather and get on with it. When I got my J, the glareshield had been covered with the cloth shown in this picture. No reflection, does not hold heat and my hand does not blister when I touch it after I have been flying in the sun for a few hours. Edited March 8, 2017 by Oldguy Typo Quote Link to comment Share on other sites More sharing options...
bradp Posted March 8, 2017 Author Report Share Posted March 8, 2017 Looks like a wool tweed. Looks quite nice. Sent from my iPhone using Tapatalk Quote Link to comment Share on other sites More sharing options...
RobertGary1 Posted March 8, 2017 Report Share Posted March 8, 2017 On 2/16/2016 at 3:17 AM, Hank said: You're a brave man! I had to pull much of my interior as a new owner to run new cable for the WAAS update. It's cramped, hot and uncomfortable, and reinstalling the back seat will enlarge your vocabulary. my vote would be to do the windows at the same time, pre-insulation. Someone here just reported the sound reduction results from doing this, search for it. Good luck! If you pull the back seat don't miss the opportunity to replace the high tech aluminum tape that prevents frozen butt syndrome in the rear seat. -Robert Quote Link to comment Share on other sites More sharing options...
Recommended Posts
Join the conversation
You can post now and register later. If you have an account, sign in now to post with your account.