

TWinter
-
Posts
1,412 -
Joined
-
Last visited
-
Days Won
12
Content Type
Profiles
Forums
Blogs
Gallery
Downloads
Media Demo
Events
Image Comments posted by TWinter
-
-
On 1/11/2016 at 9:57 AM, Eraaen said:
Just what I'm looking for. Sporty's may not carry it any longer. I looked all over their web site. Does it by chance have a manufacturers name or model number on it?
On 1/21/2016 at 6:56 PM, Marauder said:Tom -- I would be interested in knowing this information as well.
Chris
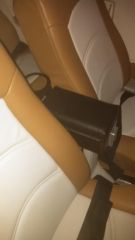
Hey guys..I didn't forget about the armrest. I looked all through my paperwork and receipts and can't find the Sporty's receipt (that's what usually happens when I do a file purge after 10 yrs). I'm 99% sure that's where I got it (Sporty's). I even spent some time looking through old emails and searching the web hoping someone might have some old posts about it or them. Can't find anything. I do think they called it a "Center Console Cockpit Organizer". I found some old web threads showing a bigger version they had. There are no manufacturing stamps or brand recognition on the piece. I did finally get to the hanger and pulled it out of the plane and will forward a few pictures with measurements. I really don't think it would be hard to make something similar to it.
Just wanted to give both of you heads up..
-Tom
-
Chris,..It's been darn cold and ice the last several days. I'm way overdue to check this out for you guys, but I'll try to get the info posted up this weekend. I did look at the online Sportys and did not see it anymore either. By the weekend for sure.
-Tom
-
I'll see what I can come up with. I usually keep most of my receipts and such. I'll also get you the pics. I didn't get to the hanger over the weekend (rain/ice) so I get it for you as soon as possible.
-Tom
-
Bought the unit from Sporty's. Then I made a base from wood, attached it to the bottom of the unit and covered it in vinyl fabric I had left over from my interior. The base sits on the floor between the backseat and the emergency gear extension. The unit comes with options such as cup holder and extended armrest. The rear cup holder kind of supports on the rear seat. The extended armrest is removable. If I'm on a longer trip I put it on, if just local I use it as pictured. If I get a chance over the weekend I'll send you a few more pictures. I wouldn't trade it for a million bucks. Works great and actually creates some elbow space between the pilot and co-pilot.
-Tom
-
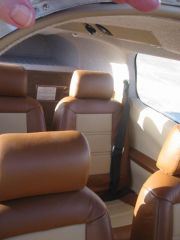
The vinyl was leftover high performance vinyl. It really only took about a 2' x 1' piece. Really not much, but buy some extra for screw up cuts. You could purchase a piece at any sign shop. They probably have some in there scrap-box they may even give you.
The rest is just cutting to fit. Most of it is illusion as you are really just using less than a half inch by 2" of vinyl in each corner.
Use a can (spray paint) or any round object as a template and cut around the can to make the smooth half circle. Use an Exacto knife for the cuts. Make the cuts outs on a flat table and then place it against the plane. Remove the rear paper liner of the vinyl and keep the sticky side wet allowing movement on the plane.
Place the cut-out in each corner. Apply water to the back to allow you to move as desired and then apply some light heat with a heat gun..be careful. Very carefully cut the excess over lap. Use a gentle hand and do not cut too deep and scratch the plexi on the window or scratch the paint. Take your time.. Or, hire a local sign shop guy that deals with vinyl to do it.
-
Very cool..I'm anxious to give it a try.
-
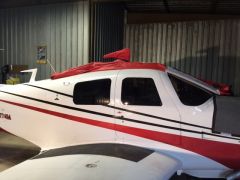
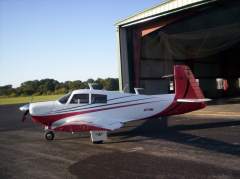
Looks great!! First class in a classic Mooney

-
Thatsa panel!! Nice
-
Great scheme..Excellent combo of colors.
-
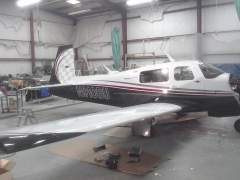
Thanks Nathan, if you get by KDYR stop by..I'm usually not far from the airport. Lunch is on me..


UNADJUSTEDNONRAW_thumb_3917.jpg
in Member's Albums
Posted
That's my old girl..