

Mooney-Shiner
-
Posts
299 -
Joined
-
Last visited
Content Type
Profiles
Forums
Blogs
Gallery
Downloads
Events
Store
Everything posted by Mooney-Shiner
-
To answer my own question about MT Prob: According to MacFarlane, "The prop/spinner and STC sells for $15,950 plus freight from Germany." Its a 3 blade with 71" diameter (so additional clearance?). Some of the benefits mentioned: "• Stainless Steel leading edge for ZERO erosion and protection of the blades • Equal or better performance in all catagories of fl ight • Unlimited Blade and Hub life • User Repairable Blades for minor damage" "No RPM prohibited zone" Tempting, but its 3K over the quote I got from Tiffin for their conventional two blade Hartzell C2R10703STP.
-
I wonder if MT from McFarlane will fit right for you? https://www.mcfarlaneaviation.com/articles/mt-stc-collapse/ I haven't tried them yet.
-

Oil cooler relocation kit.
Mooney-Shiner replied to Newowner's topic in Vintage Mooneys (pre-J models)
I'm still having issues with fitting the front filler piece. It seems to be too small to provide enough "grab" by the rivets. I wonder if any of you had the same issues? Be warned about my annoying unrehearsed and self-confusing description. -
M20F Plastic Surgery - With Pictures
Mooney-Shiner replied to canamex's topic in Vintage Mooneys (pre-J models)
I like this tool for plastic repair: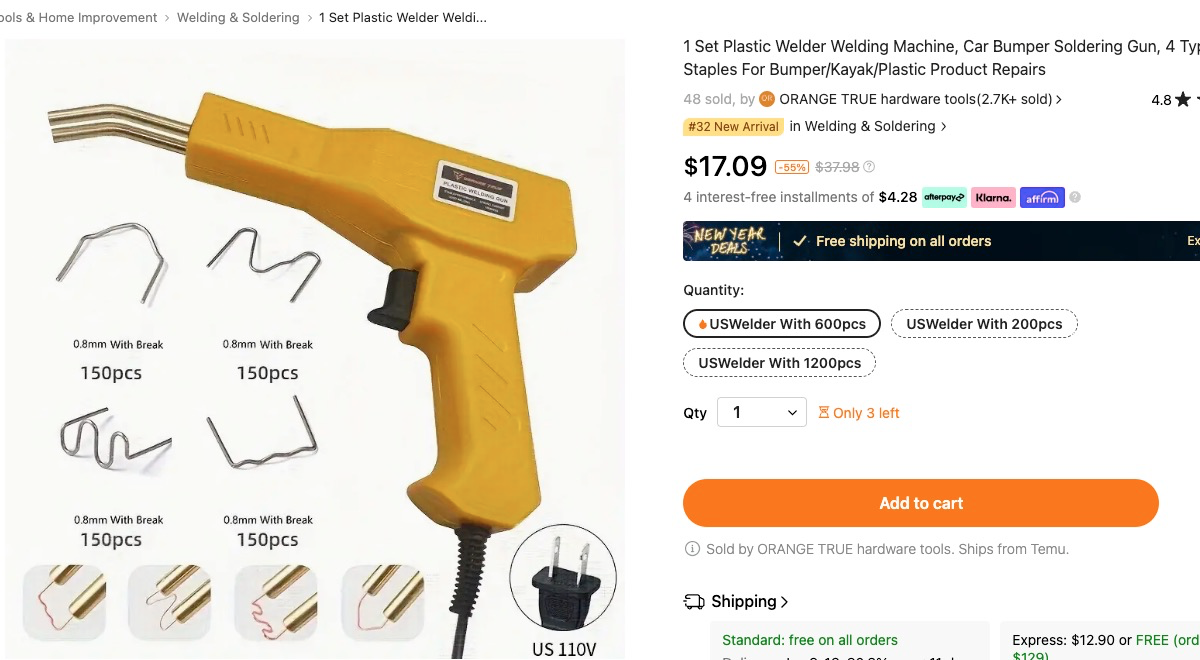
-
Suspected Broken Oil control ring
Mooney-Shiner replied to Greg Ellis's topic in Vintage Mooneys (pre-J models)
So the shop eventually determined that the cylinder was unairworthy (despite initial positive assessment)? What are you going to do with it? Re-plate with nickel or chrome and reinstall? Or replace with new? Thank you for keeping us updated -
Hmm, makes sense. I just ordered all of the CBs from Spruce, but will see if I can procure alternative 5 amp CB that has more rear clearance since I crawled into that snake nest. Thank you for huge help, 47!
-
After some pondering, I decided to replace all 7 CBs with modern 7277 at $24-sh each to adopt the bar to the new pattern. My PSM CBs are pretty ancient, and some are damaged. Also, I decided to install the shunt fuses for ammeter closer to the shunt.
-
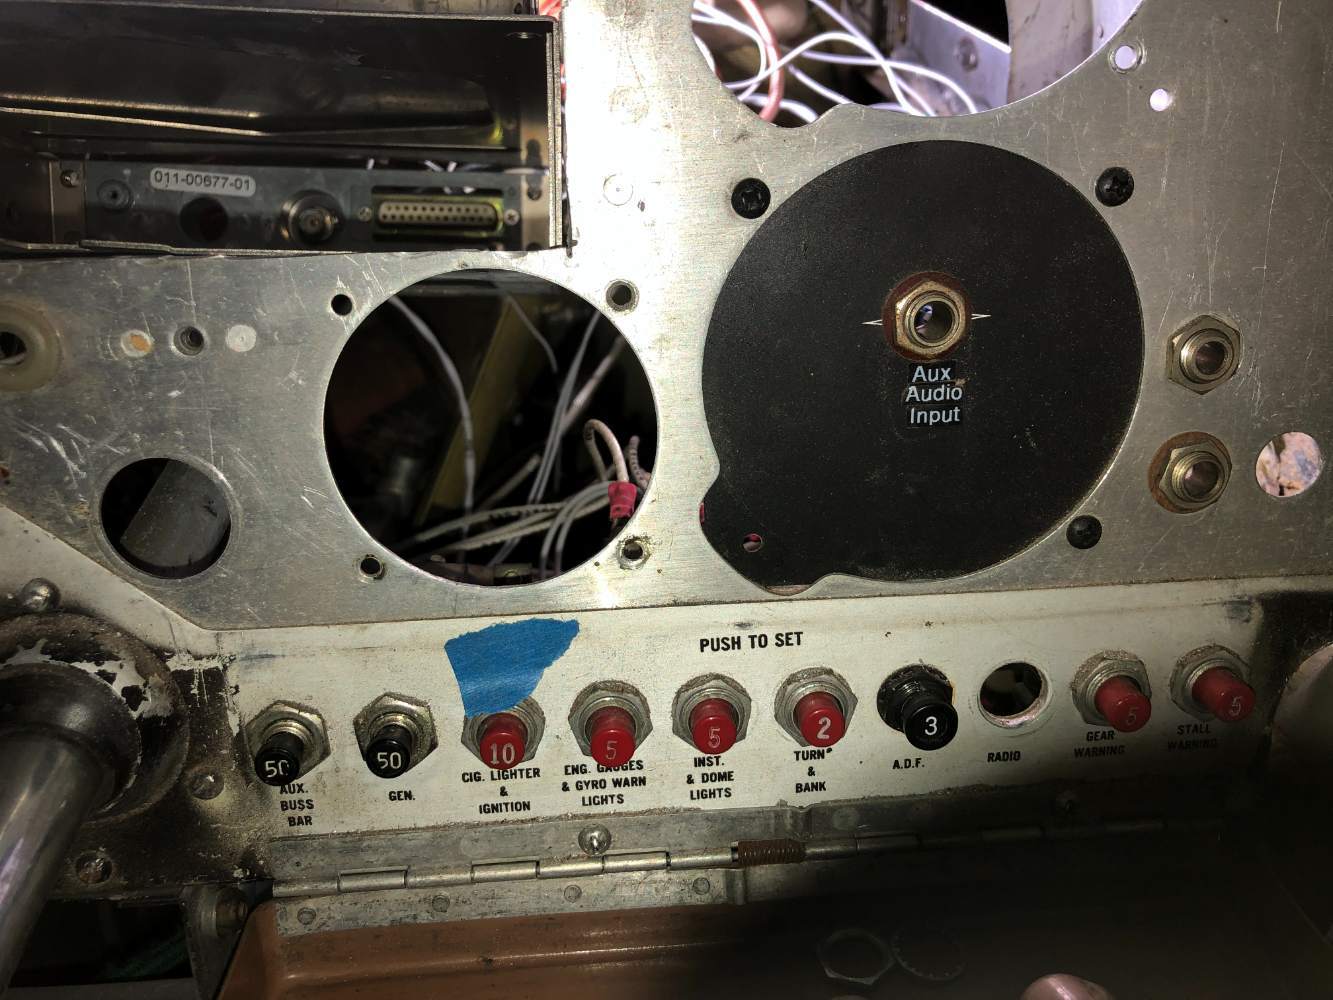
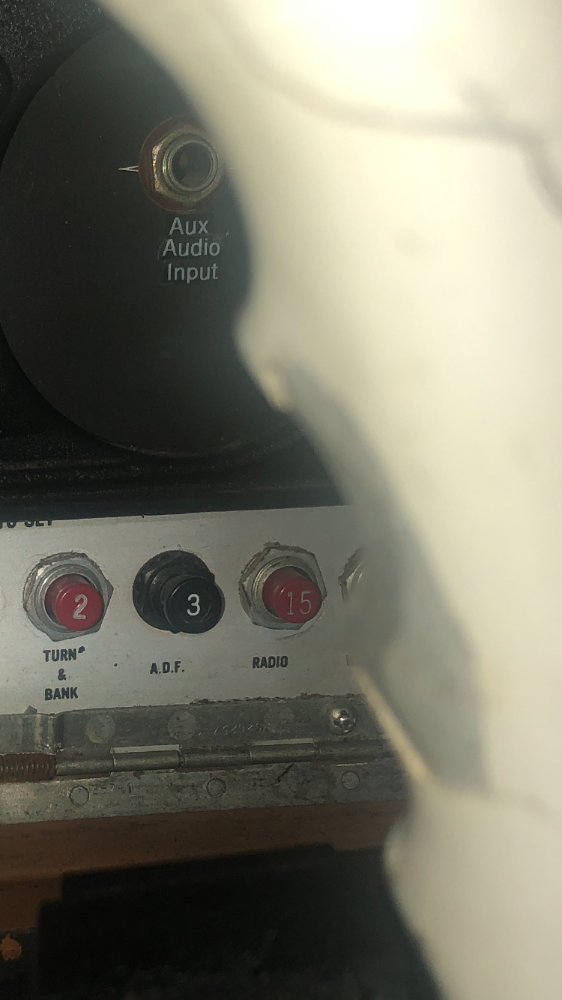
THank you. "ADF" 3 is being used for the GTX 320 transponder, but the adjacent Radio 15 is not being used by anything. I pulled this CB and tried to match it to push-pull CB in terms of size, but I can't find anything matching in terms of rear clearance (1.350"). Since I don't want to break apart the existing bussbar, I'm planning to get a regular modern push-pull 7274 Klixon and will build the a jumper wire to the existing bussbar.
-
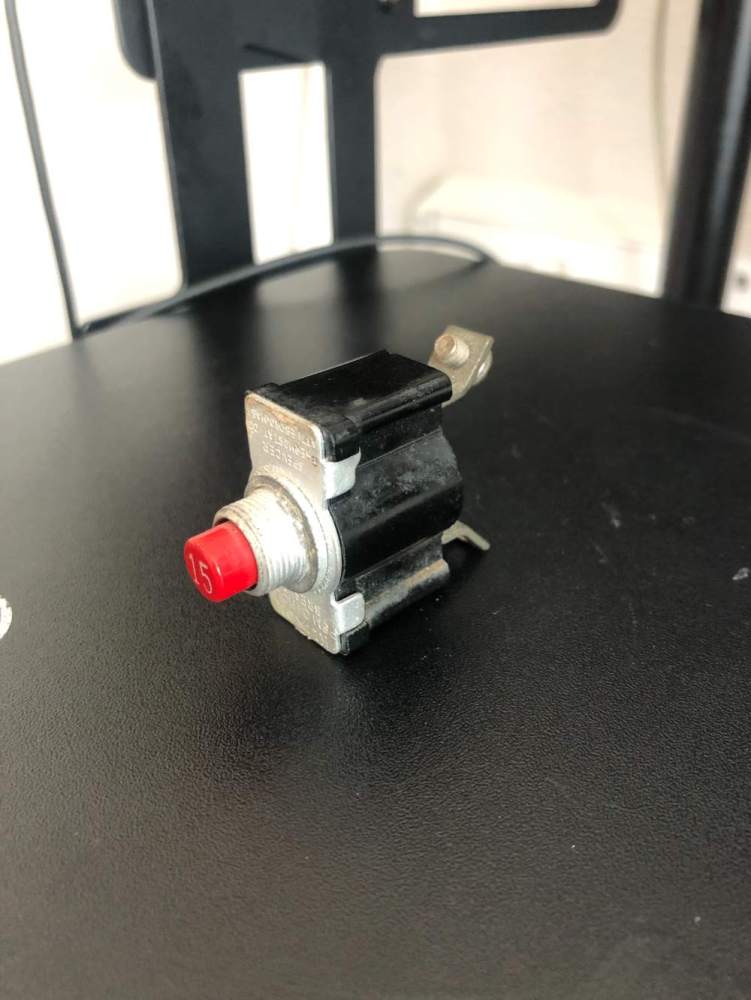
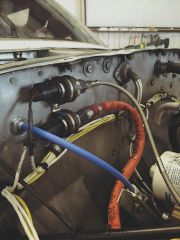
Removed the "un-employed" Klixon circuit breaker B7A 15Amp photo below. Now need to replace it with 5Amp CB to make it a dedicated CB for JPI900. What would be a good source for this replacement? I saw 2TC2-5 CIRCUIT BREAKER on Aircraft Spruce, and wonder will it fit.
-
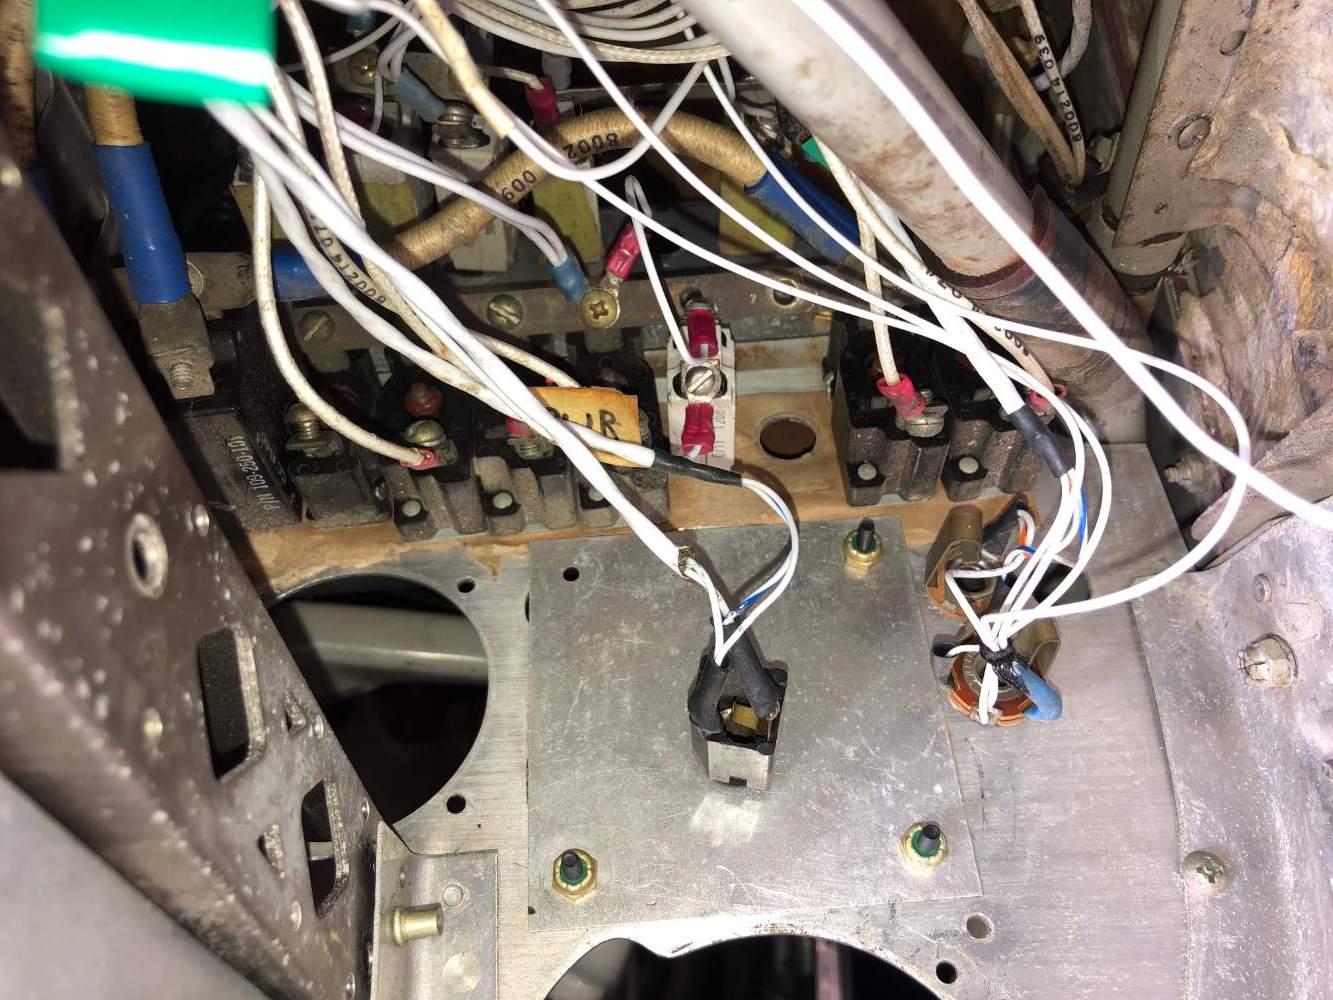
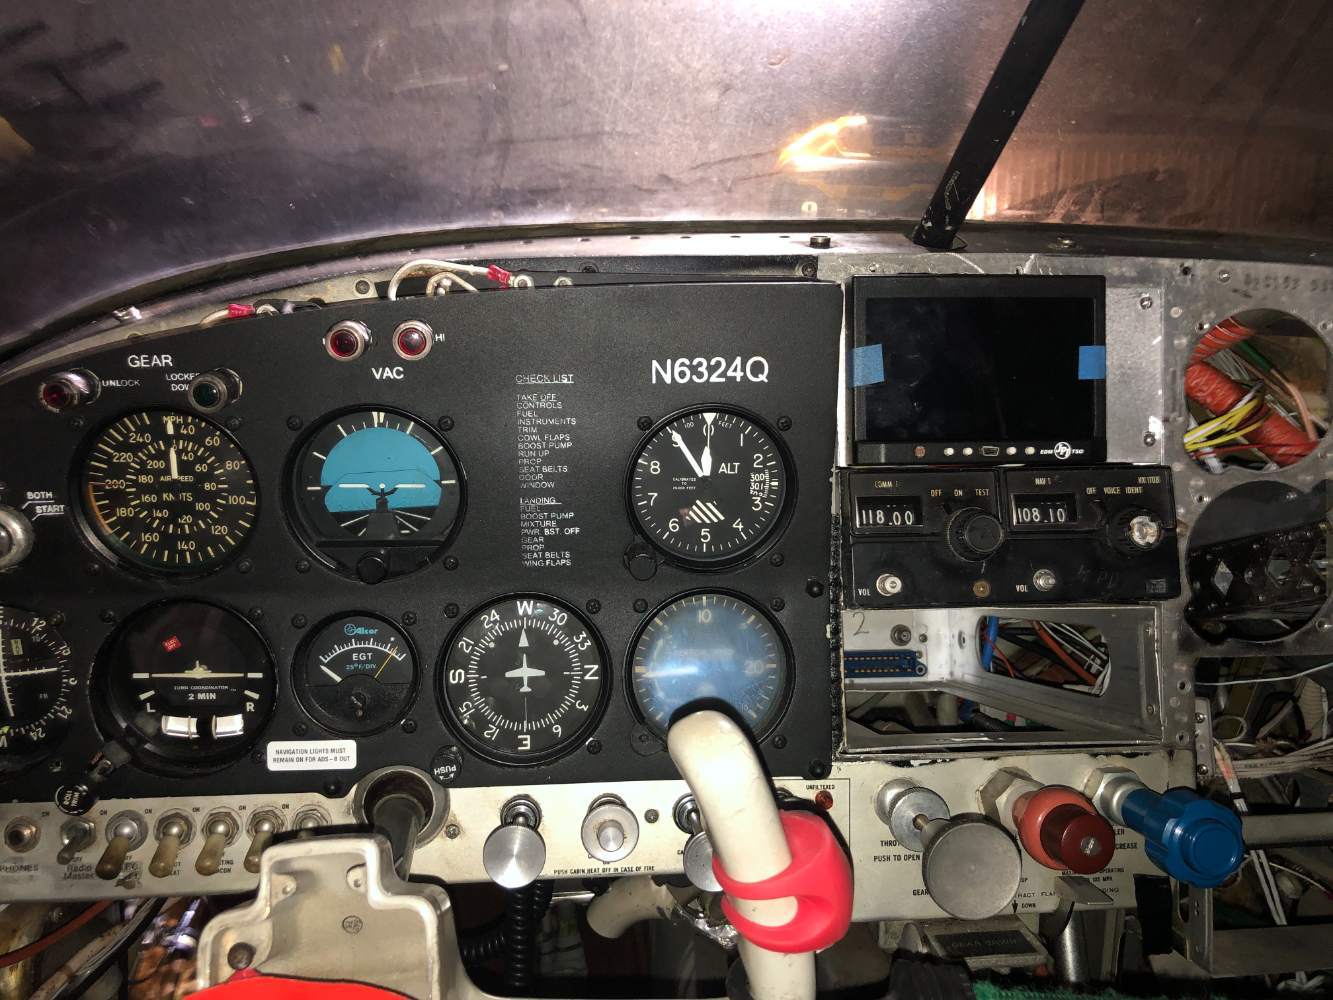
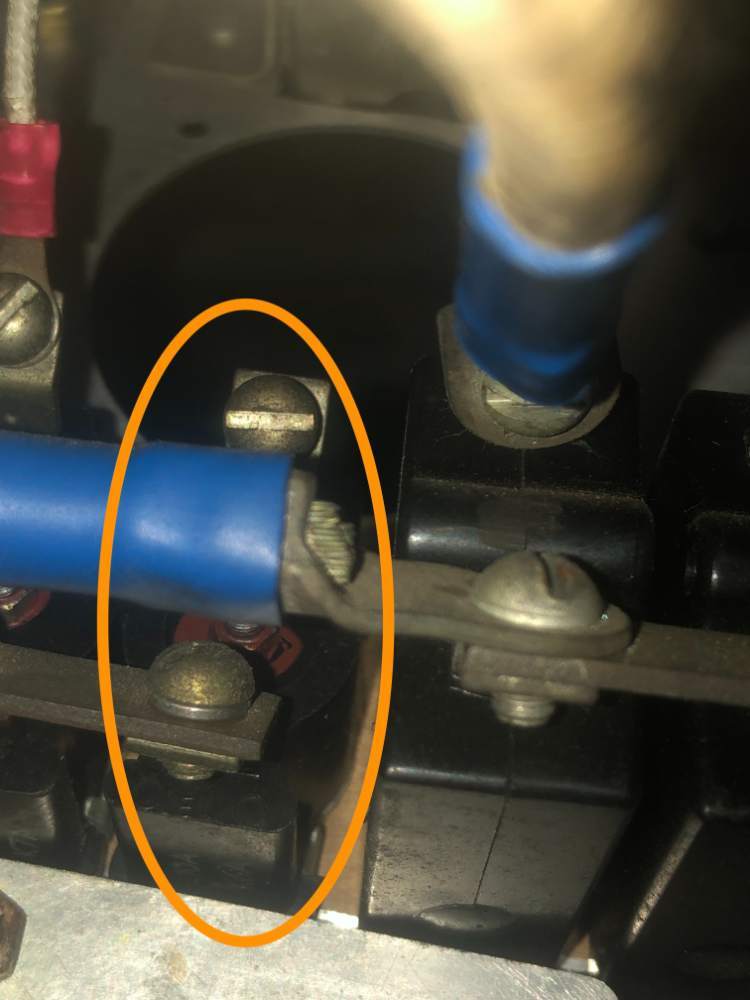
Thank you for the feed back, guys! The install is coming along. Did a dry-fit of 900 on the manufactured alum plate above radio stack. Pretty happy with the fit. Eventually, I'm thinking about cutting a carbon fiber board to cover entire right side of the panel to cover all of the holes and bare aluminum. Installed the ground wire to the engine as RX'd. Current head scratcher for me is the red power wire. The JPI instructs to "connect red 20GA wire(power) to the master solenoid at the battery to avoid the line drop when cranking. 5 Amp circuit breaker (CB) required." My master solenoid is located in far right side of the cabin and it has 1 CB that is not connected to anything ("Radio 15 Amp"), both of my radios CBs are on the separate avionics bar, connected to "Avionics" switch. I'm planning on using this Radio spot to install the dedicated 5amp CB for my JPI 900 EDM. This is what the CB similar to Radio 15 amp CB looks like from the rear. Where can I source these kind of CBs? Should I install the modern push-pull breaker? Also as for inline 1 Amp fuse for the Amperage wires to shunt, where do you place them on the JPI wires? Closer to the instrument, or closer to the shunt? Thank you for all of the support and encourangements! Yuriy

-
I took mine off from my 67F to install JPI900. You can have it for $300, if you'd like. If you don't like it, you can return it for full refund
-
Yeah, that hanging placard with all of the info is pretty good.
-
Well, duh! This makes perfect sense, doesn't it? Sorry, I tend to over-complicate things.
-
Sorry about unearthing retired thread, but does anyone have the measurements of the limits sticker? I think I will order 20 of them from local printshop instead of paying $20 for one from Lasar
-
That looks like a very clean install!
-
Don, do you have a photo with the inside install of EGTs and your wire routing? Can't find anything worthy on world wide web. Took the #3 stack to the welding shop, more to follow
-
What’s the Best Option for Upgrading Cabin Insulation?
Mooney-Shiner replied to RoundTwo's topic in General Mooney Talk
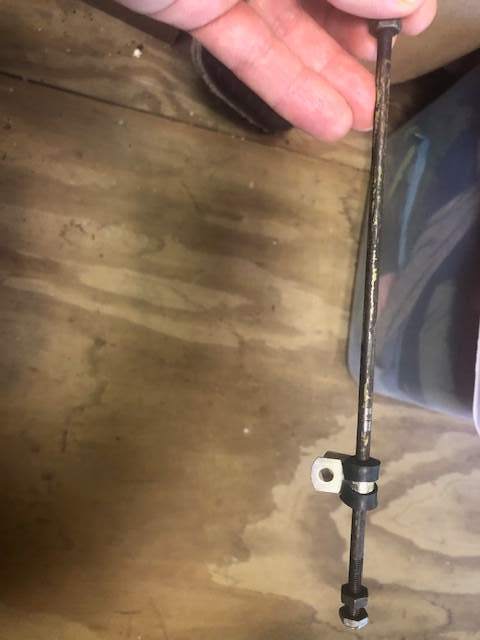
Since I'm going through insulation upgrade/SB208B compliance, I will add my $0.02. Initially I was thinking to improvise and find thickest foam to fit behind plastics for better sound insulation. But then settled on making an actual legal repair with using Mooney prescribed materials as per SB208B. Especially, if I was to expect my A&P to sign off the SB208B compliance (which adds the resell value). Initially, I reached out to Kerrville to procure 170018-901 (LH) and 170018-902 (RH). They told me to reach out to any authorized MSC, so MSC can order the kit from Kerrville and sell to me. I reached out to Lasar (MSC) and got quoted $553.85 each. Somewhat steep in the price in comparison to just getting a sheet of "good stuff" on the Ebay and "make do." But I guess I have to comply with the SB, so B.O.A.Thousand. For the sake of comparison, SoundEx kits is even more expensive than Mooney kit at $1,221.00. https://soundexproducts.com/products/pp-44e I did noticed that SoundEx kit includes the insulation for hat shelf, not sure if Mooney kit has it. Can anyone speak on it? --------------------- Also unrelated to insulation, but relevant to SB208B. I couldn't find the photo of tension bolt from fitting/spar attach point. So I followed the instructions and found the bolt myself. Next up, I will cut the safety wire and remove the bolt to pass the pencil size magnet to check/remove any rust flakes (hopefully none). Sorry for the info fire hose, and the thread hi-jack.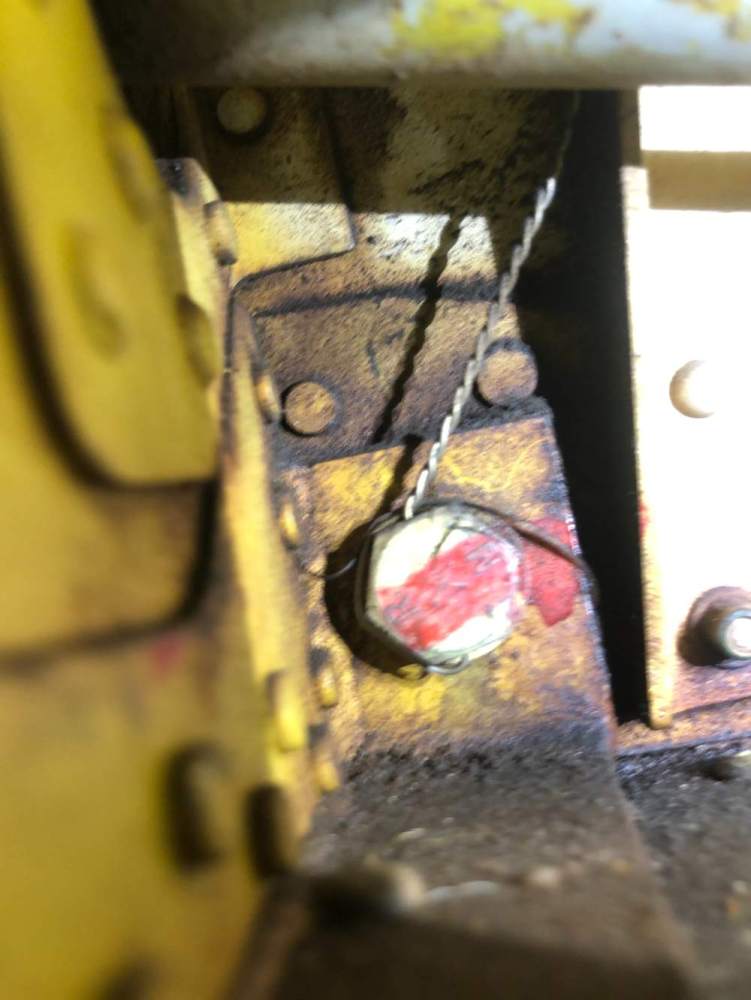
-
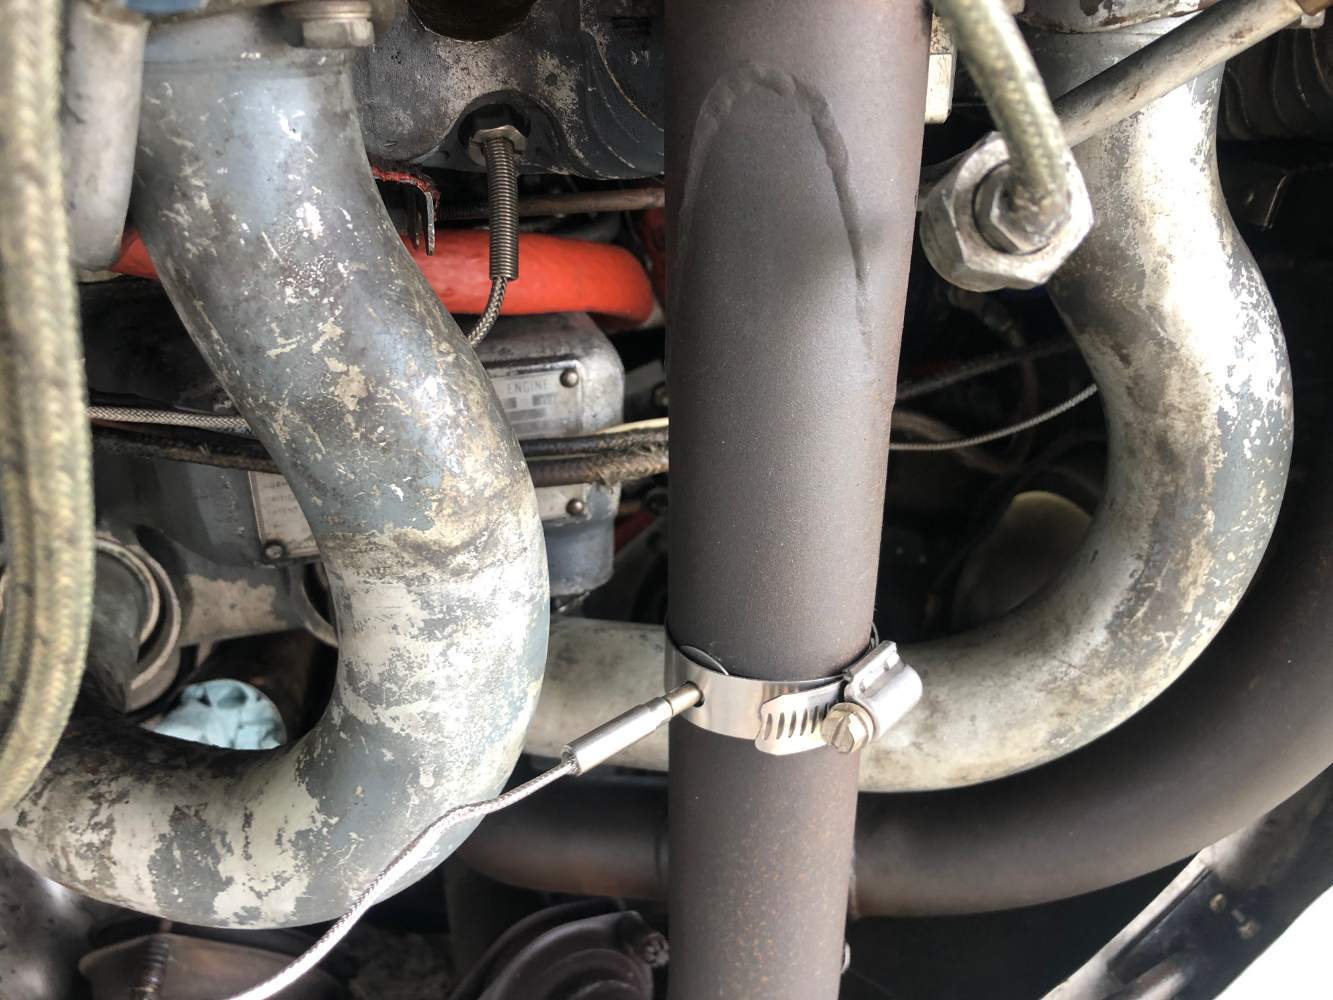
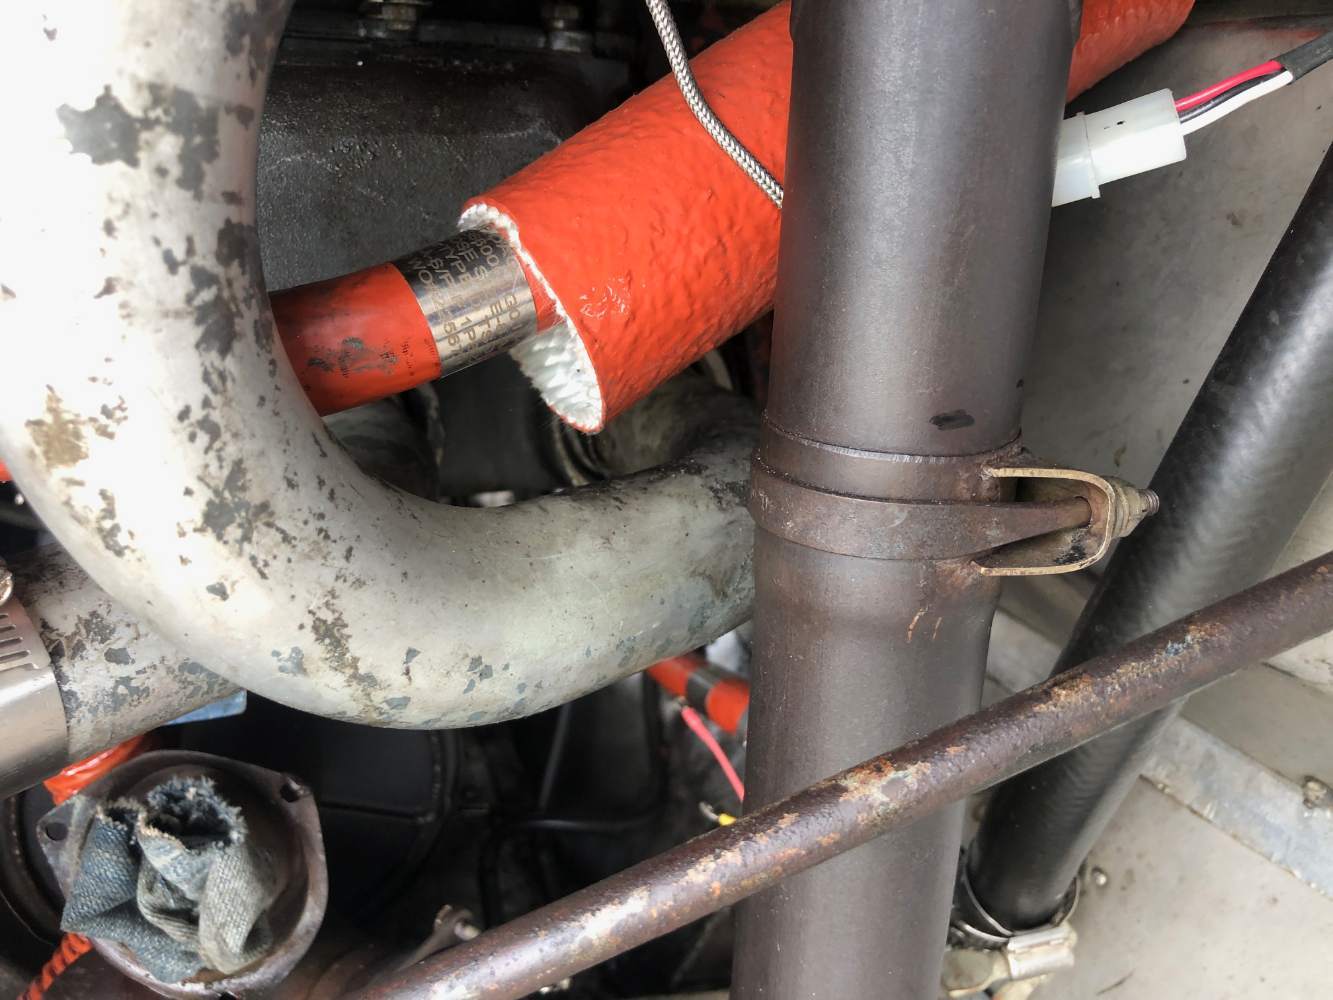
Thank you for all of the ideas! I will do the inside install of probes, and use the tensioning rod of the lower baffling(in photo below) to attach the wiring and keep the probe wiring away from ignition wires.
-
Hello, esteemed board. I currently doing owner-assisted JPI 900 install. The instructions prescribe the equal distance for EGT probe placements on the exhaust stack. I was going to re-use already factory-installed EGT hole on stack #3. However, if I replicate the factory distance for other EGT probes, I would have to install the #4 probe over the slip joint. This would go against the JPI installation instructions ("no install at the slip joint"). After speaking with A&P, he told me that welding shop can weld shut the original hole so we can install the probes at the different distance. Is there any specific way that this welding should be done? The probe opening is pretty small. I will use this thread to bring up my other questions and suggestions through my installation.
-
Maybe check the dates on the oil lines and get them replaced in case that they are slowing the oil flow? Keep the oil lines away from the exhaust stacks?
-
https://www.triconsprayers.com/collections/frontpage/products/o-1800-1-6-aviation-portable-1-liter-atomized-sprayer-system I use this. This item is great. Doug helped me a lot with ordering (including military discount). Unlikely ACF-50, the CorossionX is pretty thick stuff and the regular engine degreaser sprayer wont be able to make a foggy atomized cloud that expands into every corner of the inner space. I'm in Tampa if you need to use it.
-
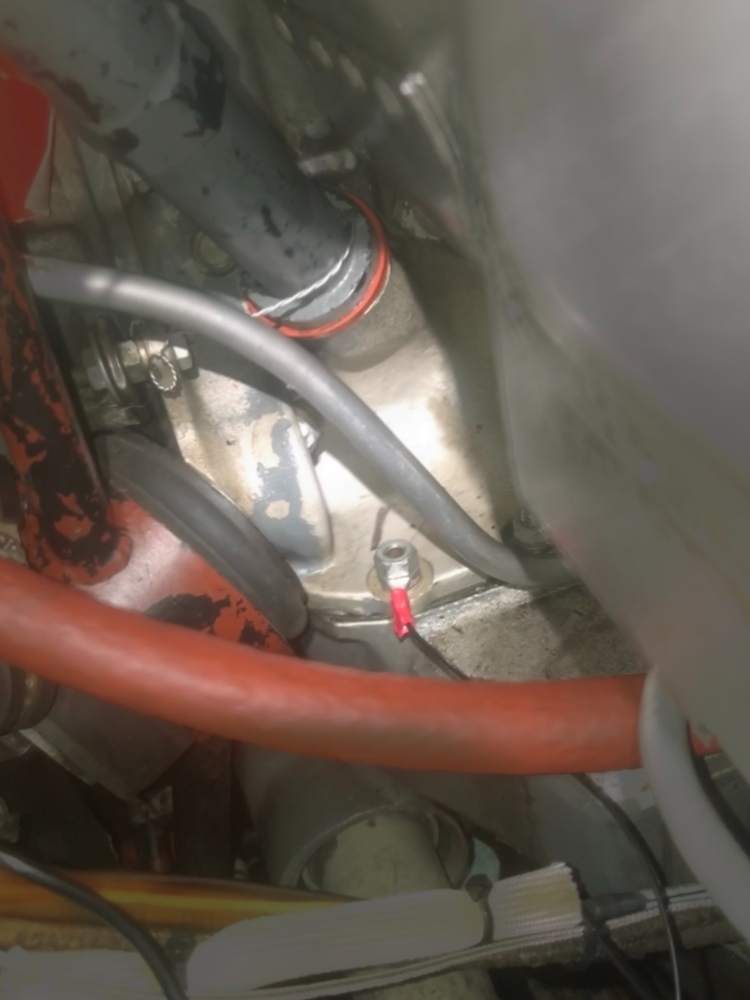
This is a good point. Its my first time seeing any notes on the when to replace/repair the mech-pump. I will have a closer look at the drain hole next time to see if I'm getting oil there.
-
JPI EDM power and breaker location
Mooney-Shiner replied to mhrivnak's topic in Avionics/Panel Discussion
Thank you for posting this. I was also trying to figure how to connect power wire to the the battery since 900 wire harness has only 2 feet long power cable. So your update makes sense. I will just wire it to the breaker location. What did you use for ground? Instruction calls for ground connection directly to the engine block, but I don't think that the ground wire will reach it. -
11011716 1019043674787630 4709199635113173842 N
Mooney-Shiner commented on davidnz's gallery image in Old MooneySpace.com Images
 Thank you! These photos are very useful. JPI is not that good with illustrations.
 -
I guess that I'm late to this party, but it looks like I was overpaying the taxes while buying parts. According to Florida Statue Section 212.08(7): 1. Equipment used in aircraft repair and maintenance.—Replacement engines, parts, and equipment used in the repair or maintenance of qualified aircraft and aircraft of more than 2,000 pounds maximum certified takeoff weight, including rotary wing aircraft, are exempt from the tax imposed under this chapter if such parts or equipment are installed on such aircraft that is being repaired or maintained in this state. 2. "All labor charges for the repair and maintenance of qualified aircraft and aircraft of more than 2,000 pounds maximum certified takeoff weight, including rotary wing aircraft, are exempt from the tax imposed under this chapter. Except as otherwise provided in this chapter, charges for parts and equipment furnished in connection with such labor charges are taxable." My 67F is roughly 2700 max takeoff weight. So this means that I'm exempt?

