

adverseyaw
-
Posts
160 -
Joined
-
Last visited
-
Days Won
1
2 Followers
adverseyaw's Achievements
")


-
Both are Artex 345 units
-
I've had two A&Ps recommend Artex 406s. Ten years cumulative on two Artex ELTs without any issues.
-
One relevant JPI P/N is Kit-1200, which seems to be a generic TIT probe. This is what was installed in my Bravo, although it was done in conjunction with my JPI 930 installation. I don't have a part number for the probe that connected to the original engine instruments unfortunately. J.P. Instruments TIT Probe - J.P. Instruments (jpinstruments.com)
-
 adverseyaw changed their profile photo
 -
The alarms are set by the factory in coordination with your POH and A&P so you should end up with the same redlines and limits as are specified in the original instruments. When a number has been exceeded, the EDM puts a line across the bottom of the display (for the 900, not sure about the 930) indicating the nature of the problem. One of the white buttons allows you to clear the error. For cases where you exceed limits or have persistent a sensor error, this is a good design, and you can clear the error and get regular functionality back immediately with a single push. It's an annoyance for intermittent errors. If an error is cleared and then later comes back, this display once again shows the problem and must be cleared with a button push again.
-
Performance numbers for Firewall Forward Horsepower Plus
adverseyaw replied to adverseyaw's topic in Modern Mooney Discussion
I saw that but did not experience any of those issues -
Performance numbers for Firewall Forward Horsepower Plus
adverseyaw replied to adverseyaw's topic in Modern Mooney Discussion
The company changed hands in the 2010s and reports were that the customer service problems were resolved. I've dealt with Firewall Forward a couple of times on minor topics, things like questions on STCs and AD'd parts, and they were professional and responsive. Denominated in knots. The choice is a personal one based on what you value. My aim here is to present the data as I see it so everyone can make a decision. Some additional considerations: 1) G100UL has reportedly better detonation margin than 100LL, so risk of detonation due to high compression will likely trend lower in the future. 2) Some A&Ps are not fans of stacking engine STCs on each other, so putting an upgraded prop or exhaust on this engine could be an issue depending on the mechanic. 3) The data shows that the increased power and efficiency at altitude is bona fide. All that said, the only regret I have with this engine is the decision the prior owner made to keep the duplex magnetos. I would much rather have a single traditional magneto and a single electronic module. There are a lot of other threads on what's involved in that upgrade. -
Interested in trying out formation flying in PNW
adverseyaw replied to shawnd's topic in Mooney Caravan
Paging @amillet and @Bolter who are up in the PNW and are great people to connect with. The B2OSH event at Bremerton is a good way to get acquainted with formation flying. To participate in the OSH flight, you will need a proficiency check by one of our Caravan safety observers, and historically we've had at least one person at the Bremerton event who can do it. I suggest reaching out to Alan and Bolter to see what will be available at PWT this year. -
Does it look like this? I should have this in my pile of parts. From a 1994 Bravo.
-
Airspeeds for calibrating GAP26 AOA indicator on a Bravo
adverseyaw replied to rbp's topic in Mooney Bravo Owners
It doesn't look like I have the printout of the installation manual my avionics shop gave me. Going from memory, it was: 1. Hold the Set button down in straight and level flight, 2. Get to 1.3Vs0 and press the set button, 3. Get to just above stall and press the set button. The instructions were about two pages long with diagrams but that was the gist of it. It took about ten minutes once on station to fly the profile as it takes time to fully stabilize on a specified airspeed. It was similar to creating a glide polar, just abbreviated to only two airspeeds. Finding the actual stall speed is a prerequisite, I agree. Mine was within a knot of the published speed. In my view, the Garmin procedures are correct, they just require a test pilot mindset. -
Airspeeds for calibrating GAP26 AOA indicator on a Bravo
adverseyaw replied to rbp's topic in Mooney Bravo Owners
I think you're referring to the configuration page on the G3X but I don't have a G3X. -
Airspeeds for calibrating GAP26 AOA indicator on a Bravo
adverseyaw replied to rbp's topic in Mooney Bravo Owners
I did, but I only have the HUD so I'm not sure if I can get the calibration data out. I'm curious to see how the numbers differ across different airplanes, but I have doubts about whether you could meaningfully use or compare the values. Every probe installation will differ in position and angle, and even Bravo airfoils differ with/without TKS sleeves. -
Airspeeds for calibrating GAP26 AOA indicator on a Bravo
adverseyaw replied to rbp's topic in Mooney Bravo Owners
Yep, I've got the GAP 26 on my Bravo. I've got a G500TXi but have the GAP running through the HUD mounted just to the right of the roll cage center post. The green circle shows up at your approach AoA, which will be 75 when at gross landing weight but typically less. I haven't taken note of the airspeed where the first green bar comes on, maybe ten or fifteen knots above approach speed. In the HUD-only setup, this isn't an airspeed I choose directly, the system picks it based on Vs0 and 1.3Vs0. -
Airspeeds for calibrating GAP26 AOA indicator on a Bravo
adverseyaw replied to rbp's topic in Mooney Bravo Owners
75 KIAS and "just above stall" are the two airspeeds I used. Be sure to fly at the noted gross weight. I'm curious to see if you can program it through the GTN -- the instructions you've sent are for the G3X (which I don't have) and my avionics guy gave me the simplified two-airspeed setup via the AoA display. I didn't even realize it could be configured through the displays. -
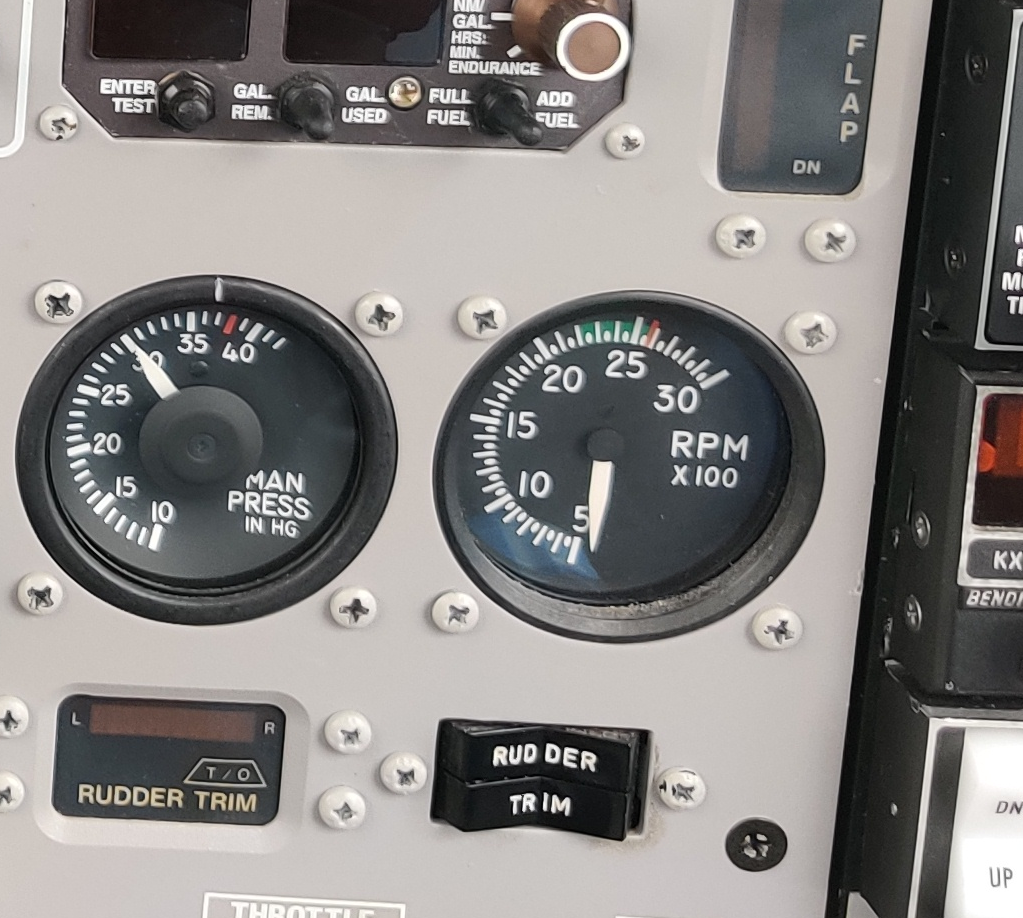
On the topic of moving instruments, I've heard that FSDOs vary quite a bit on what they will allow. I proposed relocating some of the factory indicators when I had my PFD put in, but the manager of the 145 station that did the install was clear that the local inspectors would push back hard on relocating anything that came from the manufacturer. I showed him examples like yours and he said other FSDOs were not as strict.
-
Same. I have direct confirmation on this, as we were going to leave the old Hobbs meter in. Once everything was wired up, my mechanic realized he couldn't get the three-wire Hobbs to work with the JPI 900 (similar to the 930) and had to pull the analog meter out. The 900 has a screen that shows both hobbs and tach time, it's activated by holding the center two buttons. I assume the 930 is the same. There's also a setting to show the tach time on the main display.
