

Flyin Bullfrog
-
Posts
47 -
Joined
-
Last visited
Content Type
Profiles
Forums
Blogs
Gallery
Downloads
Media Demo
Events
Everything posted by Flyin Bullfrog
-
Much appreciated-just gonna post individual pics


-
Have been off the net for a while doing some corporate flying, but found some time to do this interior. Seat Package, Flooring, and Glareshield repairs-thought I would share the B4 and Aftr. "Rico" Lenway M20C.pptx
-
what would be the projected cost?
-
Mooney team. Mic squeal issue has been resolved. Thank go to the Dave Harlow tip. Issue was the sidetone volume in the GTN 650 that was set way too high and was causing the feedback. In order to adjust it, you have to get the GTN into configuration mode. Per Dave's instrictions I set into configuration mode by holding the HOME key when you power up and ONLY touched the dial tone-reduced fm a 65 nbr to 45(a swag). Worked on the ground, after start up, and perfectly in IMC thru an LPV approach. I did not adjust the Mic gain of my Zulu 3 headset upgrade. Want to reemphasize Dave's warning. "Of course you can really screw up your configuration once you are there. So be careful!" Another happy and 0 cost ending. Rico
-
Lightspeed folks tend to think it's a Mic gain issue. Just need a jewelry flat head screw driver. Take off Mic muff and gain screw resides under a small plastic cover. Seems sailor proof: Clockwise increases gain counter clockwise reduces gain. LS says to back off .25 turn to begin with. Appreciate all the other tips. Will report the fix once the gremlin is cornered and exterminated. Rico N231C
-
I have not-good call. Tks
-
Have developed a piercing squeal when pressing the PTT. Using new upgrade Zulu3 headset via a GTN 650. New batteries. Squelch adjust has no effect on the piercing squeal. Pls help-would really like to use the noise redux of the Z3. Going to call Lightspeed, but think the issue is in the plane, 79 Mooney 231. Any advise/help would be appreciated. Tks!
-
Realized that I never responded to your email. My apologies. These aviation grade hides. I use multiple vendors: Omnavia, Perrone, Reliatex to name a few. The all come with FAA certificates of conformance. Foam name is Airflex-my apologies. Hope this helps.
-
Guess you could use them on both occasions, but prefer they remain in thee plane and let the new aeroflex foam do their mission-reduce butt and back pain on the longer legs.
-
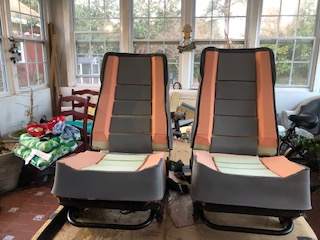
Recently completed these M305 seats and thought I would share. Job included a full redo of overhead, flooring, glareshield, side panels, and cargo area. Happy 4th of July "Rico"
-
TomK Is your VSI still avail? VSI in my K froze up and may need to be replaced Not much airplane $ after the tank strip and reseal. Pls advise, "Rico"
-
Frank Tks for the comments re: My Avatar Related to my aviation upholstery bsns that I will expand when I retire fm the military after 40yrs this July. The Mooney(for Mooney interior work, quick turn around(7-10 days) and hanger side pick up/delivery when feasible), The frog and Trident(I am a SEAL with 2 of 9 lives left). Needle and thread spool(upholstery and many yrs as a military and FAA parachute rigger). Interior work and exercising my ATP in part-time corp. pilot work. This is my "boss of me" plan. "Rico" N231C
-
Against my better judgment, breaking squelch on a renewed tank reseal thread. After years of unsuccessful hired out and expensive patchjobs, I finally bit the bullet and did the complete strip and reseal by a pro. This unavoidable decision point came when Istarted to smell traces of fuel in the cockpit. Selected the Wet-Wingologist(Edison)in Fla option. Prices abt the same with 7yr transferable warranty and good inexpensive options in the unlikely event there is an issue after the 7th yr. I developed a solid relationship with Edison, owner of Wet-Wingologists to understand his process, background, experience and finally pressed the I believe you button. Fuel tank specific DNA below: 24 yrs fuel tank specific experience with naval aviation then GA fuel tank roots. True fuel tank pro/specialist-He only does fuel tanks and has seen it all when it comes to Mooney tanks-no other maintenance distractions that reside in other maintenance facilities. Microscopic Attention to detail in the removal of tank components, stripping, access panels, cleaning/degreasing/metal preps, inspections, adhesion promoters, PPG sealants, sealant protection overcoats, gasket replace, and pressure tests. The process is solid with little room for disappointment. He can flex 4x slots each month-he had me in the shop 2 weeks after I called-sure he can accommodate specific timelines. Does not outsource his work! Location matters: The year round Florida heat is critically conducive towards the curing process-there is no artificial heat substitute in my view. Lessons reinforced: Patch jobs can be expensive losing battles There are equally reputable and guaranteed options Consider Wet-Wingologists-you will not be disappointed Picked up my K @KFXE few wks ago and on my 3rd refuel ecstatic to have resolved my Numero Uno maintenance concern. Wet Wingologists has earned A+++ rating. Do other Wet Wingologists customers agree with this assessment? Just wanted to report - pass any fuel tank specific questions VFR-Direct to Edison(954)WET-9390. “Rico” out N231C
-
Understandable Byron-I felt the same way before embarking on the first one, but now convinced it's the way to go. Glad to take you for a ride if you are ever on the East Coast. Take care, "Rico"
-
No problem-I did these mods at KPVG. My K has a similar set up, I can fly her there and show you. Glad to help
-
Hello Pat-appreciate the comment. Do this as "therapy" as I approach a 40 yr mil retirement this year. I use a local vendor for the Boltaron-Norva plastics. Kydex can also be used. The Floor can be bought SCS Interiors or Omnavia Interiors-they are both good companies. Both of these sources will certificates of conformance for purchased matl. I have made various large templates for this type work-they make the matl manageable before a final fitting. Lots of contortionist work to get it right:) Take care Rico
-
Tks-just reloaded at higher resolution. Hope this works. Rico
-
Just finished this M20J interior-pics are attached. Cut lower panels and replaced with FAA grade .060 Boltaron thermo plastic-no screws! Fastened with 3M Dual lock from the airplane frame. This provides easy access for maintenance and eliminates unsightly holes that tend to spread with age and vibration. Elimination of side arm rests have has expanded the tight Mooney cockpit. High grade Vinyl Flite floor(same stuff used on air carriers) backed up with 1/4 inch ensolite for sound proofing/insulation/comfort. I like the clean look! Glare shield repaired and covered with steam stretched leather with leading edge stitching-huge improvement! Project completed in a week-cost on this one was just North of 3K. On to the next one... Rico Flying Bull Frog LLC M20J_Interior.pptx
-
I used black leather fm a left over project. This particular hide was bought fm RELIATEX. You can use ANY aviation hide. I did not use a template for the Mooney job. I did, however, use a template for the Baron yoke. There is some technique and tips that I will write up later. more to follow.
-
Given the cost and time to accomplish to leather wrap yokes, I decided to give it a try with a Beech Baron customer. He shipped out the yoke, I adjusted some pre existing patterns for seam allowances and went to work-accomplished in about 5 hrs. Polished and repainted the Beech template, all screws and hardware. Steam stretched the leather with good results. With some difficulty, I did my K yokes while in the airplane, much better and easier with a removed yoke. Sharing the results. Rico Lenway Flying Bull Frog LLC N231C Baron yoke.pptx
-
Better resolution pics M20K_N231C_Interior_comp.pptx
-
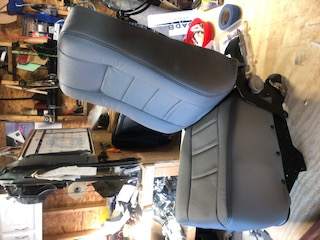
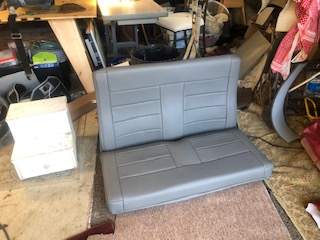
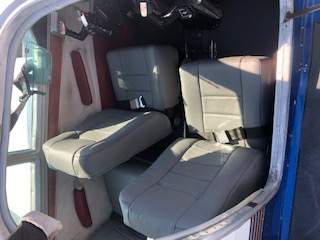
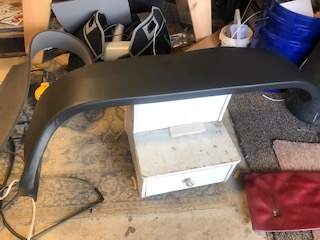
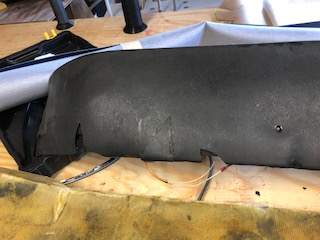
Mooney Team, After doing many interiors, I finally got around to doing my K interior with thought towards improving looks, utility, and ergonomics. Following fwd to rear narrative of this project along with attached pictures. Glare shield: Covered in black leather with an exposed red Italian stitch-a nice low profile look as to maximize vis with no observed glare. Crossbar: Covered in black leather with exposed zig-zag hand stitch-good grab point when adjusting front seats. Yokes: Used 1/8 Aerolite foam as backing. Black leather with baseball hand stitch. Accomplished with yokes in the plane-a difficult, but achievable process. I became motivated to do this given the cost by other vendors and pain to remove, ship, and reinstall. Re-did the Mooney emblems in brass via a laser engraver. Overhead: Had to fix the pilot side Weemac vent-found the needed parts on Ebay. Cut access fm the back side, fixed, and re-plugged the access point with marine grade G-Flex epoxy and cloth-it is airtight! All other cracks, holes, weak areas were fixed. Primed, textured, painted, sealed. Overhead lighting was not working-culprit was an unknown inline glass fuse in the battery compt. Co-Pilot door: Window fairing fixed and covered in one piece to tan leather stretched using steam and not-so-secret juice (1part alcohol, 1 part baby shampoo, 2 parts water in a small spray bottle). Bottom half Bruce Jaeger’s spatial interior panel, trimmed in silicon trim and attached with minimal screws. Seats: These seats where my first leather job ~4yrs ago-while craftsmanship has dramatically improved, they still look good. I refoamed the seat bottoms in 2in firm aeroflex and 1in medium aeroflex foam-now feels like a new PC-12 that I had an opportunity to fly last month. Plan on eventually replacing If I am able to find some affordable articulating seat frames and a bucket rear seat conversion. Window frames and side panels. Inspired by discussion with Bruce Jaeger(Spatial Interiors), I was boldened to cut the window just below the fore-aft trim sections, I wrapped the remaining pilot window frame in single piece leather to avoid seams. The rear window frames fixed, reinforced, sanded, primed and painted to match the overhead color. The lower sections of the adjacent to front and rear seats and leg wells where fabricated in new 1/16 in FAA grade Boltaron plastic-this eliminated large portions of deteriorating plastic, side carpeting and in my view has provided a cleaner/21st century look. I used Bruce's dual lock fastening technique plus his advice on Boltaron usage-result is a much preferred zero screws option for easy access in case of future maintenance. Edges were trimmed in silicon trim that I purchased from Bruce. Cargo Compt: Panel adjacent to the cargo door was cut in Boltaron. Rear and right panel was backed with polyboard and covered in leather with nice diamond stitching. Document holder was made in polycarbonate and trimmed in leather. Fabricated and bent a cable well in right rear panel to cover the wire bundle in this area. This piece was attached with blind rivets. Installed elongated D-Rings for easier access and eliminated those unsightly and usually stained nylon white straps. Intent to use high quality bungees or nylon straps with ratchets friction adapters when needed. Hat rack. All cleaned, primed and repainted. Rear panel was backed with 1/8 in Aerolite foam, covered in leather and hand cut a leather Mooney logo with titanium tipped scissors that was carefully sown-I prefer this better than embroideries that are subject to fraying, fading and snags. Flooring. I tend to use my Mooney in the utility mode and therefore eliminated ALL carpeting with a much more durable and easy to clean flight floor textured product with 1/4 in ensolite foam baking for comfort, insulation, and sound proofing. Flooring will be snapped in with nickel plated snaps for easy removal if needed-getting many compliments on this durable floor which comes in a myriad of colors, textures and thickness. Windlace, Pockets, and Armrests. Windlace made of matching window frame leather with a reduced 3/8in core like in the newer mooneys. Pockets made of leather, inside are black leather with a boltaron plastic stiffer as backing-I made mine to fit my IPad Mini, checklist, small flashlight, and small kneepad. The can be shaped in any way, placed anywhere after the panels are in place, sets is in and pilot identifies his preferred location. I have not installed the armrest that I fabricated after realizing the added room and minimal utility of small armrest. Will fly the airplane a bit and make a decision on installing the arm rest which has a removable (snaps) leather pad. Sorry in advance for providing long explanations amidst the ongoing east Coast Snowmageddon. Rico N231! Flying Bull Frog LLC M20K_N231C_Interior_pdf.pdf
-

Adjustable front seat frame
Flyin Bullfrog replied to flyboy0681's topic in Avionics / Parts Classifieds
Has the articulating frame been sold?
