Leaderboard


Popular Content
Showing content with the highest reputation on 11/08/2018 in all areas
-
Thank you for all the input you gave me on my dilemma on curing the inadequacies of the value guides. I think this is what I am going to do. Please let me know if you think I am on the right path. I am going to use my old MAPA format but instead of talking about a certain topic each month, I will just give some general information about buying, selling and pricing/appraising Mooneys. I will separate the data by model (pre-201, M20J, M20K, etc...). I am going to give it away in a PDF format. The only requirement I will have of the donee is that I get his or her name, valid email address and phone number and a little note about what they expect to do with the data (use for buying, use for selling, use for insurance, use for just 'hey, I like stuff like this'). If the data is being used to purchase or sell a plane, I will ask the user of the guide to provide me with actual sales data after the sale is completed so that I may keep a confidential record of sales that happen outside of my business. I will ask the user to donate to me voluntarily if the user finds the data useful. If the user doesn't want to donate, no harm, no foul, but if the guide helps them make a wise $50,000 or $100,000 or $200,000 decision, perhaps they can make a small contribution to me for the time and effort put in to produce and keep the data current. I will, of course, identify myself in the guide and explain what my services are with respect to buying and brokering Mooneys. This plan will not likely fix Bluebook or VREF and it will not likely have a real fix to the appraisal points used by lenders (who are shackled to BB and VREF). However, having the data available and a reasoned approach to how to add properly give credit for equipment in a plane may eventually have an affect on both lenders and existing value guides. Does this sound like the proper strategy? Does anyone else have any ideas or want to add to this plan? Thanks again for all the input to date. It has been a good learning experience for me. Jimmy9 points
-
Small ridges, unlikely. Control surfaces not put back exactly how they were removed, very likely.7 points
-
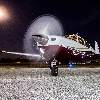
After the emergency landing at Pt. Mugu NAS in early July (caused by a piece of ram air door gasket that found its way into the fuel servo throttle body) and a somewhat eventful reposition flight over to CMA ... The high fuel pressure issue was conquered, an "early" (which ultimately become a "timely") annual was performed, a bunch of crusty old stuff (magneto harness, p-leads, etc) was swapped out, and everything checks out (though a capacitor on one of the IRAN'd mags did fail just as I was about to pick it up, a couple of weeks ago; went back to Aero Accessories to be addressed). The left fuel tank, that was empty at Pt. Mugu, has not shown any signs of leaking, over several months. I'm watching it, but, so far, it's always been exactly where I left it (dipsticking it after and before every flight). Fuel pressure is right in the middle of the green arc. Mag drops are exactly 100 RPM on both sides. Runs smooth, no missing. Temps are cooler (the baffles were installed incorrectly). Controls are smooth (the elevator bungees hadn't been removed or greased/repacked in years). Brakes work good (they were well worn). Two mild flat spots on the tires from standing on the brakes (Runway 27 at KNTD has arrestor cables I wanted to avoid!), but there's still tread. Electrical system seems fine, on the same battery (on a tender while it was being worked on). No hiccups like before. Did a couple of low approach trips around the pattern at CMA before I was comfortable flying back to TOA. Then the next day flew up to Paso Robles on my "scaredy-cat" routing (8,500' and an airport, or the surf, always within gliding distance); 3.5 hour round trip (tach time), and she purred. No hiccups. Taking her out to Marana tomorrow to have the rest of the avionics work done (S-Tec serviced the pitch servo, which has to be reinstalled, and I'm swapping the EDM-700 for the -830.) Didn't expect to need to pump $21,000 into her so soon, but, it is what it is.5 points
-
I worked for Power Flow during and after college (1998-2001), just as the company was getting started. I did a lot of test flying on their C172, 177, and Piper exhaust systems. I assure you there was a noticeable increase in performance on the O-320 and O-360 powered airplanes. We flew hundreds of hours testing different exhaust configurations, and even more to ensure the FAA STC requirements were met. We strived to provide a quality and reliable product. Of all the test flights I flew, I can assure you that when compared to the stock exhaust system, there was more power on takeoff with shorter take-off runs, better climb performance, and lower CHTs in cruise. This was not a "seat of the pants" measurement.. we always flew with a co-pilot who would document each test flight. We had a Piper Arrow that we conducted several tests on. This was the only fuel injected airplane equipped with a PFS system I got to fly on. Not sure if the constant speed prop "absorbed" the power gain, but the documented performance gains were not there. What was there was a decrease in fuel flow when compared to identical power settings with a stock exhaust, and lower CHTs. I left the company before they came out with any of their Mooney products. Fast forward (whoa) 15 years, and I had my own M20C that failed an exhaust pressure test during annual. Rather than re-welding/rebuilding for $1500, I decided to go with a PFS. The customer service had not changed since I worked there (excellent) and I had a new PFS installed on N6XM in no time. Similar to my experience with the Arrow, I did notice lower fuel flows, and MUCH cooler CHTs (around 15+ degrees cooler on each cylinder), but that seat of the pants increase in power was not there. Unfortunately, N6XM met an untimely demise with a landing gear collapse due to an incorrect preload setting during annual, so I did not get a good data set for comparison. Back to this thread... carbon monoxide poisoning simply should not happen with a PFS. There are no welds in the heat exchanger section to leak. That alone, along with the benefits of cooler CHTs, lower fuel flows, and a possible increase in HP make it a no brainier for me. If the time comes to fix the exhaust on the J model I now own, I will once again forego the $1500 and put my name in line for a PFS.4 points
-
Nothing slows a Mooney down quite like poor rigging. And no one seems to be able to coax as much speed out of a good rigging job as Don Maxwell.3 points
-
It's a heart-wrenching decision but we are selling our rare M20D, one of only three still flying. She's in amazing shape and just passed her last annual with no squawks and a new interior. She's ADSB compliant with a new Stratus transponder. We've created a blog site with all the information, price, and lots of pictures and stories. Hoping she goes to a new owner that appreciates and will maintiain her rarity. https://fixedgearmooney.blogspot.com -Sven
 2 points
 -
There's a spring in there? Mine feels like it's just the weight of the vane. Now that I think about it, if you're not stalled, the wind should actually be blowing down on the vane anyway, so there shouldn't need to be a spring in there, right? Also, when you rotate the plane on takeoff, the stall warning would only go off if you were rolling with the wings at an angle greater than the critical AOA. Given how much I remember the nose is pitched up in level slow flight with flaps down, I can't say I ever remember rotating that much on takeoff, so I think that would be a pretty dramatic "yank her off the runway" type of nose rotation before you'd trigger the stall warning.2 points
-
The P/W PT-6 I fly allows up to 10 hours of flight with Avgas. Temps run hotter so you have to keep an eye on that.2 points
-
Kevin Kammer from Mooney told me he test flies the new planes at 3100# and 45" CG. I was curious about whether the G1000 stall warning alerted faster than the beeper, and he said they are tied to the same switch. I had incorrectly assumed "Bitchin' Betty" was hard coded to an airspeed level somewhere in the G1000. My M20TN probably flies very similarly to your Bravo (just faster and using less fuel, LOL). He asked me to duplicate his method, so, power off: at 3100# and 45" i got the following: Stall Warning clean: 73 Stall Buffet clean: 65 Stall Warning Landing configuration: 65 Stall Buffet Landing configuration: 57 Betty and stall beeper are at the same speed, as you said they should be. Approx 8 KIAS between warning and buffet. For your situation, I'd record the power-off warning and stall buffet speed in T/O and LDG configuration. See if you have the 8 KIAS difference. Then I'd ask: are you getting book cruise speeds? If you are in a TKS bird, then your ASI is probably indicating incorrectly. Most are 8ish KTAS slow. Lastly, a perhaps obvious question: Are you certain that the Alternate Static is closed and not leaking somewhere?2 points
-
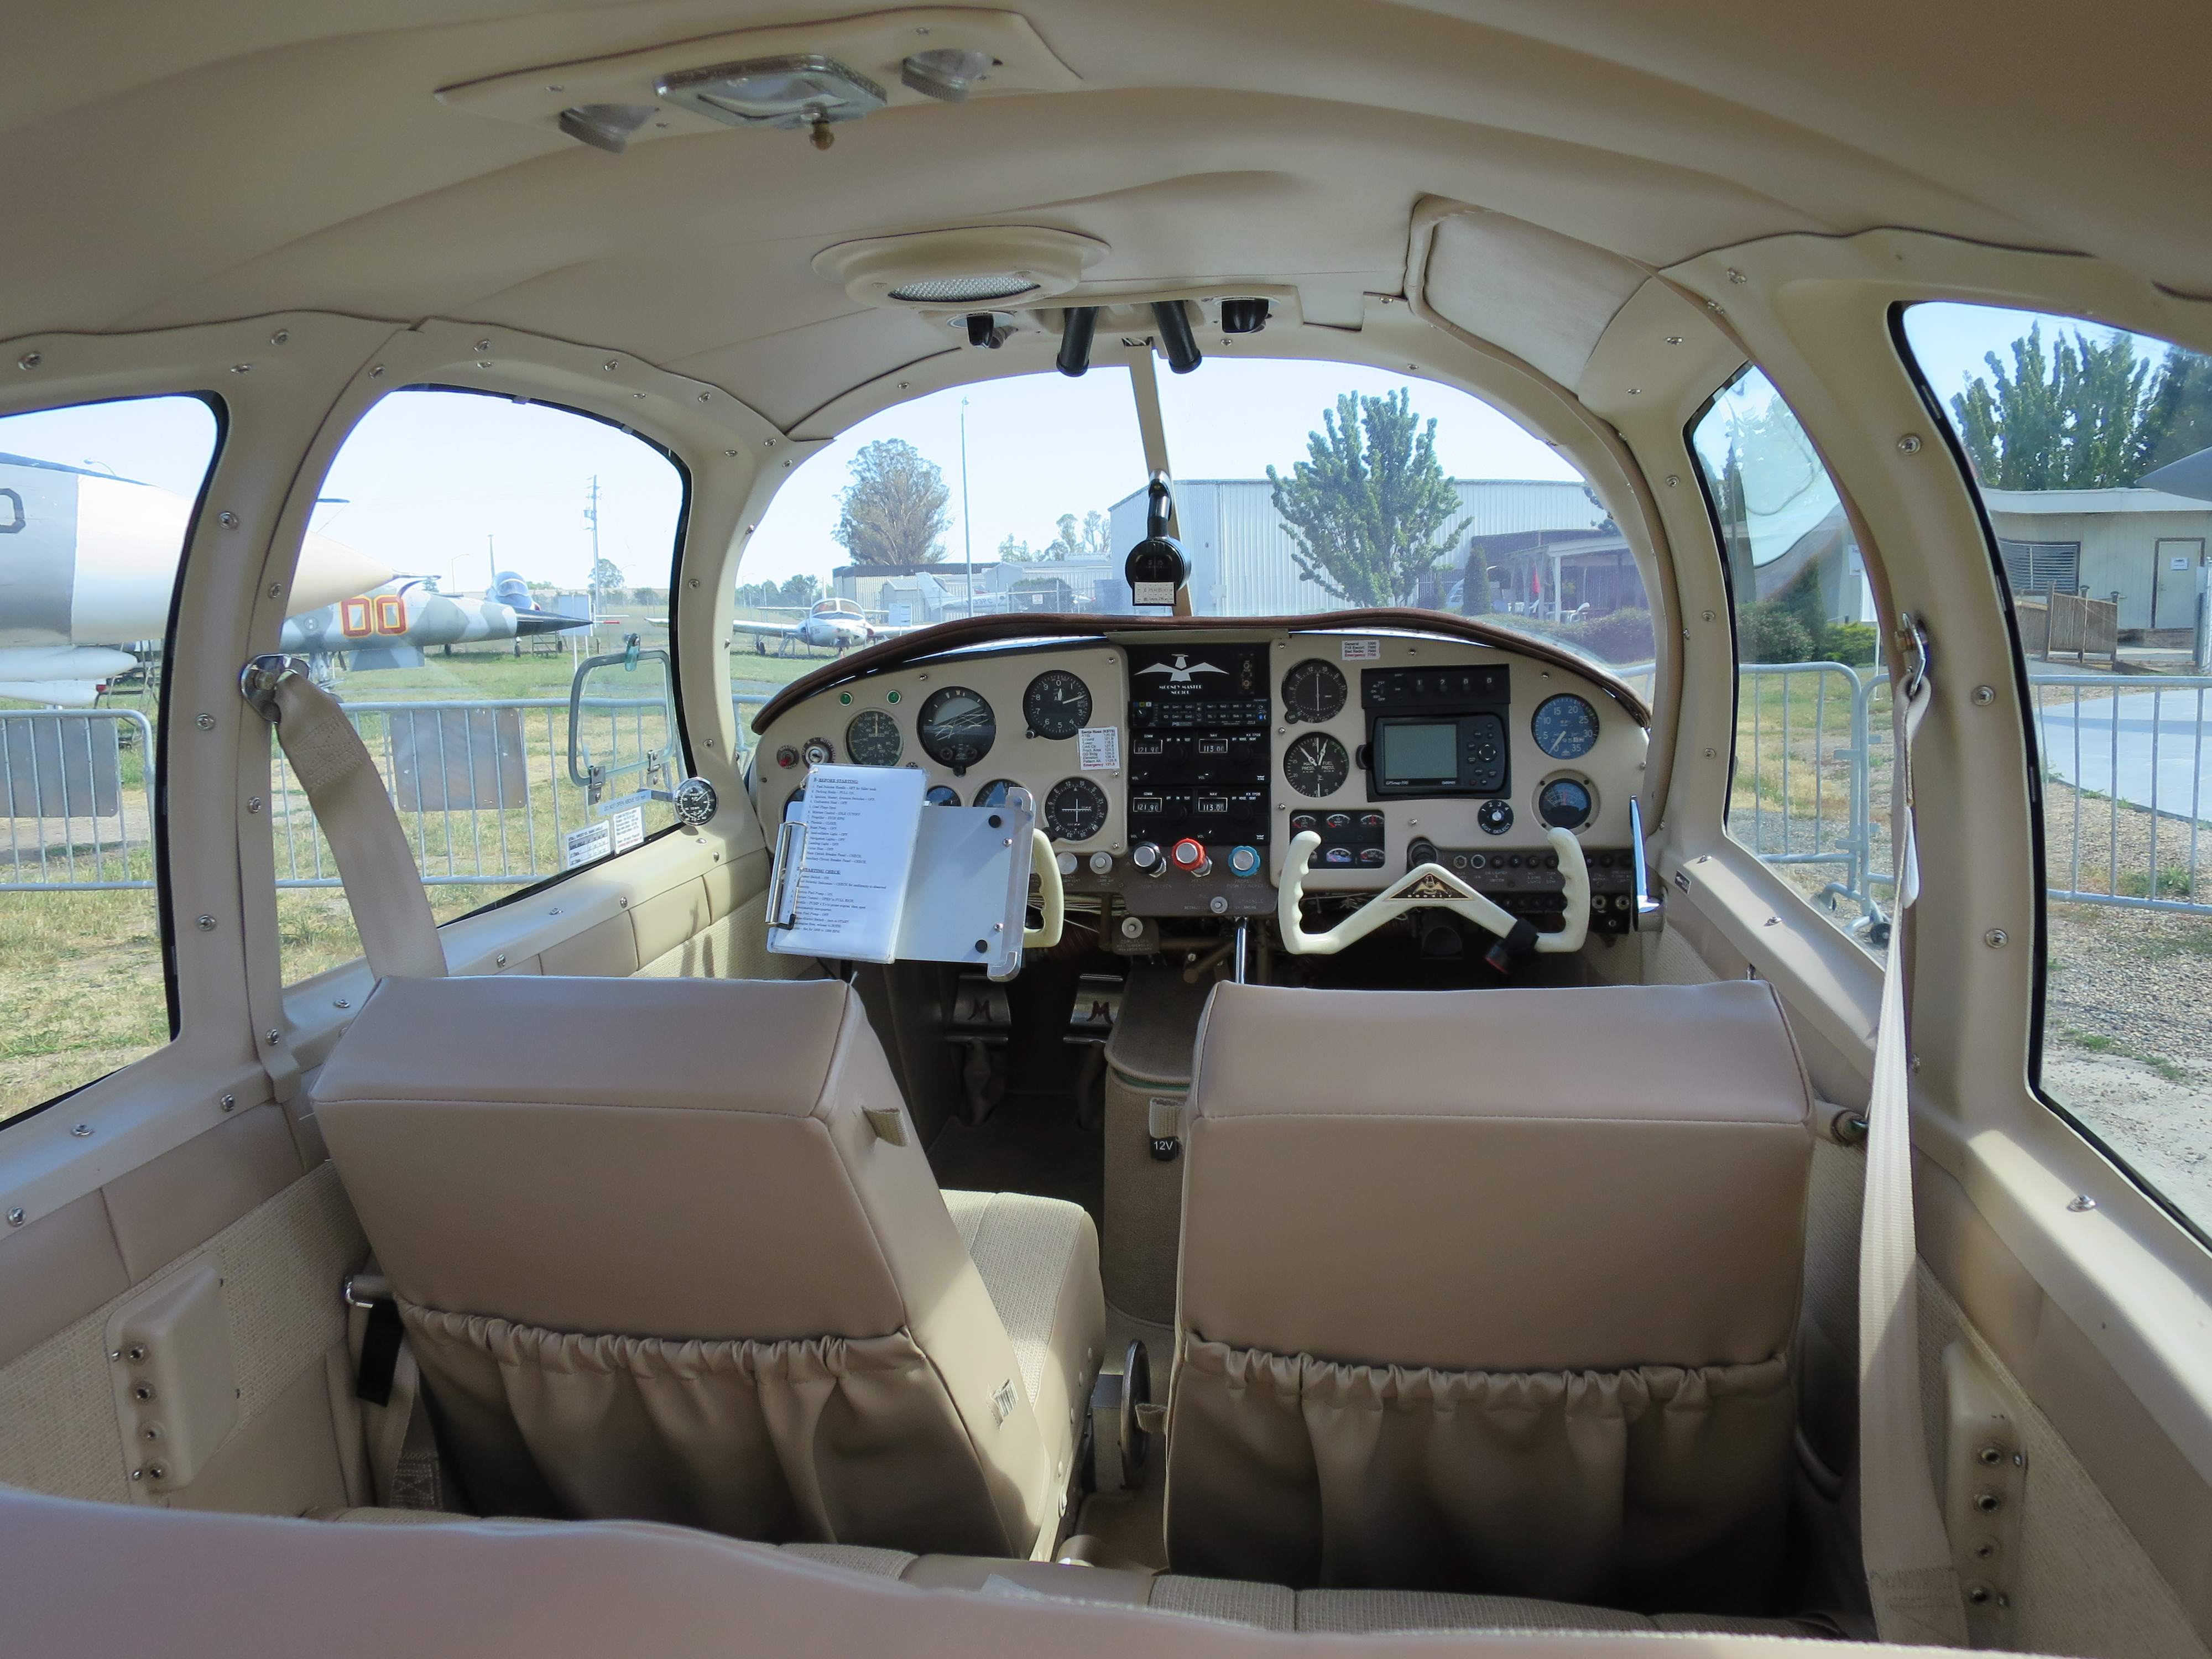
Here is a picture from behind my panel, throttle cable hole being on the right. 3/4” isn’t going to work in my airplane. Hopefully this will help others get the correct cable for their airplane in the future, it really is true that every one of these airplanes are different!
 2 points
 -
Many gas turbine engines specifically allow the use of 100LL and/or unleaded gasoline. In fact the P2V had both piston engines and jet engines, all of which ran on Avgas. Our EC135 helicopter has Turbomeca Arrius 2B1 engines. They allow a good number of hours using 100LL avgas without restrictions or overhaul requirements.2 points
-
I use Micro-Mesh regularly. Some thoughts: a) Removal of scratches requires significant sanding down of the plastic surface to a depth below all scratches. b) Sanding needs to be done in an organized manner, over a wide area. Optical clarity requires a uniform surface, without low spots. c) The finer grit papers need to be used far more than it at first seems, as you need to remove all the micro scratches you just put there with the previous sanding. d) Use a lot of water as you sand. e) I use a BluePoint 3 inch buffer (snap-on) with wool pad and "Flitz" (the metal polish) as a final finish. Done with skill, it results in world class clarity. Done without care and burns result. This heli is 17 years old and I've been able to keep the windscreens perfect, including sanding down through the minor crazing and polishing. No imperfections.2 points
-
Answers, based on my experiences... 1. Although you can reuse your EGT, CHT, and voltage, JPI will recommend against it, as your CHT and EGT probes get brittle over time due to heat. They may work for weeks, months, years, or not at all. I recommend spend a few extra $$ and replace them at the time you change out the Moritz cluster to the EDM-900. As part of the 900 kit, you'll receive a new voltage harness anyway. 2. There's no need to purchase and install an EI or any other tach. Once you or your shop purchases the instrument, JPI will set 2700RPM as the redline (along with other data from your AFM) from the factory data sheet you or your shop will provide before JPI ships it. 3. Yes 4. Your tanks will physically hold either 108 gallons (102 usable), OR 106 gallons (100 usable). You'll have to fully-fill your tanks to determine what they hold. Mooney certified Ovations (and Eagles) with different usable amounts for various reasons throughout its lifecycle. There is a filer neck kit available from Mooney that allows you to legally placard your tanks to indicate the higher usable fuel level and set your EDM-900 to the same value. What you cannot do legally is set your JPI to indicate 100 or 102 usable with your certification level and placarding indicating lower...you need the kit installed that properly converts the levels. JPI will only configure the instrument to what the airplane legally indicates. I had this done on my airplane before the 900 went in. Get ahold of me if you want the part number of the filler neck kit. 5. Per Bob Minnis, the original STC holder and developer of the 310HP conversion, the best/optimal setting to get the most life out of your cylinders while providing the best engine performance under given settings is 2550RPM. Although the engine is rated for 2700 max continuous thrust, 2550 is the absolute sweet spot if you want to maintain proper cylinder health. Proper operating regimen on the Eagle should be full power takeoff and climbout, then pull back to LOP at 23MP (generally below ~7000-8000) and 2550RPM, and full-throttle at 2550RPM at higher altitudes (generally above ~7000-8000). There's no tangible benefit to, or evidence of reduced cylinder life by running less than 2550RPM in cruise on a 310HP-converted Eagle or Ovation. 6. The GTX335 and GTX345 are nearly the same cost, so with respect to your budget, I wouldn't be penny-wise and pound-foolish at this juncture by doing the 335. The added features of the 345 (and even the L-3 Lynx NGT9000) are certainly worth the added cost. Steve2 points
-
Don't forget that starter duty cycle regardless of the starting procedure used.2 points
-
One thing nobody is mentioning is exhaust entering through the belly panels and wheel wells. Any gaps or wrinkles in the belly skins can let exhaust into the belly then up behind the upholstery and into the cabin. Also check your rat socks in the wheel wells. They are actually there to keep exhaust out of the plane not rats.2 points
-
Monday the 12th ? If so I can pick you up at TUS and take you to AVQ.2 points
-
Although I'm not sure of other possibilities, I'd bet that you do have an exhaust valve guide that is going bad. A careful borescope exam of the exhaust valve faces should tell you which one it is. It's happened to me twice so far. The times on the cylinders may not correlate with which one is the offender. In one of my cases, there was also a hiss at the exhaust when pulling the prop through the compression stroke for that cylinder. The leak was also audible at subsequent static compression check, but the compression number was still in the 70s. In the other case, the compression on that cylinder turned out to be low. In both cases, the guide was out of spec on wobble test with the valve covers off. As a quick diagnostic that an owner can do easily, I'd say borescope exam through the bottom plug hole is a pretty powerful way to anticipate an A&Ps findings.2 points
-
Just ordered the Sensorcon, thanks for this. Glad Frozen flying made it down safely.2 points
-
I'd follow Jose's list, and also fly a 3 TRACK airspeed calibration test flight for a couple different power settings in smooth air, noting your indicated airspeed, altitude, barometric pressure, and temperature. On the ground, follow your POH corrections to get calibrated airspeed, then calculate true airspeed given the test conditions. Then use the 3 stabilized ground speeds from the three different tracks and an online TAS calculator to get your real TAS. Then you'll know if you have an indication problem or a real problem. Flying tracks is crucial here...not headings. Set OBS mode on your GPS and dial up the desired tracks 90 degrees or 120 degrees apart, and let the autopilot fly them. Hand trim to zero-out pitch input from the autopilot as well. If there really is a problem, I'd look at gear doors and flaps first. Sent from my LG-US996 using Tapatalk2 points
-
The heat shroud around the muffler should be removed every annual and the muffler should be inspected. Preferably under low pressure and soap and water looking for bubbles. No need for cutting. A Sensorcon or other similar low level detector is a good tool to catch an impending muffler failure. I test the heater for CO on every flight by holding the Sensorcon in front of the heat vent and look for changes with it on and off. @Frozen Flying I'm glad my little field trip encourage you to get a detector and saved you from a similar (or worse) fate. Thanks for sharing! Cheers, Dan2 points
-
Just go with the 900 and get rid of multiple other gauges cluttering up your panel. I got rid of Tach, MP, Fuel levels, Fuel Pressure, Oil Pressure, Oil Temp, Amps, EI 4 cyl egt cht, and fuel flow. It is worth the extra $1000. From what I understand is you are not really getting two different (redundant readings) by keeping your old gauge (you would be getting two readings of the same thing on two different gauges. Just a PP opinion only I am certainly NOT the expert. Tell the shop to hold for a day or so and make a good decision (JPI should not have a problem with returning the 830 for a 900).2 points
-
My fuel servo has slowed mine down considerably over the past 3 weeks.... Top speed has been 10-15 ktas, behind a tug, back and forth from the mechanics hangar and mine.2 points
-
Here are the pictures of how it looks now.
.thumb.jpg.d92e0b7ab0376d3bc82e522ce1c6e59d.jpg)
.thumb.jpg.3c54c152ca1bb5c4935647fadbe76997.jpg) 2 points
2 points -
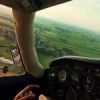
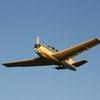
Meant to post this Sunday. It was a bumpy day down low in Oklahoma but still a beautiful day to fly. Caught a video of my final approach into my home airport KGOK (Guthrie, OK).2 points
-
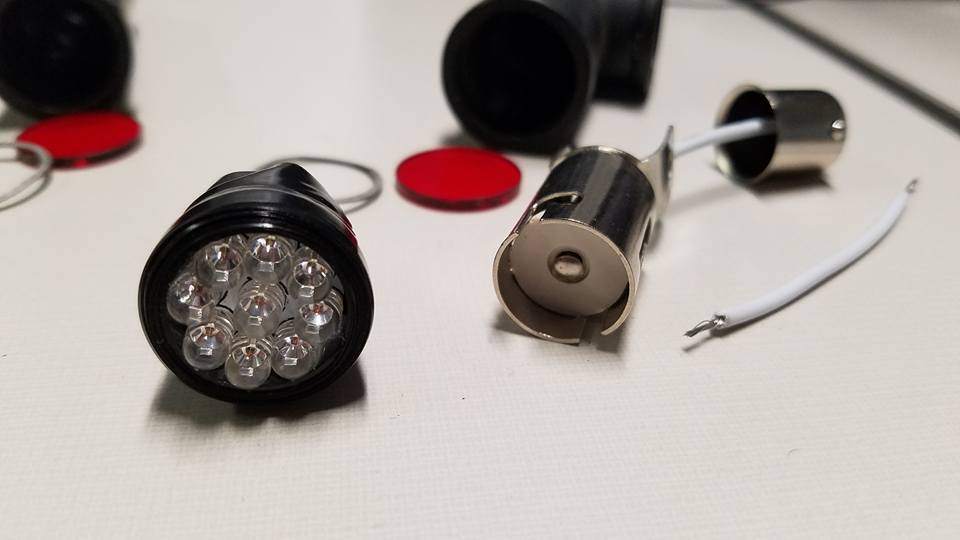
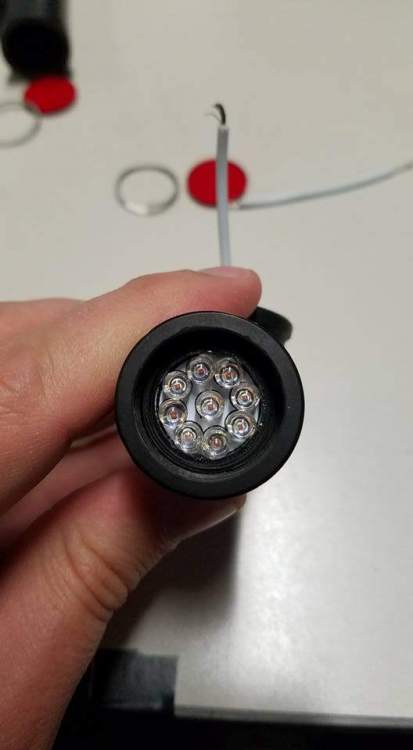
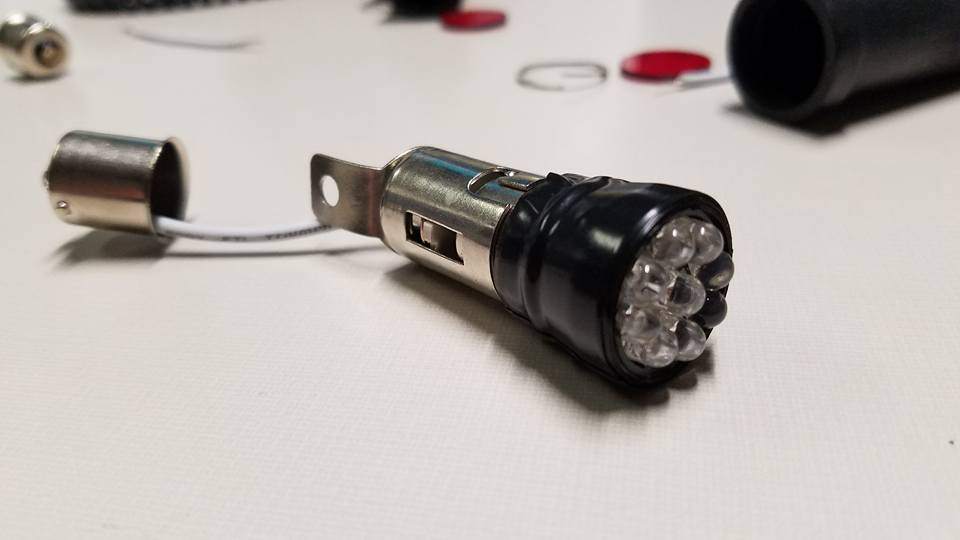
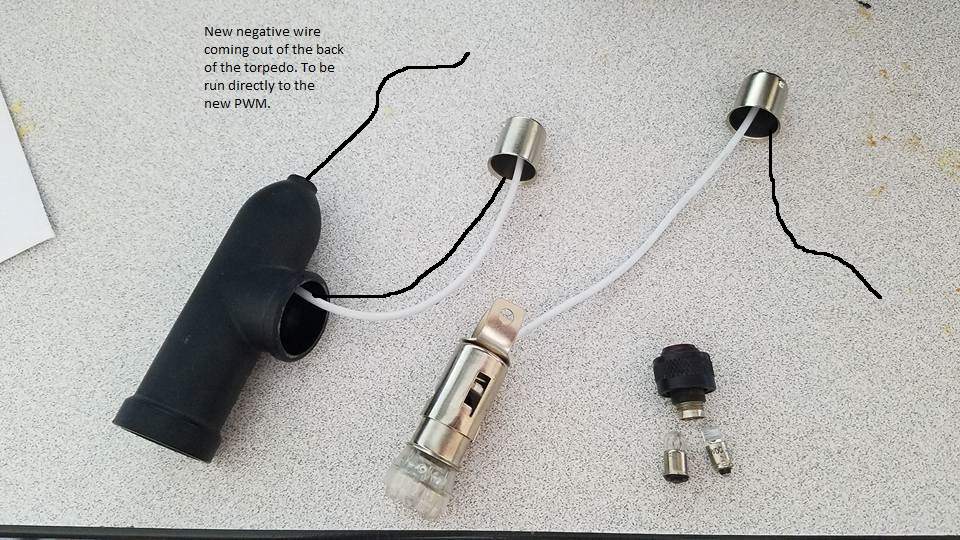
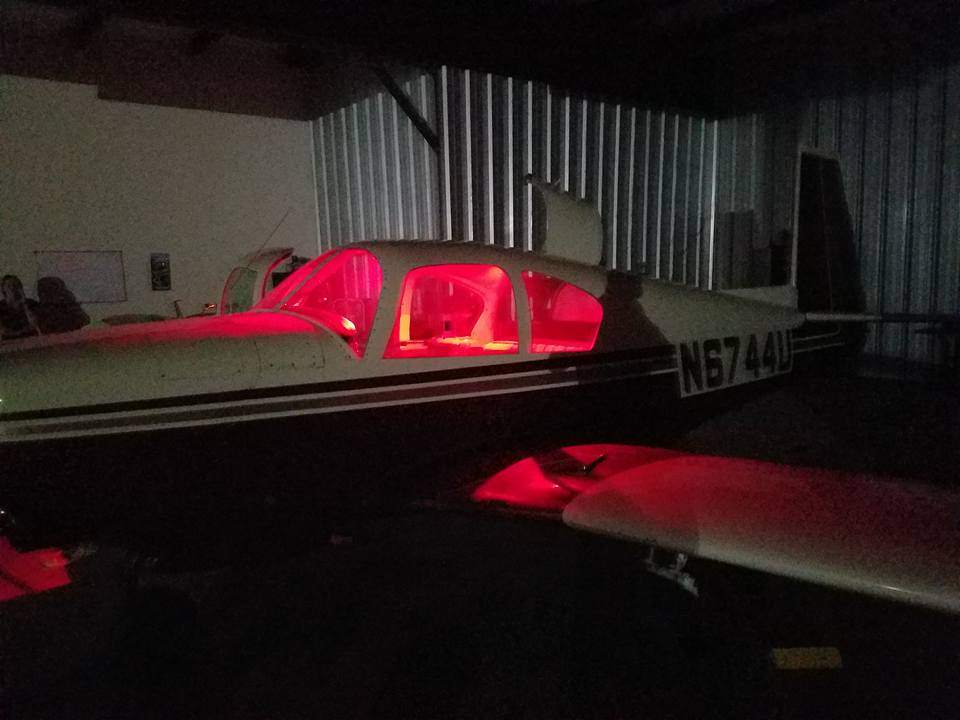
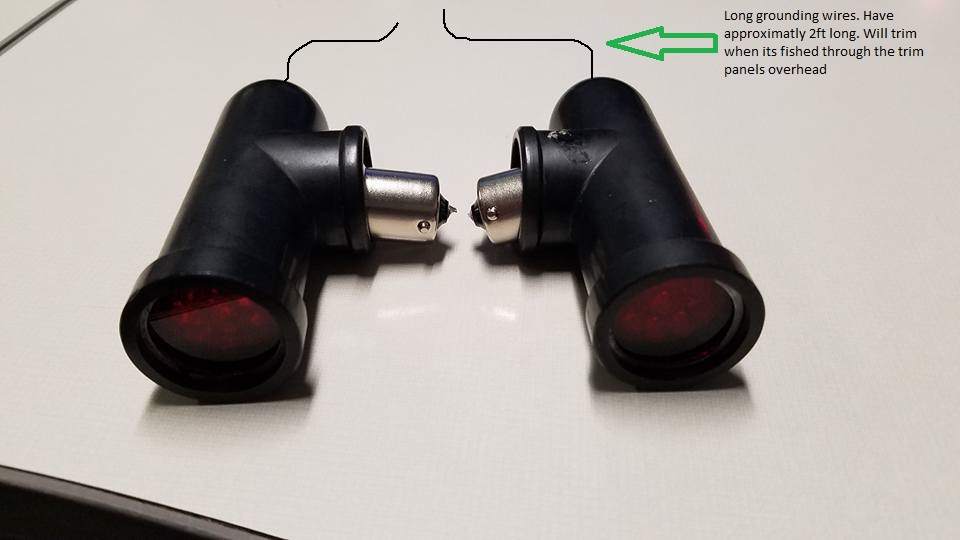
I did this a while ago but seem to be getting a lot of private messages on finding it, so I've consolidated the pictures and will be making a "how-to" in its own thread which can be searched. This is a purely informational post about the possibilities of LEDs and is tested on a grounded aircraft and is no way airworthy pending your IA, local FAA DAR, or 337 modification. This requires rewiring and removal of the old overhead rheostat that controls the lights. Approx time to complete: 2-4 hours. |Approx cost: $50 Parts needed: (I ordered my parts from SuperBrightLEDs.com, but some of these have since gone out of stock. You will need to source them elsewhere) Note: The wiring layout in these pictures is incorrect when I took them. I later rewired them. I have edited the photos that needed new wiring since taking them. Refer to the final wiring diagram at the bottom of this post. 2x BA15S Empty Bases (BA15S-EB) 2x BA15 1156 wired sockets (BA15S-SW) 2x BA15/1156 LEDs (67-R15) LED PWM Dimmer (Oznium makes a great product that is small enough to fit where the old one goes) Soldering Iron Solder Electrical tape Knife or another pointed object Wire strippers/dikes Thin (20+AWG) wiring approx 2 feet 1.)Pop the existing torpedo's off the stock lamps by gently pulling them off. Twist and remove the 1156 bulb. 2.) Using a knife, gently pry up one end of the retaining clip holding on the red lens. Remove the red lens. 3.) Turn the focusing ring counterclockwise until it stops. Using a pair of pliers, grip the twist knob and continue to turn counterclockwise. You will feel resistance, you will be ripping apart the solder holding it to the clip inside. *THIS WILL RESULT IN PERMANENT DESTRUCTION OF THE OEM FOCUSING LENS*. Once it is broken off, tap the insides out. 4.) Now that everything is disassembled, clean everything good. You'll have 50 years of crap over everything. 5.) Using the electrical tape, wrap it around the 1156 bulb about 8-10 times. Keep test fitting in the housing, it should slide back into the torpedo and fit snugly. 6.) Bend the two tabs of the wired sockets back about 85 degrees. You want a little bit of flare in them as they will press against the inside of the case to hold the fixture in place. 7.)Solder the positive 12v+ lead into the center electrode. Add some solder to the inside of the empty base and attach your 22AWG wire to that. Leave about 2 feet of dangling wire as we will need to fish through the overhead panel. Insert the soldered base into the torpedo, fishing it out through the side hole. Run the (-) wire out of the back of the torpedo. Slide the rest of the LED into the unit, and reinstall red lens and clip. Put the units back together and they should look something like this. I recommend having another 4-5 inches between the torpedo and the base socket. These were ultimately too short as you have to twist-lock the bases with the torpedo out of the way before you slide the torpedo back onto its mount Now for the hard part. (Again, please have an A&P handy for this if you are not versed in 12v applications. Of course, this is not a legal modification for flying aircraft and appropriate documentation and paperwork needs to be filed before flying). I don't have any pictures of this process but its simple once you see what I am talking about. You'll need to drop the overhead trim panel and find your old rheostat. Remove it but carefully identify which wires are which. You should have a positive and negative ship input, and one positive output (the factory map lights are grounded at the sockets. We cannot have that- they need to be grounded at the PWM hence the new wire). Remove the old rheostat and install the new one. Run factory wires into the INPUT terminals of your PWM. Run the factory output (+) wire into the appropriate terminal. Fish your 2 foot long ground wire through the steel roll cage and all the trim pieces, and then trim it down and attach to the PWM. Flick on the master, and with the PWM in the OFF position, nothing should happen. If the LEDs come on full brightness, they are prematurely grounding somewhere else. Turn the rotary dial on. It has a duty cycle of 5-100% variable and the LEDs should correspond. If this works, you have completed it. Put everything back and enjoy. (In the following pictures, I also changed out the cargo compartment dome light with a simple 3156 LED that replaces the old bulb. This is full-brightness output and can be dimmed by 95%). Any questions, feel free to PM me. -Alex


 1 point
 -
Anyone know of anywhere that might have hangar availability for this Saturday to Monday at Eagle County, Colorado? The FBO wants $165 per night, which seems a bit pricey. It's going to get very cold overnight so hopefully I can put it inside. Thanks John1 point
-
Summertime flying gave me a gain of 4 knots. Winter time flying saw a gain of 6 knots. I had the LASAR closure as the only mod to my airplane prior. Sent from my Pixel 2 XL using Tapatalk1 point
-
Everybody keeps talking about airspeeds and such. The stall vane is an angle of attack sensor. if the relative wind is below the plane of the tab it blows it up. If the wind is above the plane of the tab it blows it down. With the wheels on the ground, the angle of attack and airspeed are decoupled. When you rotate the plane for takeoff, you are raising the angle of attack above the stall angle of attack as evidenced by the fact the plane isn't flying yet. So the stall warning should sound. If you did a no flaps takeoff and just flew the plane off without rotating it, it probably wouldn't sound. The switch may have a weak or broken spring. There is a spring that holds the switch down requiring a certain wind speed to blow it up from the normal down position. This is what keeps it from going off all the time.1 point
-
Late to the conversation, but I recall from the RV forums that paint jobs could range in weight from 15-35 lbs. Since RV's generally have less surface area to cover, figure maybe as much as 20-50 lbs for a Mooney depending on the paint job? The weight would also depend on the complexity and number of layers, so it seems theoretically possible there may have been a weight gain of 10-20 lbs. That probably would not account for 5 knots of speed. Just thinking out loud1 point
-
It doesn’t seem any color showed up... or all the color showed up depending on your point of view... White... -a-1 point
-
@Bob_Belville , I was talking to Lynn there at AGL about doing my rigging a while back.. He said, one of his past customer's planes was especially difficult to rig, so he weighed the plane to figure out the lateral weight balance and found that the right wing had something like 10 lbs more paint, so he had to add some lead to the left wing tip.1 point
-
I am surprised none of our polished aluminum "naked" brethren have said "that is why flying naked is better". In an earlier post in this thread Bob said he went strait from David's to paint.1 point
-
JPI is in crazy “engine is exploding mode” blinking red on the display and the alert remote led. This happens on every takeoff unless you have the FF set on cylinder destruction flow. Oh and the wonderful fact that they set the rpm redline at 2700. So if you set the prop at 2700 you get the Christmas light show again. Does JPI care? NOPE! What the JPI/stc needs to have is put some breathing room between the proper adjustment and an emergency (out of bounds) level. They might as well set the cht redline at 381 degrees and have the unit alert the FAA if you recklessly blow that limit as well...1 point
-
Lets say the MP decrease by removing your ram air was on the top end maybe even .3" can that equate for a knot or two? Then add the difference in the ARI mod vs your new mod could that be a knot or so? Then add small weight balance change, small airflow changes with paint, small rigging differences from before and after paint another knot or two? What I am suggesting (based on everything you have looked at already and how well you know your plane) is that it is not one change that has potentially impacted your speed.1 point
-
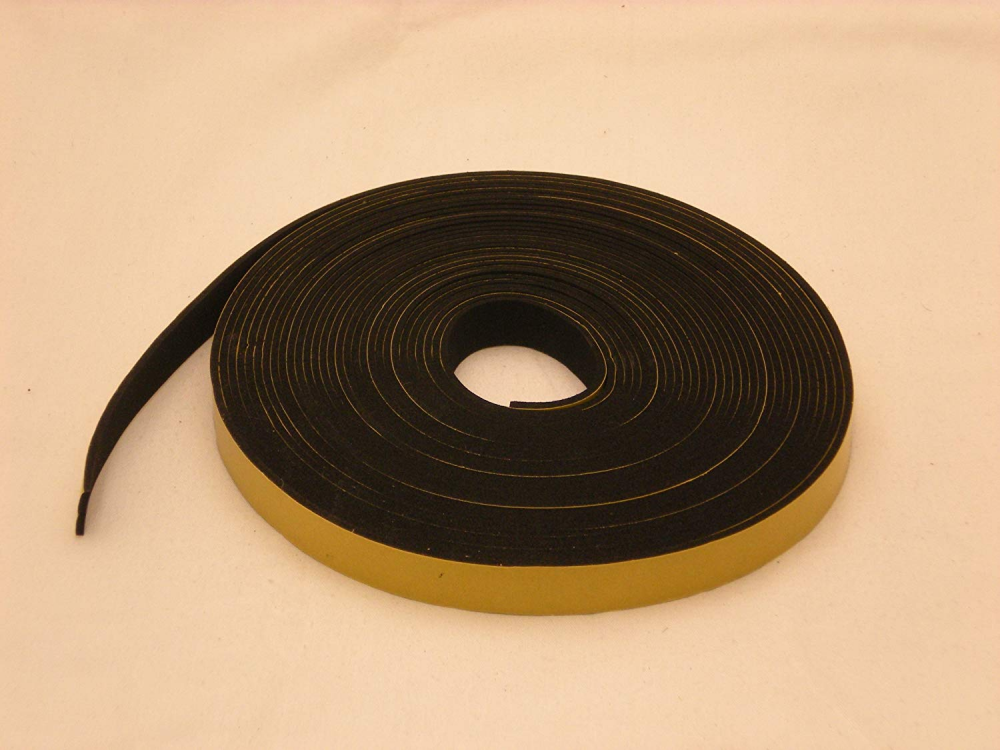
https://www.amazon.com/NEOPRENE-RUBBER-Self-Adhesive-Strip/dp/B00EE9IZNW?SubscriptionId=AKIAILSHYYTFIVPWUY6Q&tag=duckduckgo-ffnt-20&linkCode=xm2&camp=2025&creative=165953&creativeASIN=B00EE9IZNW use something like this
 1 point
 -
Only thing to add is JPI is not flexible on the max FF, I don’t even think they will use 27.2 because that value is not stated on the proper stc page. Also the fuel levels, both the fuel totalizer and resistance levels, can be adjusted by the end user/mechanic not set by JPI.1 point
-
Some probes (EGT, CHT included) are common between 700 & 900.1 point
-
Lots of ideas regarding friction being covered... The other half of the speed equation is power generation... Anything standing out related to changes in MP, rpm, FF, engine airflow/filter... Any changes in raw EGT numbers since the new cowl / air intake was installed? PP guesses only, hoping to ignite an idea in somebody else’s mind maybe... Best regards, -a-1 point
-
I can stop by the shop and communicate with Troy regularly if you need me to.1 point
-
Put a sheet of saran wrap on one side of the RTV and this will allow removal and reuse of the seal.1 point
-
Aka a "bridge". I think this is closest to what Brice is asking for, if I understand correctly.1 point
-
You know - dawling - its now how you feel, its how you wrook. And you wrook MAAAVELOUS!1 point
-
When your airplane was disassembled for paint and re-assembled could the rigging have been effected? How is the rigging currently? Does the ball sit centered when you are in level flight?1 point
-
No change before / after calibration, but I've not checked during taxi withnthe door open.1 point
-
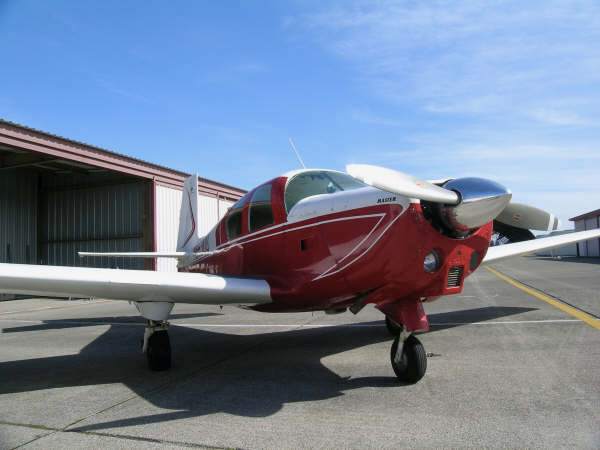
When I was young I had a blue Mooney. Now that I’m grown up I have a red Mooney. Just a random thought on election night....1 point
-
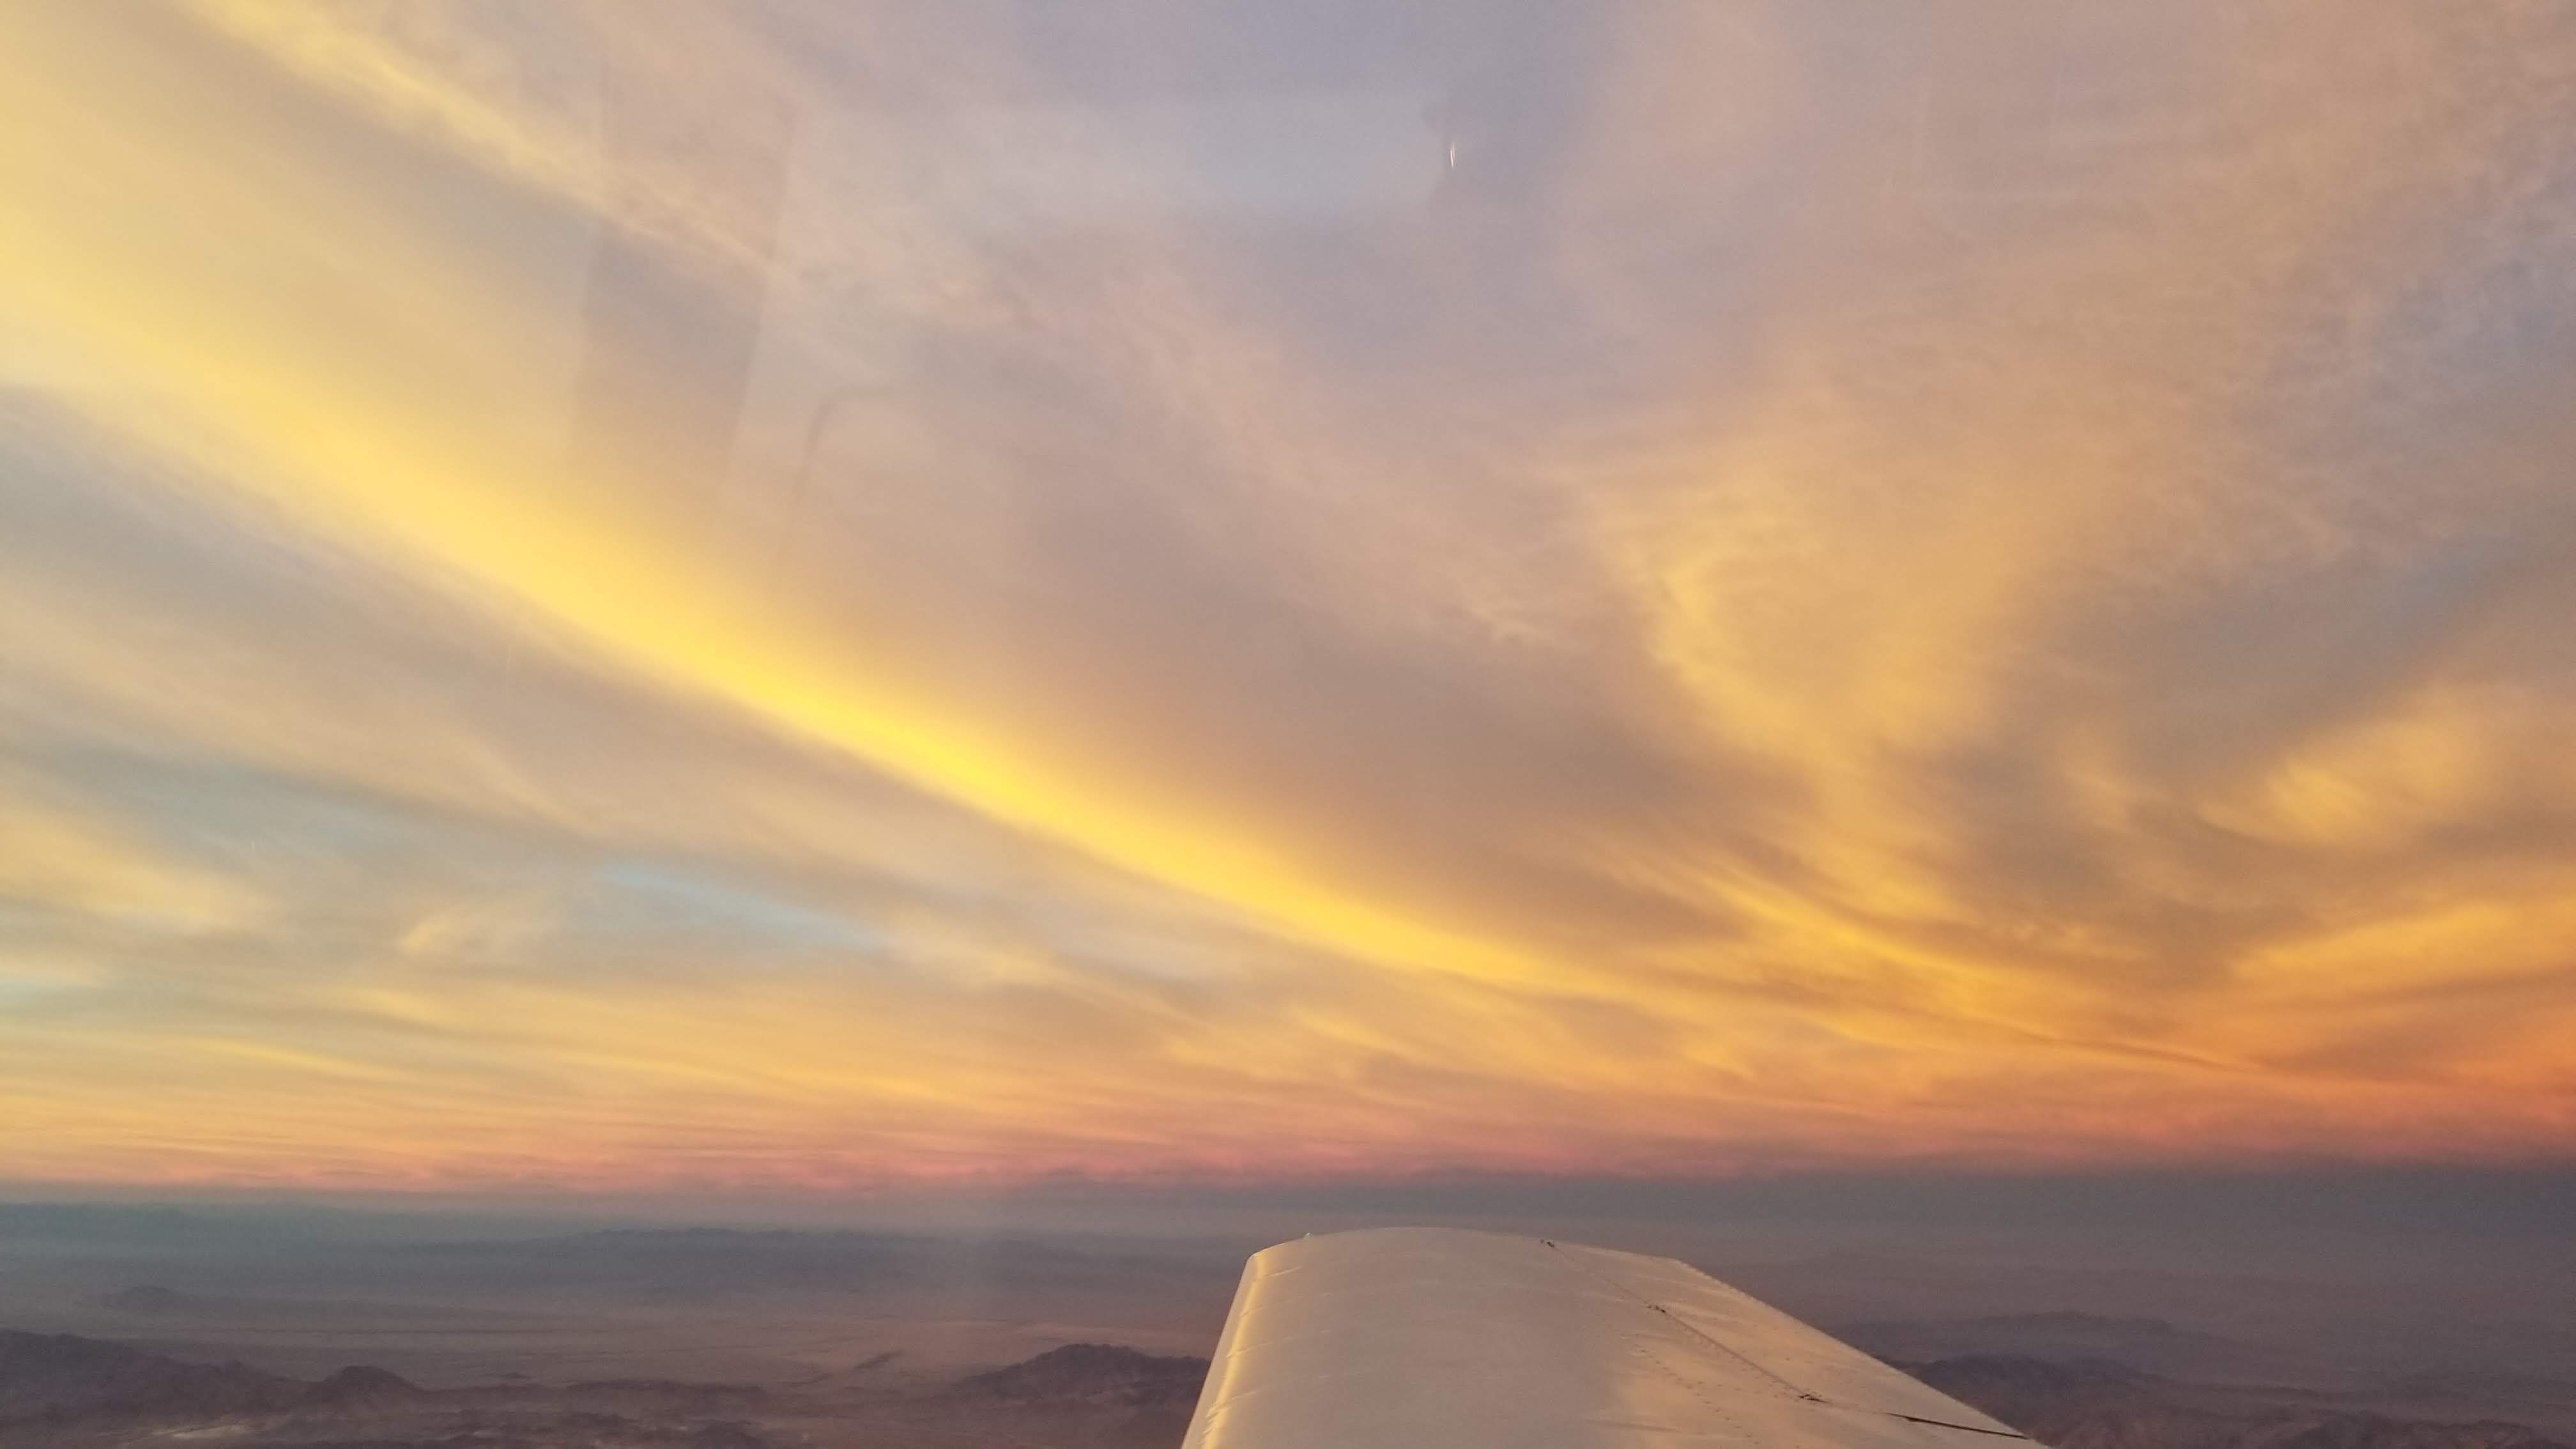
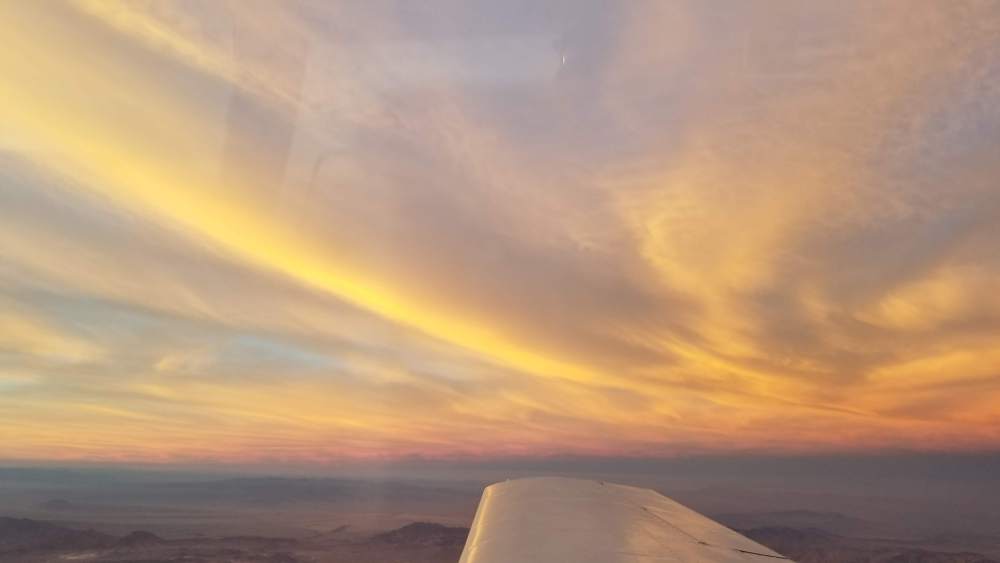
A great flight back from Phoenix to SoCal today. The sunset lasted for about an hour, it was amazing. Here's a few pictures, more over on my blog. I think I took about 40 pictures, every time I thought it was going to start fading away it just got better. https://intothesky.us/2018/11/04/sunset/

 1 point
 -
We went out for breakfast this morning to Keystone Airpark where there is a bit of history hiding away unless you know how to look for it... There is a small collection of NASA stuff in storage by a small company trying to raise funds for a museum. Its called Dreams of Flight here in Keystone Heights, FL. First stop on the tour was a backstop used by P-47 crews during WW2 when the airfield was builtt- they would use to aim divergence on their guns. The airport tried to get it removed but OSHA came by and did a soil sample and said "no way" with all the lead thats in that bunker. These are the wrenches used to bolt the Shuttle to the launch pad. ....and these are the bolts. Just 8 of them held the SRBs down, and used frangible explosive nuts to detatch at T-0. You can also see brand-new, never used spare window frames for the orbiter in the top of the photo. Consoles used during the Shuttle era: A used set of Michelin tires. Each set was used once and then removed. These came off Discovery during STS-105 in 2001. And here is the pricetag on only ONE of the ELEVEN nitrogen fuel tanks used in the orbiter Now I think this was THE COOLEST part of the tour. This is the front and rear pieces of the Shuttle Simulator. In these seats sat EVERY ASTRONAUT that ever flew a shuttle. Even the fated Columbia and Challenger crews. The little brown boxes, each of those contains one brand-new chute for the top of the SRBs. Never used, spares made and left abandoned by NASA. This big container? Steel and sealed simply bears the stenciled markings "GRUMMAN AEROSPACE CORP BETHPAGE, NY" and just under it: "P/N B91B30001-48 EA OUTBOARD ELEVON R.H" Here is the first airplane in the world to sport wingtips. NASA used this plane to do drag tests which later became norm for commercial airliners and jets All of this stuff was simply being tossed away by NASA. They got word, went down there with a convoy of trucks, and took is all home for free. They are hoping to raise money to build three hangars and display museum buildings to house off this stuff. The pictures above are only a taste of some of the stuff they have. We then left and went for lunch a few miles away at a friends airstrip for some good food: I then tried my hand at the spot landing contest. Other "opponents" were two 182s, a Comanche 250, 172, a RV-4, and two Aeronca Champs (which I think took 1st and 2nd place). I'm still awaiting the results but I think I came damned close. 45488960_2186189764956257_7767842224791879680_n.mp41 point
-
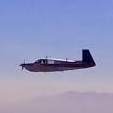
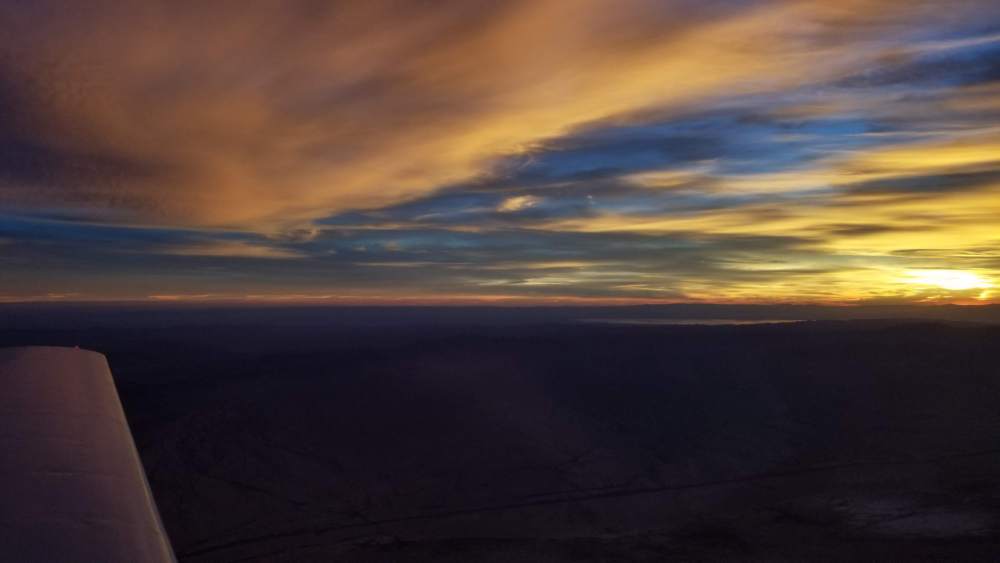
Flight home from work this evening.1 point
-
M20s do fine on some grass fields as long as the gopher holes are smaller than the nose wheel. -Robert1 point
-
15 years ago? I'm using those funny things to get mine today!1 point


.jpg.38f0195cf3a20e54be478783c4039636.jpg)
.jpg.6c5345cda69262bb6e0774d39abb3add.jpg)