Leaderboard


Popular Content
Showing content with the highest reputation on 11/28/2025 in all areas
-
I had hopped out so brakes weren’t an option (for me at least …). It was flat ground, but there was a strong wind and the rear hinged canopy was up like a sail (F-15). It was on a run up area in Kuwait. The plane was rolling backwards towards the dirt. My whole piloting life flashed through my mind and I pictured my impending death at my commanders hands when his jet ended up in the sand. I would have thrown my body under a tire to stop it if I thought it would work. Thank god we bombed the crap out of that place in the Gulf War and the concrete debris was still there 15 years later. I ran off the ramp, grabbed a huge piece of 3” thick concrete debris with the Herculean strength of desperation and got it under a rear tire just before it would have gone off the pavement. I braced it with my whole body. The tire partially rolled up, then settled back down. Most of the back of the jet was hanging over the edge as if I had backed it in. My wso was still in his seat the whole time yelling that it was rolling. It wasn’t until after that we both remembered he has an emergency accumulator brake handle right in front of him. There but for the grace of god go I…4 points
-
Sorry for replying so late. I need to check this site more often. I just got off the phone with Thomas from CAV. My usual contact Jeff has been away on break . They are usually very responsive. Im sure you know the phone number: +19137385390 but here are the emails that I have been using to communicate with them customerservice@cav-systems.com techsupport@cav-systems.com2 points
-
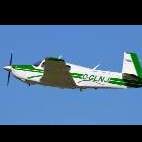
Earlier this evening, after crossing the Mississipi River on a flight from Santa Fe, New Mexico, to Tuscaloosa, Alabama. Average g.s. at 11,500.... 194 knots! Hit 214 knots g.s. at top of descent. A new personal best.
 2 points
 -
I don’t understand why there isn’t tribal knowledge about an alternative option from the former California shop. It’s just a basic motor. There are thousands of motors across airframes and would assume they are typically refurbished with off the shelf parts. Are there no more electric motor shops in America? Is it more complicated than I assume?2 points
-
Is this a motor for a gear actuator or a fuel pump? Aeromotors lists capability for Dukes fuel pumps but not actuators. Wouldn't hurt to call. Do you know what is wrong with the motor?2 points
-
That looks very compact. I like the little right-angle connector for audio. The copper color almost look like RF antenna lead clip-ons... I had been using this combination, though I'd not been plugging in the audio adapter to power while in flight, so it ends up being the proverbial "dongle": https://www.amazon.com/dp/B0DMF9C5LH?th=1 The very compact power adapter I use (low-profile): https://www.amazon.com/dp/B0BLYX8SHZ2 points
-
Once back in my PPL days One operator I flew for we did what could be called critical flying, even that being said the pilot was ALWAYS to do a quick one around before shutting the door, also kinda a last boots up first boots down type deal. If you’re feel yourself in a rush, STOP, regroup and continue That’s how most of these mistakes happen2 points
-
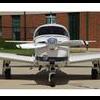
She's a trooper! The fun part was directional control after touchdown, as the rudder lost effectiveness in the much-stronger-than-forecast crosswind. The tractor made me say bad things and float a bit then bounce, but I was still stopped in about 2000' to taxi in for parking. She will still fly home with me . . . I just enjoy the flying, she enjoys the quick transportation. This time, we both enjoyed not having to drive across Atlanta on the two busiest travel days of the year, Thanksgiving Wednesday and Sunday.2 points
-
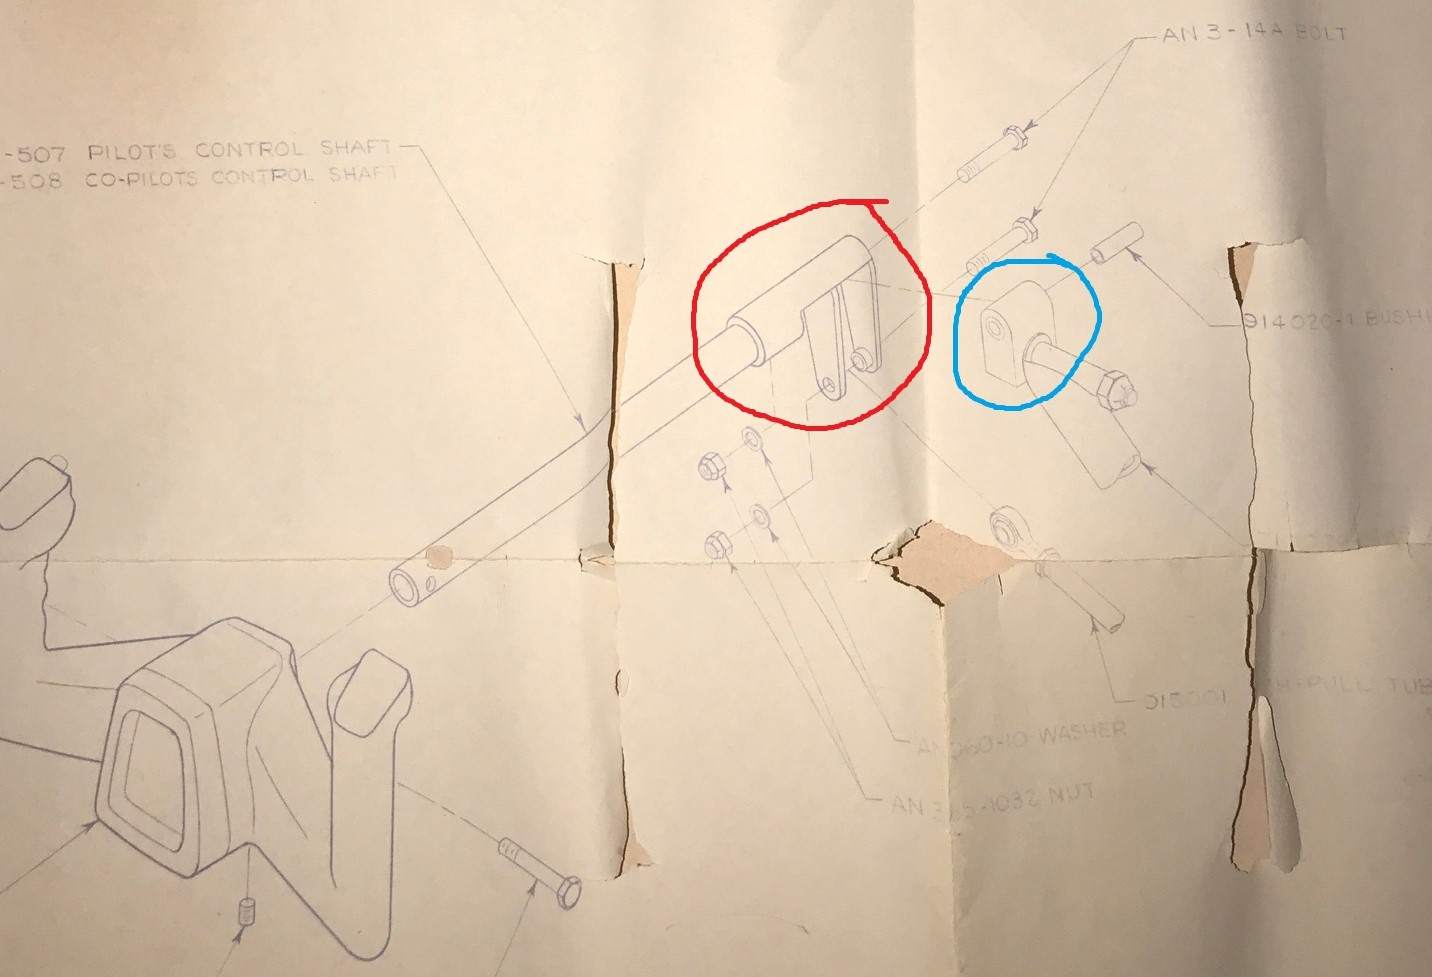
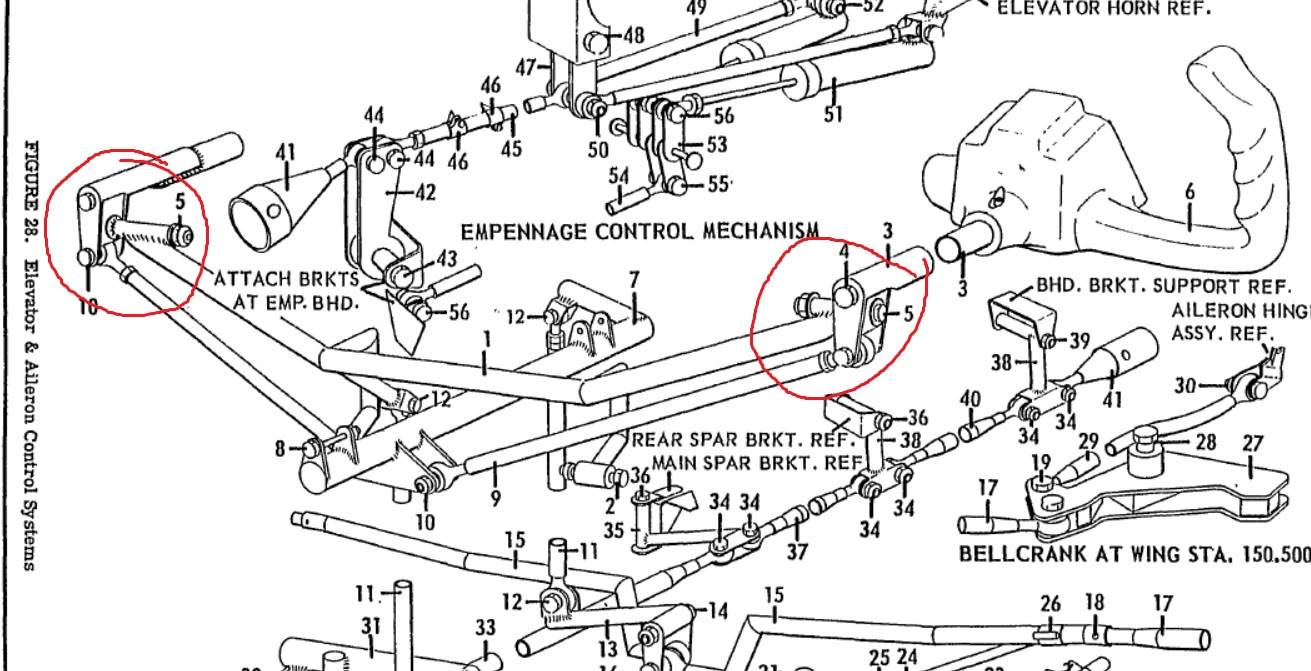
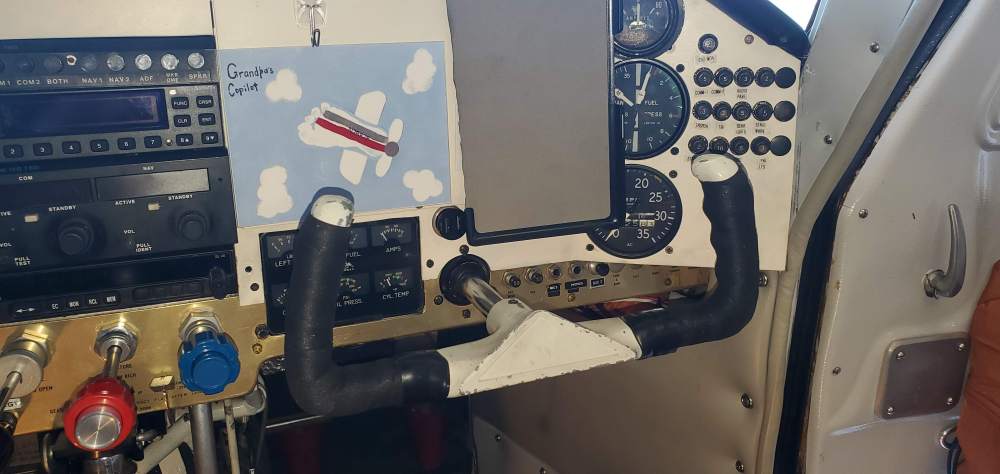
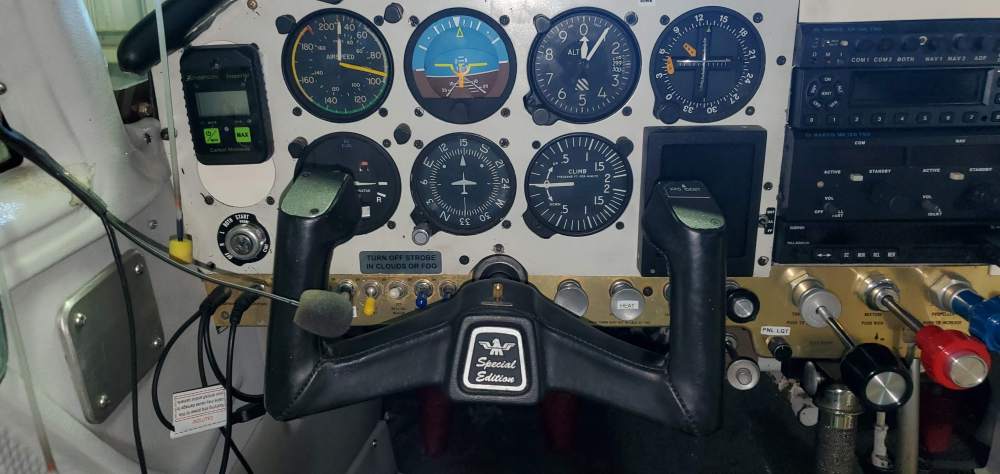
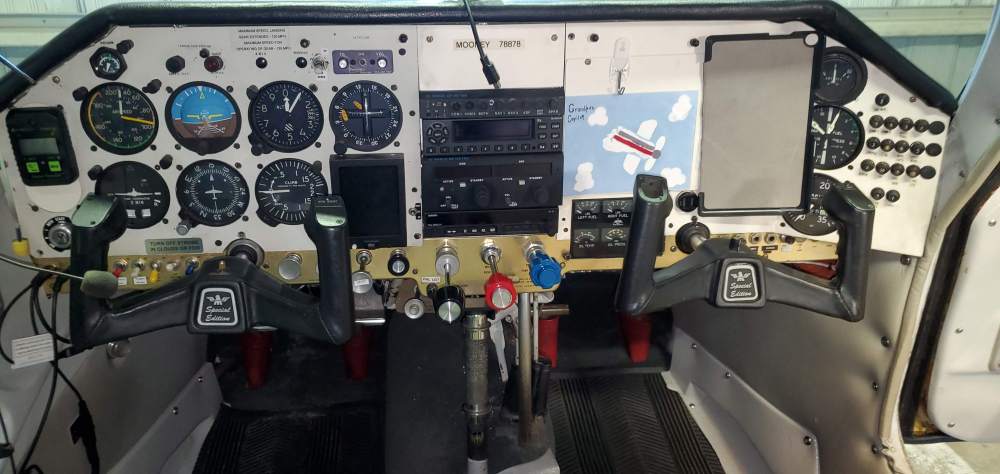
If you have a vintage Mooney you know about AD 77-17-04 which requires removing the control wheels every 500 hours and inspecting the shafts for cracks with dye penetrant. All M20 control shafts are the same outside diameter. People talk about the newer planes having a thicker shaft, the difference is in the thickness of the wall of the shafts, with the older M20's at 0.04 and the newer M20's at 0.06. The difference in the thickness of the shafts obviously results in a smaller inside diameter. The AD does not apply to the thicker shafts. Every now and then a set of control wheels comes up for sale, offering the opportunity to upgrade your old control wheels and remove the AD. I recently was able to buy a set of control wheels, shafts, and the yoke from a 1996 M20R to put in my M20D. If you have a chance to acquire a set, I highly recommend doing so. I did not think there was much of a difference, and mine actually feel pretty good with the bike tape on them, but once I wrapped my hand around the newer style wrapped in leather I wish I had done it a few hundred hours of flying ago. I want to share a few things that you will need to know if making the swap. The new control wheels mount to the shafts with a bolt going horizontally from 9 o'clock to 3 o'clock. The old control wheels mount to the shafts with a bolt going vertically from 12 o'clock to 6 o'clock. To replace the control wheels and use your old shafts would require drilling horizontal holes in the shafts. Even if you could find an IA willing to sign off on it I feel it would be extremely foolish to add a hole to a shaft that already has an AD to inspect for cracks... Depending on the shafts that you are buying you will likely have to also replace the yoke. The control shafts have a half circle piece on the end where they attach to the yoke. This piece is what allows the shaft to rotate and provides the stops so that it can't rotate too far. The ones coming off my plane have this half-circle piece on top, centered at the 12 o'clock position. On some models Mooney has the shafts that still had this on top of the shaft, and at one point offered these shafts for sale when upgrading control wheels. I do not believe it is possible to get them from Mooney anymore, and it is likely you will have to replace the yoke. On the ones that I got off the M20R these are rotated 90 degrees with the LH side centered at 9 o'clock and the RH side centered at 3 o'clock. If your new shafts are like that you will have to replace the yoke. In this drawing that Mooney put out for replacing the control wheels and shafts you can see circled in red the end of the shaft and circled in blue the piece on the end of the yoke that mounts vertically into the shaft. You can also see it in the parts catalog drawing circled here in red. I had hopes that I would be able to just remove the ends off my yoke and replace them with the ends off the new yoke, that will not work. The ends are held to the old yoke with a bolt through the end, then through the yoke, and a lock nut on the end of the bolt. The new ends have the bolt integrated into them and are held on with a castle nut and cotter pin. The diameter of the bolt on the new ones is too big to fit in the old yoke. You can see the differences in this video. Having established the requirement to replace the yoke, here are a few tips for the rest of the project. Remove the front seats, you are going to be spending a lot of time on your back under the panel, it's much easier without the front seats in the plane. There is not much to replacing the yoke (aside from contorting yourself and laying on your back under the panel) You will have already removed the control wheels and shafts so there are only the two bolts holding the yoke to the tubular frame and the one holding the push rod going to the elevators. Once you remove those you can remove the yoke and put the new one in. (The one off the M20R has a big bob-weight on it. The M20D does not need it so I removed the weight.) You do not have to replace the pheonolic blocks that the shafts go through. In fact in my case the new ones won't even mount to my panel. On my plane they are held in place with two screws at the bottom (about 4 and 7 o'clock) and one at the top (at 12 o'clock). The new blocks only have two at the bottom that don't line up with the holes. I had removed mine and had to reinstall which was a waste of time. Take a look at yours in your plane and the new ones before removing them. After you have the shafts in, the wheels on, and the shafts attached to the yoke you need to connect the push-rods that go to the ailerons. You will most likely have to adjust the length of them by turning the end to make them shorter so that the wheels are level. You will need to take the slack out of the ailerons before doing this. We used the plane jacks with a piece of wood on them under the ailerons to lift them (lightly) so that they sit even with the flaps. After that you can place a straight edge or level across the shafts and line up the wheels with it. Simply slide the bolt through the shaft and the aileron push-rod (no need to put the nut on yet) and then climb back out from under the panel and see where they are at. Go slow, a half turn at a time of the rod end, put the bolt back through and take another look. Continue to do this until you have them level. Once they are level put the lock nut on and snug them down. Make sure you work the new wheels and shafts through their full range of travel to ensure that they do not get caught up on or rub any wiring or the ducts for your vent/heat and defrost. I did this while laying on my back under the panel to make sure nothing was rubbing or binding. Because they are M20 parts your IA "should" sign it off as a minor change in your log book. Mine listed the part numbers that were replaced in the log book entry. (Disclaimer - I am not an AP nor an IA but I did work with mine on this project and this is the process we went through) I am looking forward to now having a push to talk on the RH control wheel and flying with the new control wheels. There really is no comparing the way they feel in your hand compared to the old ones. Old control wheel (wrapped with bike tape to make the summers less sweaty and winters less cold...) New control wheels (Need to make a plate to cover the top of the left side of the right weel)


 1 point
 -
I pull a fair amount down through the calipers.. with a mity mite. Then with an oil can 25 pumps up from the caliper. Refill and then 25 more. The second person watching the oil reservoir is helpful. sometimes another 25 pumps is needed after checking the pedal. There is one thread about creating a remote mount reservoir on the fire wall. The Ovations have the reservoir mounted about mid way up on the baggage wall in the comm bay. This should be above the parking brake.1 point
-
New production gear actuators that didn’t get used. Sent from my iPhone using Tapatalk1 point
-
The KFC225 has two lines on the display. The top line indicates the present mode, the lower line shows upcoming mode(s) that are armed. The simplest way to use the APR mode is probably to use autopilot in HDG to intercept the localizer and then to switch to the APR mode when the localizer begins to move. The GS Arm message should appear on the lower line of the KFC225 display. When the glideslope is intercepted and the needle centers the KFC225 display should show GS on the upper line indicating the AP has captured the GS. If your 430W is in GPS tracking and you switch it to VLOC to fly an ILS the KFC225 cancels the active mode and reverts to ROL function. Select VLOC on the 430W first and then set the KFC225. If the approach is RNAV GPS then you leave the 430W set to GPS for the entire approach. if you have a Garmin 650/750 instead of the 430//530 then there is an extra step: A message prompt will appear on the navigator, and you must open the message page and then press the “activate approach guidance” soft key before you can set the KFC225 to APR mode. I’m not sure if the KFC225 can be in VS mode to a preset altitude below the GS intercept altitude and simultaneously be armed in APR mode. I suspect not. in any case—If you don’t see the “GS Arm” message on the lower line line of the KFC225 then it will not capture the GS.1 point
-
If it's just the motor, you can take it to any electric motor shop willing to work on it. An A&P just needs to "supervise", which isn't really defined anywhere.1 point
-
Just have to call Lasar back and ask how many more individuals they need before running a batch, they initially said they need 50, figure with the MSCs and individuals wanting/needing them that they would have 50 by now.1 point
-
Chances are, when you torque it down it's going to protrude past the nut and apply even more pressure against the window. Really the only alternative would be to rotate the collar to get a little more space between the nut and window and grind down the end of the nut so it doesn't protrude past the bolt..1 point
-
I bought my F with a RayJay mostly just because I wanted to. It is about 10-20% practical. I fly KTOR->KLZU or KJMS->KLZU couple times a year. I can make that non-stop some times due to tail wind (80+ knots kind of thing) coupled with TAS (160-170kts at FL190). I have also beat headwinds by going up. I came out of NW Indiana once and went to FL250 and took 30 mins off my trip because 30KT direct headwind flipped to a 30KT direct tailwind (or something like that). It has helped me on occasion top some weather. You can climb over a FL430 cell but they don't get that wide, if you get up around FL190 or so you can see them and navigate around them in VMC. It will keep about a 500FPM climb all the way up to FL210 it gets slower in the climb because you have to keep reducing pitch to keep up cooling. CHT becomes a challenge. You will need to run full cowl flaps open and 1-2GPH richer than normal. I have once or twice over the years seen the mags get funky (non-pressurized) but nothing crazy. The controls get mushy at FL210, I have had mine to FL250. FL190-210 is where it generally likes to be. Honestly from a logical perspective it probably isn't that useful if you are flat lander. You need to really be going far (to make up for the time to climb) and have a good tail wind to make it worthwhile. When it works out though you can hit 260KTS ground speed. If you live with mountains it probably is more useful (KTOR is 5000' so I use it on take off as example and no issue being at MTOW).1 point
-
Doh, of course both engines would have been shut down.1 point
-
Well I guess it's ragsf15e and not rollerf15e, so you got a pass...1 point
-
Back in the mid 90's, my plane was owned in a 4 owner partnership. One of the partners, being helpful during a pre-flight check, noticed the brake fluid reservoir was low and decided to add fluid to the reservoir. He added DOT-3 automotive brake fluid to the existing 5606 without telling the other partners or logging anything.... On a later flight, one of the other partners had one side of the brakes fail during landing. Luckily, he kept it on the runway. They told me it caused the brake fluid and system to gum up. After they had the brake system flushed, repaired and bled, it was the final straw that caused the partnership to break up. They put the plane up for sale.1 point
-
Theres a lot of incense burning, balancing acts, low muttering, and some downright voodoo to get the last few bubbles. Id use google to search “mooneyspace brake bleeding” and sit down to read with a big cup of coffee.1 point
-
First of all it was an Airbus A330. Second, I had just blocked in from crossing the North Atlantic soooooo, the accumulator was charged, really charged.1 point
-
@PT20J meant to say Royco 782. My experience with 5606 mirrors that of @PT20J. 5606 degrades with use over time. How long will depend on use and environment. I have a large can of 5606 in my hangar that dates back to ‘04. It still looks fine. However in the past, fluid from that same can has shown to be slightly discolored at the caliper after 5-6 years in service. When I rebuilt my hydraulic flap actuator for the first time back in the early oughts, there was gelled fluid in the system. It could have been 35 years old. I switched to 782 about 10 years ago. Both the flaps and the brakes are a challenge to bleed, I want to minimize the need to open up those systems. For that reason, I want the most durable fluid I can get.1 point
-
Thanks, Lance. That answers the question perfectly and I think I’ll bid on that unit for sale.1 point
-
Of course, the hydraulic system needs pressure. In my ancient history… the -135 left hydraulic system has an aux pump that runs off the battery. That will charge the brake accumulator giving you about 3 (no more) brake applications. When we had to tow an airplane, the brake rider switched the battery to emergency and ran the left aux pump to charge the brake accumulator (in the left wheel well) to 1,000 psi minimum. It was a pretty weak pump, only 0.7 gph. If it wouldn’t pressurize, you had to drag chocks to tow the jet. Nobody wanted to do that. I had 17 years on the -135, Offutt, Mather, and Beale. It’s a good jet. Inefficient by today’s standards, but those were some of the best years of my tenure.1 point
-
Too bad you have to go home some day…..1 point
-
You should re-read what GeeBee wrote. He said he stopped the airplane using accumulator brake pressure. The transport category airplanes I’ve flown had hydraulic accumulators which were good for at least a few applications, and certainly enough to engage the parking brake.1 point
-
As @Jackk said, there are normal pedals in both seats, but they completely stop working as soon as you shut down both engines as you lose hydraulic pressure. There is an emergency hydraulic accumulator that nobody ever uses (or probably practices) that can give you some pressure for a short time. Loss of brakes and the dumping of unburned fuel already at the engine is why chocks are always in and the crew chief is back out front before he/she signals to shutdown. Unfortunately, we had been flying all over the persian gulf for like 6.5 hours of vul time and then ended up diverting (twice) due to a massive sandstorm. By the time we landed, we were at a marine base with no fixed wing planes and no crew chiefs. I was the 6 ship lead, so I parked first and (being an idiot, and exhausted) shutdown. I got out, stretched, took off my g suit and reached up to hang in on the ladder as I realized the ladder was moving backwards and picking up speed! So at least my entire 6 ship was there to see my buffunery. Not one of them ever mentioned it to anyone after dinner that night in the marine chow hall.1 point
-
The Boeing and other swept wing I flew both needed engine power or electric to pressurize the brakes (amongst other things) I’d be surprised if any transport category as normal toe brakes1 point
-
The factory. Sent from my iPhone using Tapatalk1 point
-
Happy Thanksgiving!1 point
-
Yes. The newer spec is MIL-PRF-5606H, but it's the same thing. If you are changing the brake fluid, you might consider Royco 782. It's a newer synthetic MIL-PRF-83282 fluid that won't congeal with age like 5606 which is a mineral oil. It is fully compatible with 5606, so you don't have to flush the system.1 point
-
When I extracted the 56 Cessna I had, the fuel in it was 10 years old. It started right up with it. It was very blue. A lot of the avgas had evaporated and concentrated the blue dye. Probably concentrated the TEL too. Avgas is almost pure alkylate. If it evaporates you just get less of it, it doesn’t change properties. Car gas, on the other hand is a witches brew of different stuff with very different volatility. So, when it evaporates, it does so very unevenly. The most volatile stuff goes first. So it changes properties rather quickly. Jet fuel will oxidize and form gum over time. When I was working on cruise missile fueling systems, they measured the gum content of their fuel storage tanks every day.1 point
-
I have one of the Commander docking stations for updating my KLN. The base stations / power supply are the same for all units, they change the top cage to fit the unit you have. There are two connectors on mine, a data connector and a power connector. I took them apart, and honestly, if you're handy with a soldering iron you could make your own if you have a DC power supply for the unit. Download the installation guides for your units and have a look at the pinouts to see how many wires you need. The Bendix King stuff I have, has a special "take home" pin that needs to be grounded so the unit knows it's in "practice / update" mode and not in an actual aircraft, so it won't give errors for no GPS position, etc. With that grounded, it pretty much ignores all the inputs and just needs a power/gnd. The data cable is totally seperate, but is just a DB15 cable with a couple wires for RS232 in/out that I run to my computer. Honestly, I like having the heavy chassis to hold the unit on my desk when I'm doing an update, but they are expensive. Up to you if you want to spend the money, but it's nothing you can't fab yourself in an afternoon if you don't mind a more "temporary" setup for updating.1 point
-
Jack I think you'd find fault with anything1 point
-
Meh - tons of anecdotes for glitches and failures with both modern Garmin and Aspen stuff, some having durable software fixes. The big red Xs on the original Aspens once airspeed input is lost was a troubling vulnerability but was addressed in the Max upgrade. There is no objective comparative data on pfd reliability I'm aware of here, only the passions of individuals with different experiences and biases.1 point
-
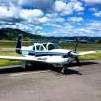
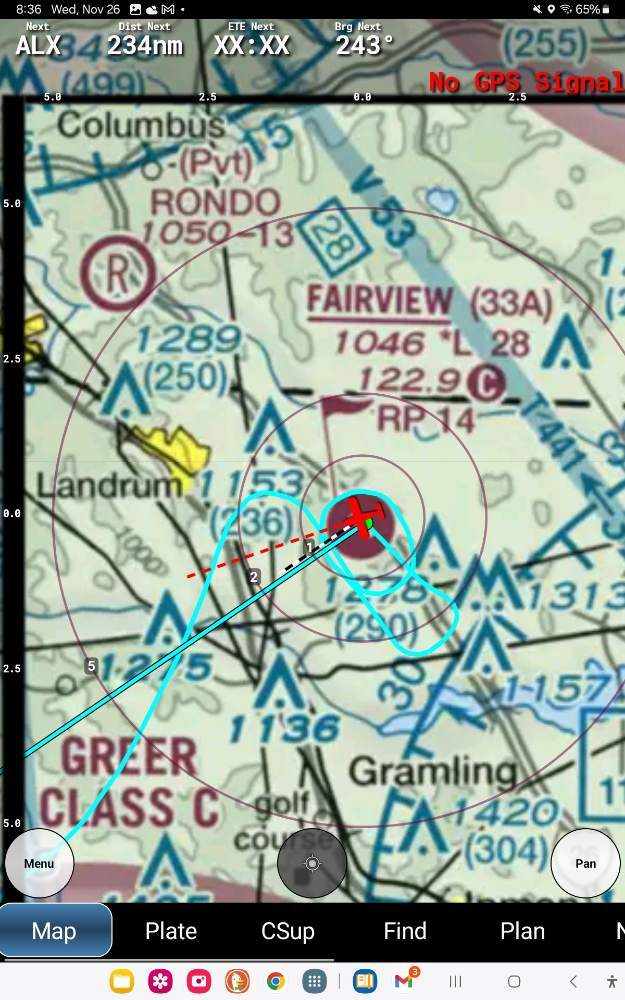
It was a beautiful day to fly in Sweet Home today, if you were heading E to NE. Over the larger hills it got a little bumpy, and landing with these crosswinds was "sporty" in all the wrong ways. Near home: Later on, loving thise tailwinds in my C: And the hills, with small mountain wave and turbulence in the leeside downdrafts: Took two tries to land, notice how far the crosswind blew me on the first try, so I went around and had a nice 2-mile final, and as I was coming over the trees, an idiot in a road grader pulled across the near end of the runway (2770 x 30) (they're working around the airport). No photos or videos, I was too busy and my wife was holding on too hard. Yee haa!!


 1 point
 -
It needs to be installed properly, I have an electro air on my plane and I have a BX 1200 magneto, but it’s very marginally better than the 1200 Bendix magneto. It does run warmer, it doesn’t start or any faster nor idle any better. I don’t really get the dual installation. It’s probably $9000 by the time it’s completely installed with all the labor, and then you have to have a separate battery pack, and I see the small benefit with one of these, but two of them there’s nothing additional. And you’re replacing a pretty robust and reliable, dual magneto for something that’s way more complex and although it doesn’t have any single failure points, like the Bendix dual magneto does, it can still leave you stranded a lot easier and probably more likely. I’m not sure how long that backup battery lasts, but when that goes dead, the engine stops running. I kinda like the idea of something that makes its own electricity.1 point
-
Buy a skin wedge from ATS and shove it in between the windows and skin. It won’t hurt the skin and probably the windows. Work your way around the windows. They will eventually peel off. They are sealed with tank sealant. It is tough stuff.1 point
-
@Smroot Looks like you have the KS17X series of servos. They are different from the more common KS27X series of servos. They do not have separate mount plats that the servo bolts to. The servo slip clutch and mount are all part of the servo assembly. They can be a bigger pain to remove from the aircraft due to it being a complete assembly. Also, parts are hard to get for theses servos. Make sure whoever is working on the servo knows how to service the units. Attached is the IM for reference. MOONEY M20J M20K INSTALL 006-00249-0000_13.pdf1 point
-
Up on top today, with Mt. Assiniboine poking through at 11,765’.
 1 point
 -
@Patrick Horan just got great service from them.1 point
-
Hello all, After a rough couple months of spam-bot invasions I have decided to make some critical changes to the way new users to the community are validated and how Supporter level memberships work. Here are the key changes: When a new account is created here it will be placed in a group called Unverified Members. This group can browse the site but cannot create any new content. To upgrade this account to a Verified Member you have two options: a) pay a $2 fee for instant validation which is good for the life of the account or b) contact me @mooniac58 with a picture/scan of your valid ID to prove you are who you say you are. The old manual $10 minimum donation for upgrade to Supporter level has been replaced with a $25/year automatic subscription system that will renew every year on its own unless you cancel it. No more waiting for me manually upgrade your account, etc. Those that purchase the $2 instant validation will get a $2 credit towards their first year of Supporter level access...so $23 for the first year and $25 thereafter. Generic Donations: Separate from the membership plans, users can still donate arbitrary amounts to support the site using the new donations page. Those that donated prior to today with the old system will continue to have Supporter access until 12 months from your last donation as long as that was $10 or more. These are the current membership levels for members: Unverified Members - New accounts, can browse site, cannot create content or message others. Verified Members - Either paid the $2 fee or proved in another way that they are a real person. Can post new content but not in classified forums. Limited to 200MB total storage for attachments, photos and other files. Supporter Members - Signed up for $25/year subscription. Do not see advertisements on site. Able to post non-commercial topics on the classified forums. Storage limit of 1GB. Sponsor Members - These accounts have paid a fee to have a limited number of commercial posts on the forums (usually 1 per month limit). Some final notes: While I am confident new spam-bots are not being registered on the site, I am quite sure that they have dormant accounts that were created in the past that still exist undetected. For this reason we have and will see brief uprisings where they rise up and make a bunch of spam posts. We will ban each of these as they occur and wipe the content. I don't expect much of this and the past few days have been clear skies here. If you created an account prior to August 5, 2025 and did the normal email based activation then you are in the Verified Member group. No one was downgraded during this process and you don't need to do anything to validate your account. Please do not do the $2 validation process (I am still working on hiding this option for everyone except unvalidated accounts in the site). I will be making small changes here and there to try and make it more clear how new users validate their accounts. For now I hope newly registered members find their way to this topic to get the instructions. Eventually I hope to figure out how to customize the site more to guide new members through the process better. And lastly a big thanks to everyone who has supported this community over the past 17 years! Craig1 point