Two Oh One Posted August 2, 2015 Report Share Posted August 2, 2015 Howdy folks, I've been looking for a description or write-up on the mods you can do to a J cowl to keep it from lifting up in flight. I've searched the forums here and the internet and haven't been able to find it, but I know I've seen it somewhere.. Can anybody point me in the right direction? My A&P went through a lot of effort shimming my newly overhauled engine so that it's all properly aligned, but the cowl lifts every time I fly and then things are slightly out of whack again, especially the ram air inlet. '77 201 with about 1870 TTAF. Thanks! Quote Link to comment Share on other sites More sharing options...
Piloto Posted August 2, 2015 Report Share Posted August 2, 2015 I had the same problem and solved this way. The cowl lift up because of the gap on top between the top cowling edge and the edge of the skin. I filled the gap by placing a #20 gauge insulated white wire along the perimeter of the skin were the cowl flap seat. I glued the wire to the surface with white silicon glue. Since the white wire matches the white paint is not noticeable. It works pretty well. José Quote Link to comment Share on other sites More sharing options...
Guest Posted August 2, 2015 Report Share Posted August 2, 2015 Howdy folks, I've been looking for a description or write-up on the mods you can do to a J cowl to keep it from lifting up in flight. I've searched the forums here and the internet and haven't been able to find it, but I know I've seen it somewhere.. Can anybody point me in the right direction? My A&P went through a lot of effort shimming my newly overhauled engine so that it's all properly aligned, but the cowl lifts every time I fly and then things are slightly out of whack again, especially the ram air inlet. '77 201 with about 1870 TTAF. Thanks! Call LASAR in California, they have a cheap and simple mod to correct this. Clarence Quote Link to comment Share on other sites More sharing options...
jetdriven Posted August 2, 2015 Report Share Posted August 2, 2015 the J cowl doesnt fit a lot of the airplanes very well. The camloc holes wear out and the aerodynamic force is always acting to lift the cowl in flight. The LASAR kit helps, but in my experience, does not cure the issue. The LASAR kit has a strap and a nutplate for the bottom. A screw goes through the lower cowl into the nutplate and pins the lower cowl in place, it cant move forward. Then you replace the floating camloc receptacles on the upper cowl with fixed ones. I did that and I didnt like it. You must exactly center the camloc receptacle to the hole in the cowl. Then the camloc fasteners have a large shear load which wears the holes even faster, and the cowl still slides on the top, which angles the camlocs. You must pin the top cowl too. To fix this I riveted a small piece of angle aluminum to the boot cowl on each side. Then I laid some stranded fiberglass roving and epoxy int the top cowl. then I trimmed the fiberglass to where it meets the angle piece on the boot cowl and it stops solid. The gap can be very small and it cannot move. Quote Link to comment Share on other sites More sharing options...
ArtVandelay Posted August 2, 2015 Report Share Posted August 2, 2015 To fix this I riveted a small piece of angle aluminum to the boot cowl on each side. Then I laid some stranded fiberglass roving and epoxy int the top cowl. then I trimmed the fiberglass to where it meets the angle piece on the boot cowl and it stops solid. The gap can be very small and it cannot move. You have any pix? Quote Link to comment Share on other sites More sharing options...
Two Oh One Posted August 2, 2015 Author Report Share Posted August 2, 2015 To fix this I riveted a small piece of angle aluminum to the boot cowl on each side. Then I laid some stranded fiberglass roving and epoxy int the top cowl. then I trimmed the fiberglass to where it meets the angle piece on the boot cowl and it stops solid. The gap can be very small and it cannot move. Thanks for the ideas everyone. This is the one I'd heard of before. Jetdriven, are you saying that your mod to the top cowl works in conjunction with the LASAR strap kit, or in lieu of? Like Teejay asked, any pics? Quote Link to comment Share on other sites More sharing options...
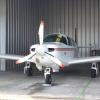
jetdriven Posted August 3, 2015 Report Share Posted August 3, 2015 In conjunction with the lower part of the laser kit. I put floating camloc receptacles and completely ground away and rebuilt the aft 2" of the cowl. Put in a new .020 aluminum strip and reamed the holes then countersunk. I'll get pics of the inside, but here's the top where it meets the airplane. 1 Quote Link to comment Share on other sites More sharing options...
Two Oh One Posted August 3, 2015 Author Report Share Posted August 3, 2015 Nice, very clean. Looking forward to the inside pic when you have a chance. Quote Link to comment Share on other sites More sharing options...
testwest Posted August 5, 2015 Report Share Posted August 5, 2015 Byron, did you get an all-new cowl? Quote Link to comment Share on other sites More sharing options...
jetdriven Posted August 6, 2015 Report Share Posted August 6, 2015 NO but its efffectively new. Upper cowl: carbon fiber stiffeners and doubler under spinner hump completely stripped away and rebuilt the part behind the spinner, including new .020 metal strips embedded in the layup rebuilt the forward corners completely stripped away and rebuilt the rear 2" of the cowl, new metal strip, reamed and countersunk holes. Straightened the TE of the cowl and the metal skin on the airplane. reglassed the spinner ring on upper and lower cowl Lower cowl: rebuilt the rear 2" of the lower cowl completly replaced the glass in the center lower cowl reinforced the lower cheek corners, the flexing there cracks the paint glassed in the hole for ram air replaced the cowl flap frames and modified the hinges with bushings, very similar to SB M20-231. Added universal head rivets in the cowl flap hinge area, the flush style pull through the fiberglass. replaced the metal stiffener piece located just forward of the cowl flaps with carbon fiber stranded UNI. the rivets on these pull through, composite is a better way. fixed several heat damaged areas of glass. added heat reflective barrier at center lower cowl and in vicinity of #1 exhaust pipe. added the post SN 24-1616 bump cowl flap. CHTs dropped from 380-390 in the summer to 365 max. could run it ROP and send the CHT over 400F pretty readily. Now its phydically not possible to exceed 380. Plan to run the flat cowl flap in the winter. Then stripped all 11 layers of old paint and primer (plus some bondo, polyester red filler, green chromate primer, etc) from 3 previous jobs, down to the factory gray primer. Sprayed epoxy primer and blocked and primed the whole cowl. Now its flat, no fooling, and the only thing on the cowl is glass, epoxy, factory gray primer, epoxy primer, and a small bit of epoxy and micro. also, reformed the boot cowl flange on the airplane. the upper cowl on the corners sat 1/8" high of the airplane skin due to the angle. I cut a couple slots in the flange, reformed it down, added a doubler, and now it sits flush. Perhaps I should make a How to about this. I spent about a hundred hours reworking thsi thing and there seems to be little interest once I lay that on them. 4 Quote Link to comment Share on other sites More sharing options...
KSMooniac Posted August 6, 2015 Report Share Posted August 6, 2015 100 hours of repair and suddenly spending 5-10k for a new and improved cowl looks better. Maybe not 15k. Sent from my VS985 4G using Tapatalk Quote Link to comment Share on other sites More sharing options...
testwest Posted August 6, 2015 Report Share Posted August 6, 2015 That is great, I salute you! Any pictures of the work in progress you want to share? Quote Link to comment Share on other sites More sharing options...
jetdriven Posted August 6, 2015 Report Share Posted August 6, 2015 sure, here you go. all the glass work was achieved with 7781 fiberglass 8.8oz cloth and vacuum bagged with MGS epoxy. The spinner rings were repaired with stranded fiberglass roving and dunked in epoxy, then stacked up into a channel formed by aluminum tape before pics. lots of cracked and ratty looking fiberglass: rear upper cowl at boot cowl (marks on first photo are how high the cowl is: rebuild front corner of upper cowl. Its a complex shape took two days. rebuilt upper cowl behind spinner ring. 7781 cloth 8 or 10 layers.: carbon fiber stiffener upper cowl. : carbon spar lower cowl, fitting new cowl flap frames..Loking back I'd make an angle piece of carbon instead of the UNI. Its too bendy like a fishing rod, i want granite, which is achieved with angle shaped carbon cloth.: upper spinner ring, lower similar. stranded fiberglass roving: upper cowl knock paint down and block, prime. there were 13 layers of stuff on here. : lower rear cowl TE rebuild. grind inside half thickness. lay up 6 layers of 7781, bag and cure. Then griund away the outside 6 layers, fit the aluminum strip, 5 layers of 7781 cloth, bag and cure. then rough fit, locate and make holes, ream to fit, countersink, then final fit on trailing edge for gap. lower cowl replacement of fiberglass (6-12 layers inside the black mrker areas, its a lot... as removed. check all the pulled rivets around the forward of the cowl flap openings. I suspect much of this si from having the cowl flaps locked open in flight. Always trail them starting at takeoff. Anyways, i shortened the rivet spacing and used universal head rivets in that area. : reglassed areas: lower cowl flap area rebuild, new cowl flap frames, fit new LH bump cowl flap, universal head rivets, hinge mod. that cowl flap cools like crazy Im only planning on running it in the summer time: fiberglass landing light cable clips, you can snap the cable in and out: 6 Quote Link to comment Share on other sites More sharing options...
KSMooniac Posted August 6, 2015 Report Share Posted August 6, 2015 Excellent work! Quote Link to comment Share on other sites More sharing options...
Guest Posted August 6, 2015 Report Share Posted August 6, 2015 You and David, Sabremech would be an awesome team. Clarence Quote Link to comment Share on other sites More sharing options...
Two Oh One Posted August 6, 2015 Author Report Share Posted August 6, 2015 Outstanding couple of posts there, very helpful. Quote Link to comment Share on other sites More sharing options...
carusoam Posted August 7, 2015 Report Share Posted August 7, 2015 Byron and David... Mooney pilots that are artists, mechanics AND engineers in one... Pilartineers....? Very impressive precision and documented work. Best regards, -a- 1 Quote Link to comment Share on other sites More sharing options...
Piloto Posted August 7, 2015 Report Share Posted August 7, 2015 My CB solution to the problem The cowl lift up because of the gap on top between the top cowling edge and the edge of the skin. I filled the gap by placing a #20 gauge insulated white wire along the perimeter of the skin were the cowl flap seat. I glued the wire to the surface with white silicon glue. Since the white wire matches the white paint is not noticeable. It works pretty well. José 2 Quote Link to comment Share on other sites More sharing options...
Two Oh One Posted August 9, 2015 Author Report Share Posted August 9, 2015 José, the CB factor here is off the hook! I may give this a shot while I build up the gumption to start a full Jetdriven rebuild.. Quote Link to comment Share on other sites More sharing options...
jetdriven Posted August 12, 2015 Report Share Posted August 12, 2015 You have any pix? Here u go. 1 Quote Link to comment Share on other sites More sharing options...
Guest Posted August 12, 2015 Report Share Posted August 12, 2015 I recall someone using a very similar method to Byron's. It was a hardwood block bonded to the inside of the cowl and a metal angle riveted to the firewall flange. Clarence Quote Link to comment Share on other sites More sharing options...
jetdriven Posted August 13, 2015 Report Share Posted August 13, 2015 Like all great ideas I stole that one from the thread you mentioned. I went a little further, I used a cut down piece of 6061 angle because it's stronger, and made the block that stops against it out of stranded rovings and epoxy. Quote Link to comment Share on other sites More sharing options...
xcrmckenna Posted May 4, 2017 Report Share Posted May 4, 2017 My 77' J is in great shape other than the top and bottom cowling like most of them. I don't have any body work knowledge that could get me through the upgrade you did Jetdriven. And yours does look great. I was wondering if anyone knows of a shop in the Oregon Washington, and Northern California area that could do an upgrade like that to mine? Sent from my iPhone using Tapatalk Quote Link to comment Share on other sites More sharing options...
Recommended Posts
Join the conversation
You can post now and register later. If you have an account, sign in now to post with your account.